Category: Uncategorized

  • Fried Bread Scramble


    Something delicious often comes forward when you believe, at first, that you have nothing.

    The core inspiration behind this breakfast is mimicking chilaquiles, which is an ingenious way to dispose of stale tortillas, but I just used the same idea and applied it to what I had lying around that day, which happened to be bread. Lots and lots of bread.

    We can’t consume as much of Nate’s bread as we’d like to, and unfortunately some of it does seem to “go to waste,” but I’m crafty and have found ways to still turn it into something delicious (here’s another good recipe for this quandary). One morning I was feeling especially lazy and didn’t feel like going to the store to get ingredients. On the counter was some stale bread cubes that Nate had prepped to turn into breadcrumbs when the time came, but I decided to take a risk because, guys, I was, like, really, really hungry. I made a quick salsa in my blender using ingredients that I had on hand, and then I fried the bread before adding the salsa to it. I added an egg for protein, then I just threw some cheese and green onion on top because that’s all we had at the time. 

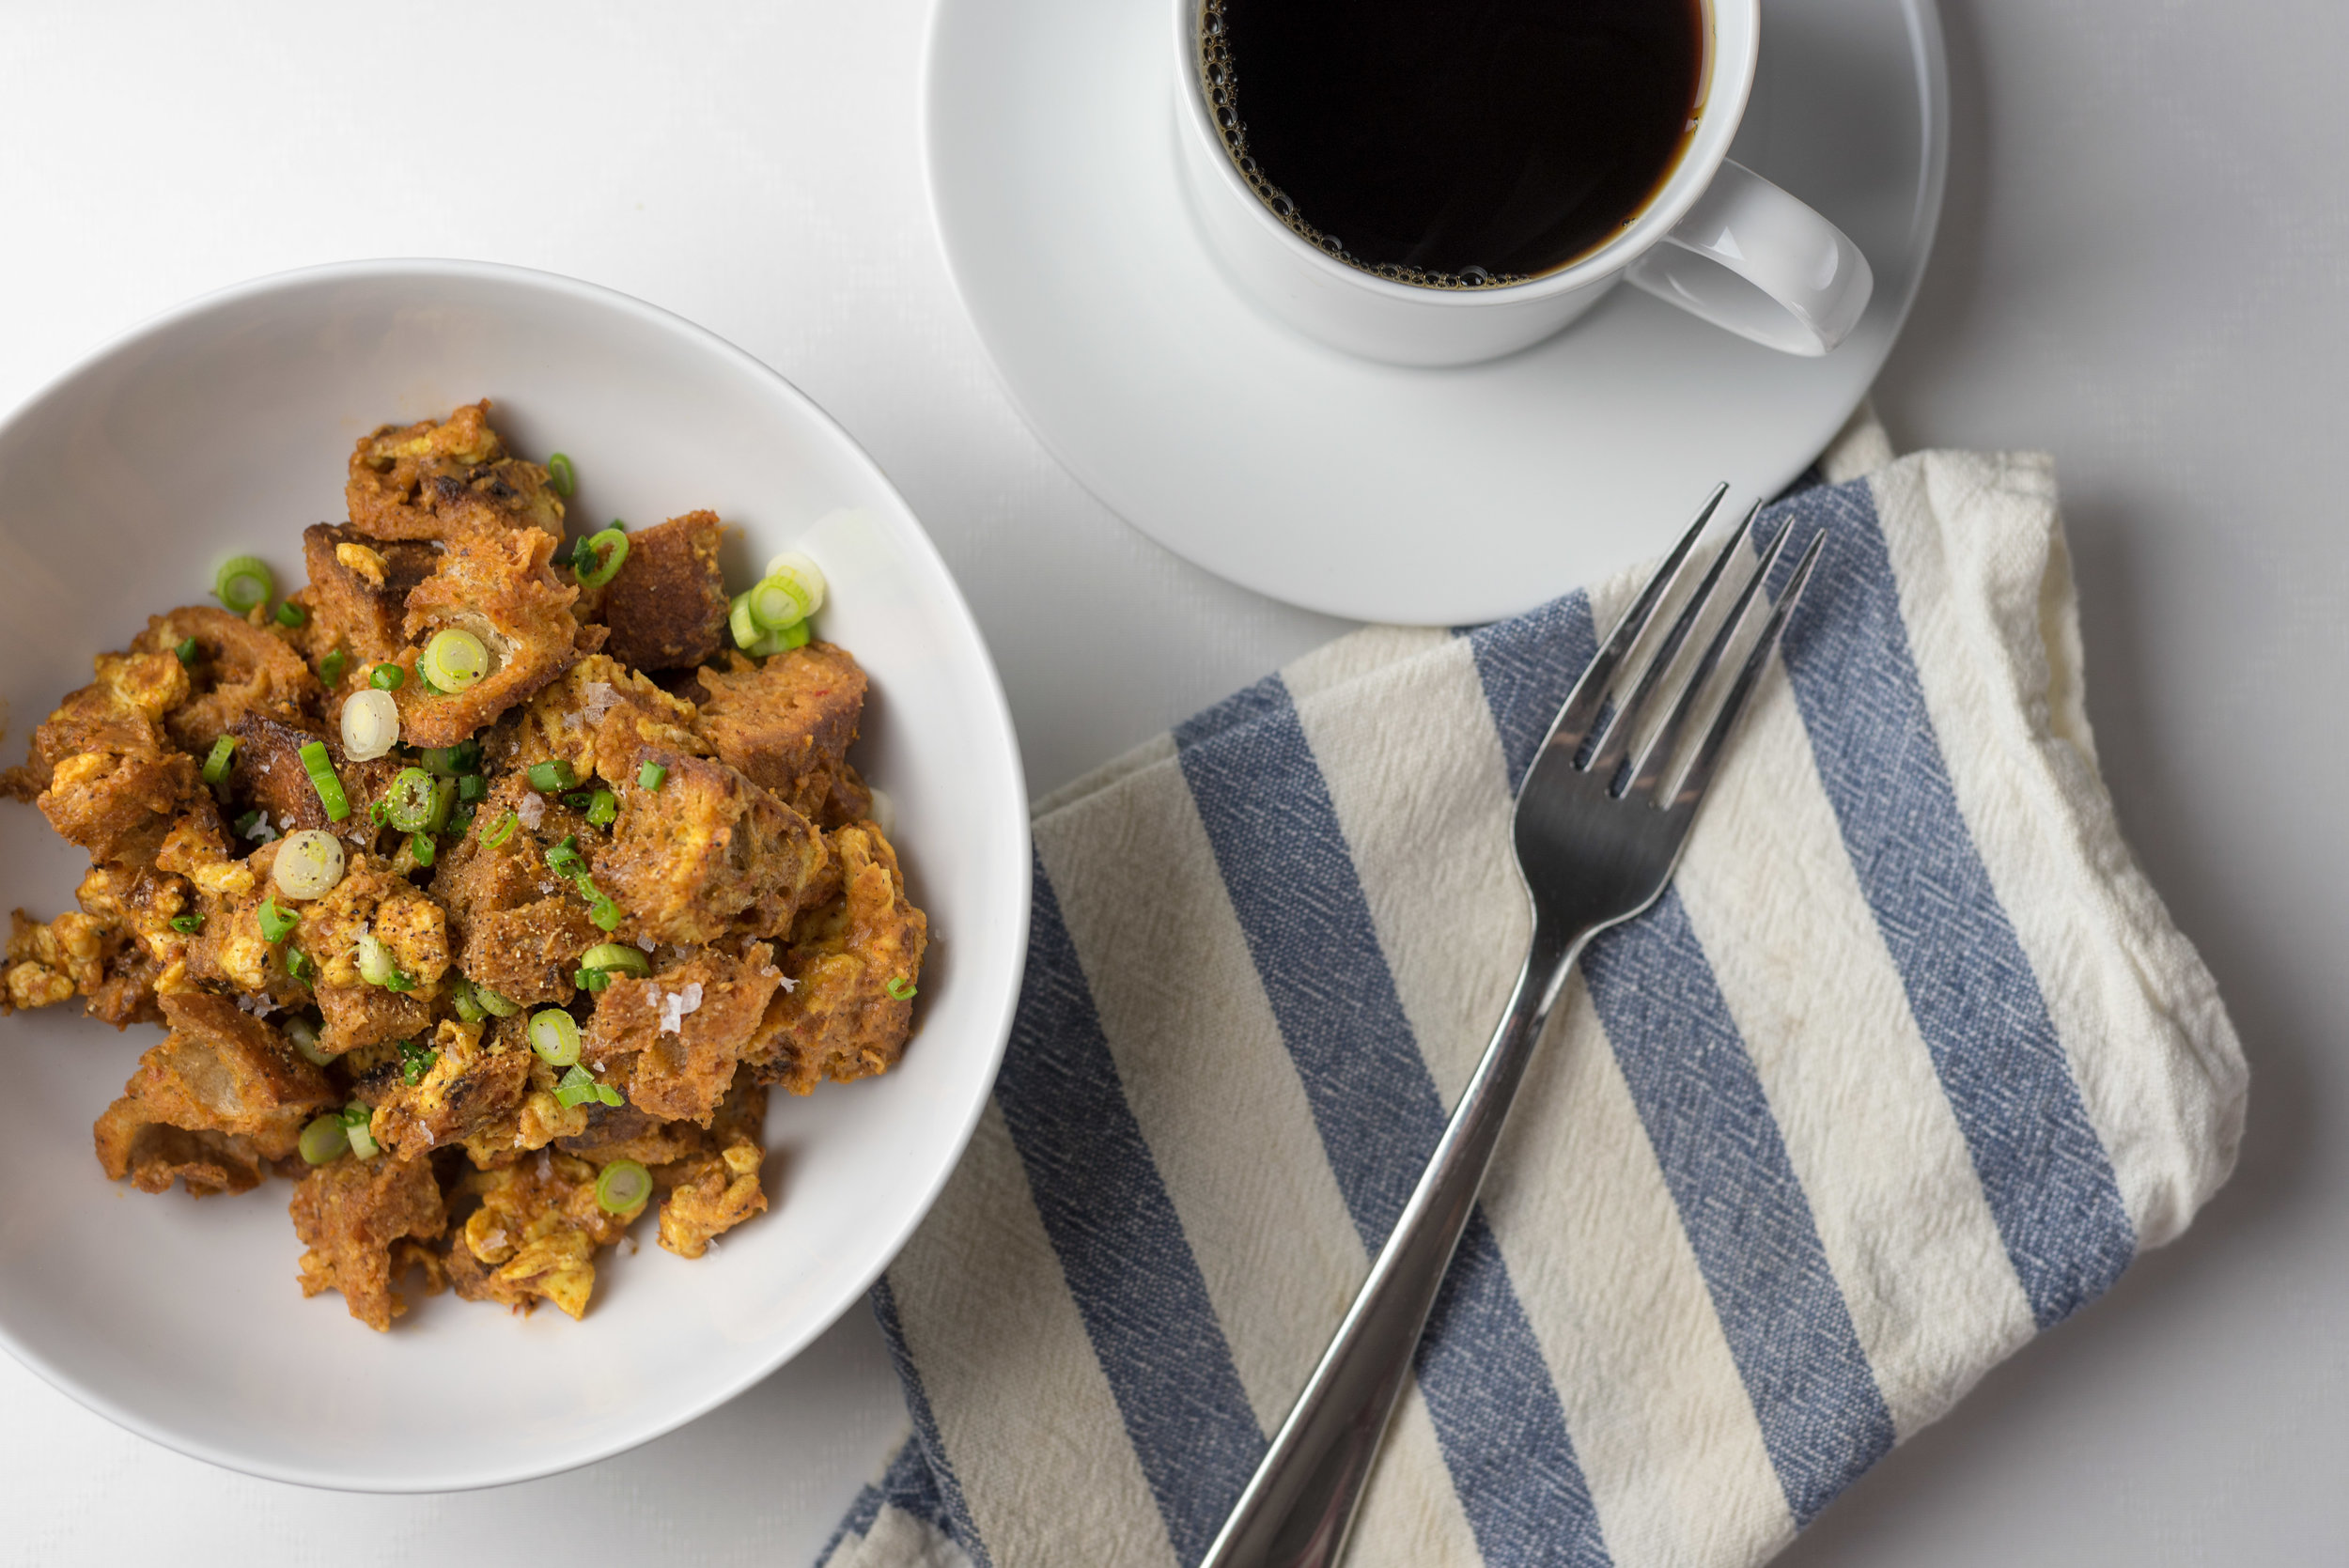
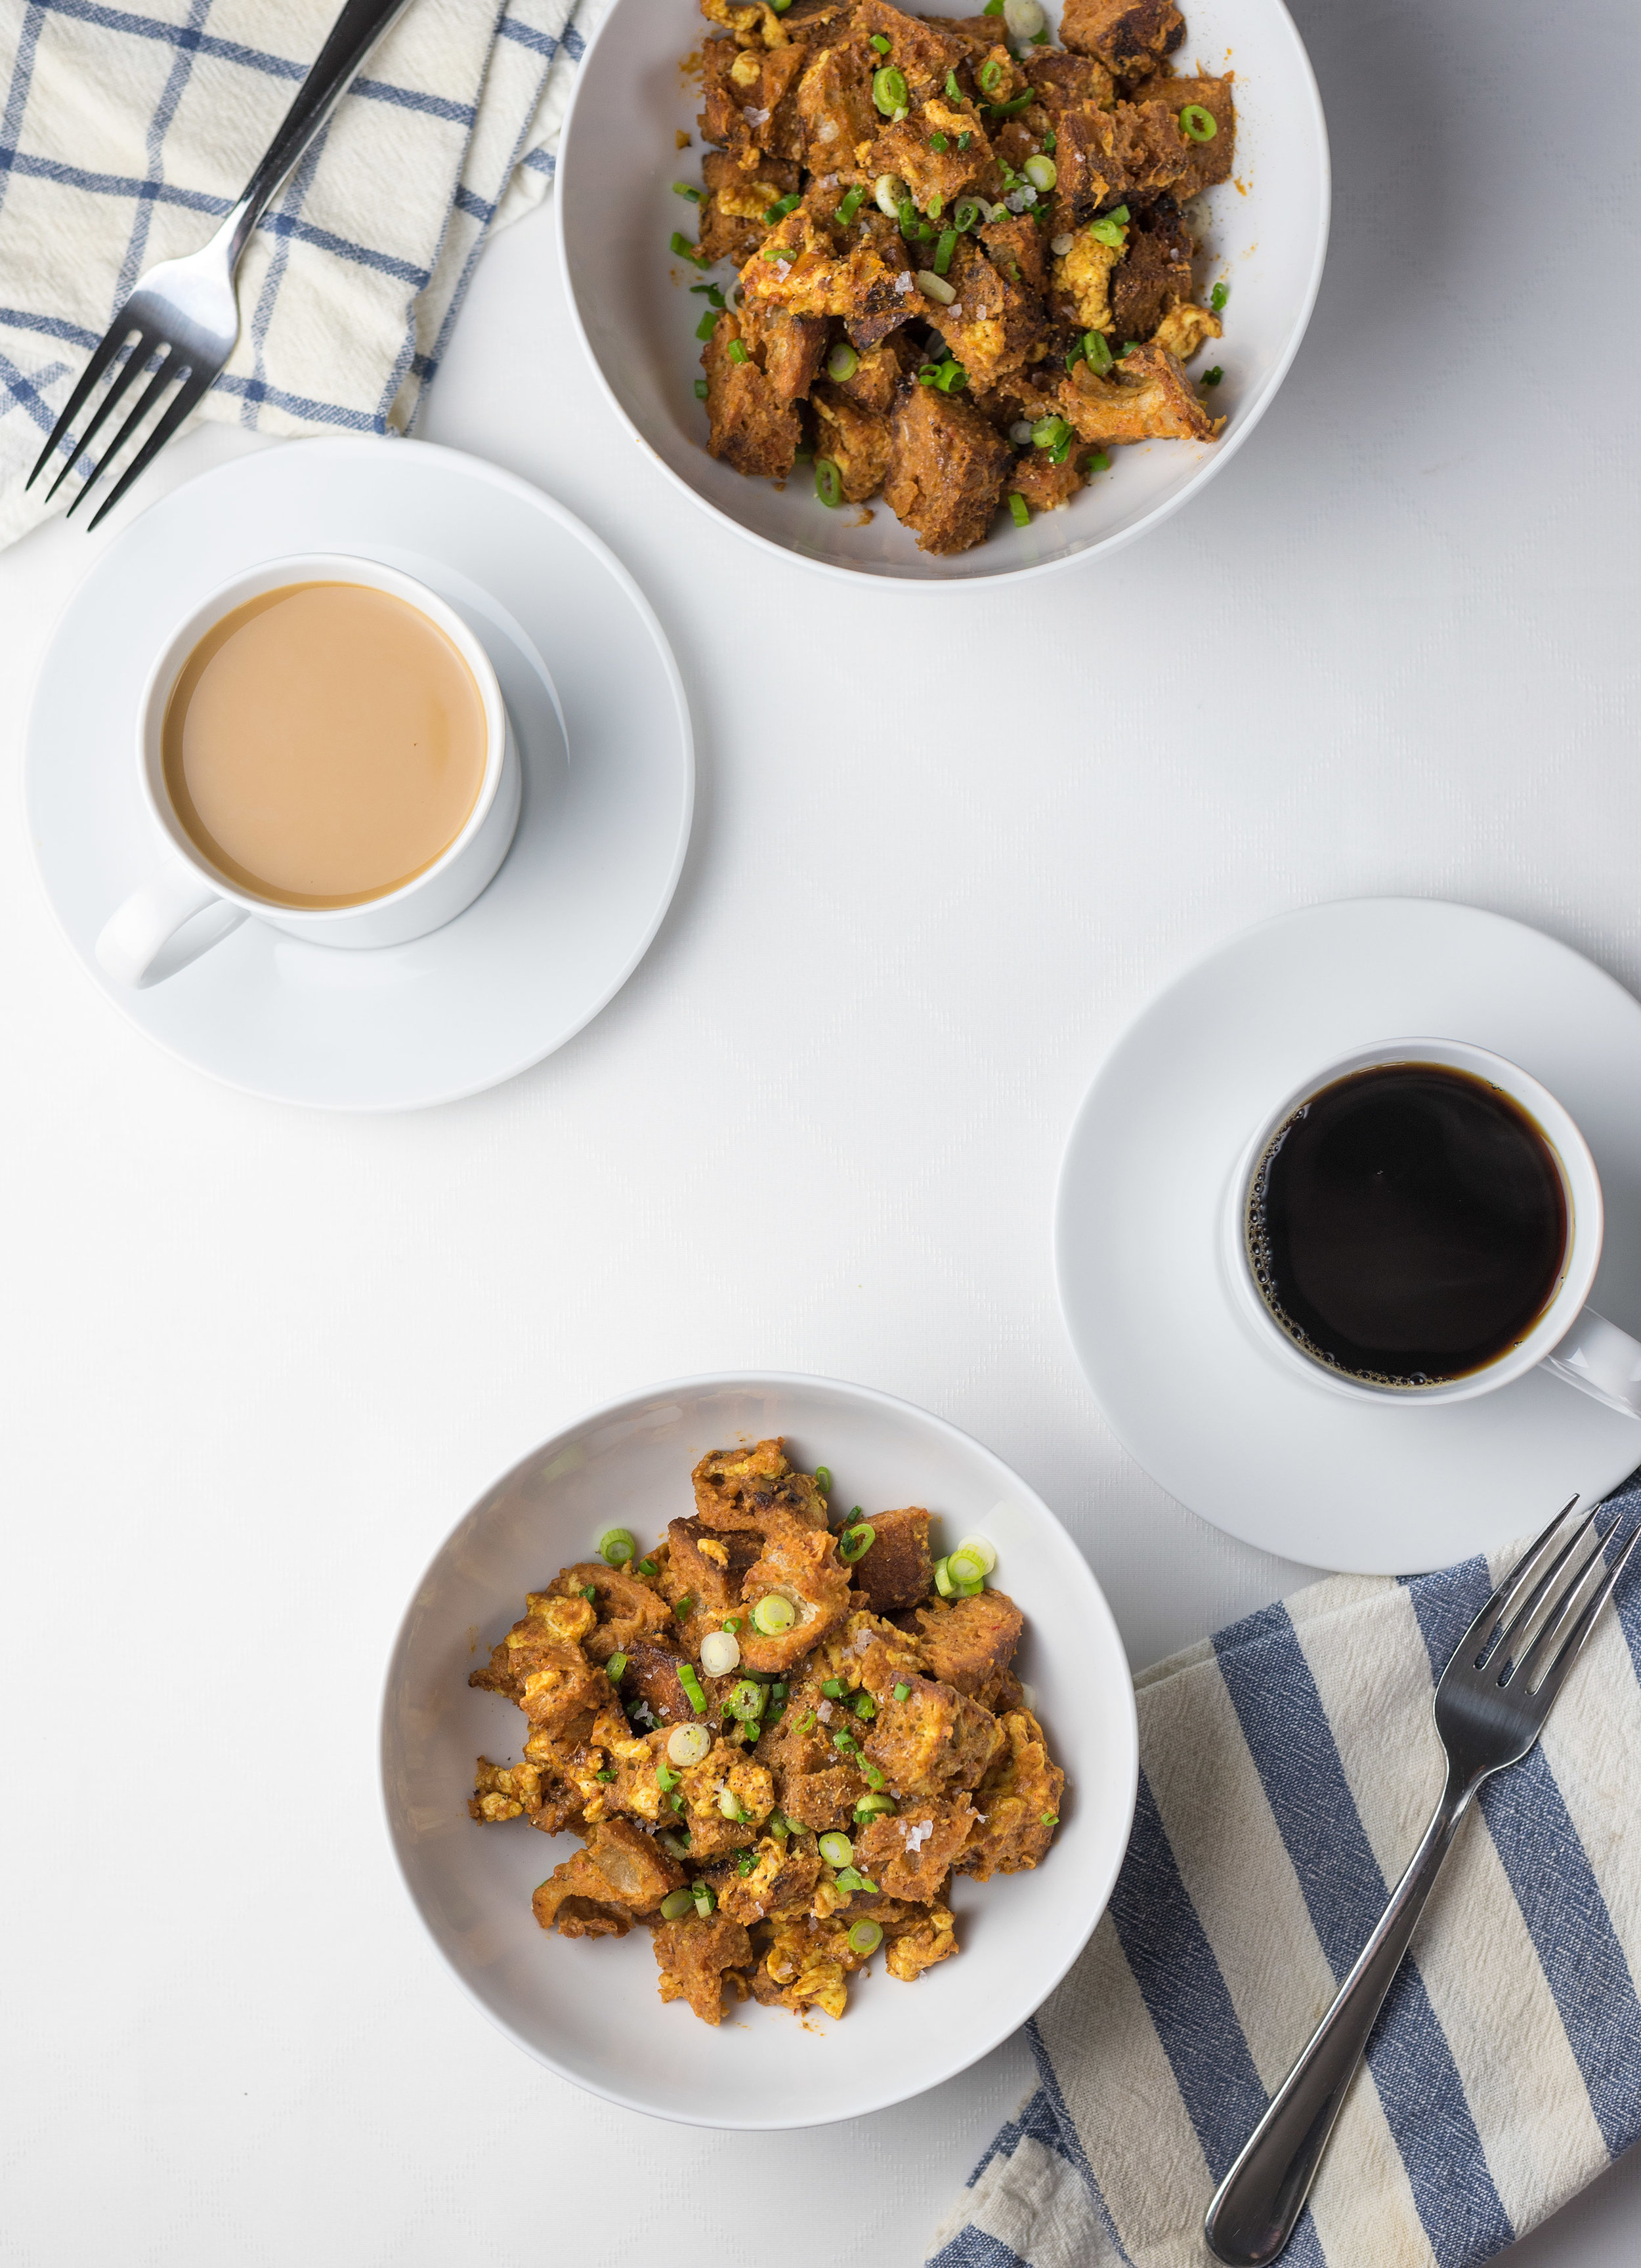
    The result took me by surprise. I expected it to be fine and get me through the morning, but it was far more than that. It was a collection of complex and satisfying textures; the bread had sopped up some of the salsa but had remained soft and fluffy while the parts that had been fried were delightfully crispy.  The salsa was also surprisingly good for something that I had just thrown together, and the leftovers of it found it’s way into many other meals throughout the week. It was so satisfying that I insisted on making it for Nate one weekend. He was dubious at first, but it too surprised him with its deliciousness. It’s such a good and easy breakfast for us that it’s made its way into our normal weekend rotation.

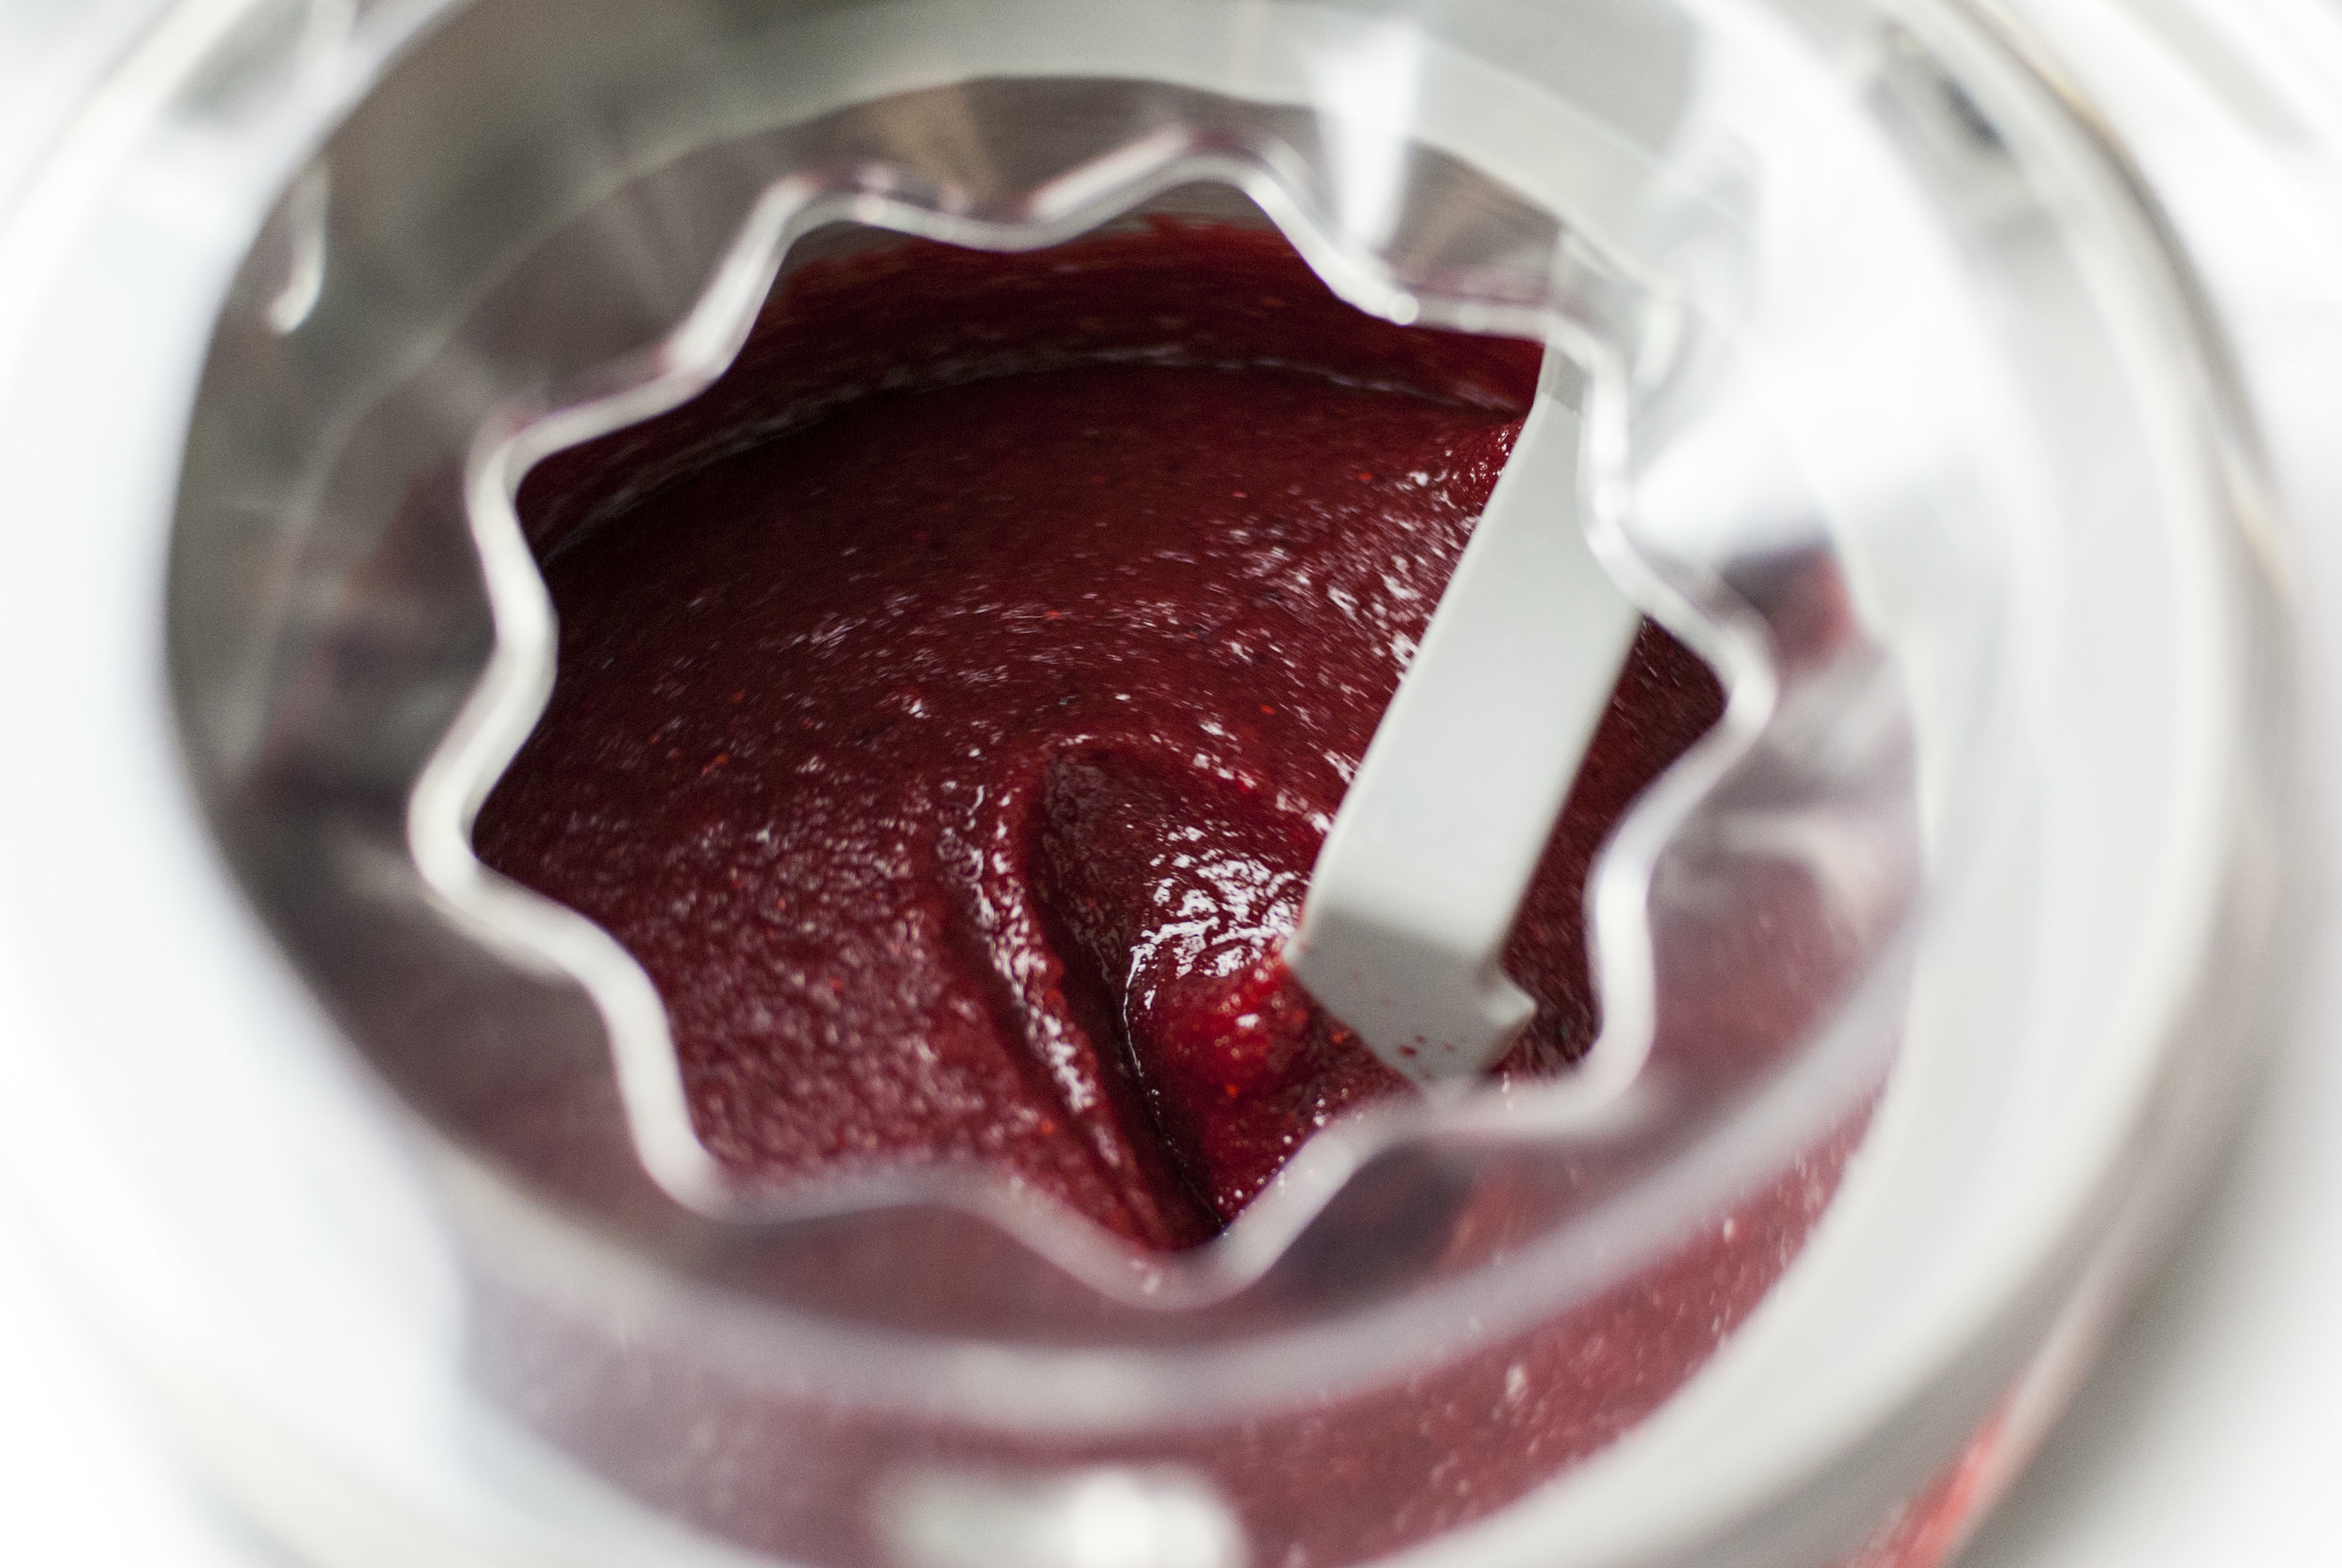
    Quick Chipotle Salsa

    • 1 14.5-oz can of tomatoes (fire-roasted if you can get them, but if not it’ll still be awesome)
    • 3 cloves of garlic, skins removed and very roughly chopped
    • ¼ of a small onion, very roughly chopped
    • 3 chipotles in adobo sauce + a little bit of adobo added in
    • ⅓ cup of white vinegar
    • ¼ cup of a neutral tasting oil (canola or vegetable will do just fine)
    • Salt to taste

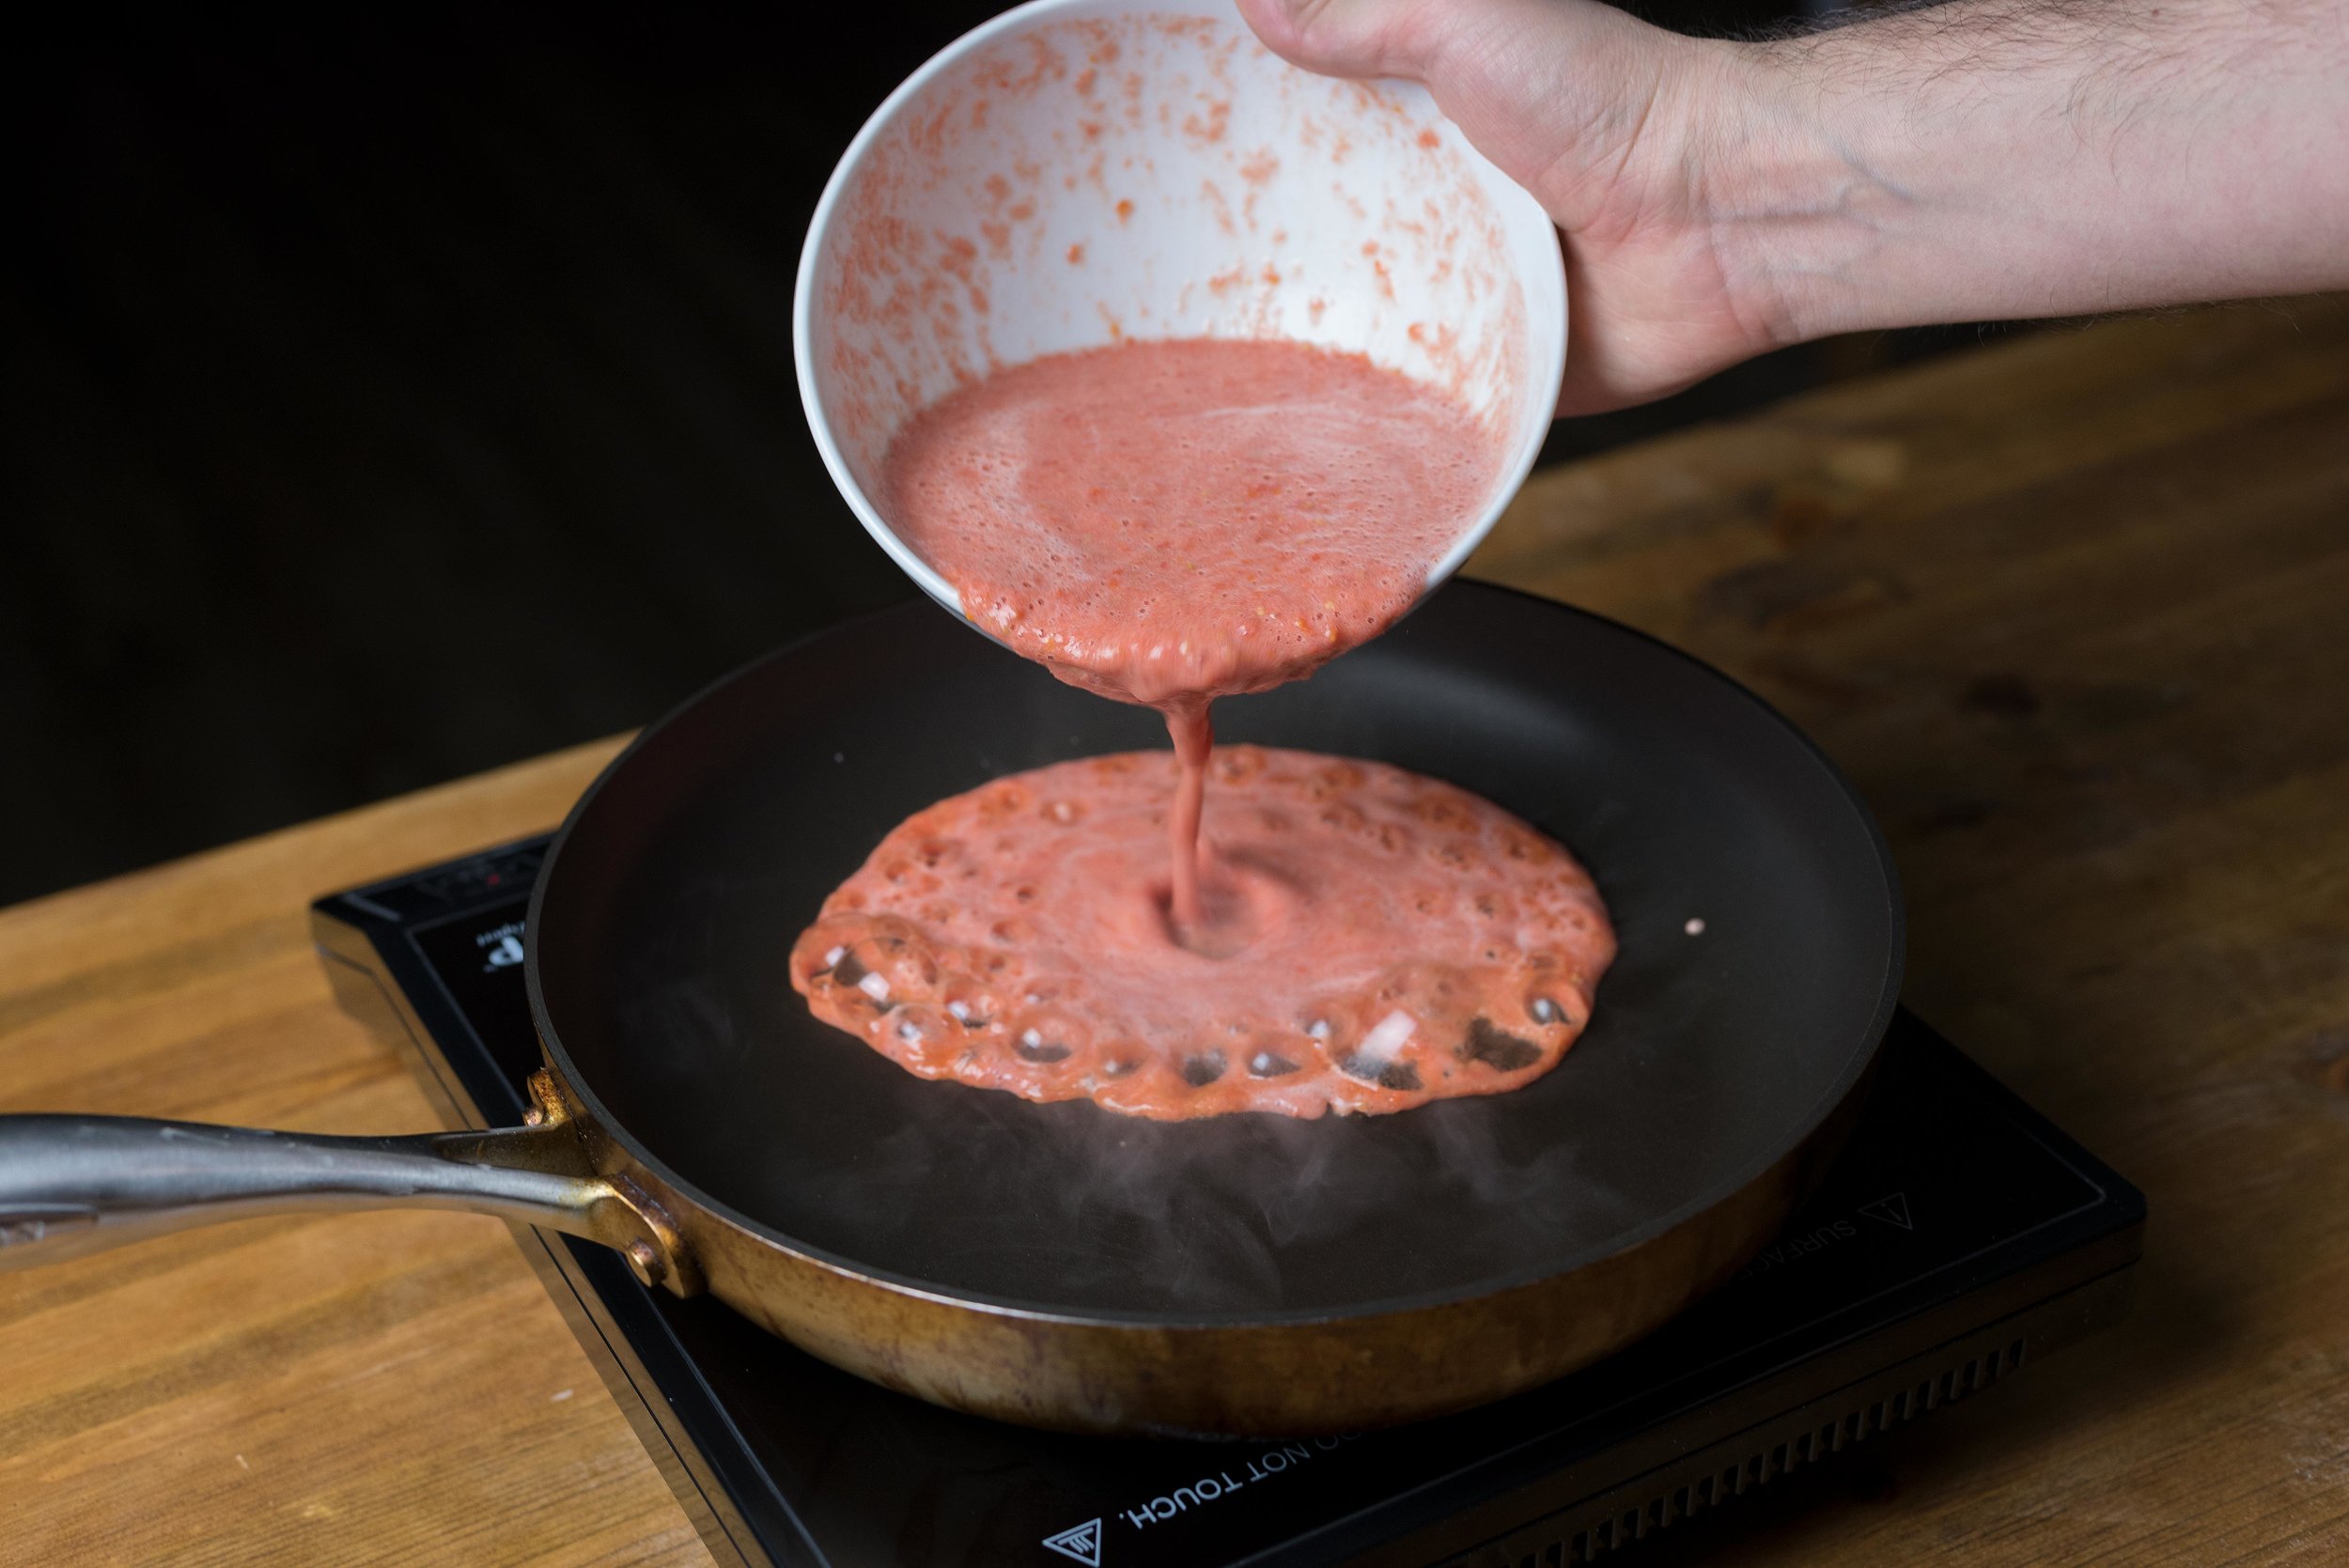
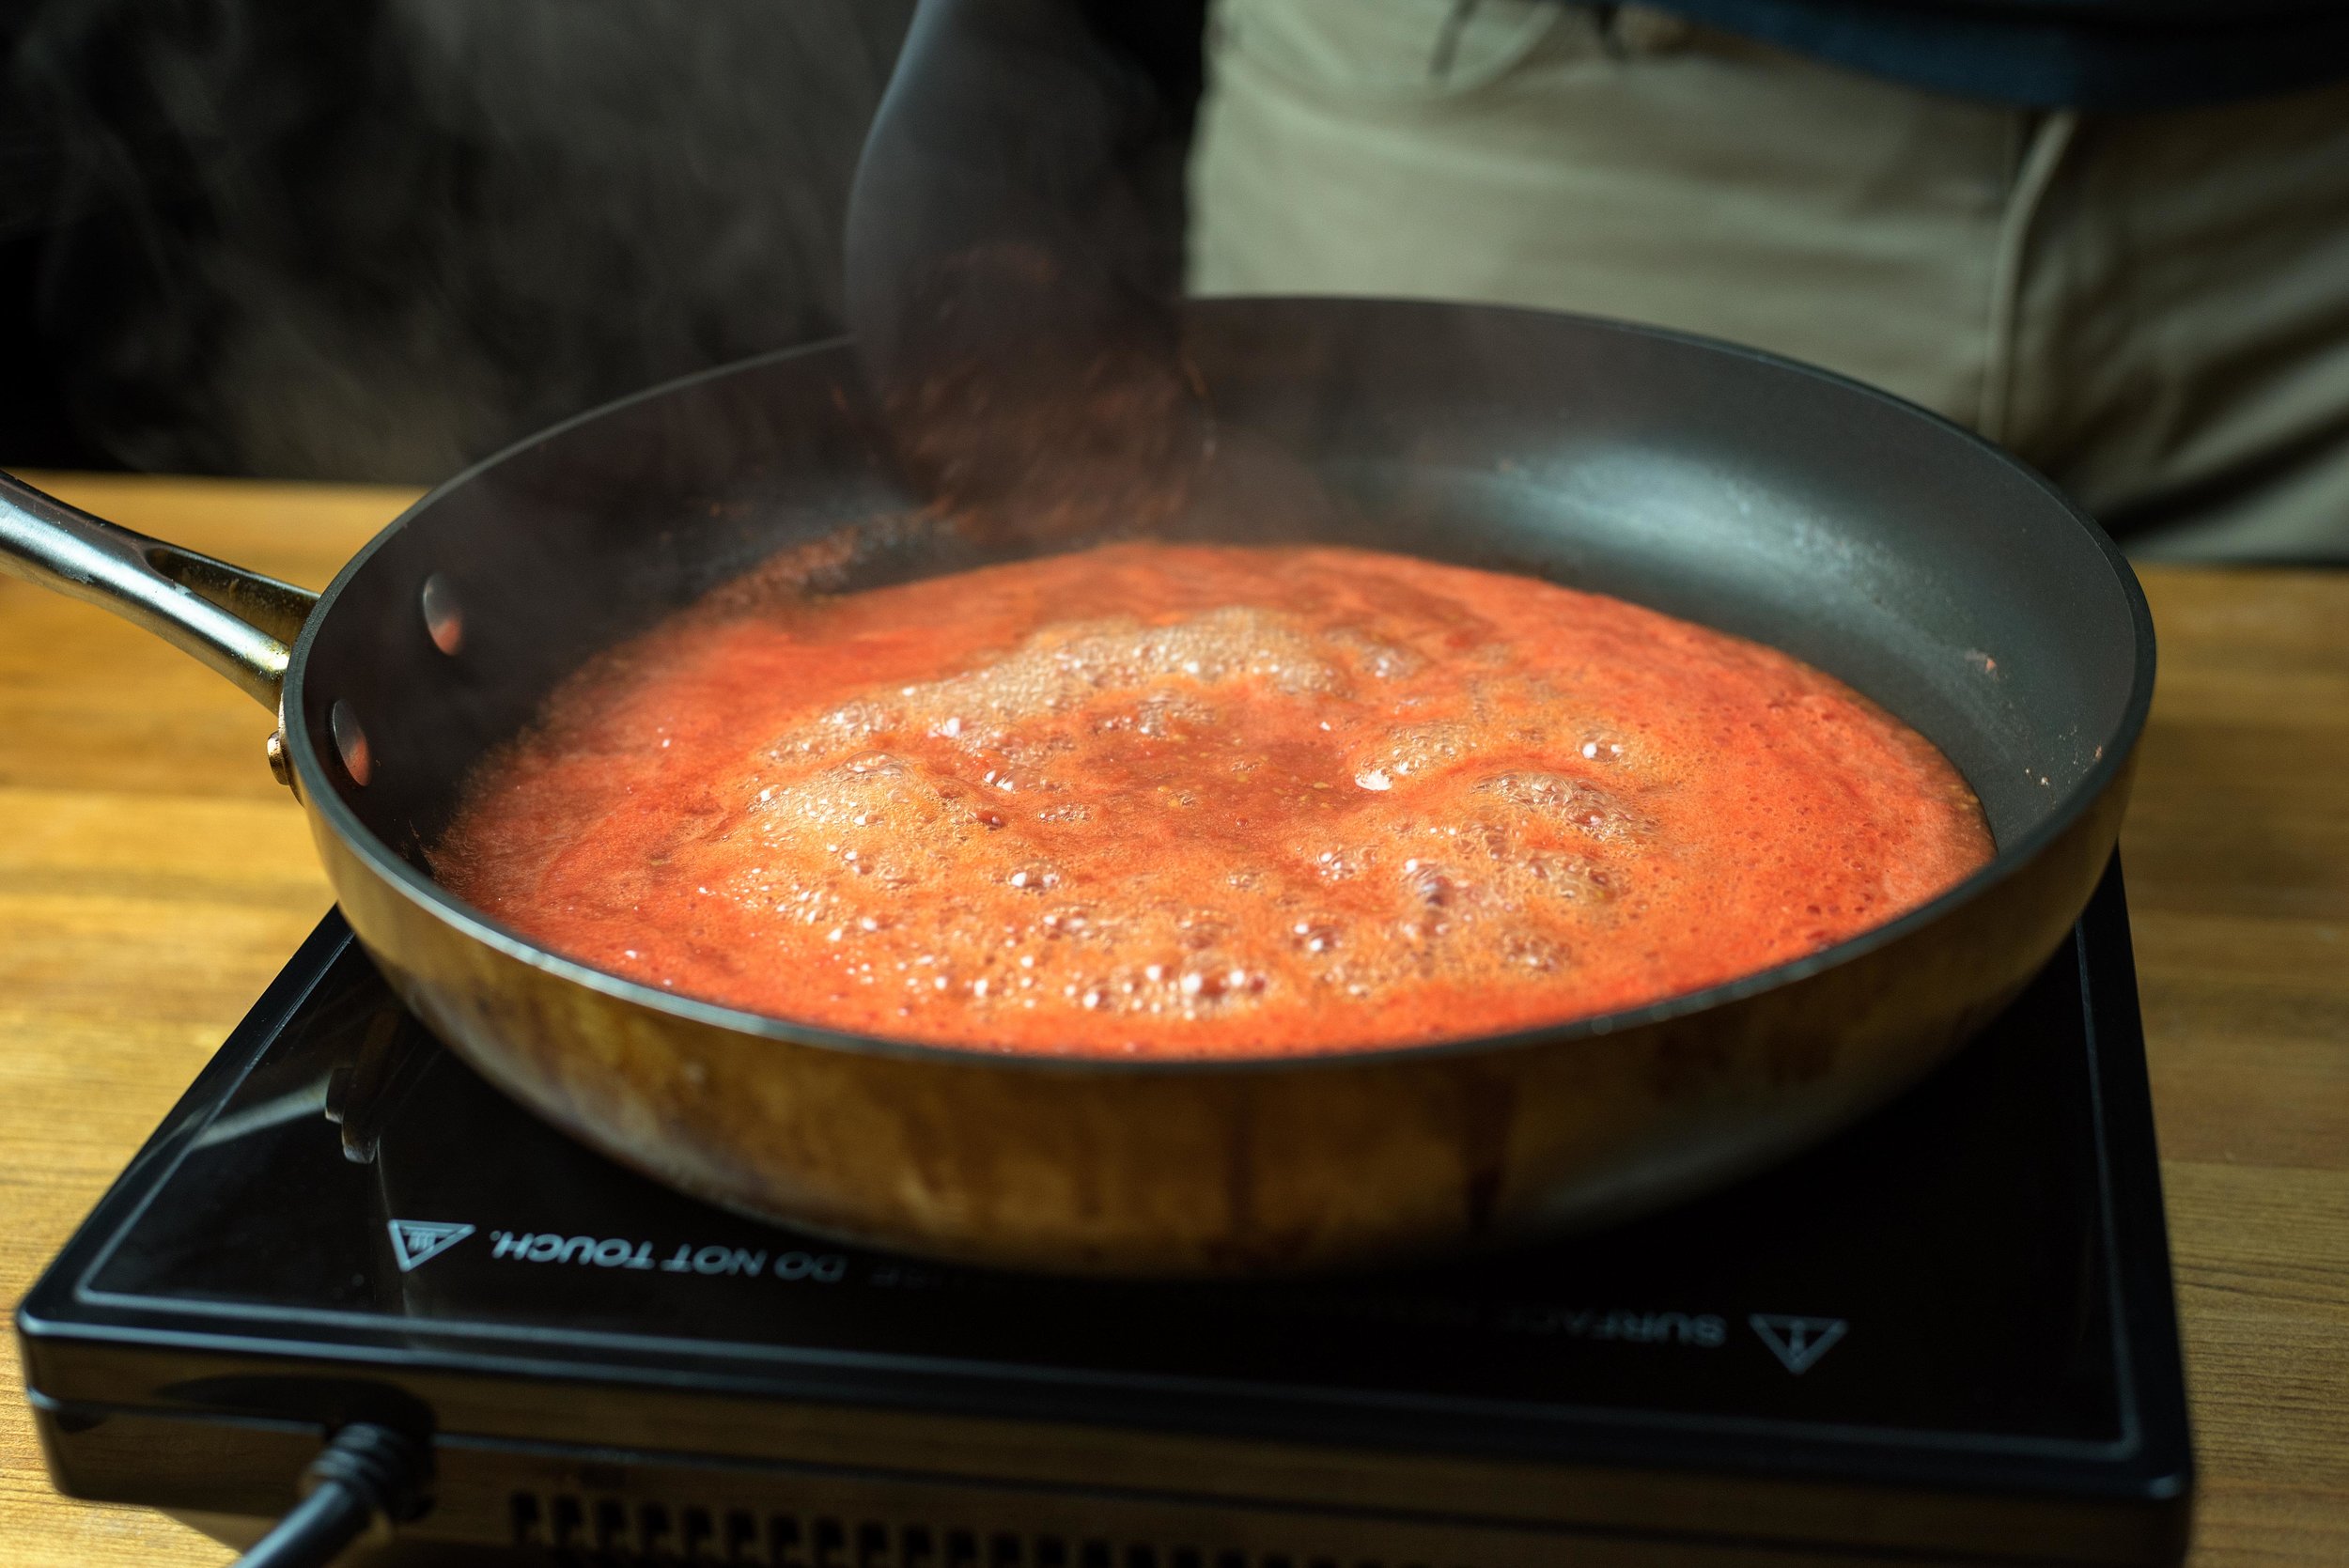
    Make the salsa by adding the tomatoes, garlic, onion, chipotles with adobo sauce, vinegar, and oil into a blender and pulse until it becomes smooth. Add salt to taste, then set aside.

    Fried Bread Scramble

    • 2 tablespoons canola or vegetable oil
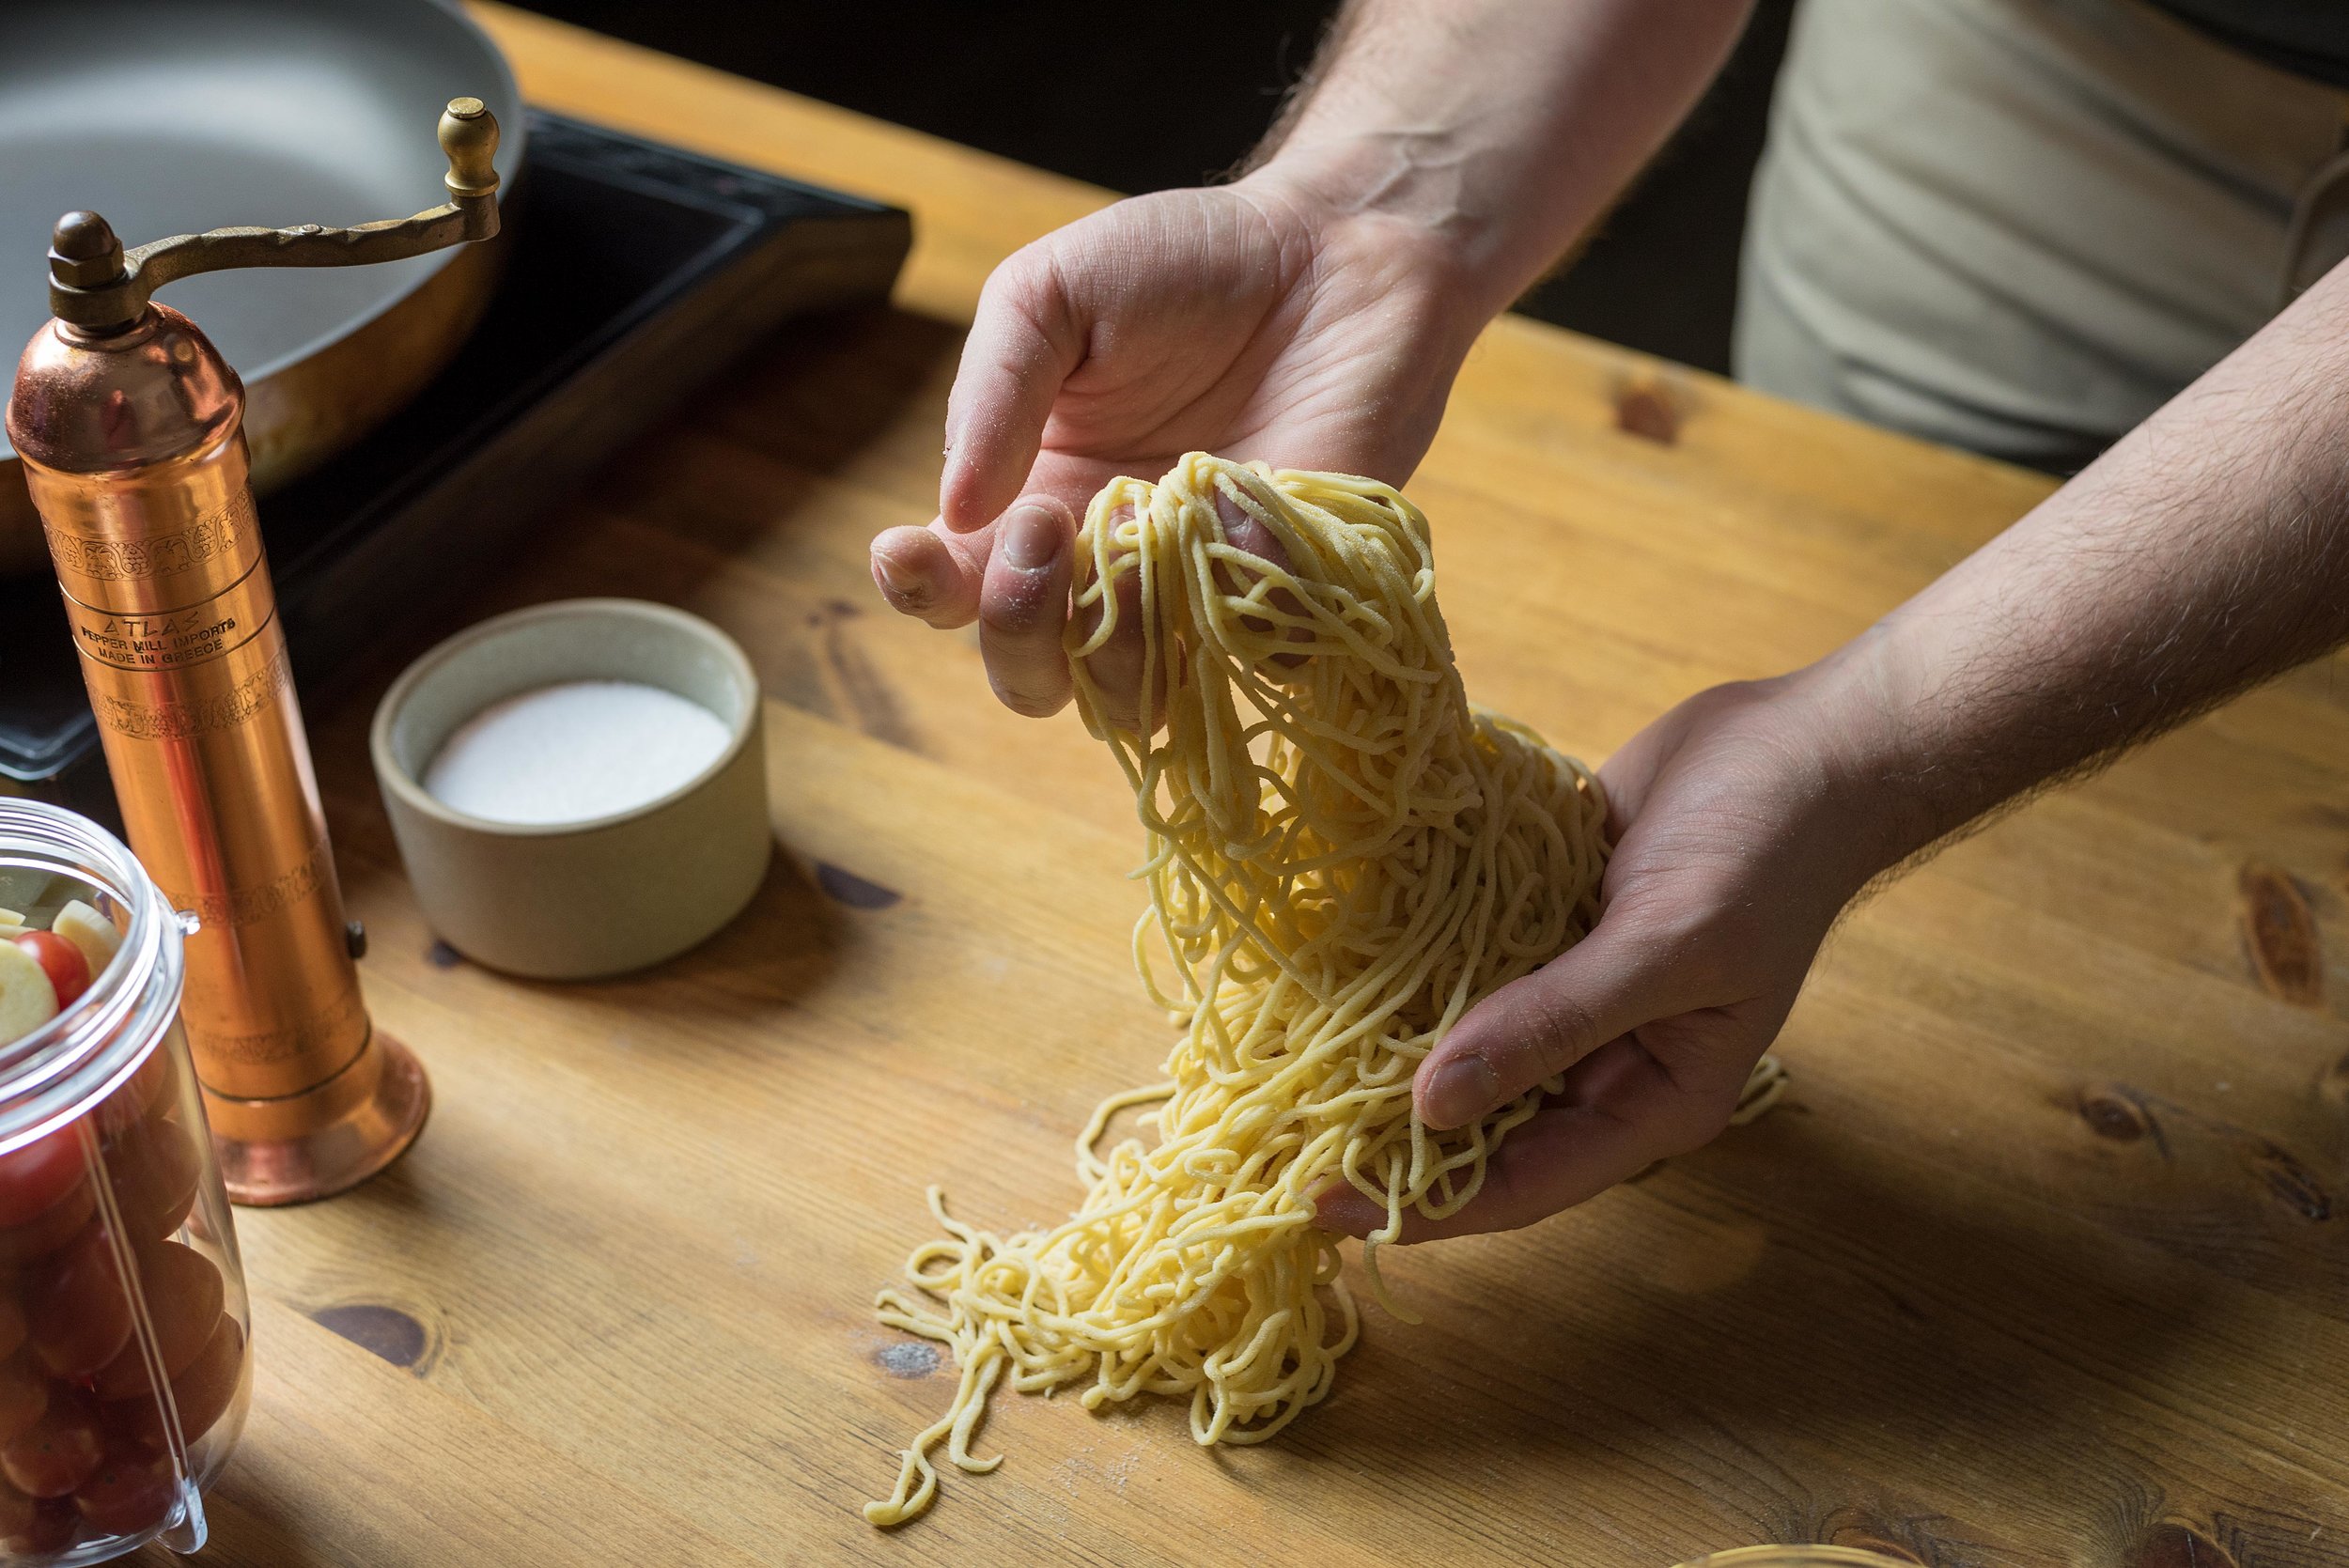
    • 150g of stale bread cut into bite sized pieces (about 3 or 4 slices of bread)
      Note: I would encourage you to use a sturdier bread for this like a peasant loaf or a rock hard baguette (phrasing). Store-bought sandwich bread will just dissolve into the salsa and not be tasty at all.
    • 2 eggs, beaten
    • ½ cup of chipotle salsa (from above)
    • 2 oz of cheese (use a good melter for this like cheddar or mozzarella)
    • 1 green onion, thinly sliced
    • Salt to taste


    fried_bread_scramble_02.jpg

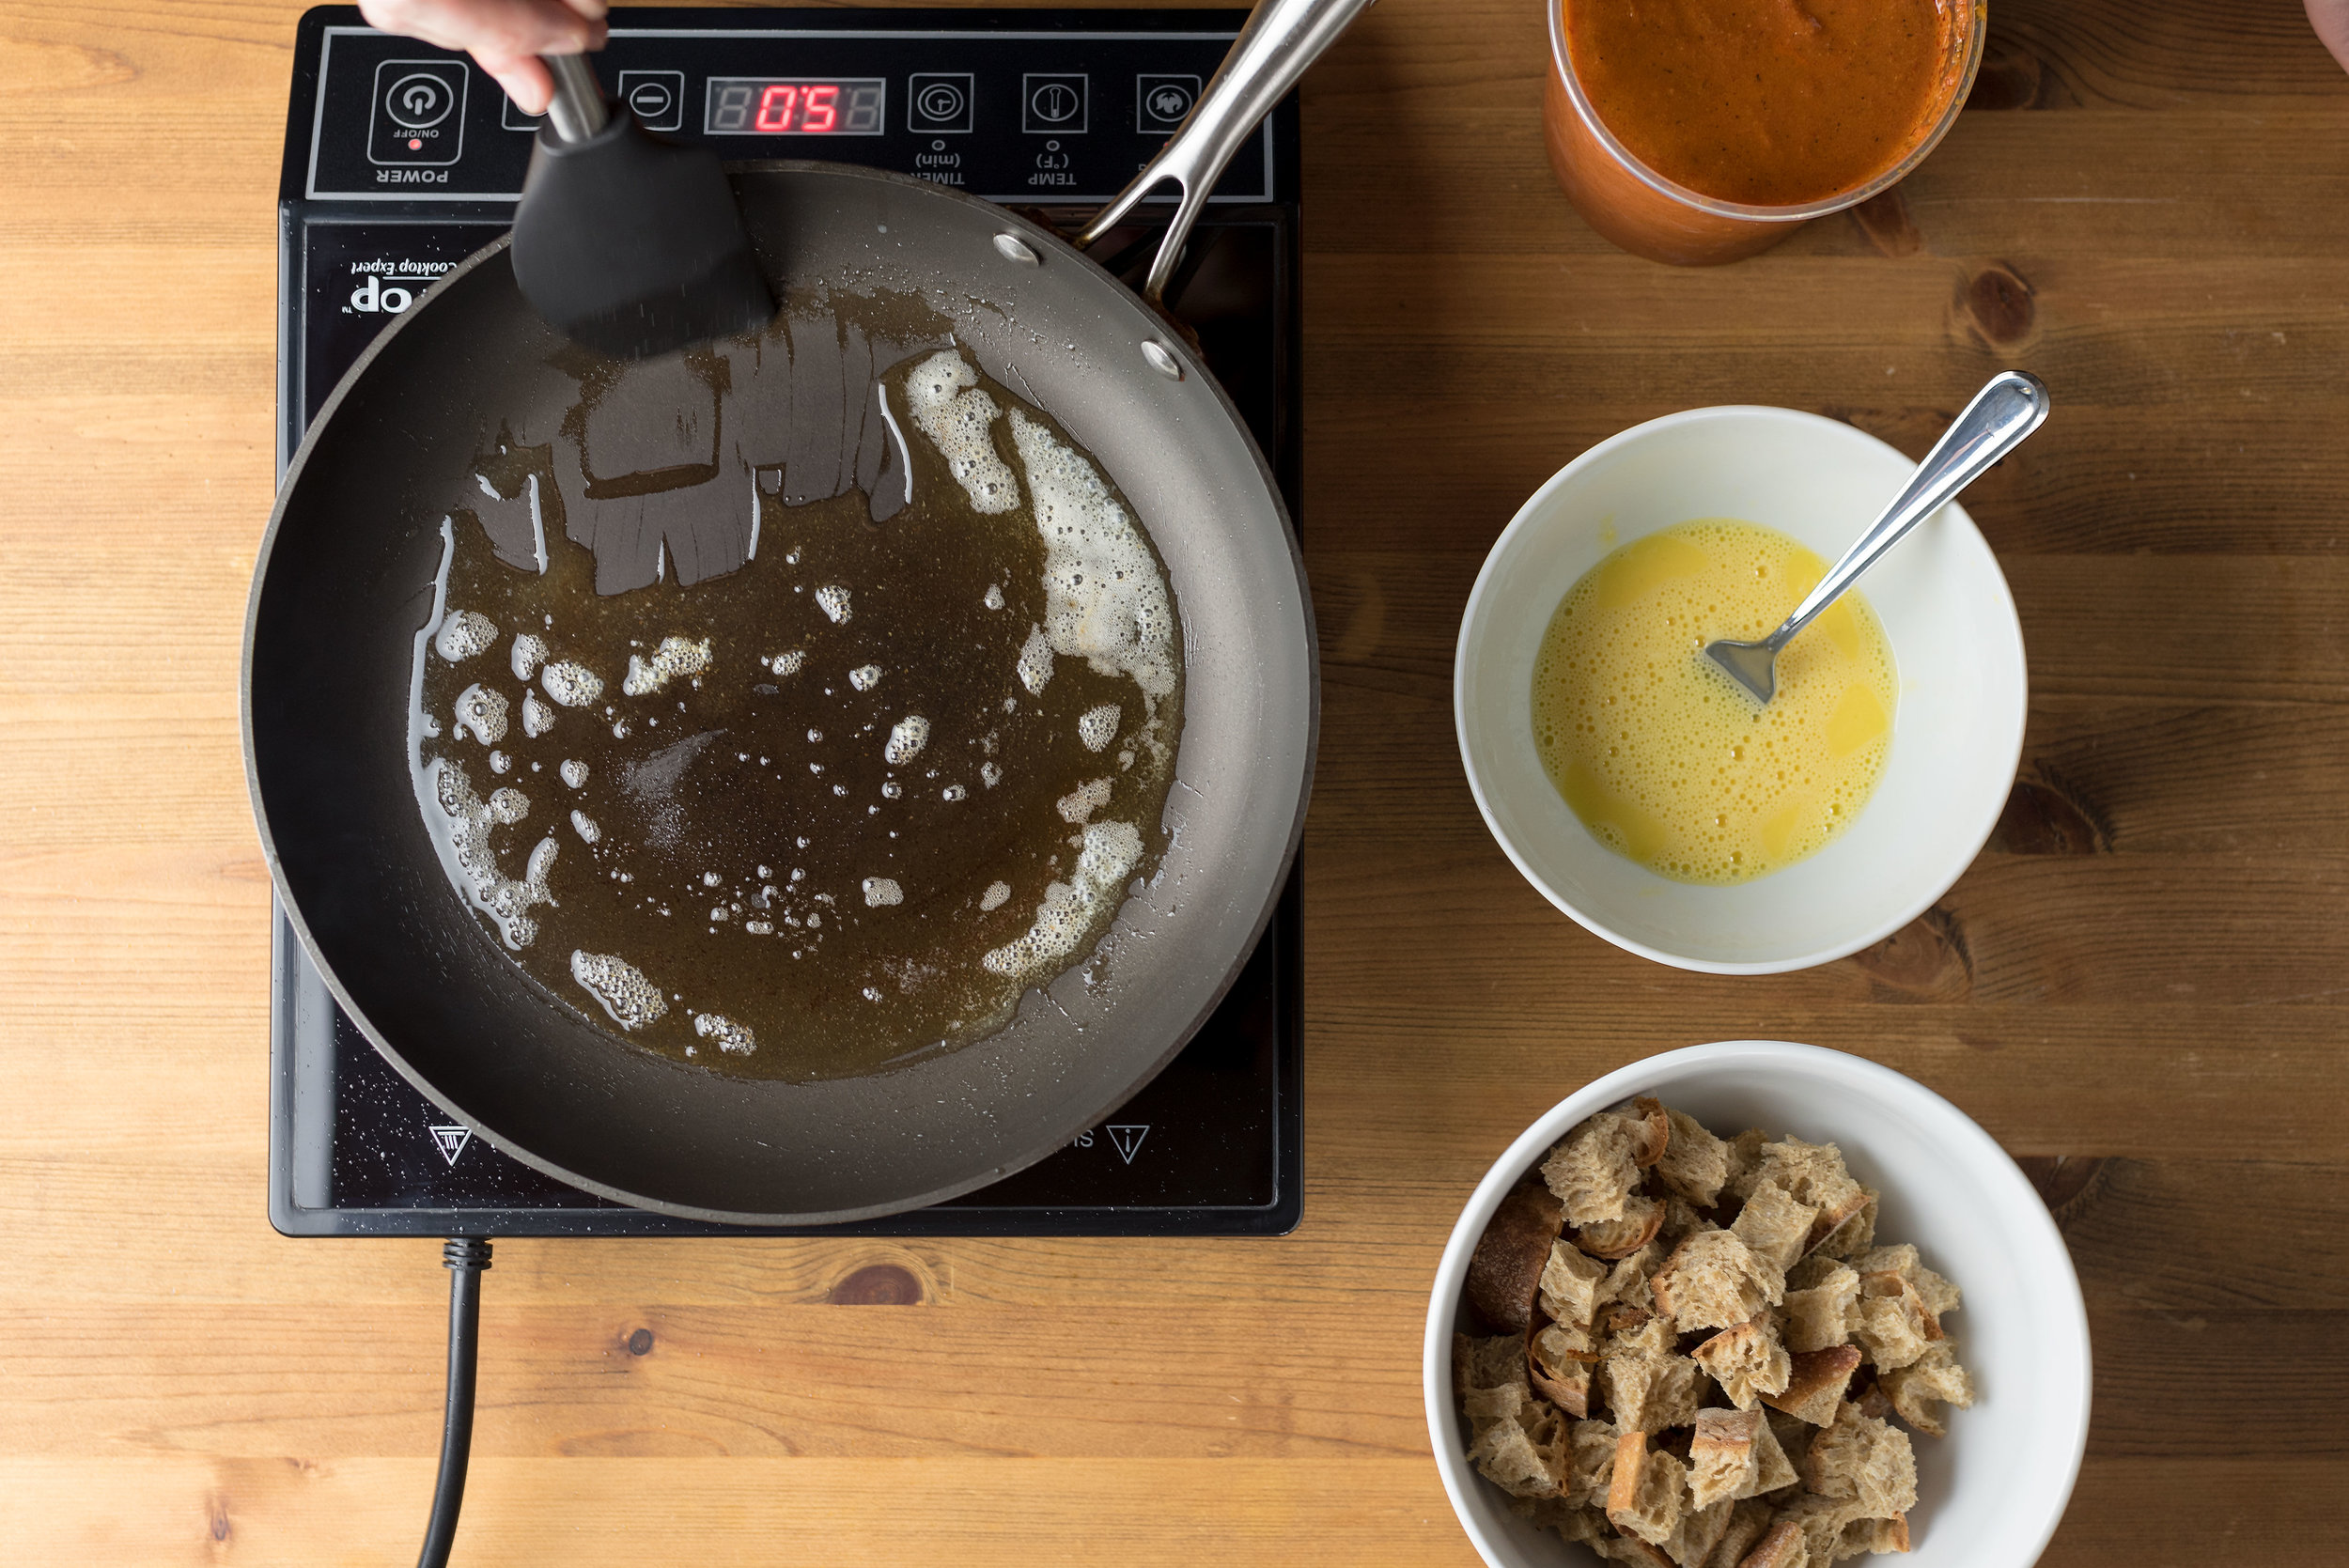
    Preheat a nonstick skillet on medium heat, then add the oil. The oil should shimmer in the pan before adding the bread. If you’re uncertain if your pan is hot enough, add one of the bread cubes to it and see if it sizzles. If it doesn’t sizzle immediately, it isn’t hot enough. Remove the cube and wait for it to get hotter. If your oil isn’t hot enough, your bread will soak it all up and your scramble will be heavy and soggy. Nobody wants a soggy scramble. Nobody.


    fried_bread_scramble_03.jpg

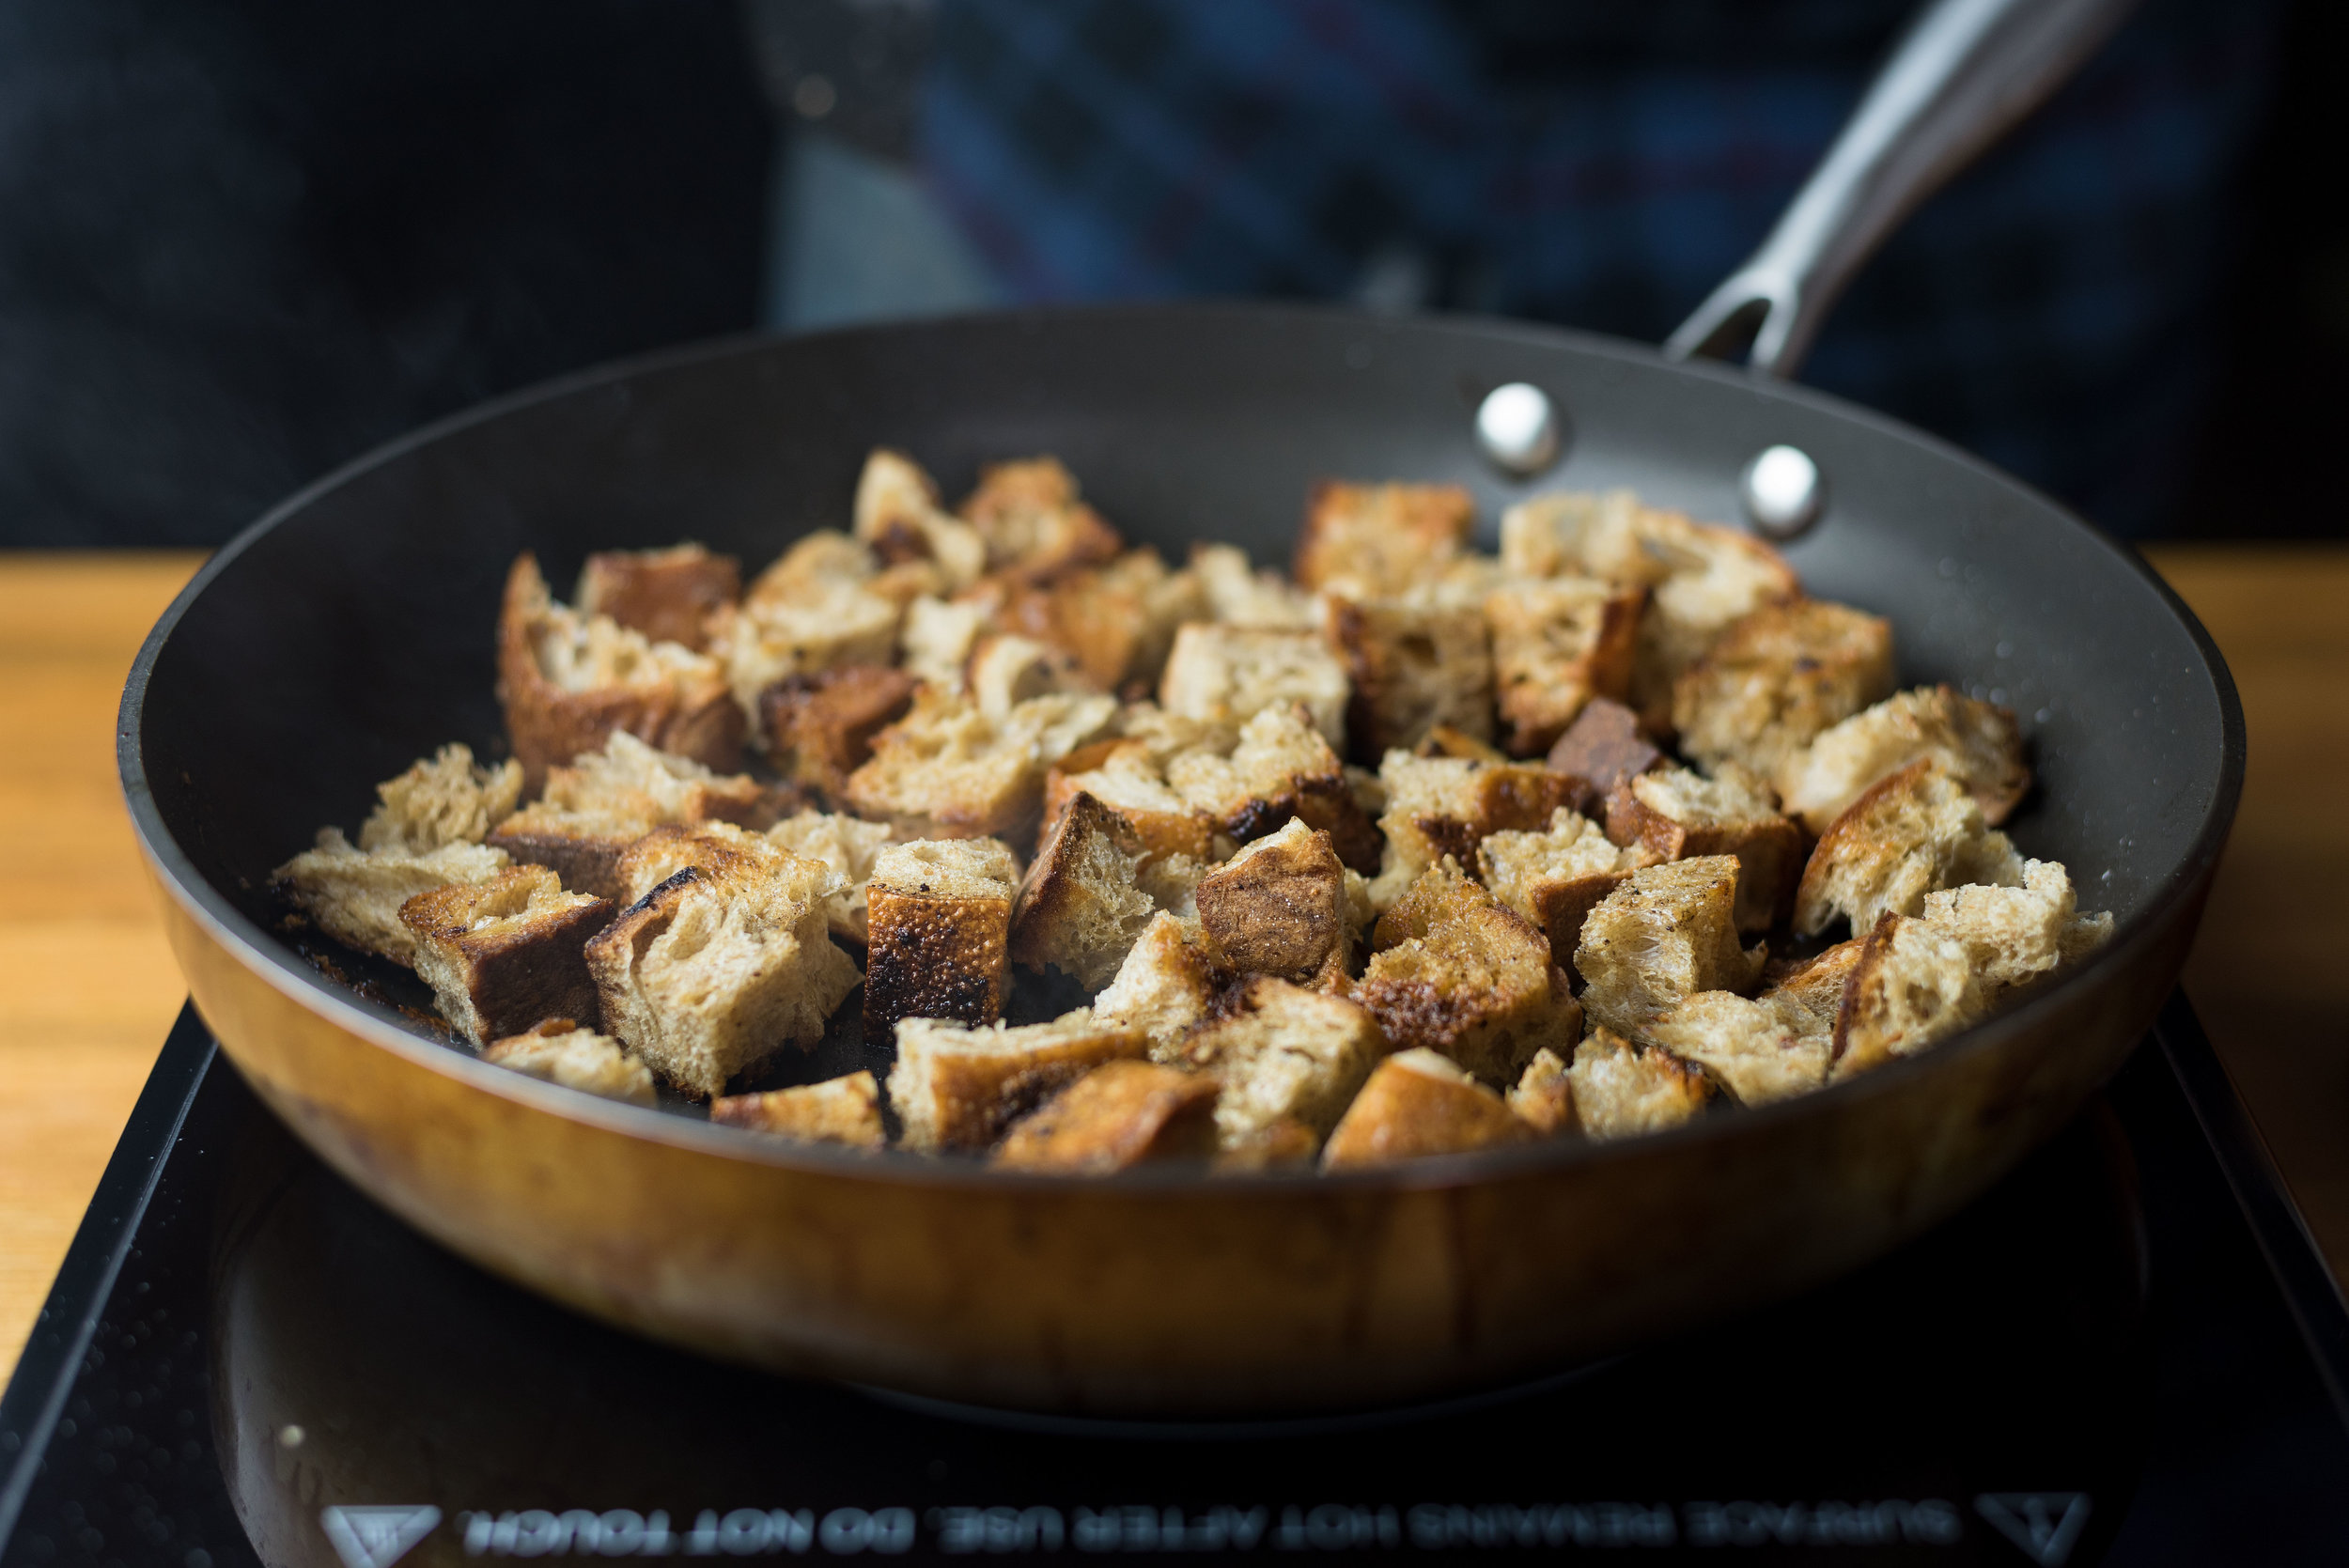
    When your pan is hot enough, add the bread and let it crisp up in the oil, flipping them over to other sides when they get golden brown. I’d recommend using tongs to flip your cubes. I like to make sure that my cubes have at least two or three sides that are crisp and golden before moving forward.

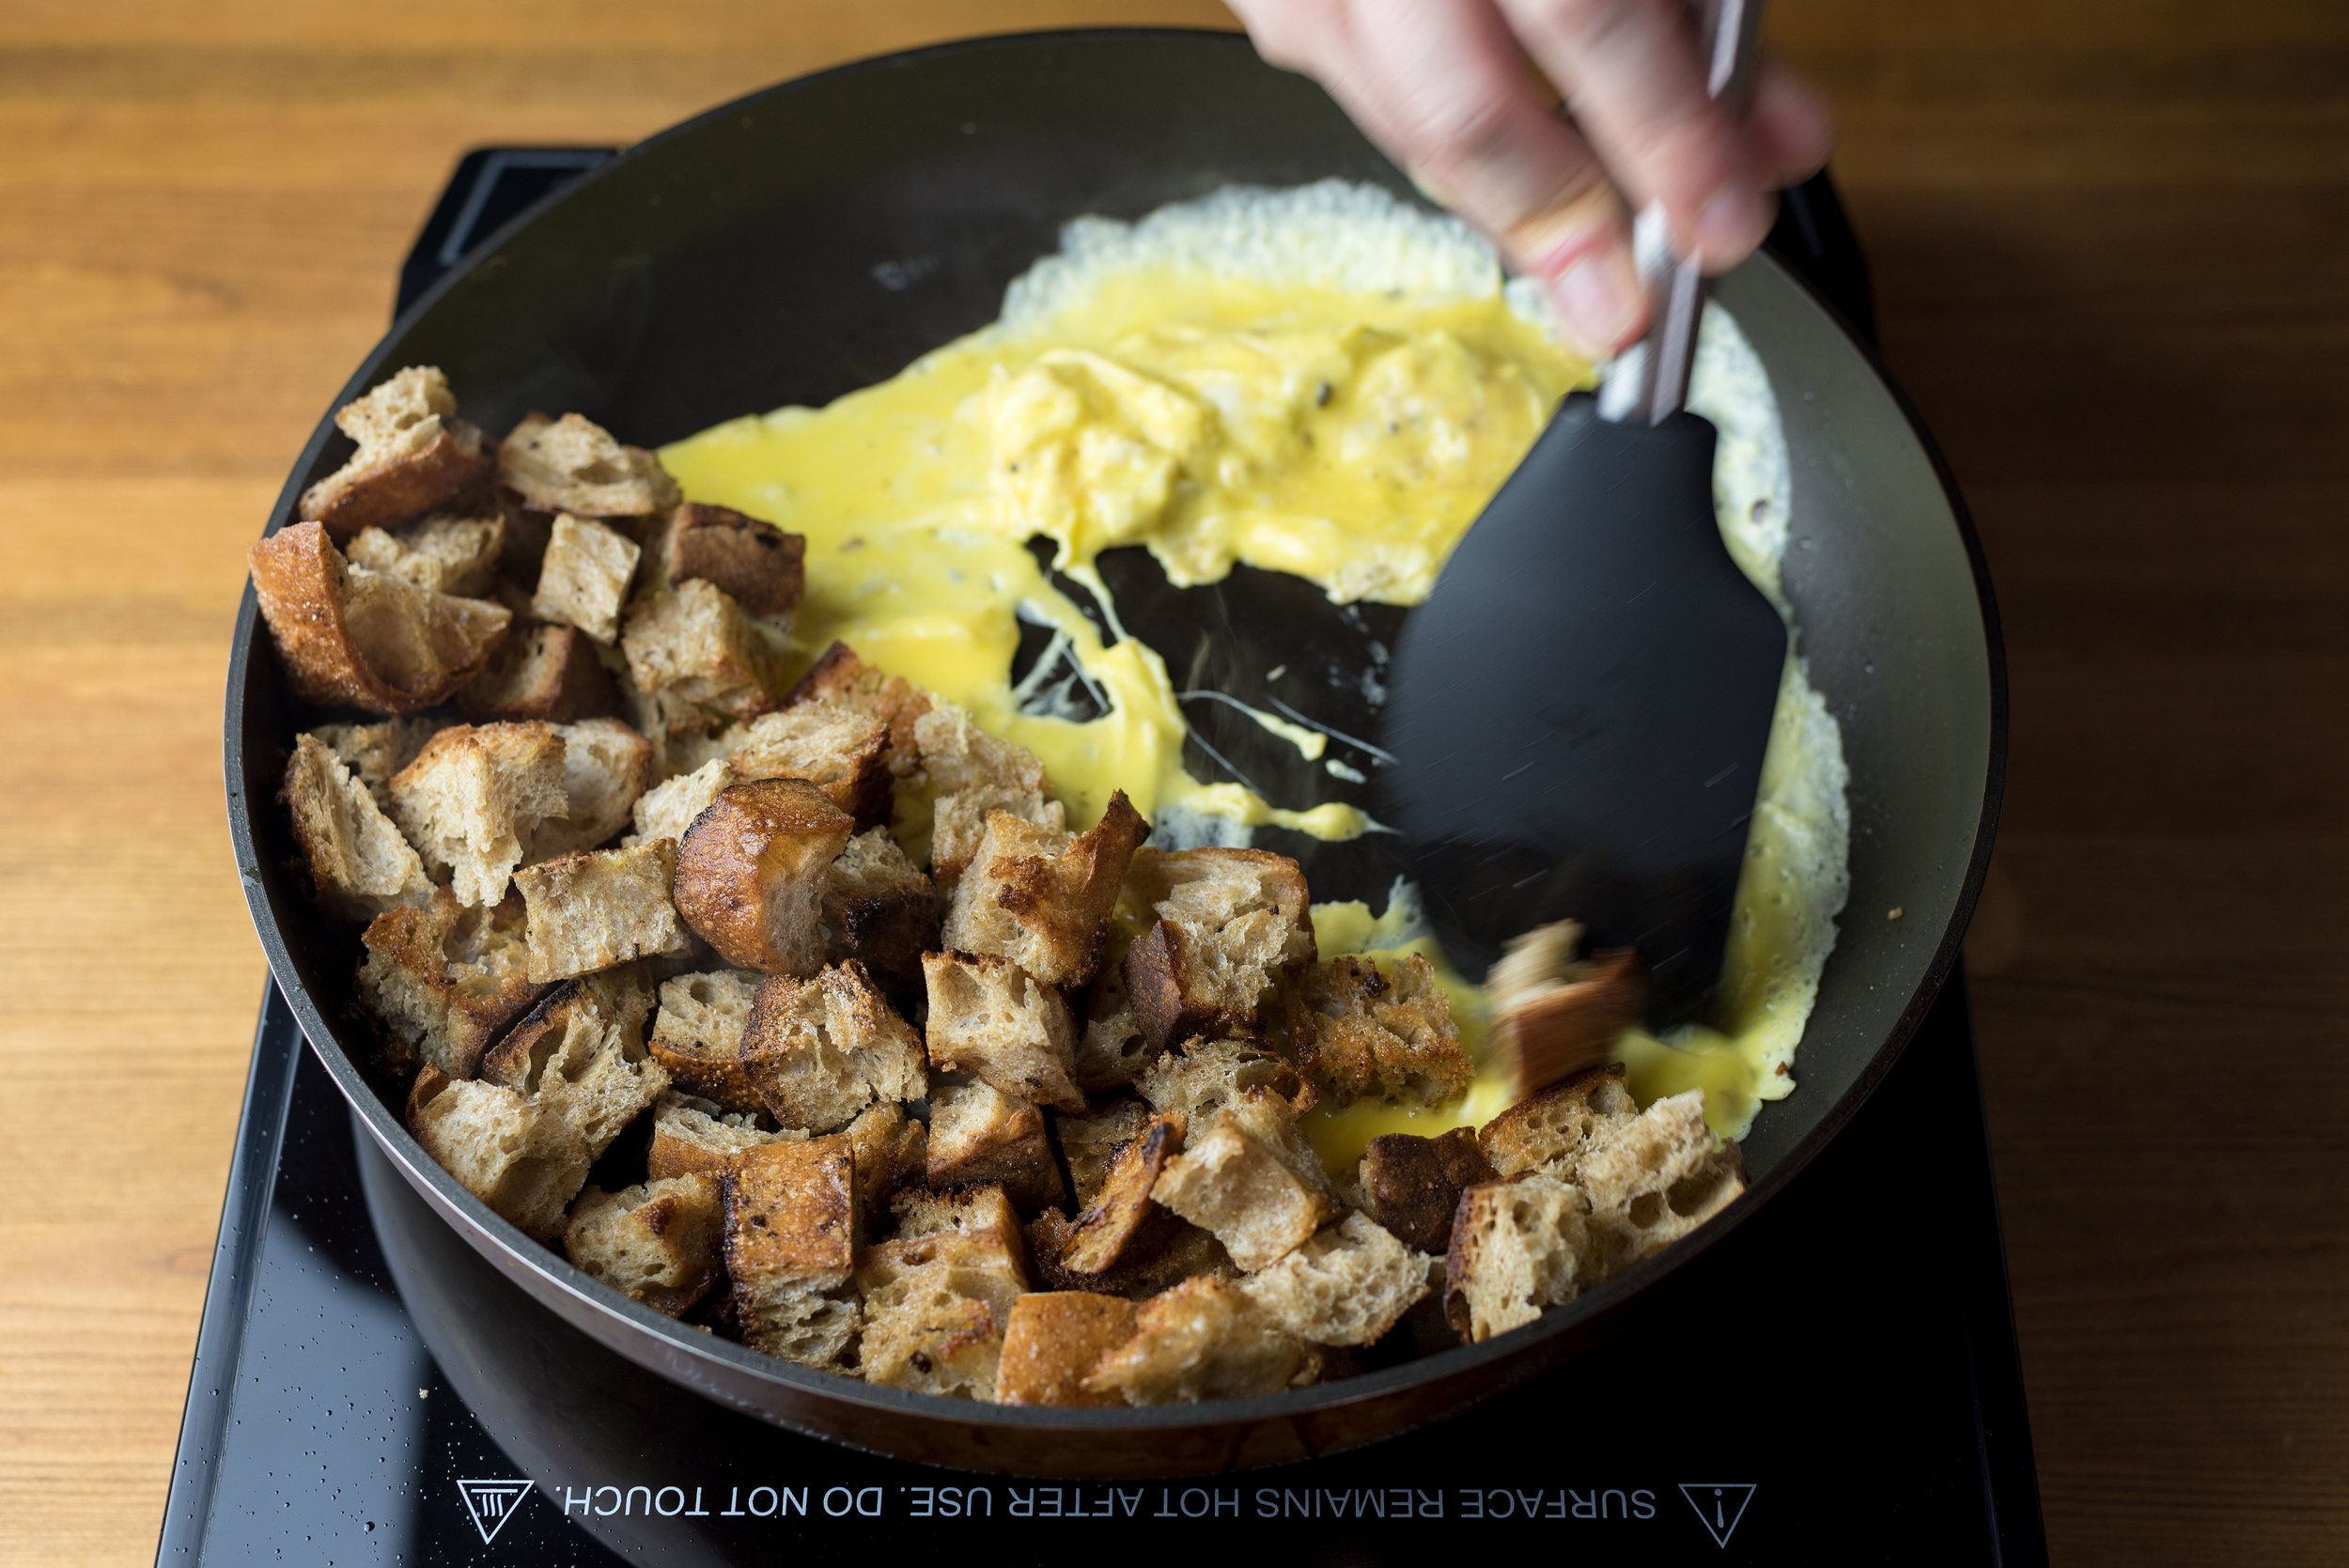
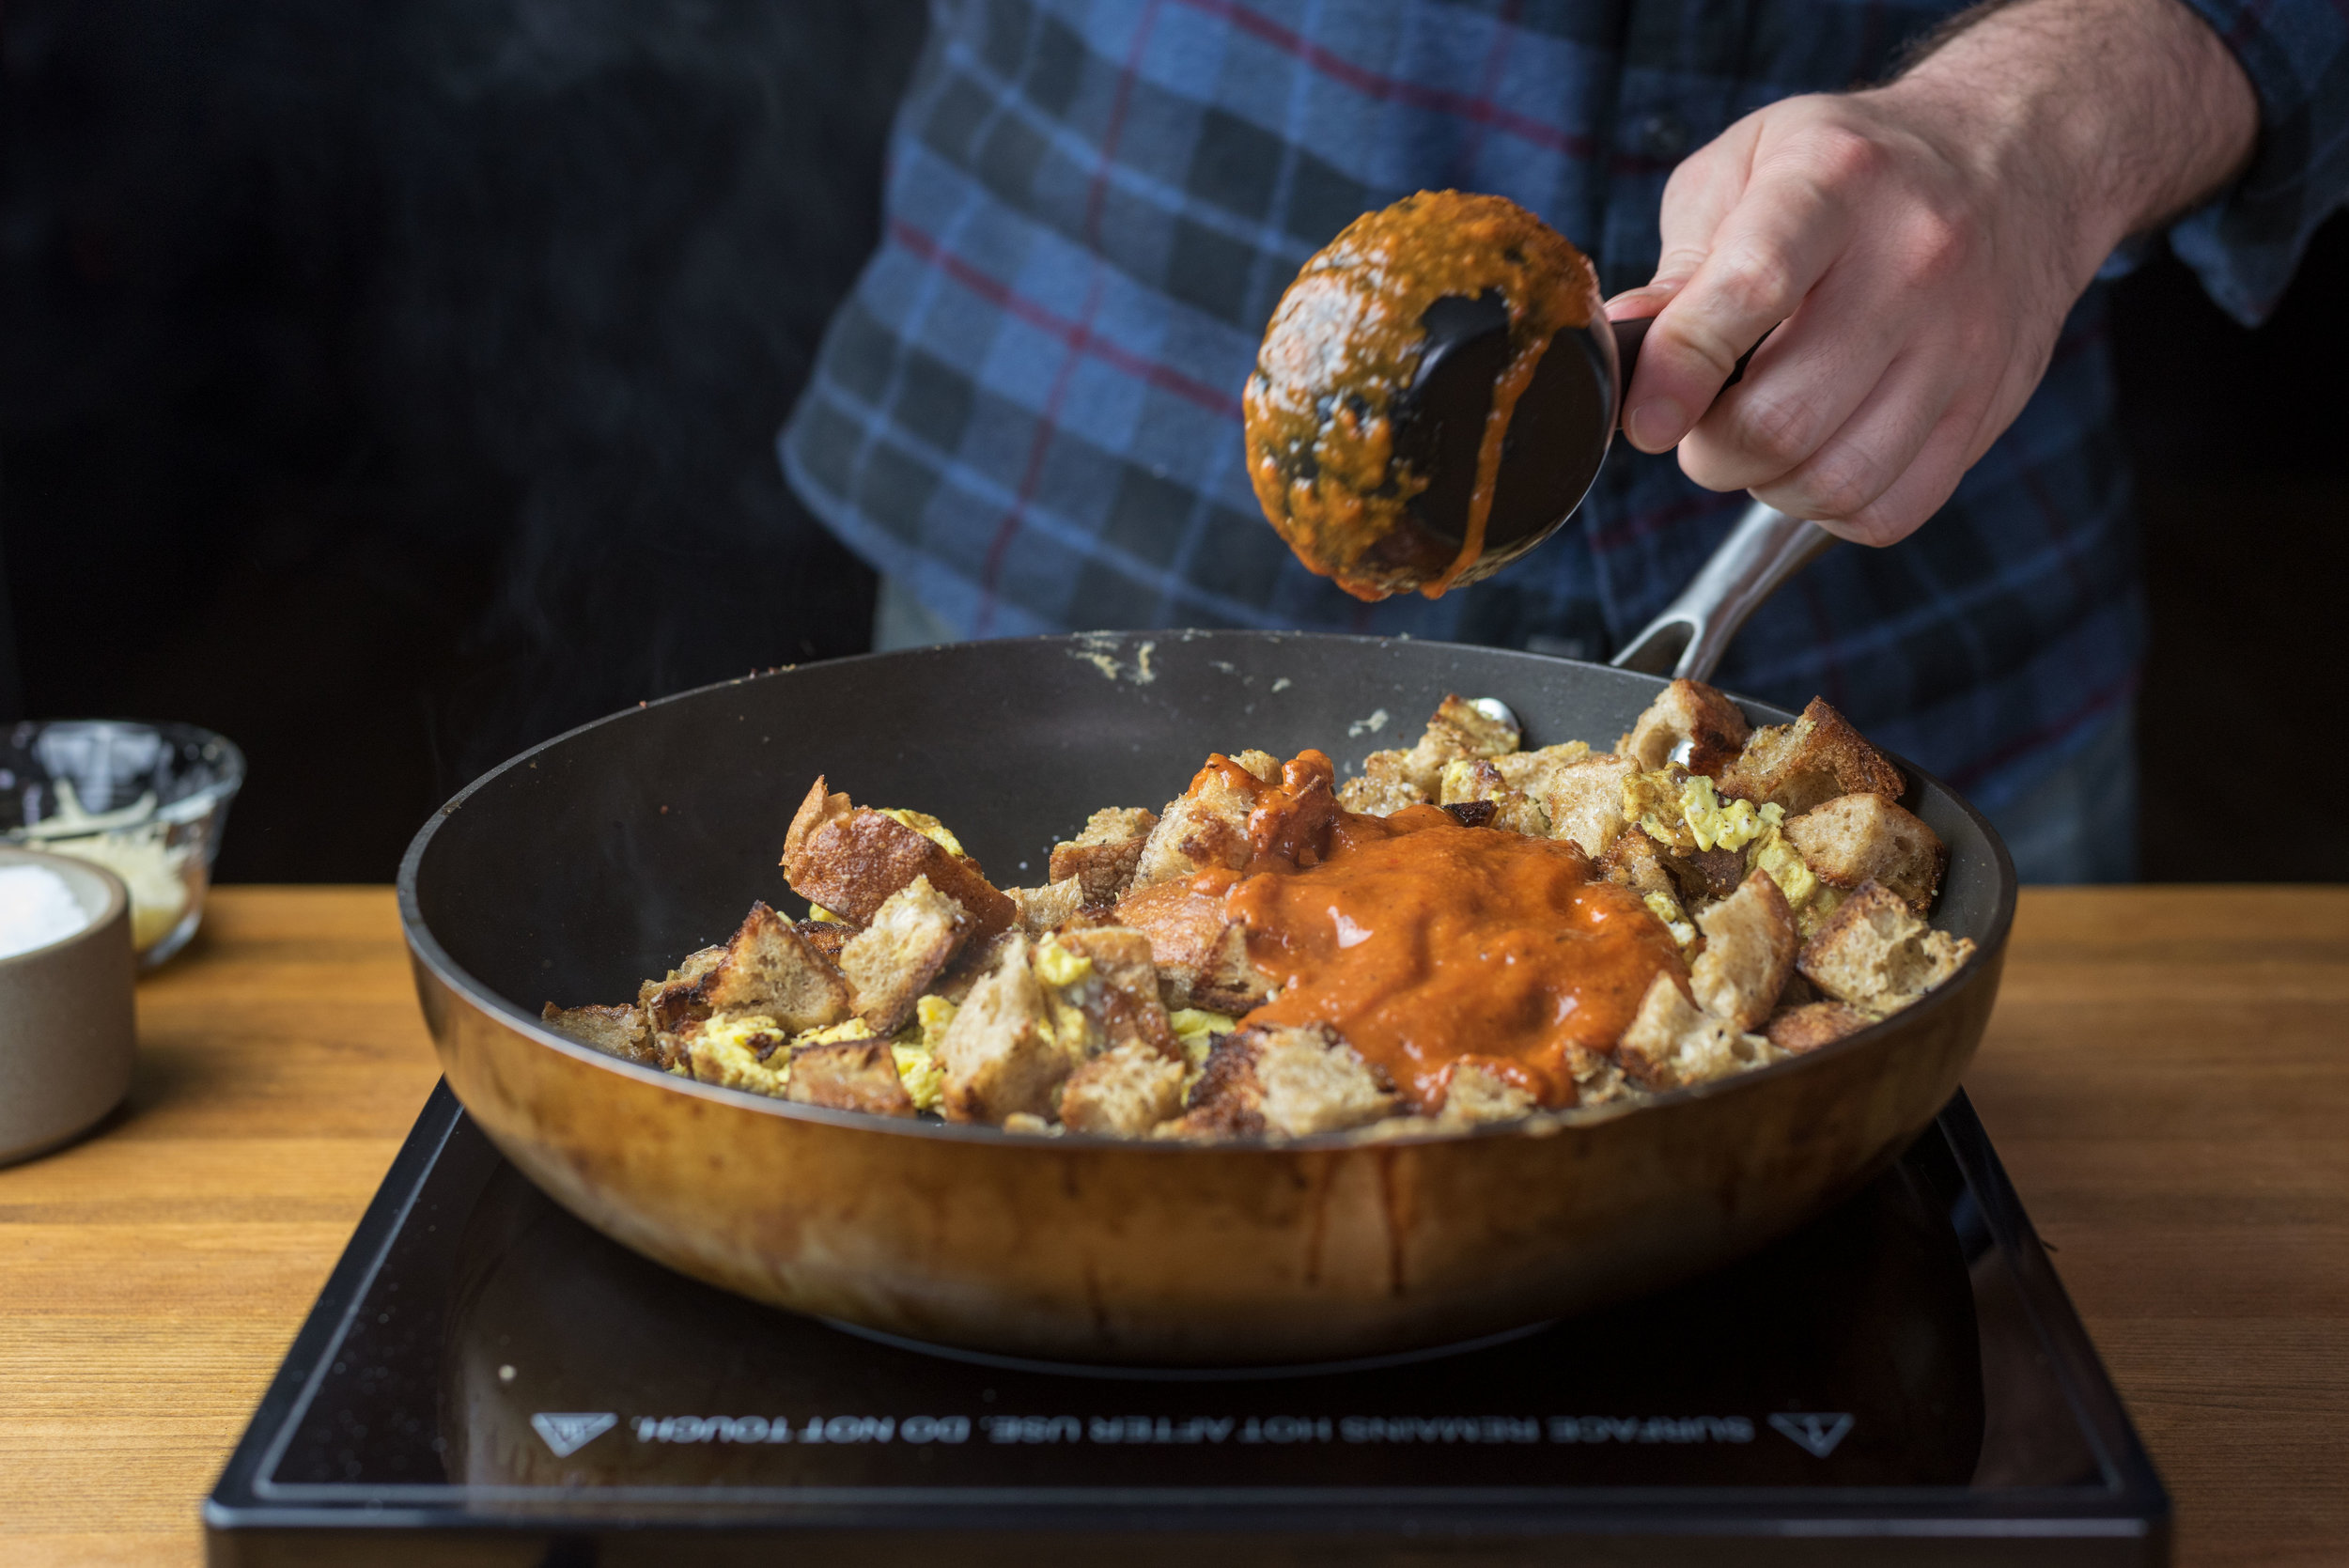
    Move your cubes to one side of the pan, leaving half of your cooking space exposed. Add the beaten eggs to the pan and move them around cooking them quickly. When they are scrambled (a little underdone is preferred), incorporate them among your bread cubes, then add the salsa. Remove pan from heat immediately and keep stirring to coat the bread with salsa.


    fried_bread_scramble_06.jpg

    While your scramble is cooling and thickening up, add the cheese and a big pinch of salt. Then stir it together, making sure the cheese is incorporated and melting. Serve immediately with the thinly sliced green onion garnished on top.

    Serves 2.


    fried_bread_scramble_08.jpg


    fried_bread_scramble_01.jpg

  • Pasta in Fresh Tomato and Butter Sauce


    If you’ve got your shit together, this pasta sauce is ready in 10 minutes.

    The bones of this sauce are based on Marcella Hazan’s amazing tomato sauce, but just because it’s me, I’m impatient and seem to have an affinity for tossing all my problems into a blender until they’re nice and smooth and unrecognizable. This recipe doesn’t take an hour and requires minimal cleanup. Plus, if you omit the pasta and, like, salt, effectively there are three ingredients in this recipe. Three.

    You have no excuse not to make this.

    Pasta in Fresh Tomato and Butter Sauce

    • 9–10 oz ripe fresh tomatoes

    Note: We recommend using little guys like cherry or grape tomatoes. You don’t have to cut anything, they’re easier to weigh, and they tend to have a better flavor than their bigger counterparts if you’re shopping at a regular grocery store. You’ll miss out on the beautiful tart flavor if you don’t use good tomatoes for this. That being said, if you choose to make this during summer and you want to use some glorious heirloom tomatoes that you just bought at the farmers market as opposed to the little ‘uns that we we recommend here, then you do yourself a goddamn favor and make it with those.

    • 2 large garlic cloves, skins removed, very roughly chopped

    • ¼ cup (½ stick) unsalted butter

    • salt & pepper to taste

    • Roughly 4 oz. of uncooked dry pasta or 220 grams of fresh pasta

    Note: We always use fresh pasta for this sauce, and the recipe we use for fresh pasta is our own. It tastes incredible, plus it makes better pasta water. You can find the recipe here.

    • ¼ cup pasta water (or more if needed), reserved

    Bring water in a pot to boil for your pasta while you preheat a skillet over medium high heat.


    pasta_tomato_butter_sauce_002.jpg

    In a blender, add the fresh tomatoes and chopped garlic and blend until completely smooth. Pour the sauce into your hot skillet and let it reduce by about half. Stir occasionally and keep an eye on your color. 

    When the sauce has reduced and turned a lovely shade of darker red, add the butter to the pan and let it melt. Stir the melted butter into your sauce, then lower the heat on your pan to medium low and let the butter and tomato sauce simmer. Season with salt and pepper to taste as the ingredients in the sauce bond.


    pasta_tomato_butter_sauce_006.jpg

    This is a good time to cook the dry pasta in your boiling water. The noodles should be cooked until a little under al dente since they’ll cook a little more after they’re tossed in the hot sauce. If you’re using fresh pasta, I’d wait until the sauce has simmered a little more since fresh pasta can be cooked in a minute or two. Be sure to take some of the pasta water out of your pot and reserve it before draining your noodles. Add 1/4 cup of the water and stir it in (or more if you think it needs it, it all depends on how much the sauce has reduced).


    pasta_tomato_butter_sauce_007.jpg

    Remove your pan from the heat and add the noodles, then toss them in the sauce. As the noodles cool while they’re being stirred, they should thicken the sauce on their own, so be patient while the starches in the noodles work their magic. Once the noodles are evenly coated and the sauce has thickened, serve immediately. Garnish with freshly grated parmesan and red chili flakes, maybe some chopped parsley or basil if you’re feeling it.


    pasta_tomato_butter_sauce_008.jpg

    Serves 2, or one if you happen to be Nate after leg day.


    pasta_tomato_butter_sauce_011.jpg

  • Brown Sugar Coffee Ice Cream


    #newyearnewme!

    Barf.

    Make some damn ice cream. This one ought to wake you up from any pipe dreams you might have that you’ll be able to subsist on kale, quinoa, and good vibes for the next 12 months.

    Happy New Year, kids.

    • 2 cups heavy cream
    • 1 cup whole milk
    • ¾ cup dark brown sugar
    • ¼ cup (1 oz/28 grams) freshly ground good coffee (medium roast preferred)
    • ⅛ teaspoon cinnamon
    • A pinch of xanthan gum
    • A pinch of salt
    • 1 tablespoon bourbon

    In a saucepan, heat the cream, milk, and brown sugar until it simmers and all the sugar has completely dissolved, then remove from the heat.

    In a French press, add the freshly ground coffee, then pour the hot cream and sugar mixture over it. Let sit with the sieve on top (to keep the heat in) for about half an hour to let the coffee brew directly into the cream base. Push the sieve down, straining the grounds away from the cream base, then pour the base into a large bowl. Discard the grounds. Whisk in the cinnamon, xantham gum, salt, and bourbon until thoroughly incorporated. Chill overnight or until completely cool.

    Churn the chilled coffee base in an ice cream maker in accordance to the machine’s instructions. When the mixture resembles soft serve, remove it from the ice cream maker (quickly!) and place it into an airtight container with a layer of plastic wrap to keep even more air out, as well as to prevent ice crystals from forming on the top of your ice cream. Chill in the freezer overnight, or until the mixture sets.


    coffee_ice_cream_09.jpg

    Yields almost 4 cups of ice cream. You decide how many servings that is.


    coffee_ice_cream_08.jpg

  • Butter Bean and Kale Soup with White Miso


    It’s getting cold, kids. Real cold.

    Portland has been plunging pretty regularly into the low thirties recently, and how have Nate and I been dealing with it? We’ve been baking bread (duh), playing The Legend of Zelda: Breath of the Wild (new DLC, baby), and making a lot of soup, including this nifty riff on white bean and kale soup that I threw together recently. It ended up being so good that we made it three times in a week.

    White bean and kale soup is something I hear about a lot of people making this time of year, and while I certainly think it’s delicious, it hasn’t always been something I turn to. Whenever I’ve made it, I’ve always been tempted to load the soup with some kind of chorizo or fatty flavor boost, but this time I wanted to take a different approach: I focused on the bean, or beans…

    My first alteration? I changed the beans in the recipe to butter beans. Why? Because I love butter beans and I don’t need to justify anything to you people.

    My second alteration? I use a secret-flavor-weapon I came up with at the very last second while futzing with this recipe: miso. Miso provides anything you add it to with a little umami boost, and that’s exactly what I wanted for this soup. It doesn’t sidetrack your palate away from the beans like bacon or chorizo might, and it keeps the soup light even though it tastes really rich. Also, if you were to make this soup with veggie broth, it’d be vegan, which is a nice plus. Throw in some protein of choice at the end then serve with some rice or a piece of good crusty bread and you’ve got a complete meal ready in about 45 minutes.

    P.S. This soup makes amazing lunches; its flavor deepens substantially the following day.

    Butter Bean and Kale Soup with White Miso

    • ¼ cup of olive oil
    • 1 large onion, finely chopped
    • 2 14-oz. cans of butter beans, washed
    • 2 bay leaves
    • 4 cups of chicken or veggie stock
    • 1 bunch of lacinato kale, stems removed and very roughly chopped
    • 3 cloves of garlic, minced
    • 1 heaping tablespoon of white miso
    • Salt to taste

    Bring a soup pot to medium heat, then add olive oil and onions. Cook the onions until translucent, then add half of the washed butter beans, stirring occasionally to avoid any sticking to the bottom of the pan. While the onions and beans are cooking, put the other half of the washed butter beans into a blender with some water (not more than one cup of water, unless you want to wait a long time for your soup to reduce) and blend until smooth. 

    Add the puréed beans to your soup pot along with the bay leaves and the broth. Bring the soup to simmer and let it do its thing without a lid for about half an hour, allowing it to reduce.

    Once the soup has achieved your desired thickness, remove it from the heat and add the kale and garlic, then stir. Place the miso in a small cup or ladle and incorporate it into a small amount of the soup broth so that you avoid lumps, then add it to the rest of the soup. Add salt to taste and serve in bowls (like you have a choice).


    miso_white_bean_kale_soup_009.jpg

    I recommend garnishing the soup with some chopped parsley, as well as some freshly cracked black pepper, smoked paprika, or chili flakes (or all of them, if you’re a total garnish floozie).


    miso_white_bean_kale_soup_010.jpg

    Serves 4.

  • Tom Kha Teacups


    Autumn is just around the corner, and you know what that means?

    Soup weather.

    We are gonna be making many different kinds of broths as much as we can to create some luscious soups and braises as the impeding doom and gloom settles just outside our window, and to start, we decided to give you guys one of our go-to’s we’ve had for years.

    Everyone has that drinkable “cure all” in the back of their mind that they subconsciously reach to whenever they can feel the grip of sickness beginning to take hold. It’s always some kind of elixir that warms you up and rejuvenates you, making you more aware of your senses and rousing you from your slump. While we certainly don’t wait to be ill to make this recipe, it’s the first thing we reach for when we start to feel under the weather. This light and complex broth is crammed with Southeast Asian aromatics and Thai chiles that blast away any feelings of sluggishness or apathy, leaving your mind—and sinuses—a little clearer than they were a moment before. We can’t help but grin with every time we take a sip.

    This recipe isn’t new, but the presentation and ratios might be. Tom kha gai is a soup that most people know about, but whenever we crave it we don’t necessarily want all the toppings and noodles it sometimes comes with; we just want that broth. We meditated on that preference, and the more we thought about it the more we realized that the preparation was less like other soups where you need to cook what you’re adding into it. Since you discard most of your flavorings at the end, it’s really just an infusion. It’s more like, well, tea. 

    This broth is magical, and we encourage you to take a step back and enjoy the delicious simplicity of it on its own. Your body will thank you.


    Tom Kha Teacups:

    Makes scant 5 cups broth.

    • 4 cups good chicken broth (preferably homemade)

    • 2 stalks lemongrass, very roughly chopped, white and tender green parts only

    • 2 inches galangal, very roughly chopped

      • Note: If you can’t find galangal, you can use ginger to substitute for this. It won’t taste the same, but it will still be delicious.

    • 1 ounce shrimp shells (optional, but highly recommended)

    • ½ cup coconut milk

    • ¼ cup fish sauce

    • 1 tablespoon palm sugar simple syrup

    • 8 kaffir lime leaves

    • ¼ cup cilantro leaves, roughly chopped and packed

    • 2 thai chiles, roughly chopped, stems removed

    In a saucepan on high heat, add the chicken broth, lemongrass, galangal, shrimp shells (if you’re using them), fish sauce, and palm sugar simple syrup. Bring to a boil, then bring the heat down to low and cover. Simmer for 15 minutes.


    Remove the lid and turn the heat off. Add the coconut milk, lime leaves, cilantro, and Thai chiles, then put the cover back on. Let stand for 4 minutes. Strain the broth and discard all the aromatics. Serve in teacups, bowls, or just leave it in the sauce pan and use a bendy straw.

    Serves 4-ish.


  • Fish Tacos with Late Summer Salsa


    “What grows together goes together.”

    It’s a well known saying that we couldn’t agree with more, and it was the first thing that popped into our heads on our most recent trip to Sauvie Island. We had gone to pick peaches, but due to the erratic weather in one of the most uncharacteristic summers we’ve had in recent memory, we unfortunately missed them this year. However, that didn’t stop us from just taking a look around to see what else was in season.

    We always knew that the farm we frequented grew a large variety of vegetables, but they always seemed to take a back seat to the fruit that we usually make the trip out for. We ended up finding some gorgeous looking poblano chiles, which was something I never expected find there, and I was practically giddy upon the discovery. Later down the row we reached the corn fields, and the subject of this post simply materialized afterwards. Both of these ingredients being in season was too good to pass up.


    Charred corn salsas pop up frequently because, well, they’re really delicious. Most salsas tend to be smoky or tart, but this one is decidedly sweet, which is a nice change. While we tend to not want to veer on things being very sweet, adding some charred poblanos is not only an informed seasonal choice, but their natural and beautiful bitterness fits seamlessly into the salsa like a missing puzzle piece. A little bit of a rarer fresh herb called epazote also gives the salsa a refreshing grassy flavor, speaking directly to corns natural sweetness. Pair this salsa with the simplicity of fish tacos, and you have a light, sweet, and herbaceous ahead of you: a perfect quick dinner for the hot nights of late August and early September.

    Late Summer Salsa:

    • 1 ear of sweet corn
    • 1 large poblano chile
    • 1 jalapeño, minced
    • ½ sweet onion, diced
    • 1 tablespoon finely chopped epazote leaves
      • Note: Look for epazote at your local Mexican market. If you can’t find epazote (it’s not the easiest herb to find), use cilantro instead. It’ll still be super tasty.
    • Juice of one very juicy lime
    • Salt to taste

    Char the poblano chile skin with a blow torch, or if you have a gas stove simply put it on the grate with the flame on high. Once all the sides of the chile are black, place the chile in a plastic bag and let it sweat for about 15 minutes. 


    While the poblano is sweating, char the corn kernels with the blow torch or on the stove. The ear shouldn’t be completely black; you only want the tops to be charred. Allow the ear to cool a little bit before cutting all the kernels away from the ear, then discard the cob. Place the kernels in a bowl large enough to hold all the ingredients for the salsa and set aside.


    Remove the chile from the bag and run your fingers over the skin to remove it. Once all the char is rubbed off, remove and discard the stem and the seeds of the chile. Dice the poblano flesh and add it to the bowl with the corn kernels.

    Add the jalapeño, diced onion, epazote (or cilantro), and lime juice, then stir until completely incorporated. Add salt to taste.

    Fish Tacos with Late Summer Salsa:

    • 1 pound of white fish fillets, such as cod or rockfish, deboned
    • 1 tablespoon of cumin
    • 1 tablespoon of smoked paprika
    • 2 teaspoons of salt
    • Oil for sautéing 
    • 1 batch of Late Summer Salsa

    Mix the cumin, paprika, and salt together in a small bowl and rub it over the fish filets liberally. Set aside on a plate.

    Heat a non-stick pan on medium heat with some oil until it shimmers, then place the spiced fish filets in the pan. Fry until the fish is cooked through and can be easily flaked, about three minutes a side. Let the fish rest for around 5 minutes, then serve with warmed corn tortillas, salsa, some queso fresco, and chopped cilantro. Add some refried black beans and rice to the spread if you like.


    Serves 3–4.

  • Strawbanero Sorbet


    Sorbet gets a bad rap.

    “Why would you want to eat that when you could have ice cream?”

    “That‘s gross, no thanks. I’ll take the good stuff.”

    “Aww, I’m sorry that’s all they have for you…”

    Rude.

    I’m going to make something clear here. If you think that sorbet is gross, it’s because all the sorbet you’ve had is garbage. It’s simple as that.

    I can understand the aversion; lots of commercial sorbet can be incredibly icy, resembling more of of a sad popscicle that got crammed into a pint container, but know this: it doesn’t need to be this way. Real sorbet is light and bright, harnessing the pure and unadulterated essence of the fruit it was made with. In a way, it’s like a little time capsule, keeping the fruit at the peak of its ripeness so you can revisit it every time you open your freezer. Good sorbet outshines any alternative no-fat, low-carb, low-sugar, high-protein, “guilt-free” bullshit on the market today. We tried some just to see for ourselves what the fuss was all about (for science!) and let’s say that we won’t be returning to that arena any time soon. Or ever.

    While Nate and I love almost everything about ice cream (eating it, making it, designing it) we understand that it’s a sometimes food. So, in an effort to find a dessert lower in fat that would be a little easier on our bodies and also rid ourselves of the ungodly amount of strawberries we purchased at the farmer’s market this week (they were just so pretty) we came up with this little recipe. Using amazing strawberries make it bright and floral while the habanero lends its own sweetness to the mix along with something a little extra.

    Strawbanero Sorbet:

    • 2 pounds ripe strawberries, tops removed

    • 1 small(!) habanero

    • ¾ cup sugar

    • ¾ cup water

    • ¼ cup light corn syrup or tapioca syrup

    • 2–3 tablespoons lemon juice (to taste)

    Put the sugar and water in a sauce pan over high heat and allow the mixture to boil, dissolving all the sugar in the solution. Once it resembles a syrup, remove from the heat and let it cool to room temperature.


    Spear the habanero on a fork and flame the skin over a gas burner (or with a blow torch) until the entire body of the chile is black. Remove the habanero from the fork and place in a plastic bag for 10 minutes or so, allowing the chile to sweat and its outer skin be very tender. Rub the char off the habanero, then remove the stem and the seeds, discarding them.

    Put all of the strawberries and the processed habanero into a food processor and blend until completely smooth. Strain it, if you like. Transfer the very fine strawberry habanero pulp to a large bowl and whisk in all the simple syrup and corn syrup. Chill in an airtight container until cold, at least an hour (we recommend overnight as it will allow the subtle flavor of the habanero to develop further).

    Prepare your ice cream/sorbet churner (if you using a freezer bowl make sure that it is completely frozen—this typically takes up to 24 hours). Remove the sorbet mix from the fridge and add the lemon juice, then pour into the churning machine. Churn for 15–20 minutes, or until it becomes thick and almost smoothie-like. Transfer into an airtight container like a large tupperware; cover in plastic wrap, allowing it to stick to the entire surface of the sorbet, lid it, then chill in the freezer for at least 4 hours.

    Serve in cups, cones, or maybe even in a spritzer for a zippy float.


    strawberry_habanero_sorbet_03.jpg