Category: Vegetarian

  • Everyday Gnocchi


    Gnocchi is one of those recipes that mystifies me when I find out that someone thinks that it’s difficult to make, because not only is it really easy (and cheap) to produce, it’s also easy to produce a lot of it; and that’s exactly what we do. It’s common for me to whip out about four batches at a time of this recipe (a standard mixer should be able to hold two at once) then freeze the lot on a sheet tray and store these little guys in a large plastic bag. It’s such a satisfying meal for us, and the knowledge that we can put in minimal effort for it makes it all the more alluring after a long day of work where you just want something delicious and quick. Just pick your sauce, pop these kids out of the freezer and boil ’em in water till they float, and you’re set.

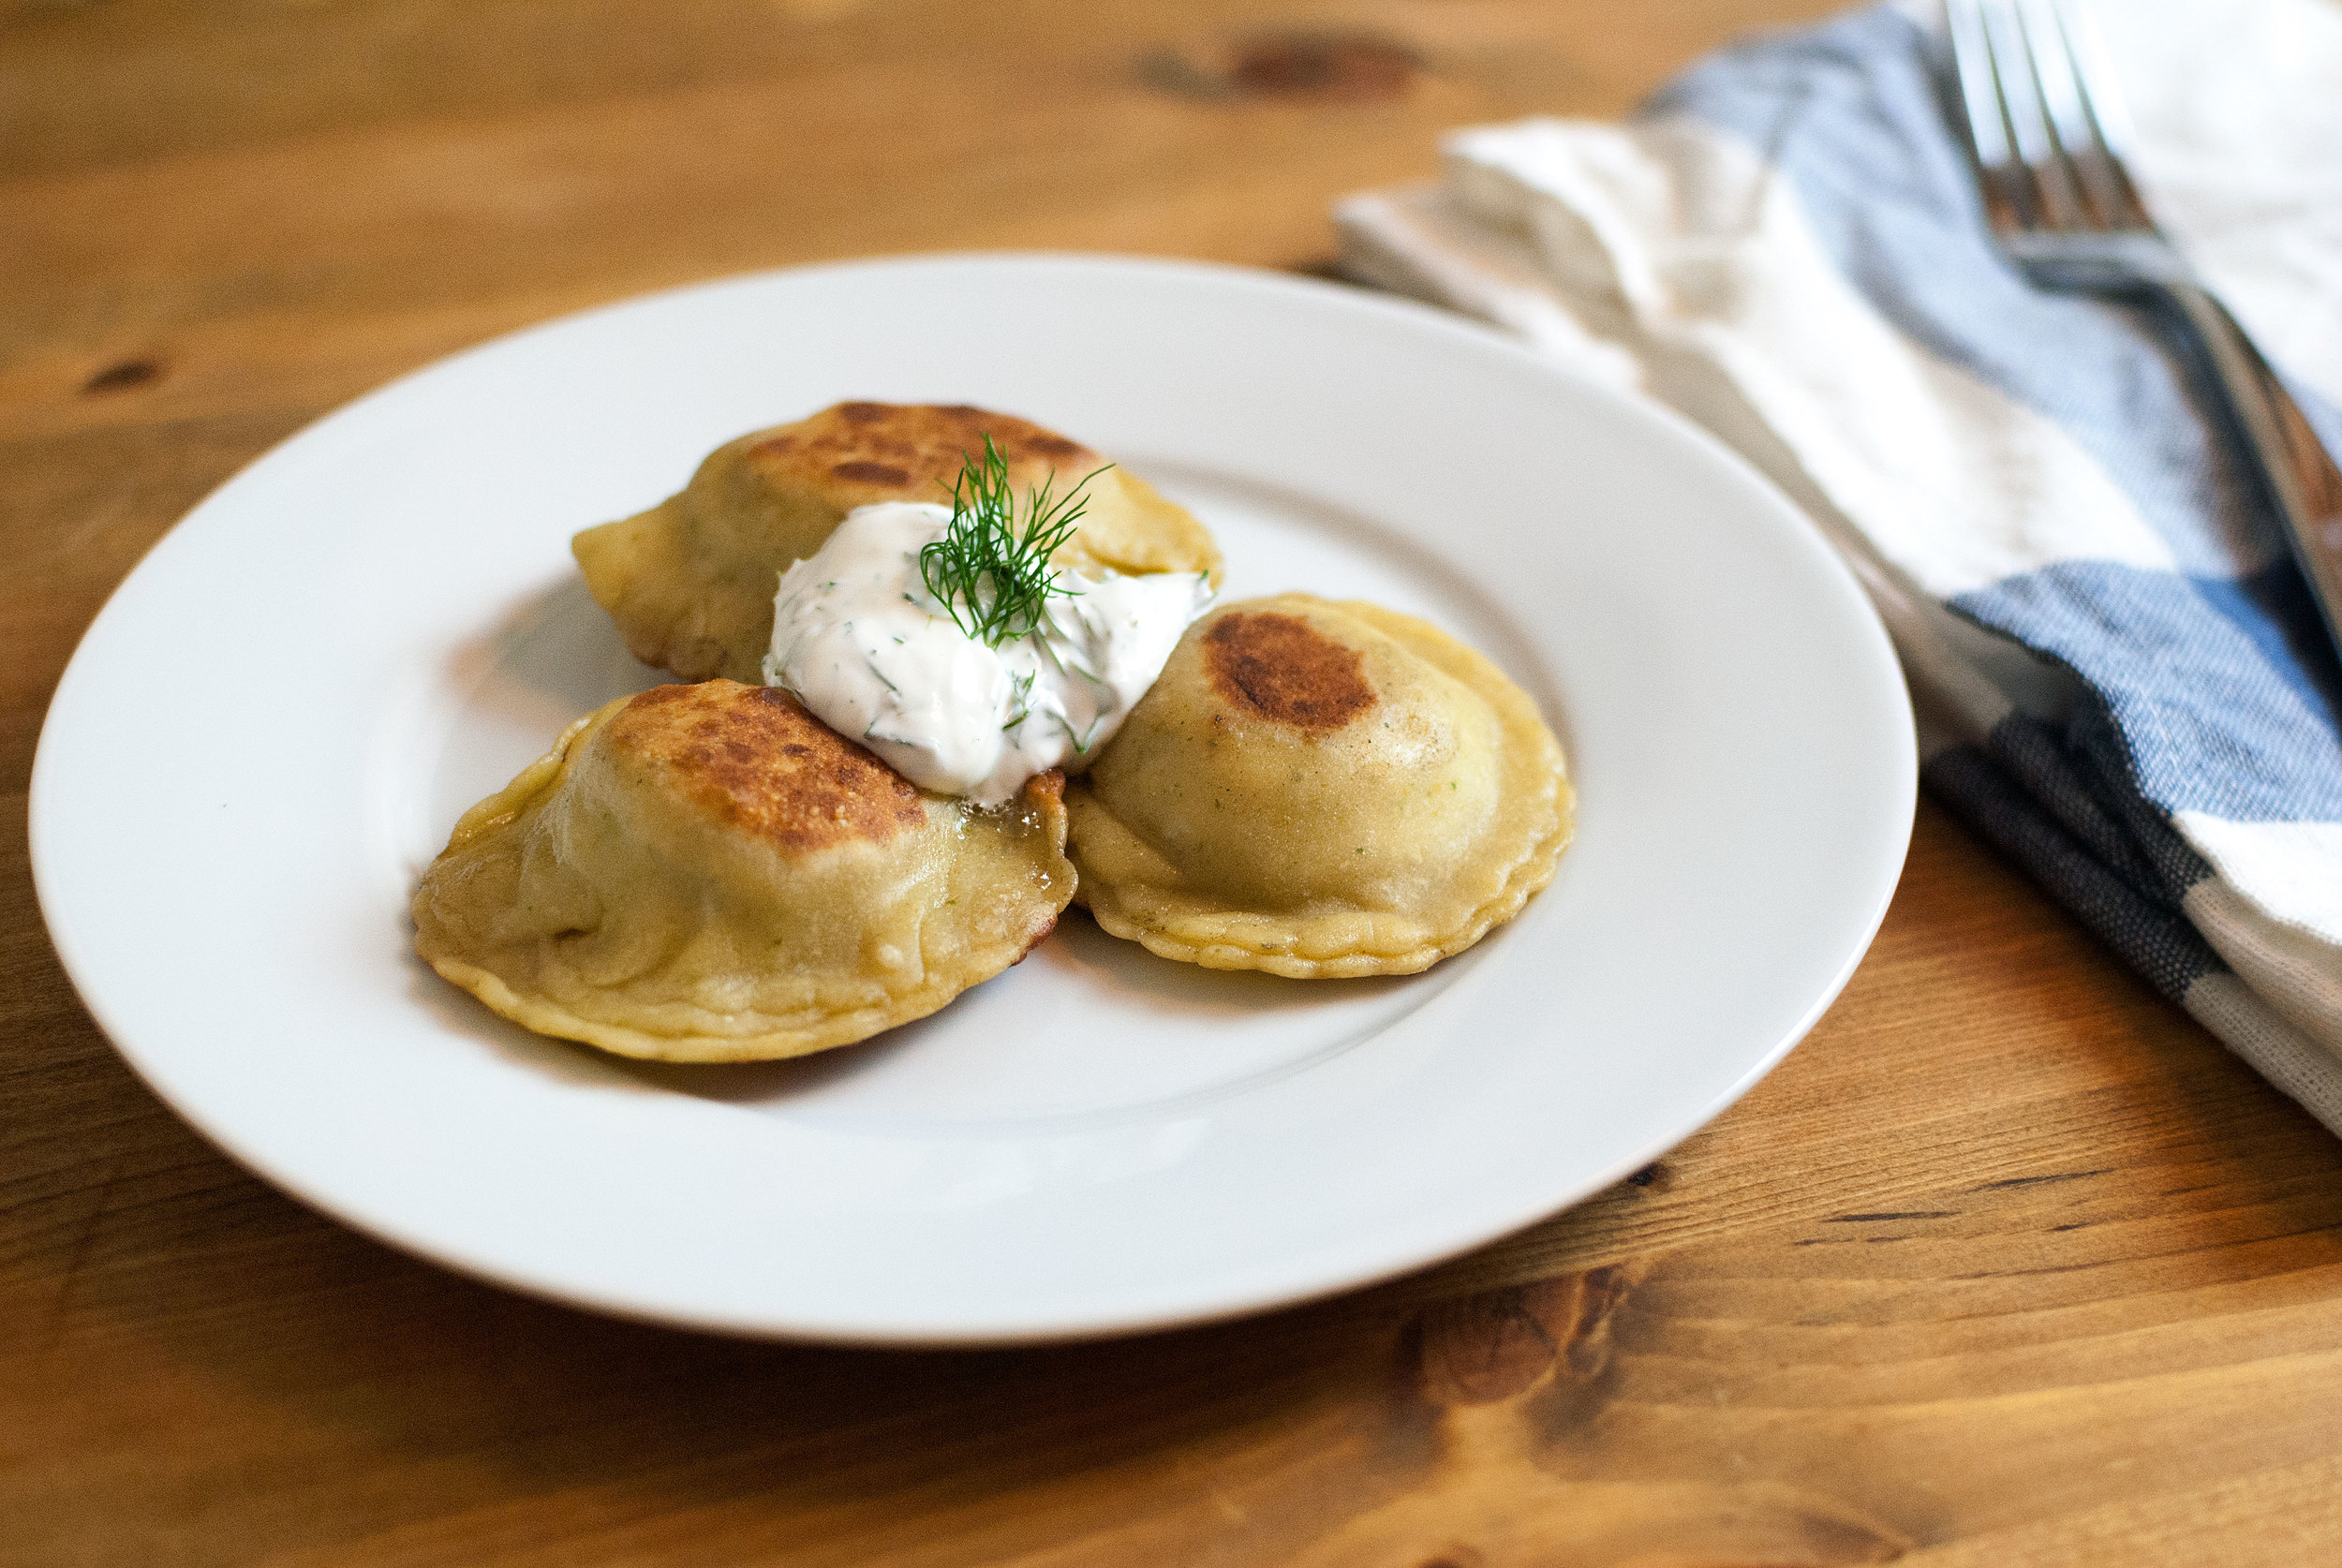
    Side note: yes, the gnocchi in this recipe are pressed onto a gnocchi board. Do you need to do that? No, no you don’t. Do grooves hold more sauce? Yeah, they do. Will your dinner be any less delicious if your gnocchs are just little grooveless potato lumps that you cut off from your giant slab of dough? Nope, it’ll be awesome.

    Did we press these onto a groove board just for this post so our gnocchi will look awesome even though we almost never do it in real life?

    You bet your ass we did.

    Everyday Gnocchi:

    • 1 cup of cooked skinless russet potato flesh, thoroughly mashed with as few clumps as possible.

      • Side note: When I do big batches of gnocchi, I will often add my cooked potato to a food processor and blend it until it’s very smooth, along with the olive oil. This changes the texture of the potato dramatically, making it much smoother (almost like a potato cake batter, and makes a much stickier dough after you add the flour to it. I’d recommend doing this, but if you’re tired and just wanna mash the potatoes by hand, your gnocchi won’t be any less delicious.

    • 2 tablespoons olive oil

    • 1 large egg

    • a big three-finger pinch of good salt
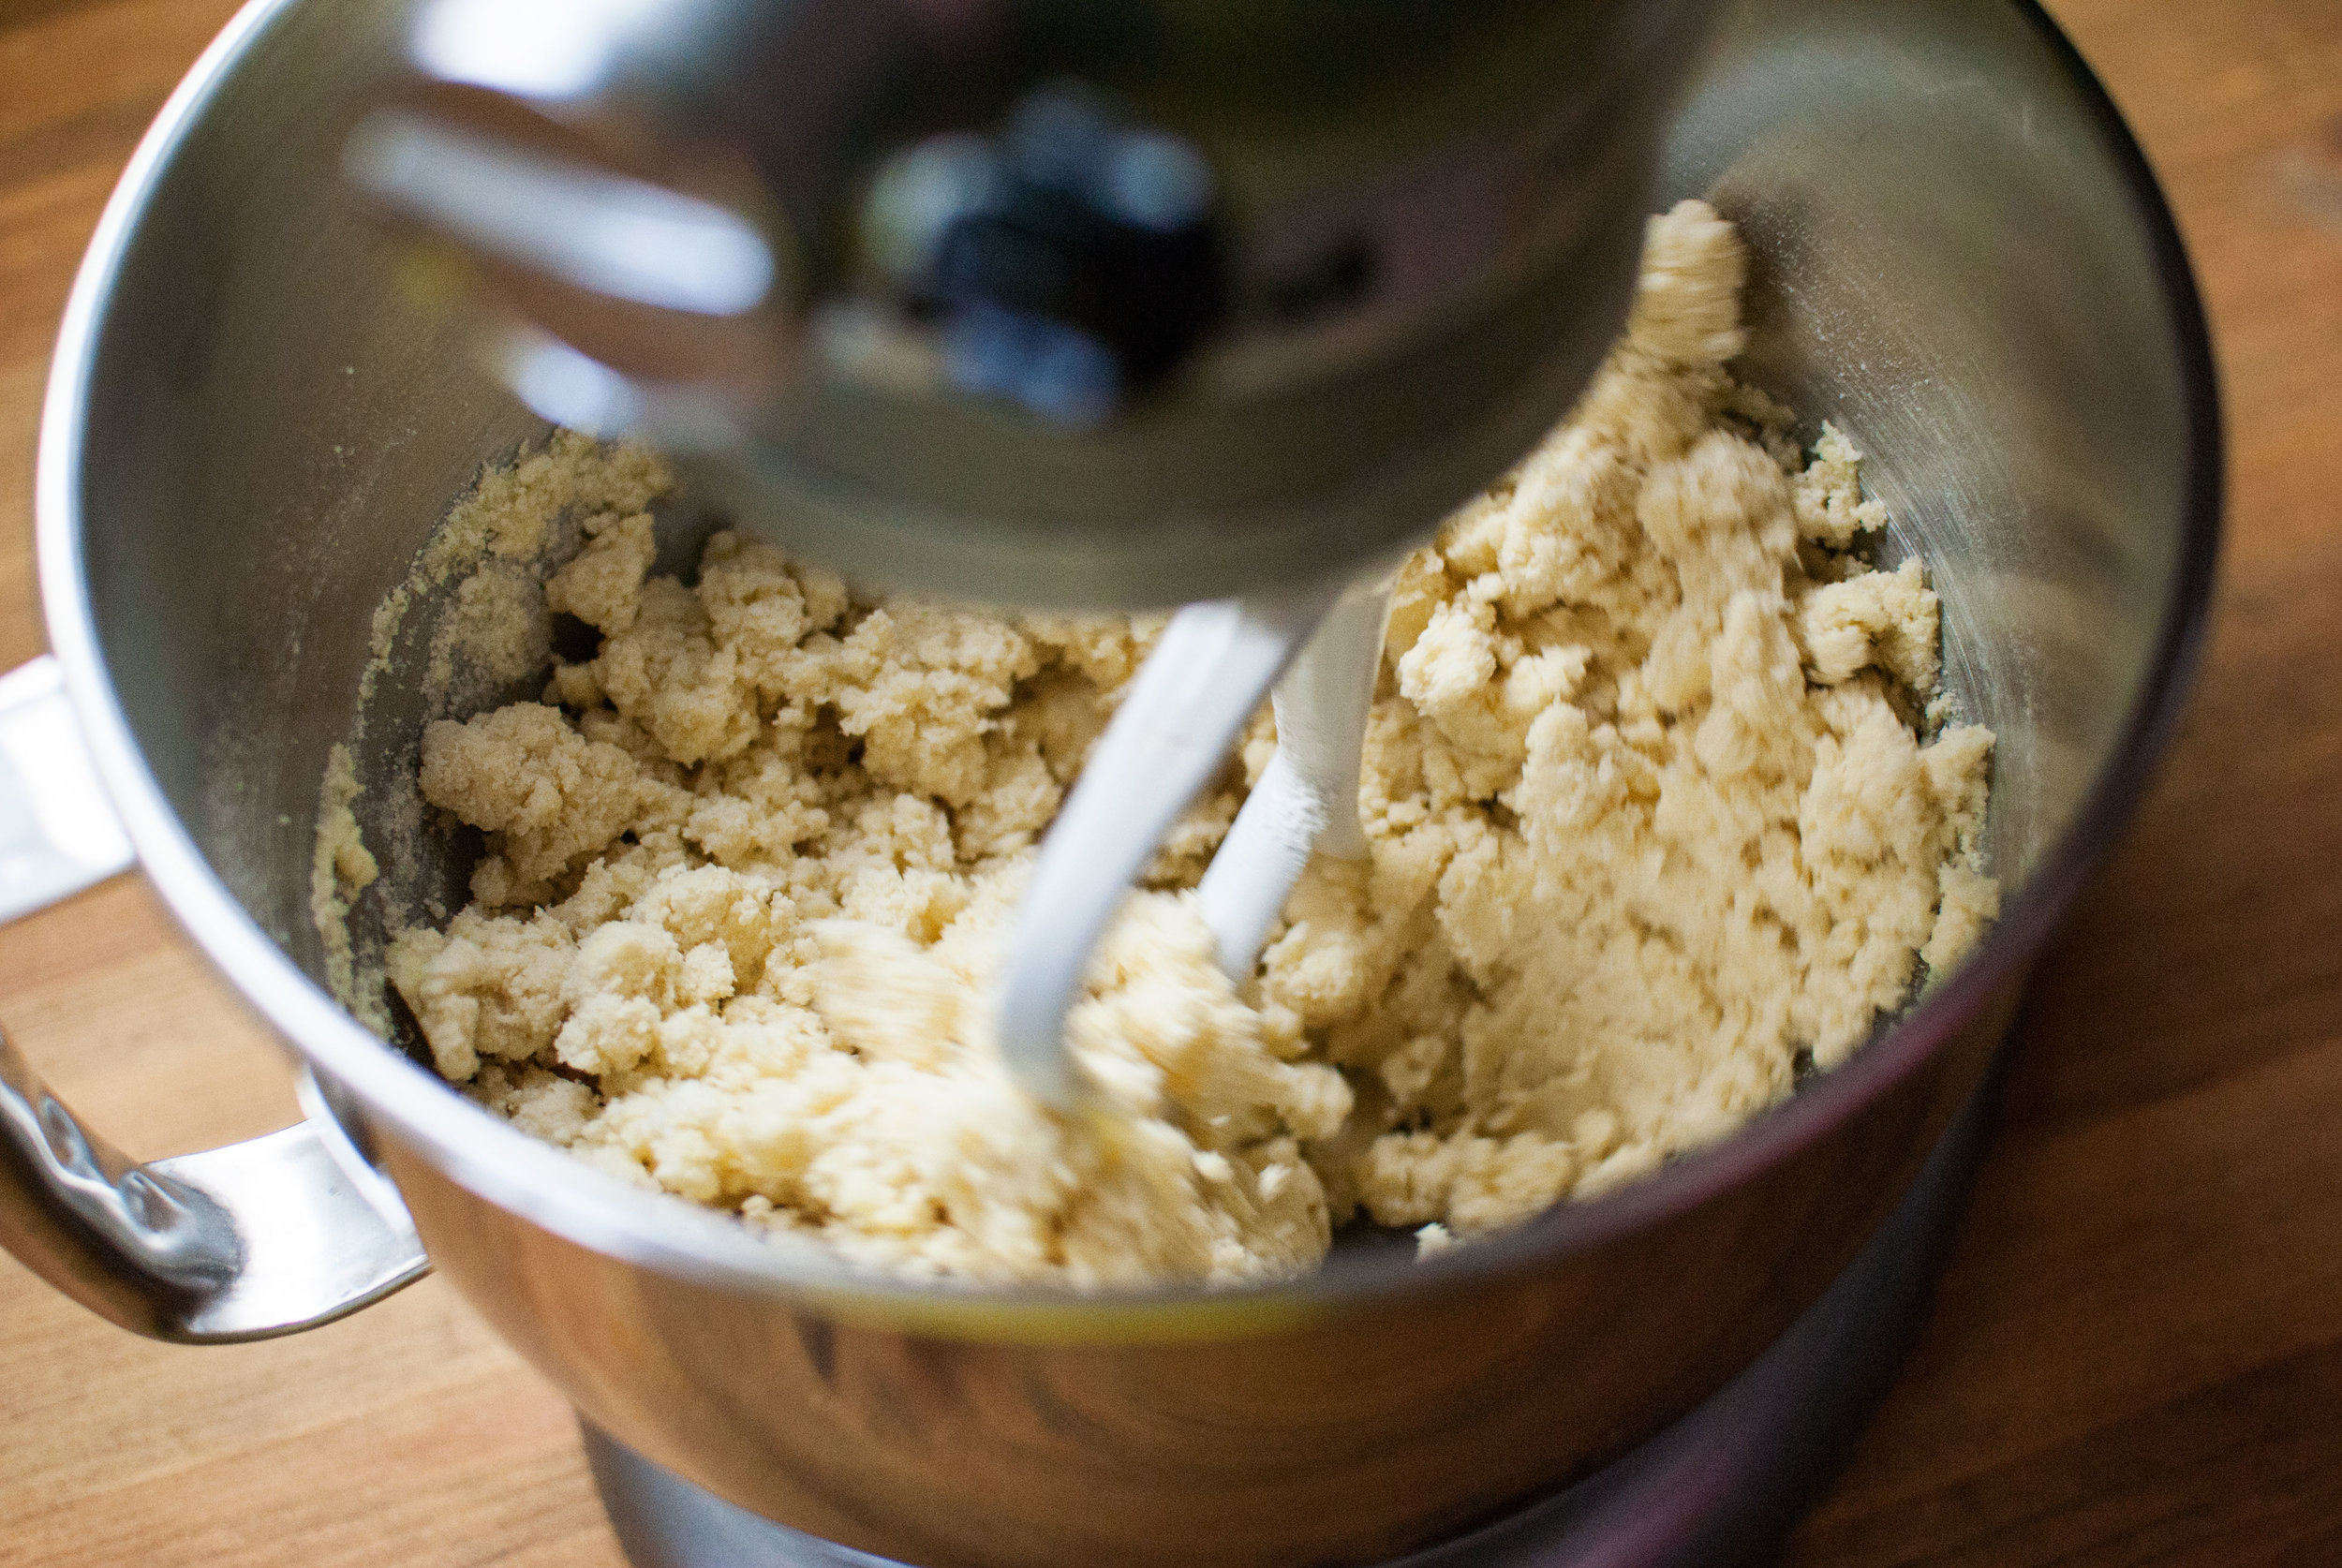
    • 2 cups flour

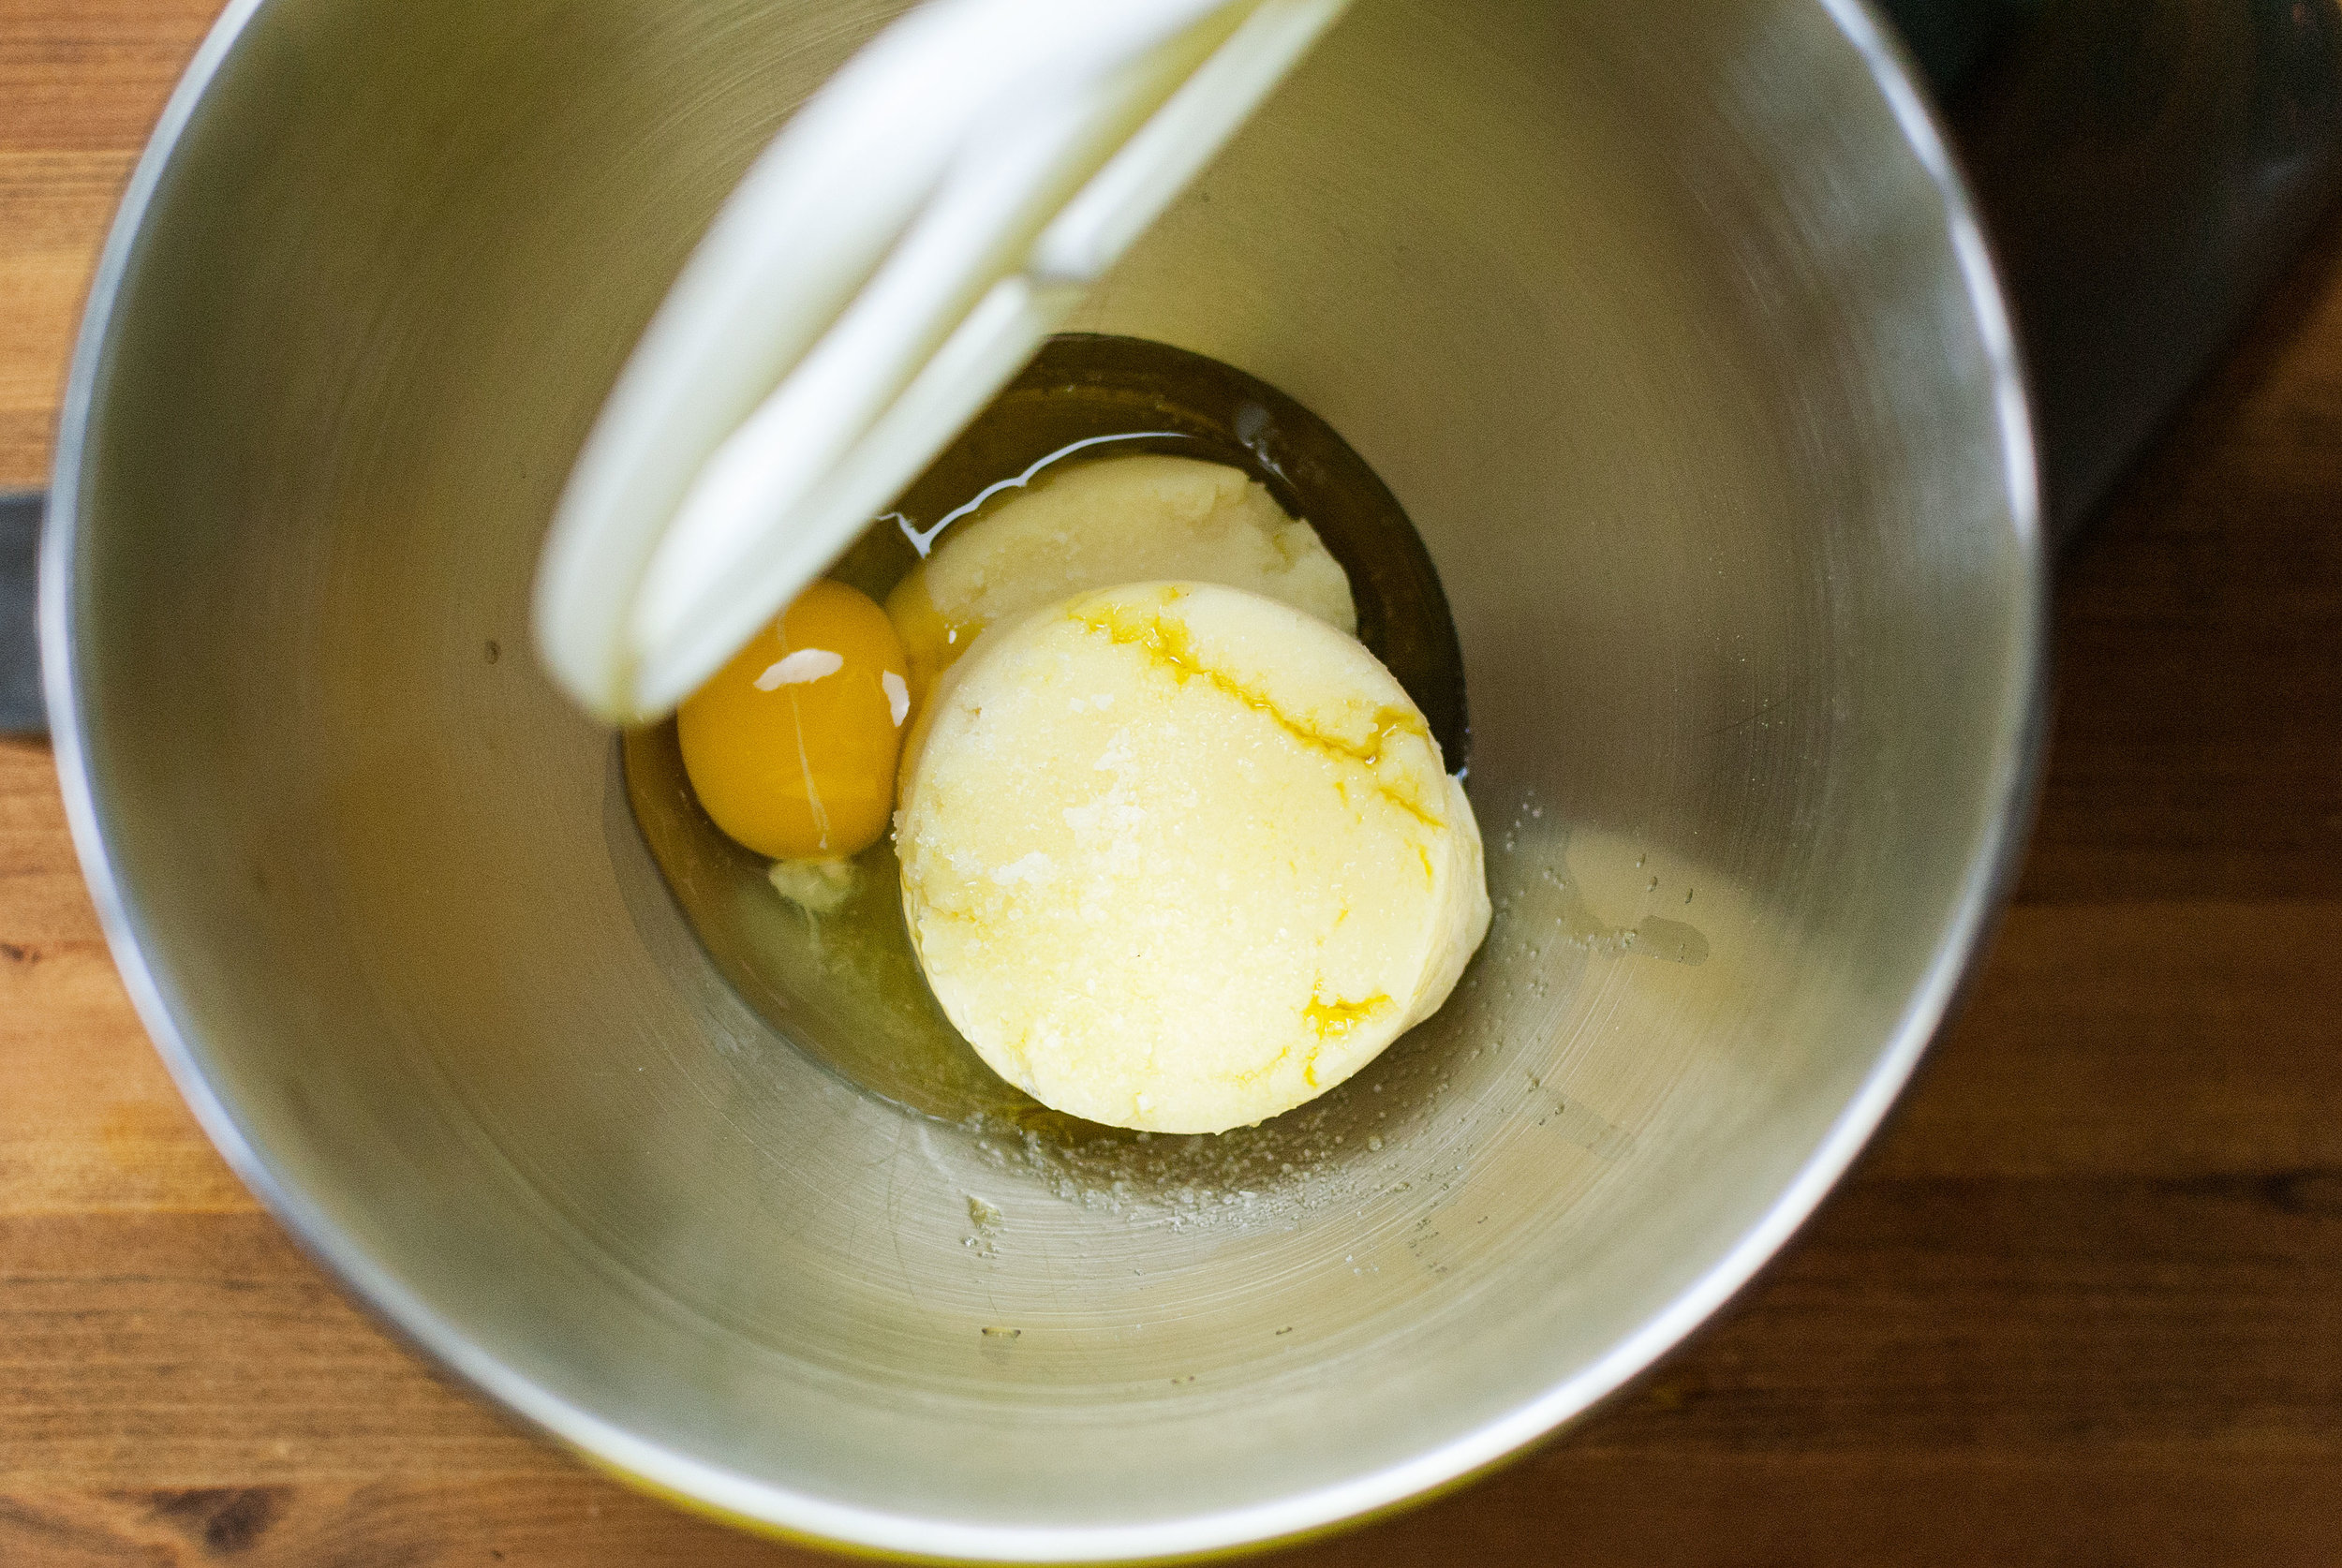
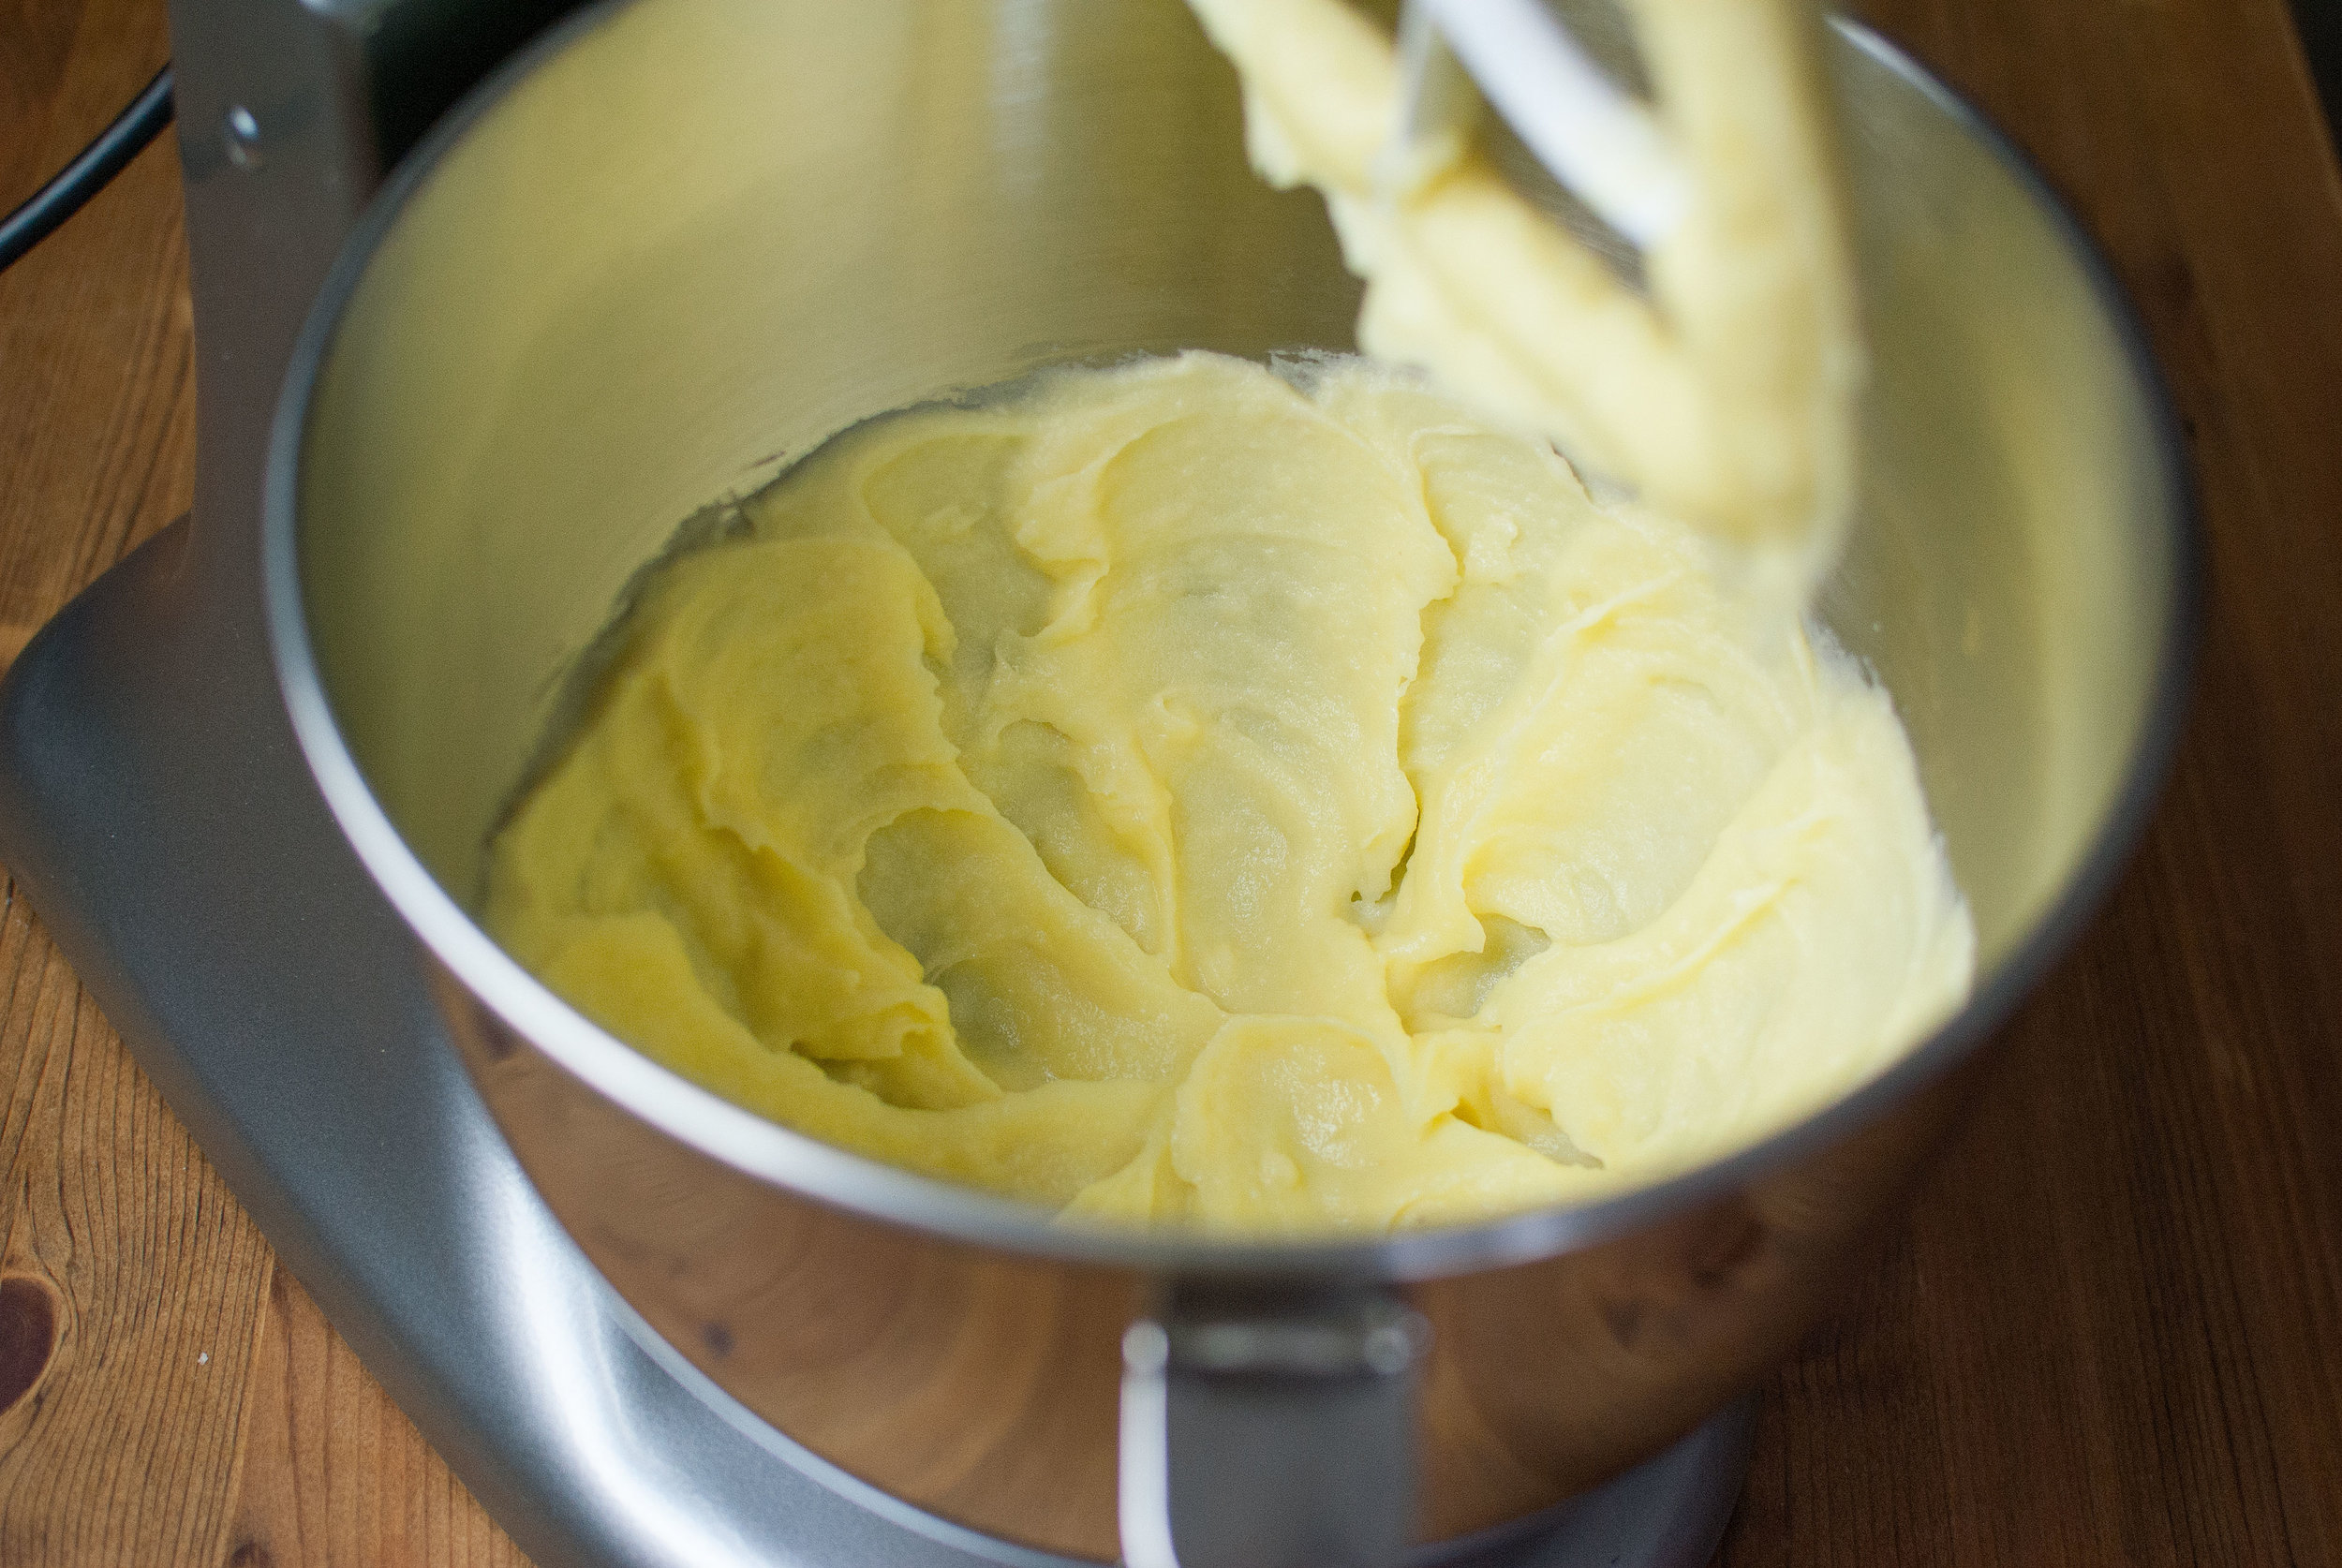
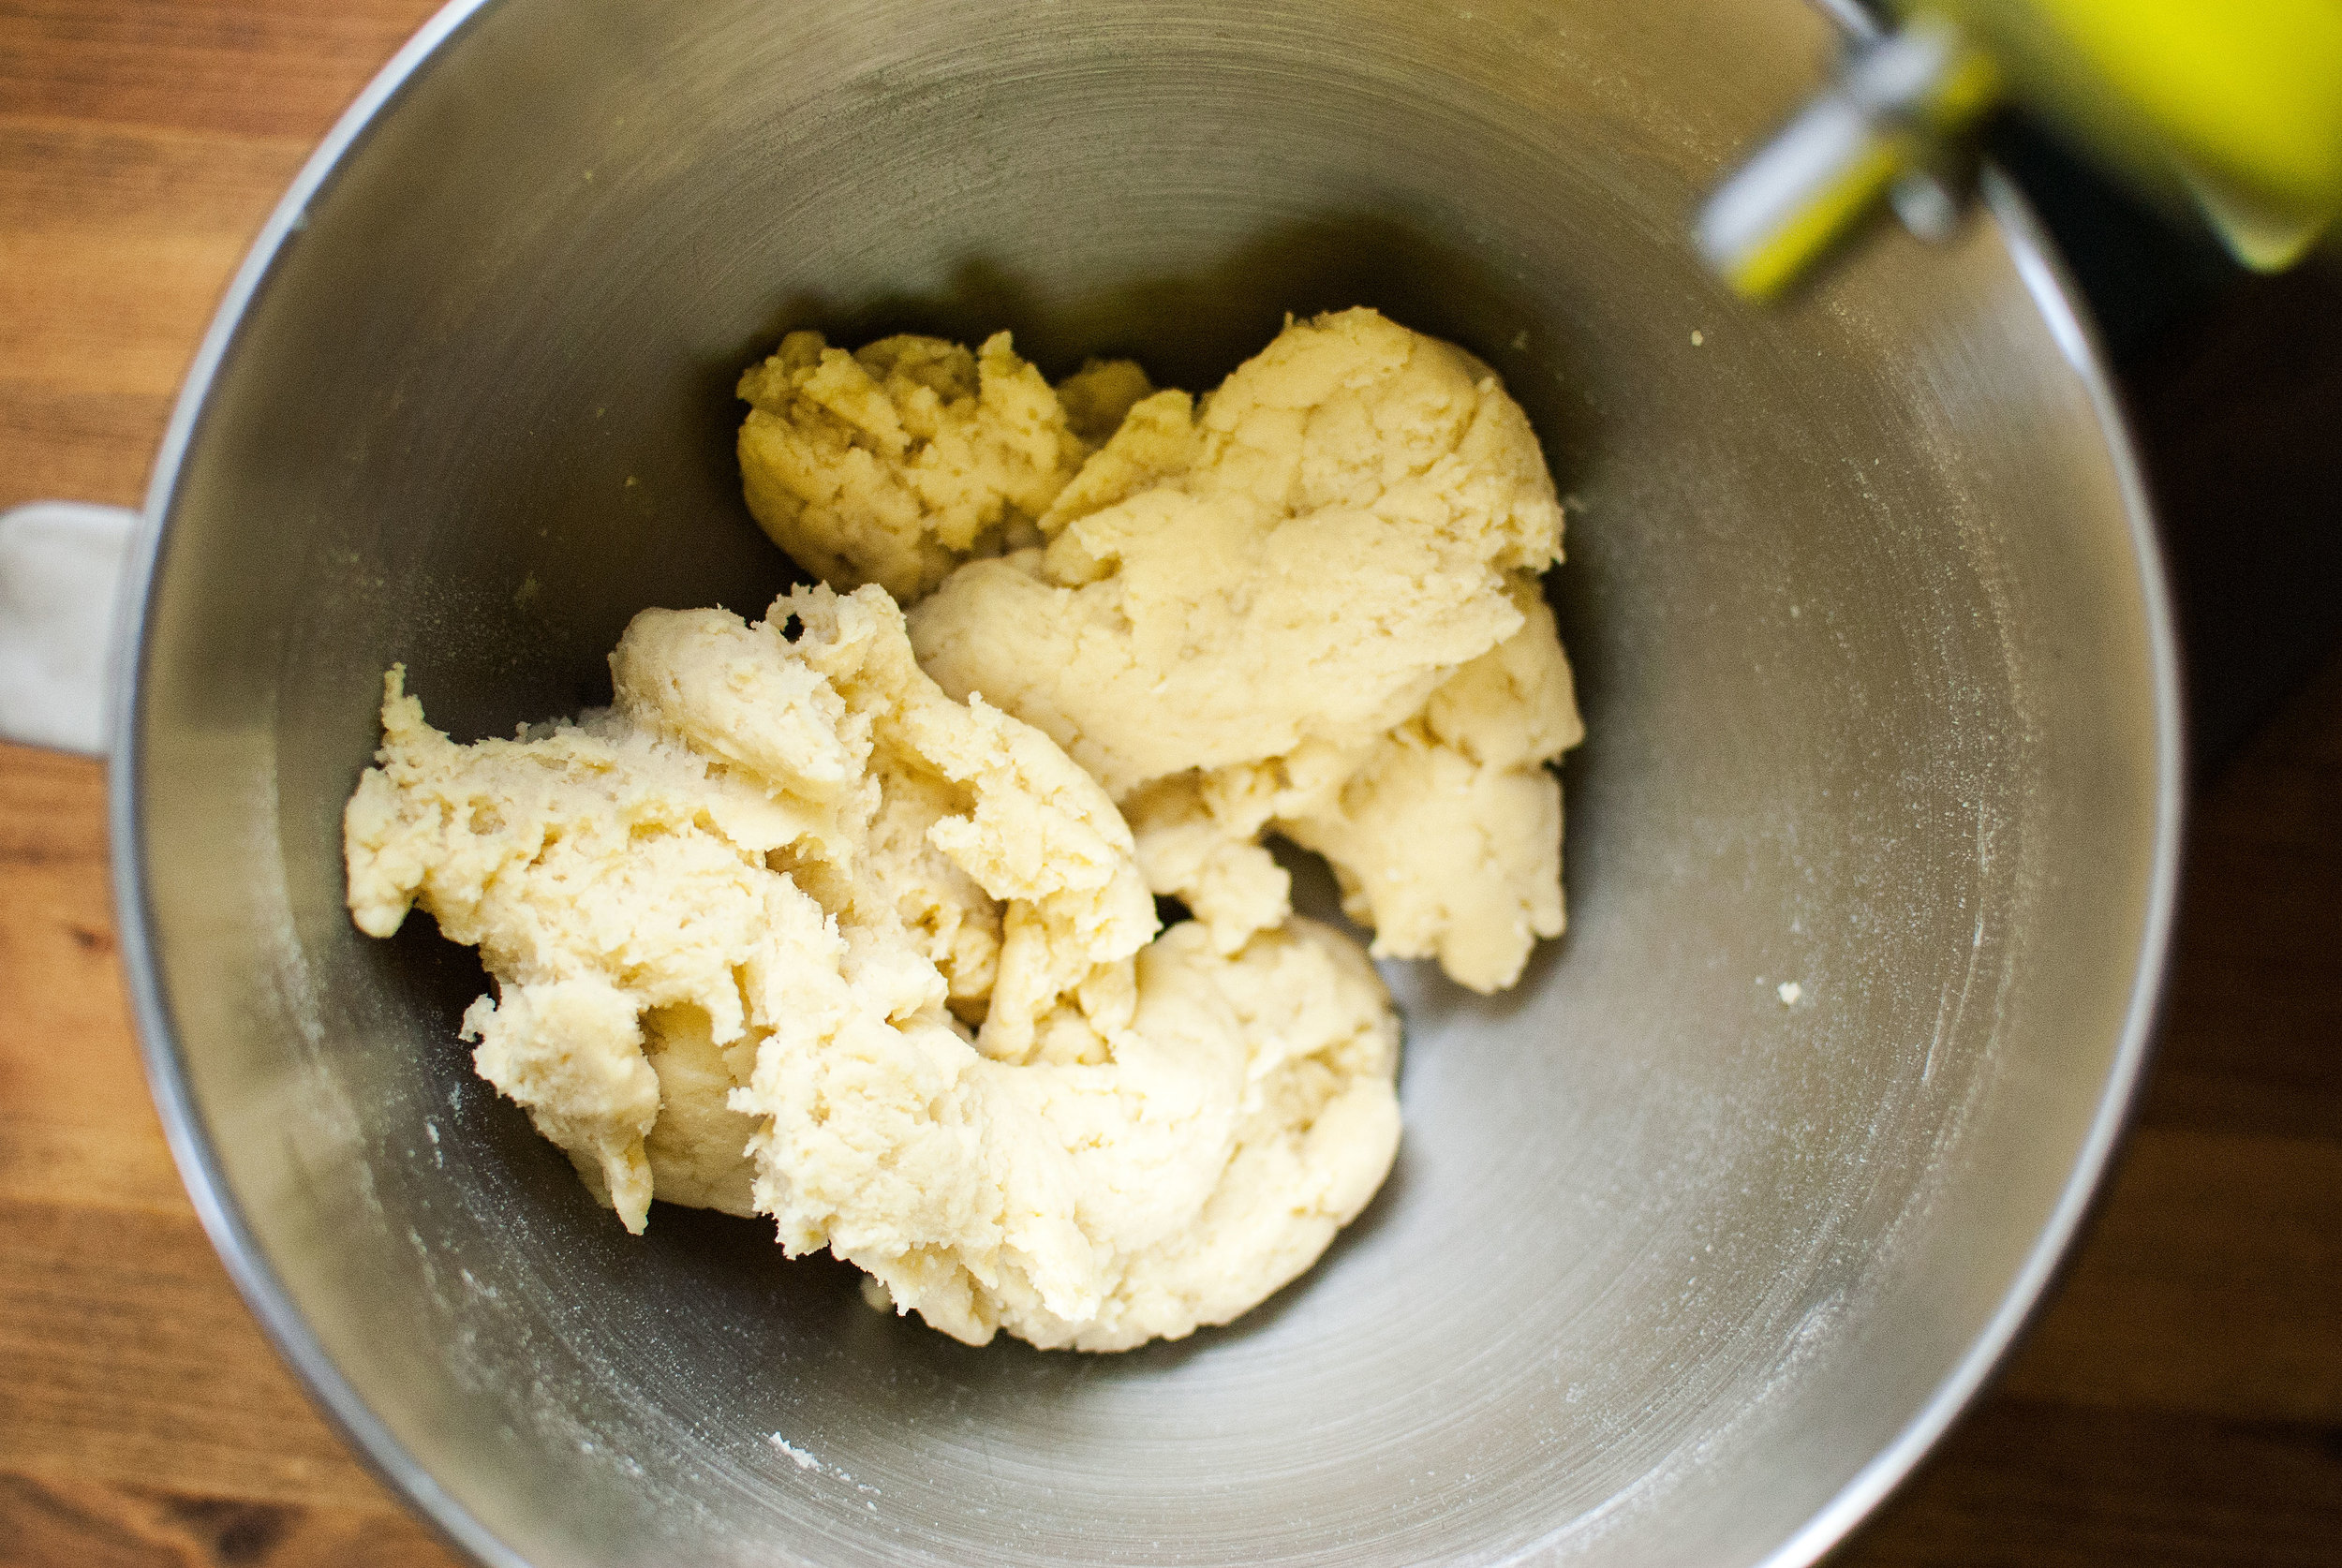
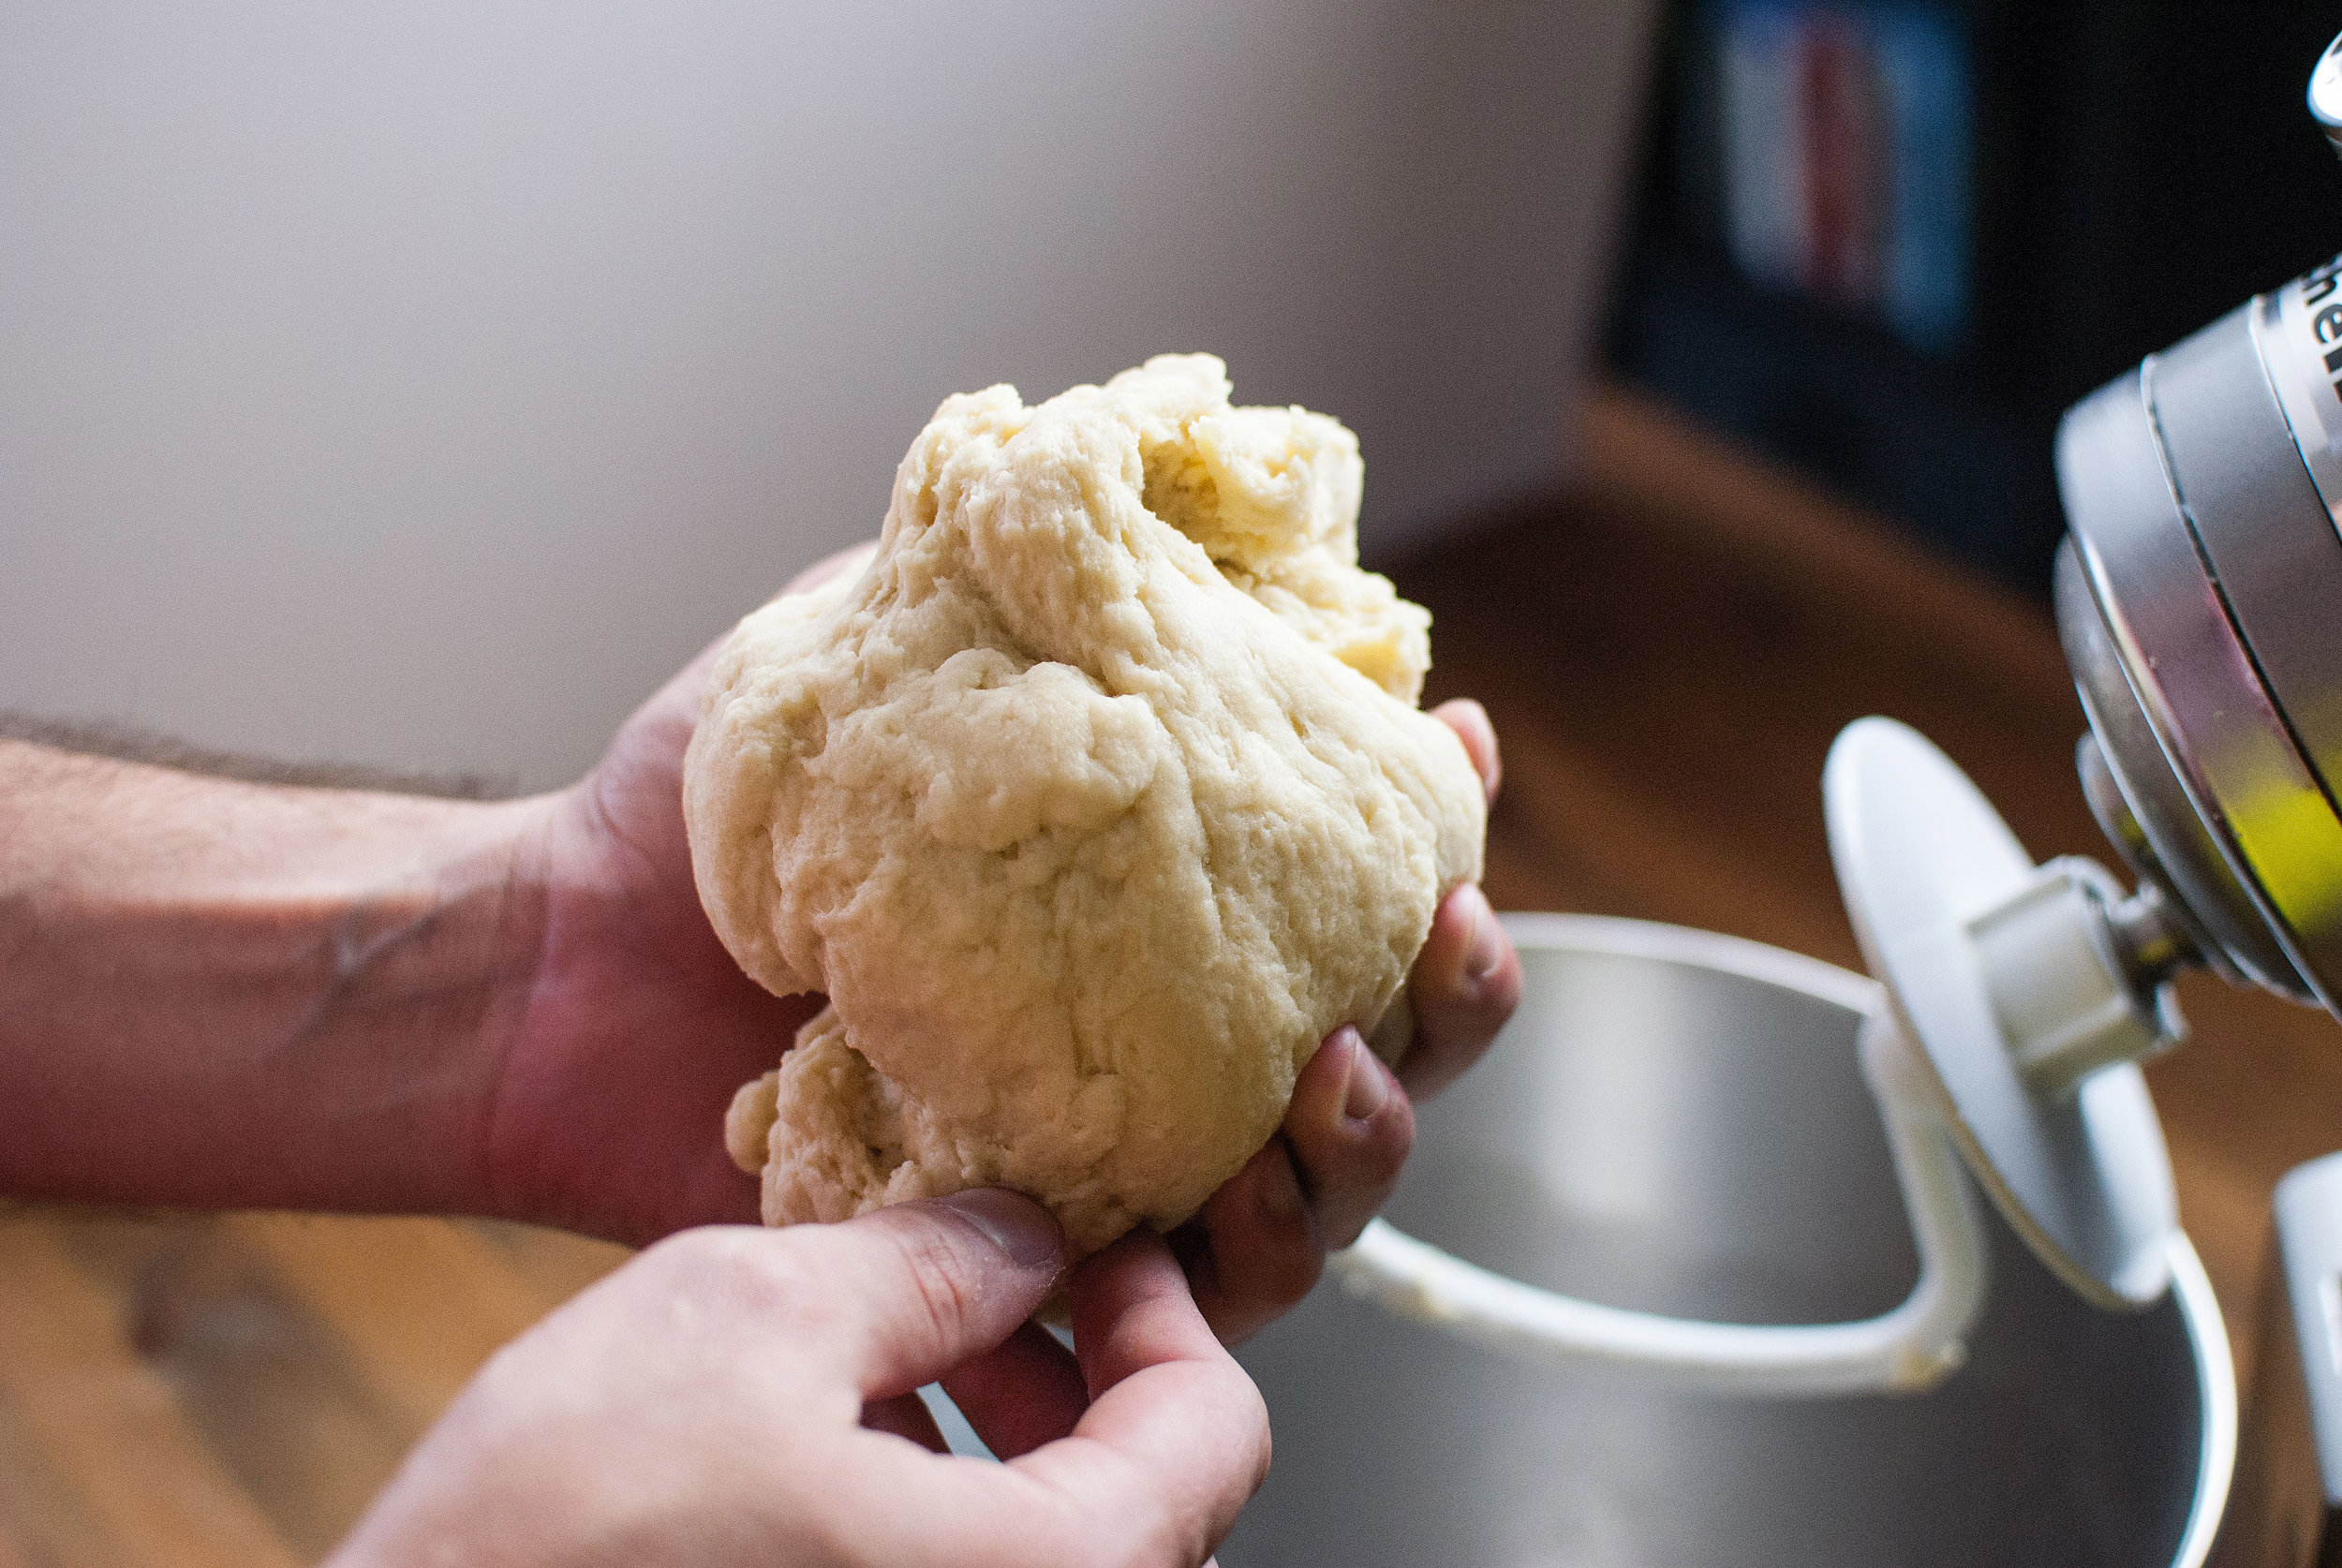
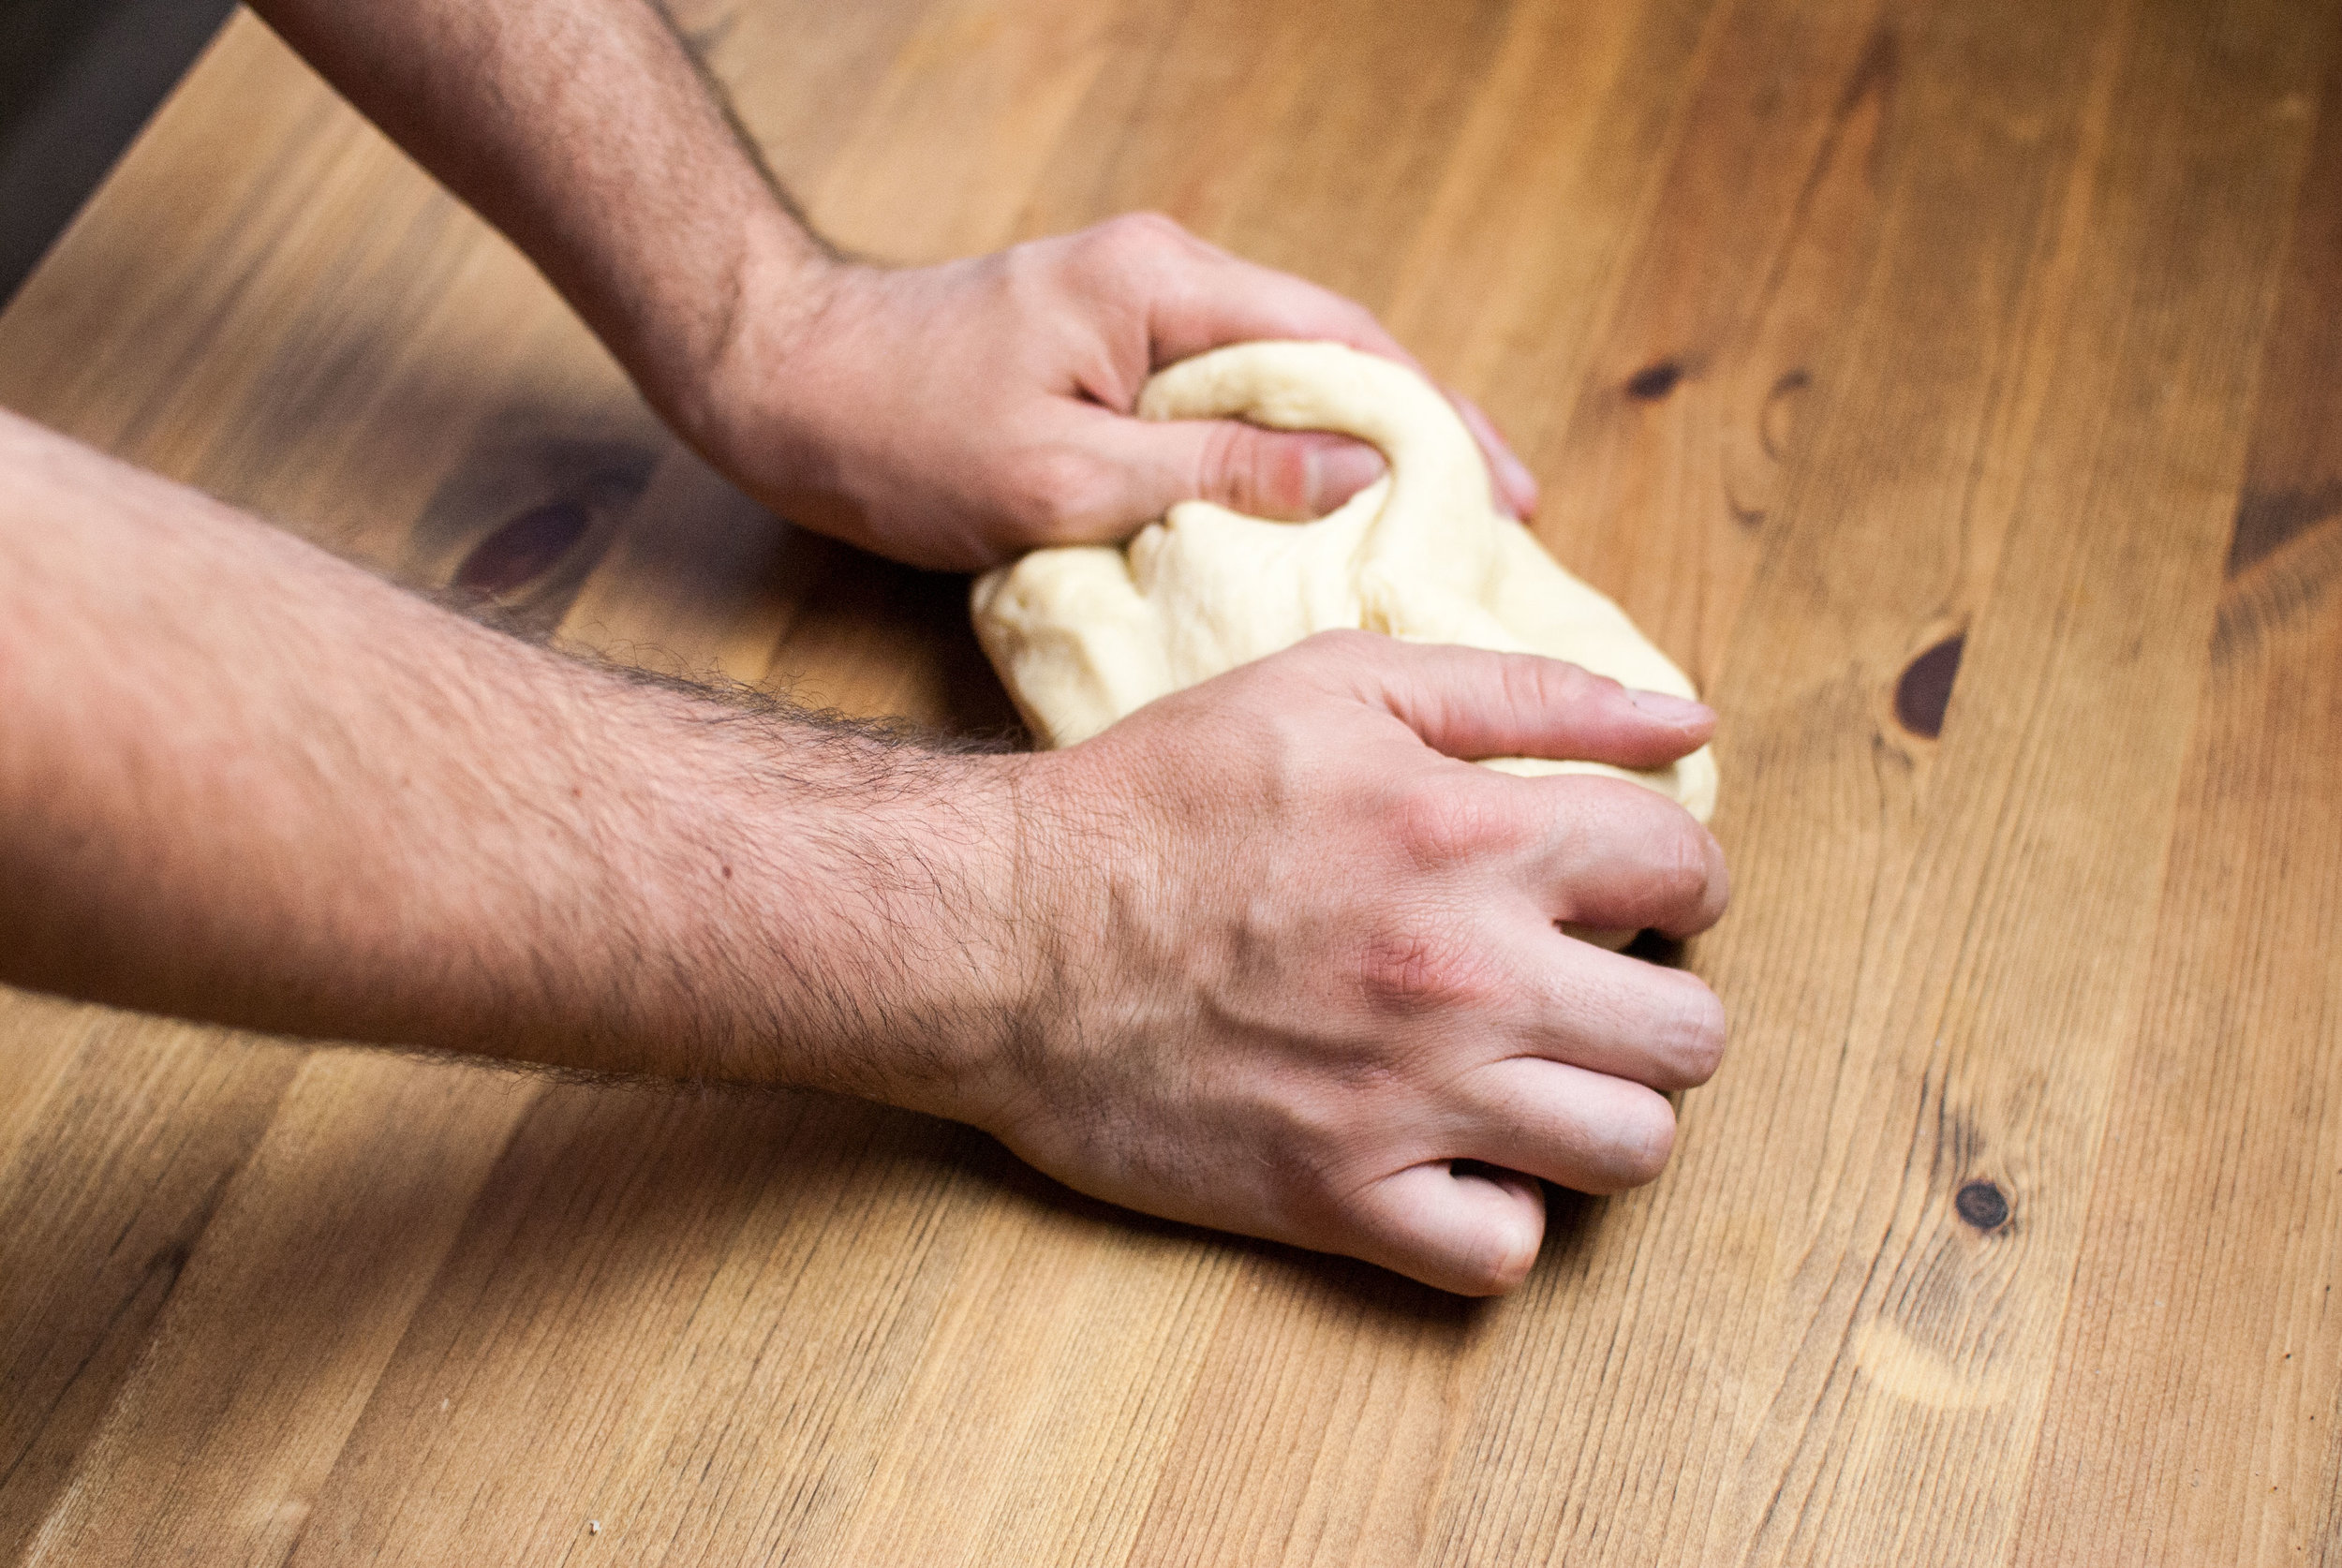
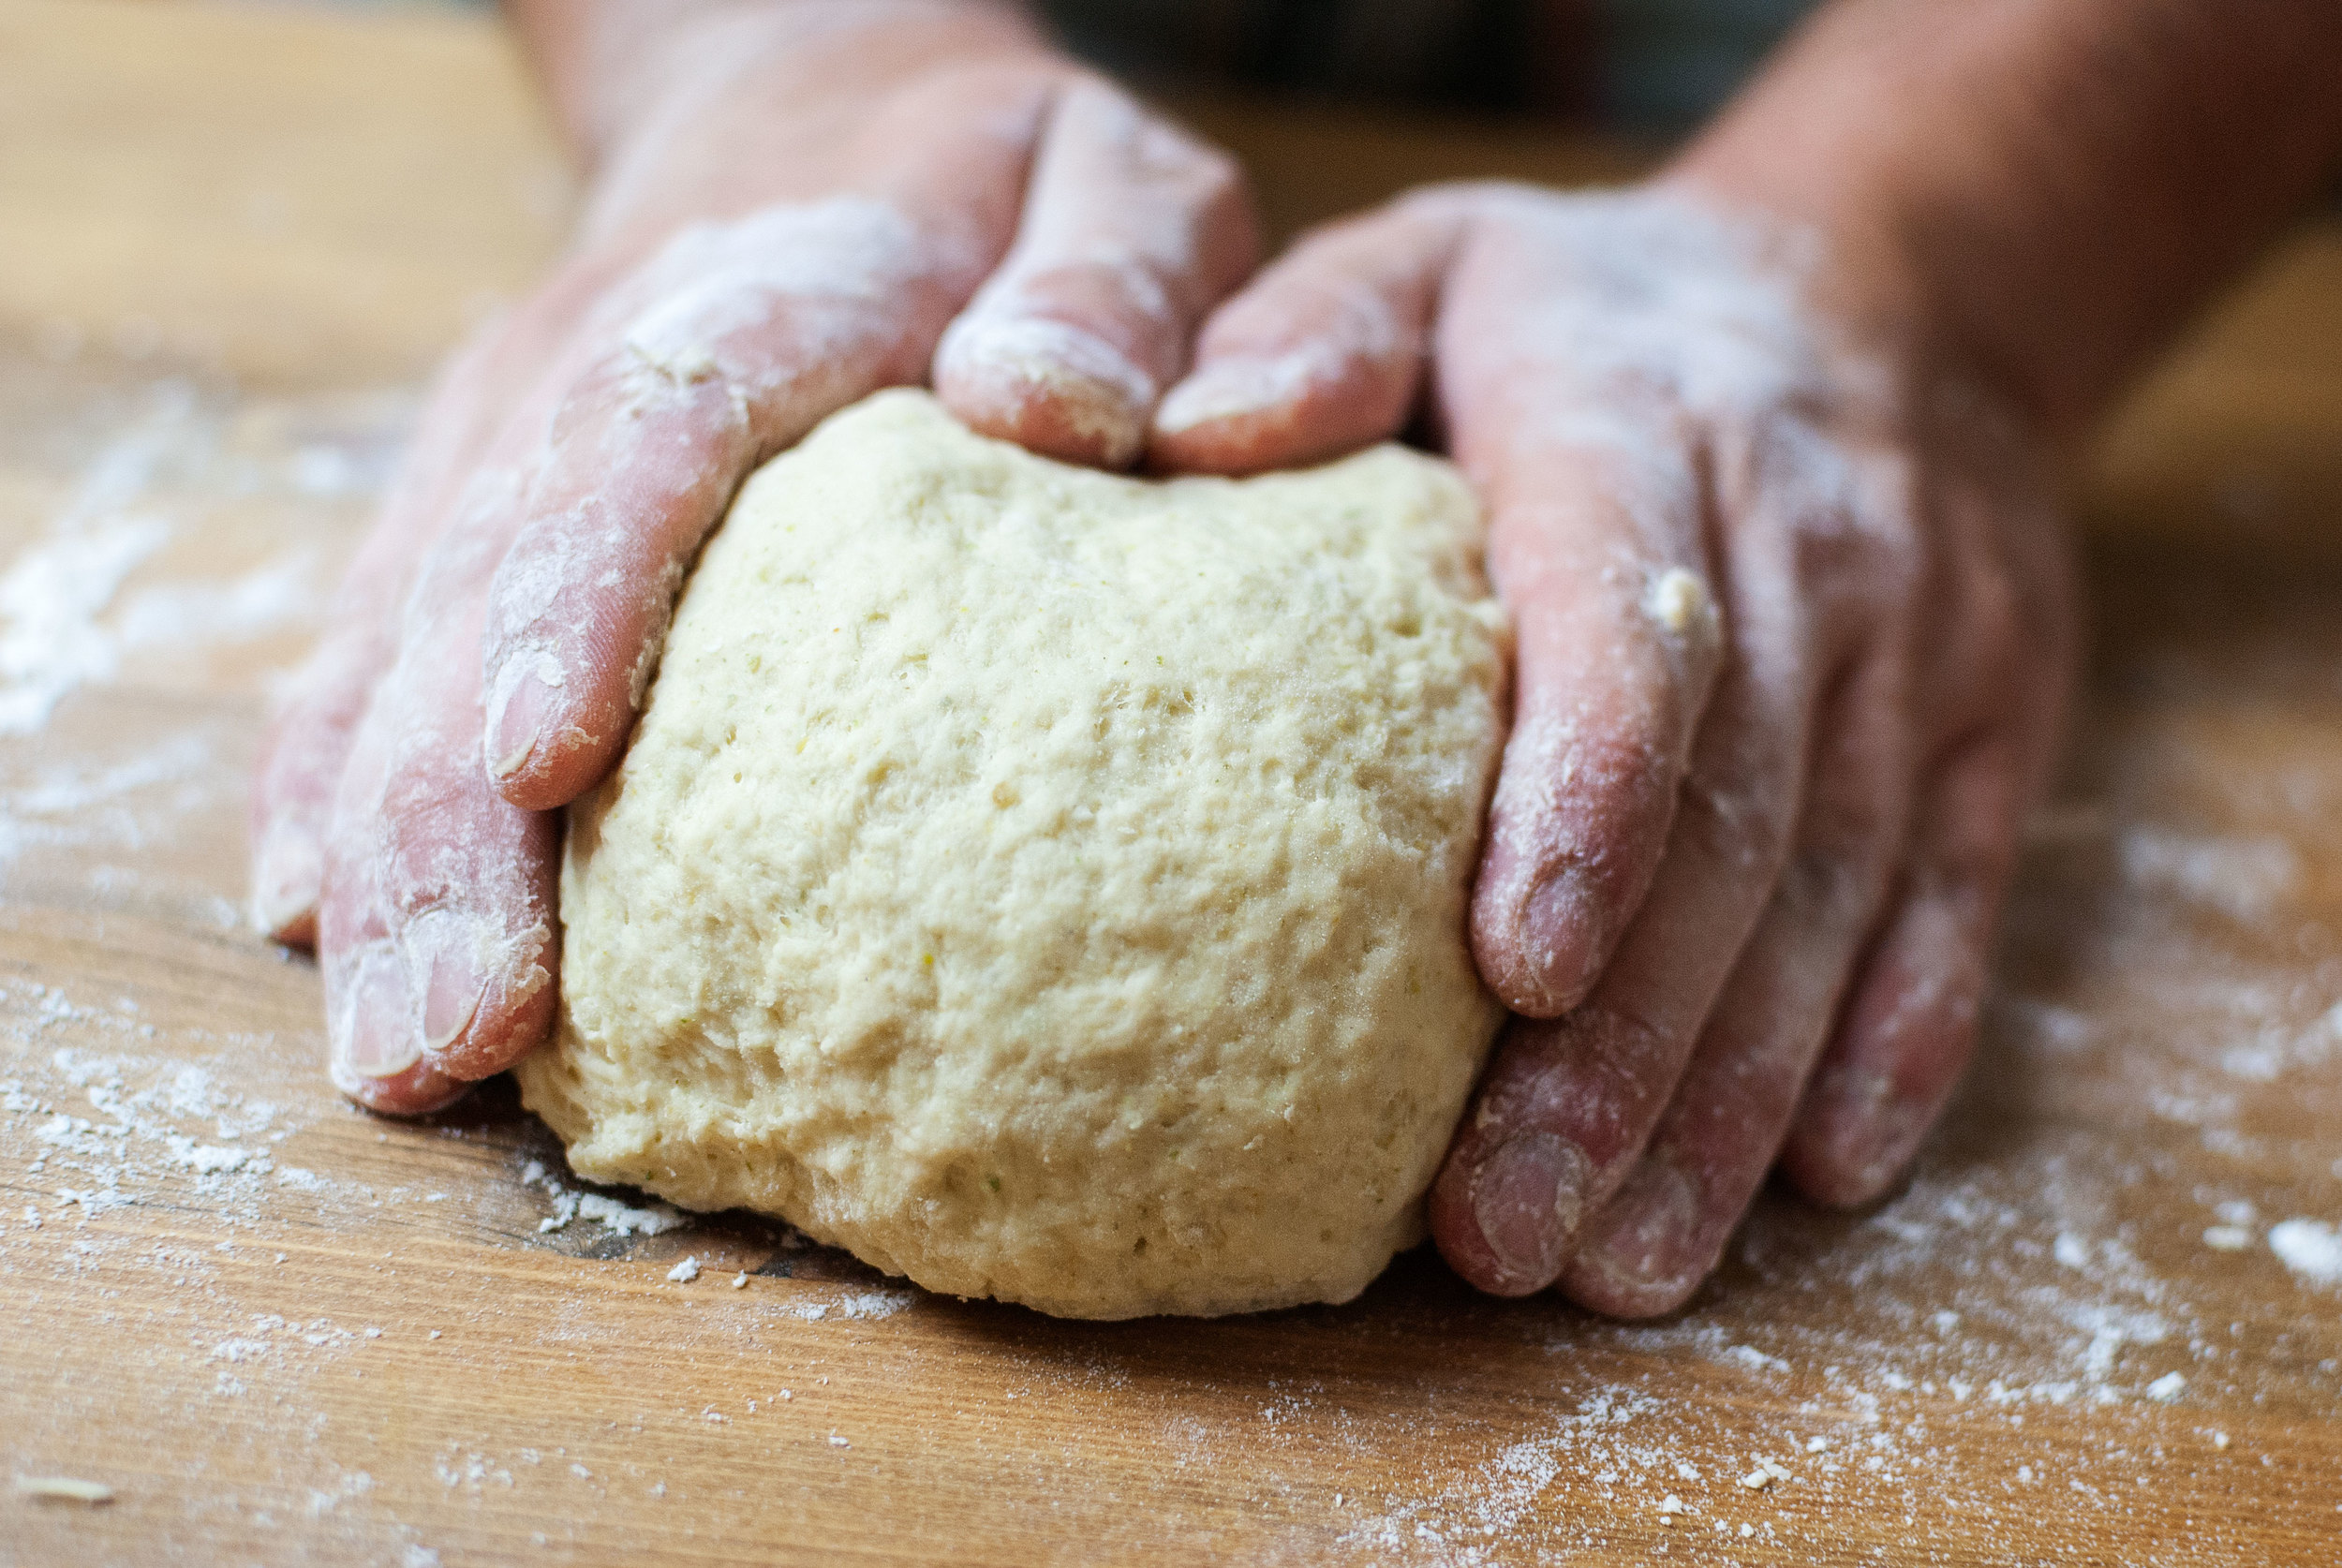
    Mix the mashed potato, egg, olive oil, and salt until thoroughly combined. Add the flour all at once and mix (your hands are the best tool for this if you don’t have a mixer) until all the flour is integrated. Continue to knead the dough until it becomes firmer and pulls away from the sides of the bowl.  The dough should be smooth, not unlike bread dough but much less springy. If you’re using a mixer, you’ll need to use the paddle at first to blend the flour into the wet ingredients, then switch to the dough hook once the it all begins to come together. Knead it for a minute or two until it becomes a tight dough. Let the dough rest at room temperature for about 30 minutes in a bowl with a cloth over it before proceeding to shaping.

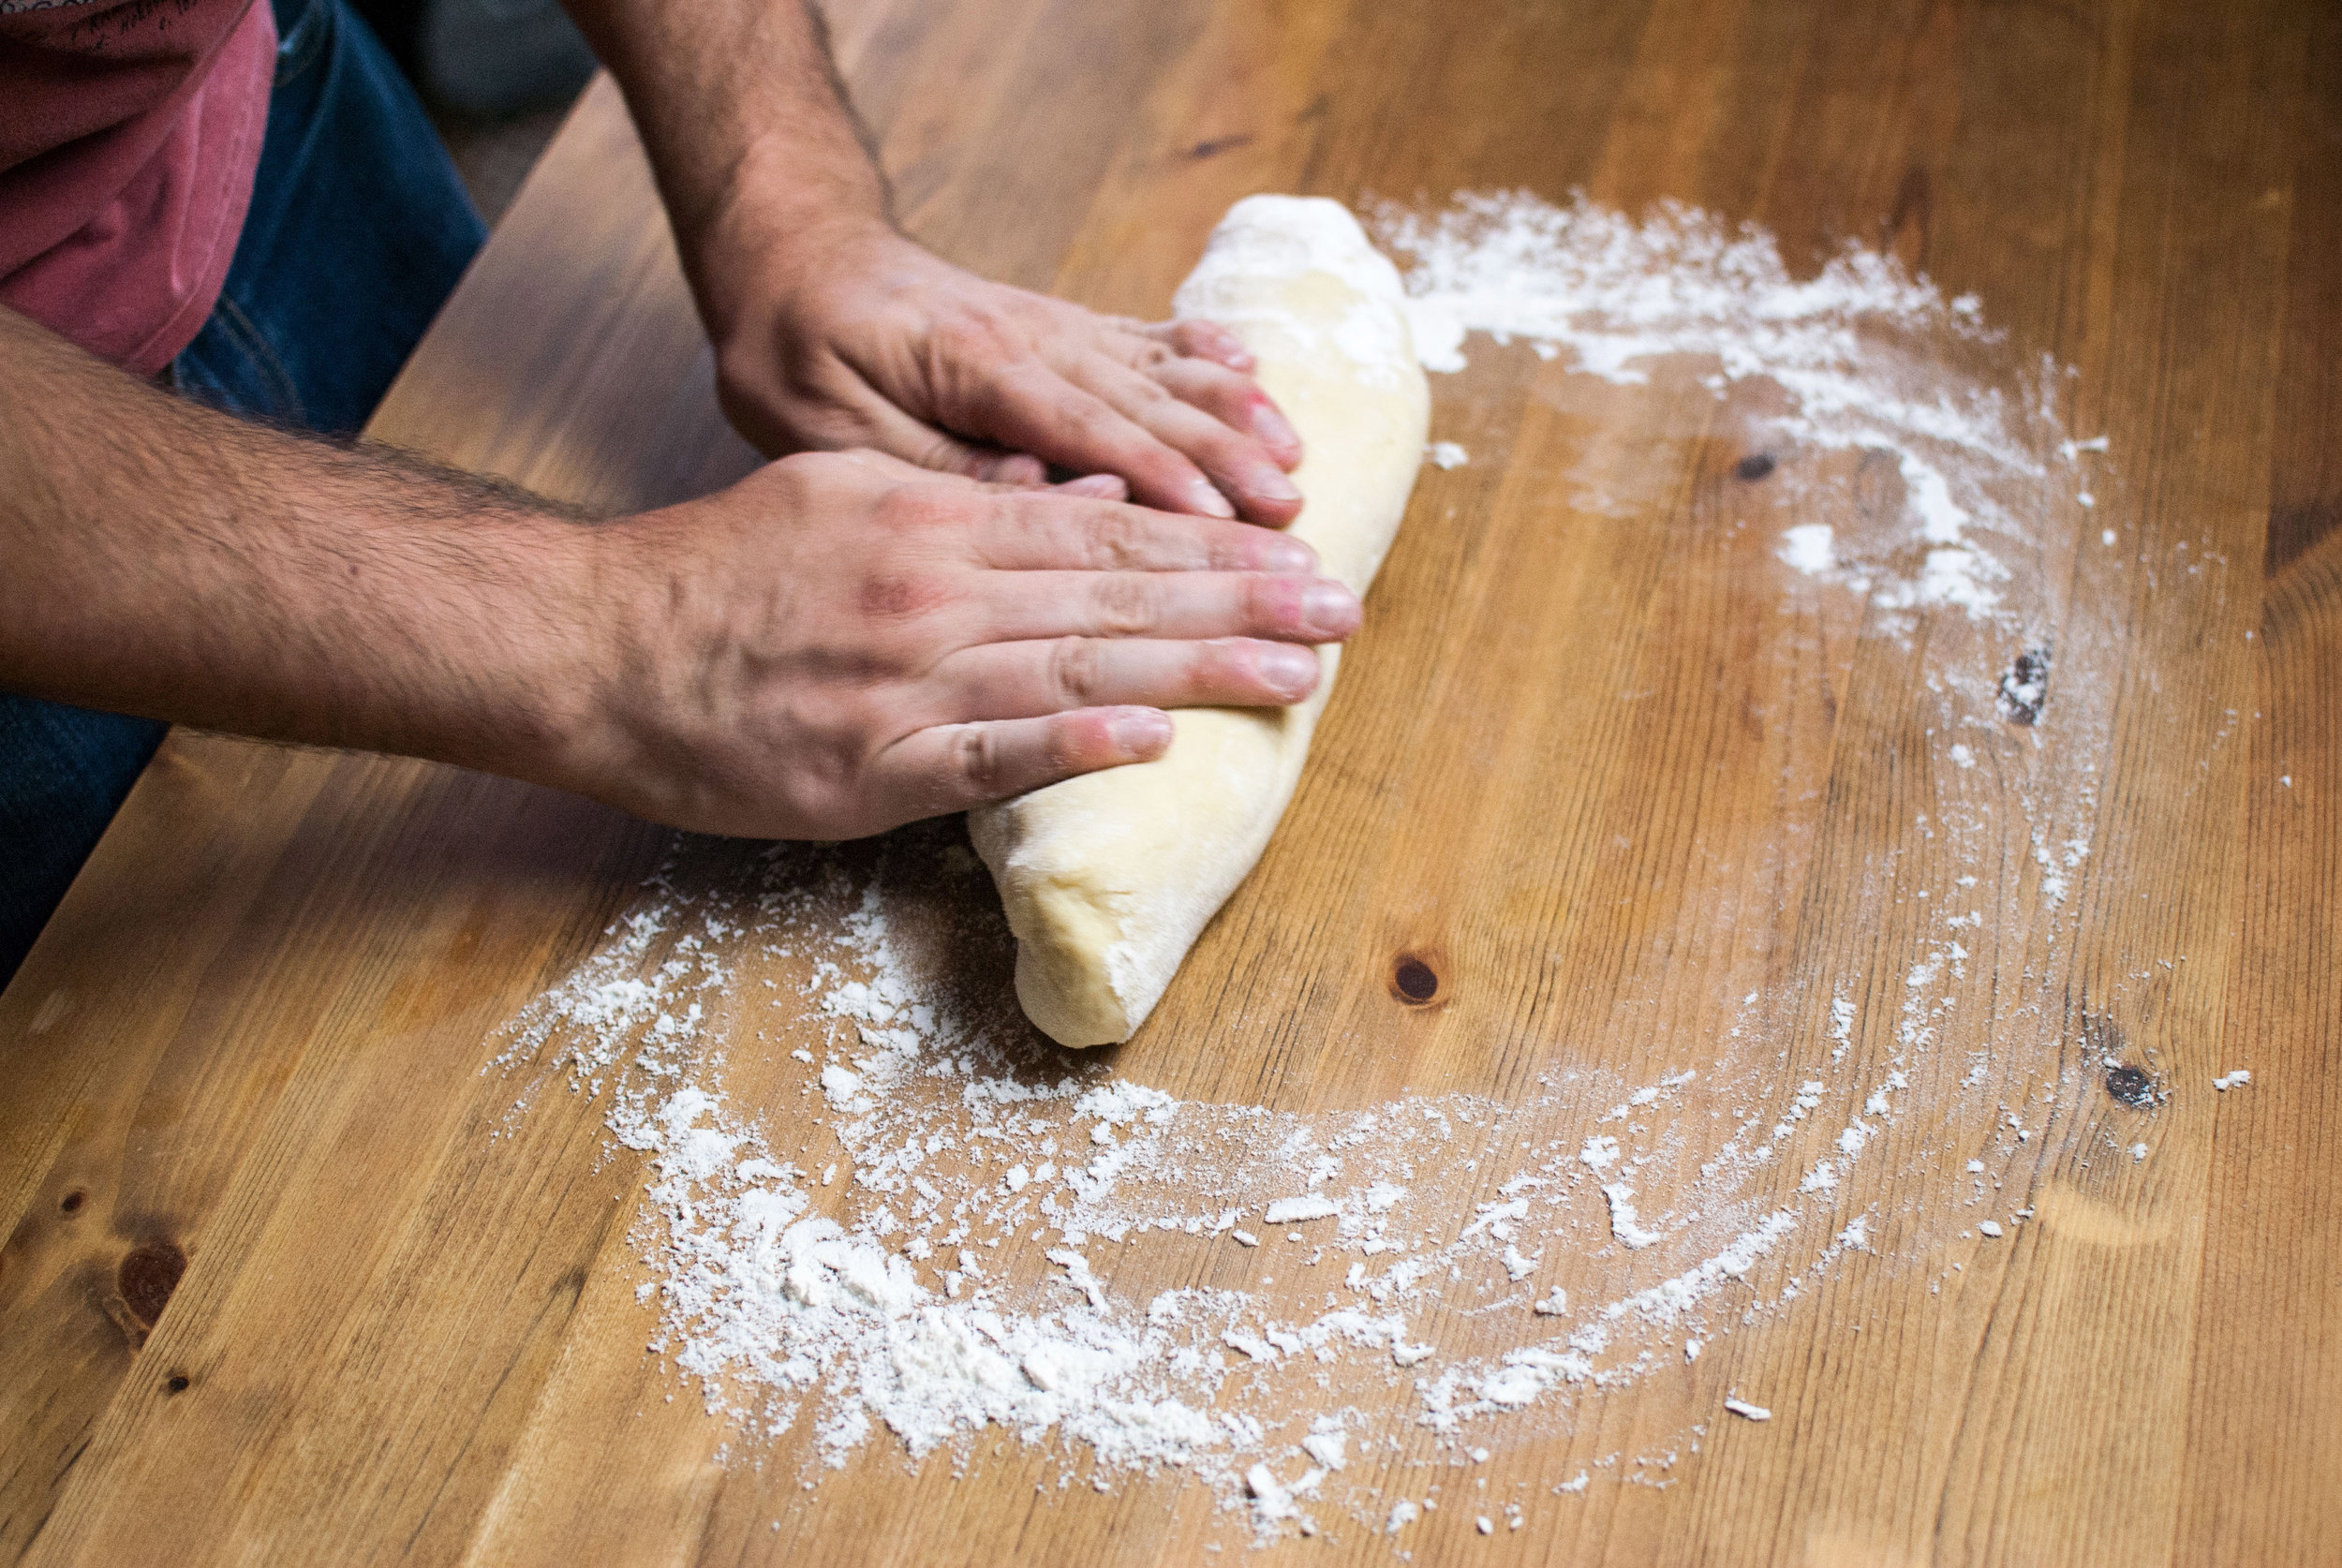
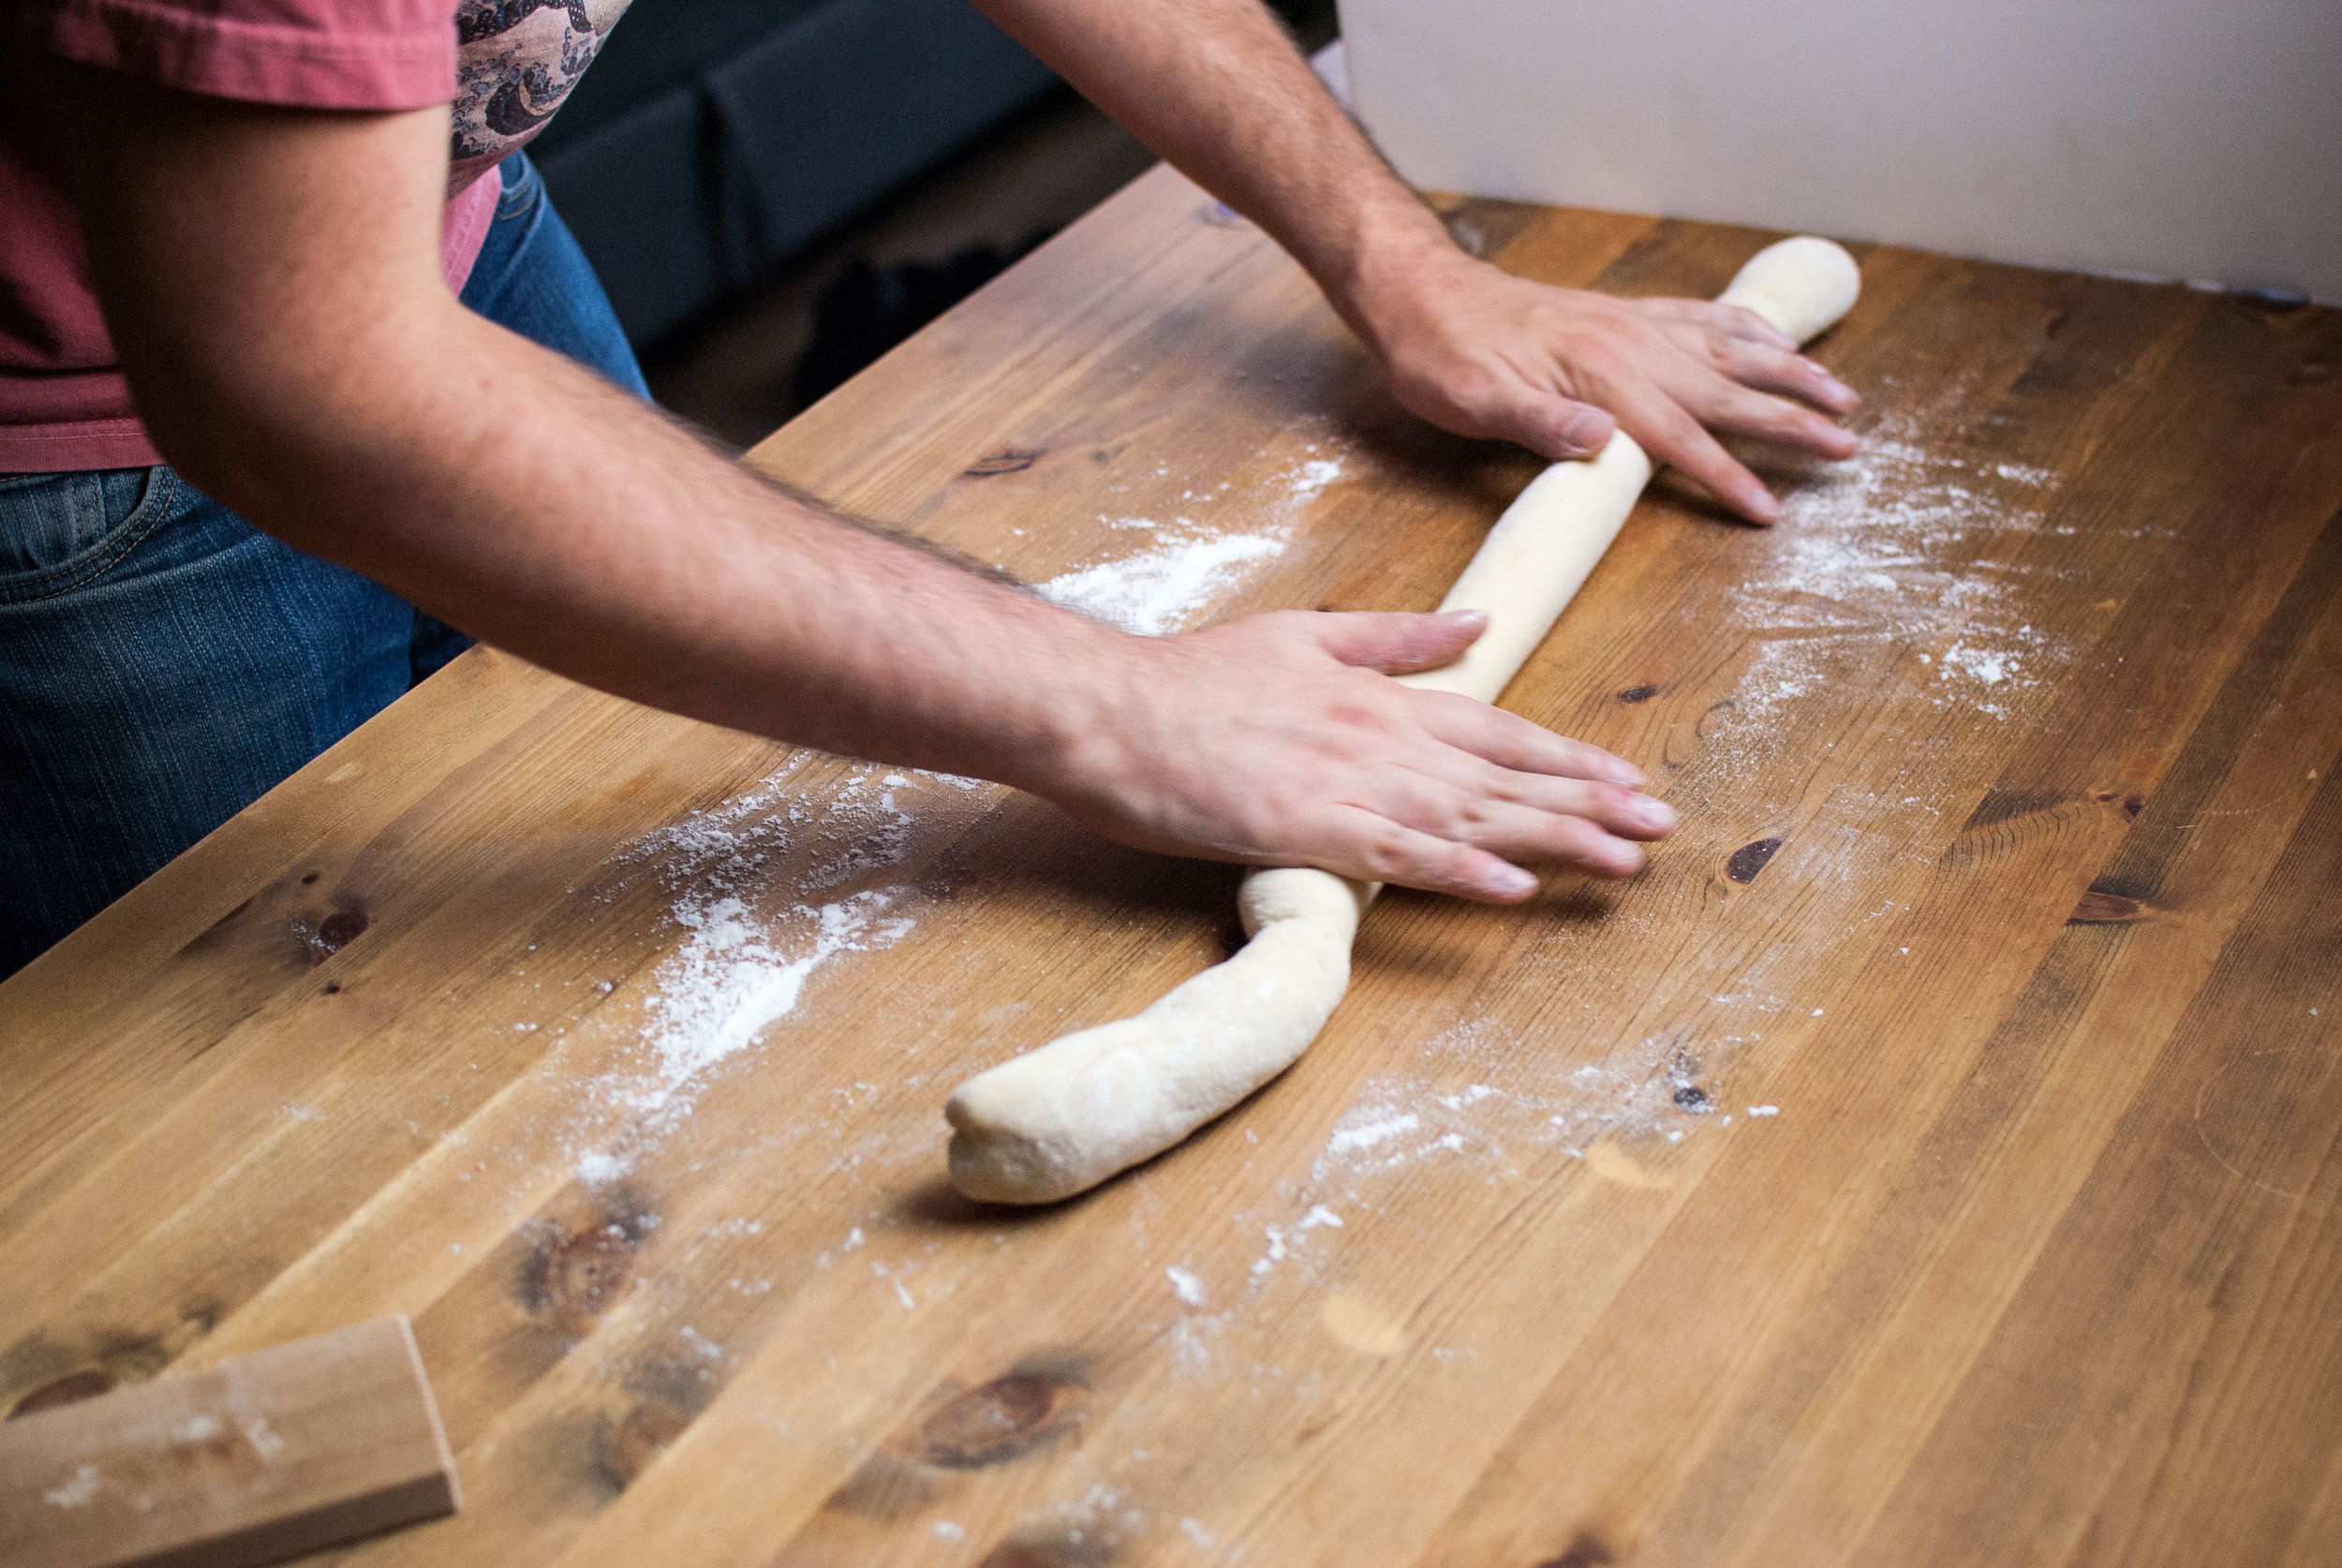
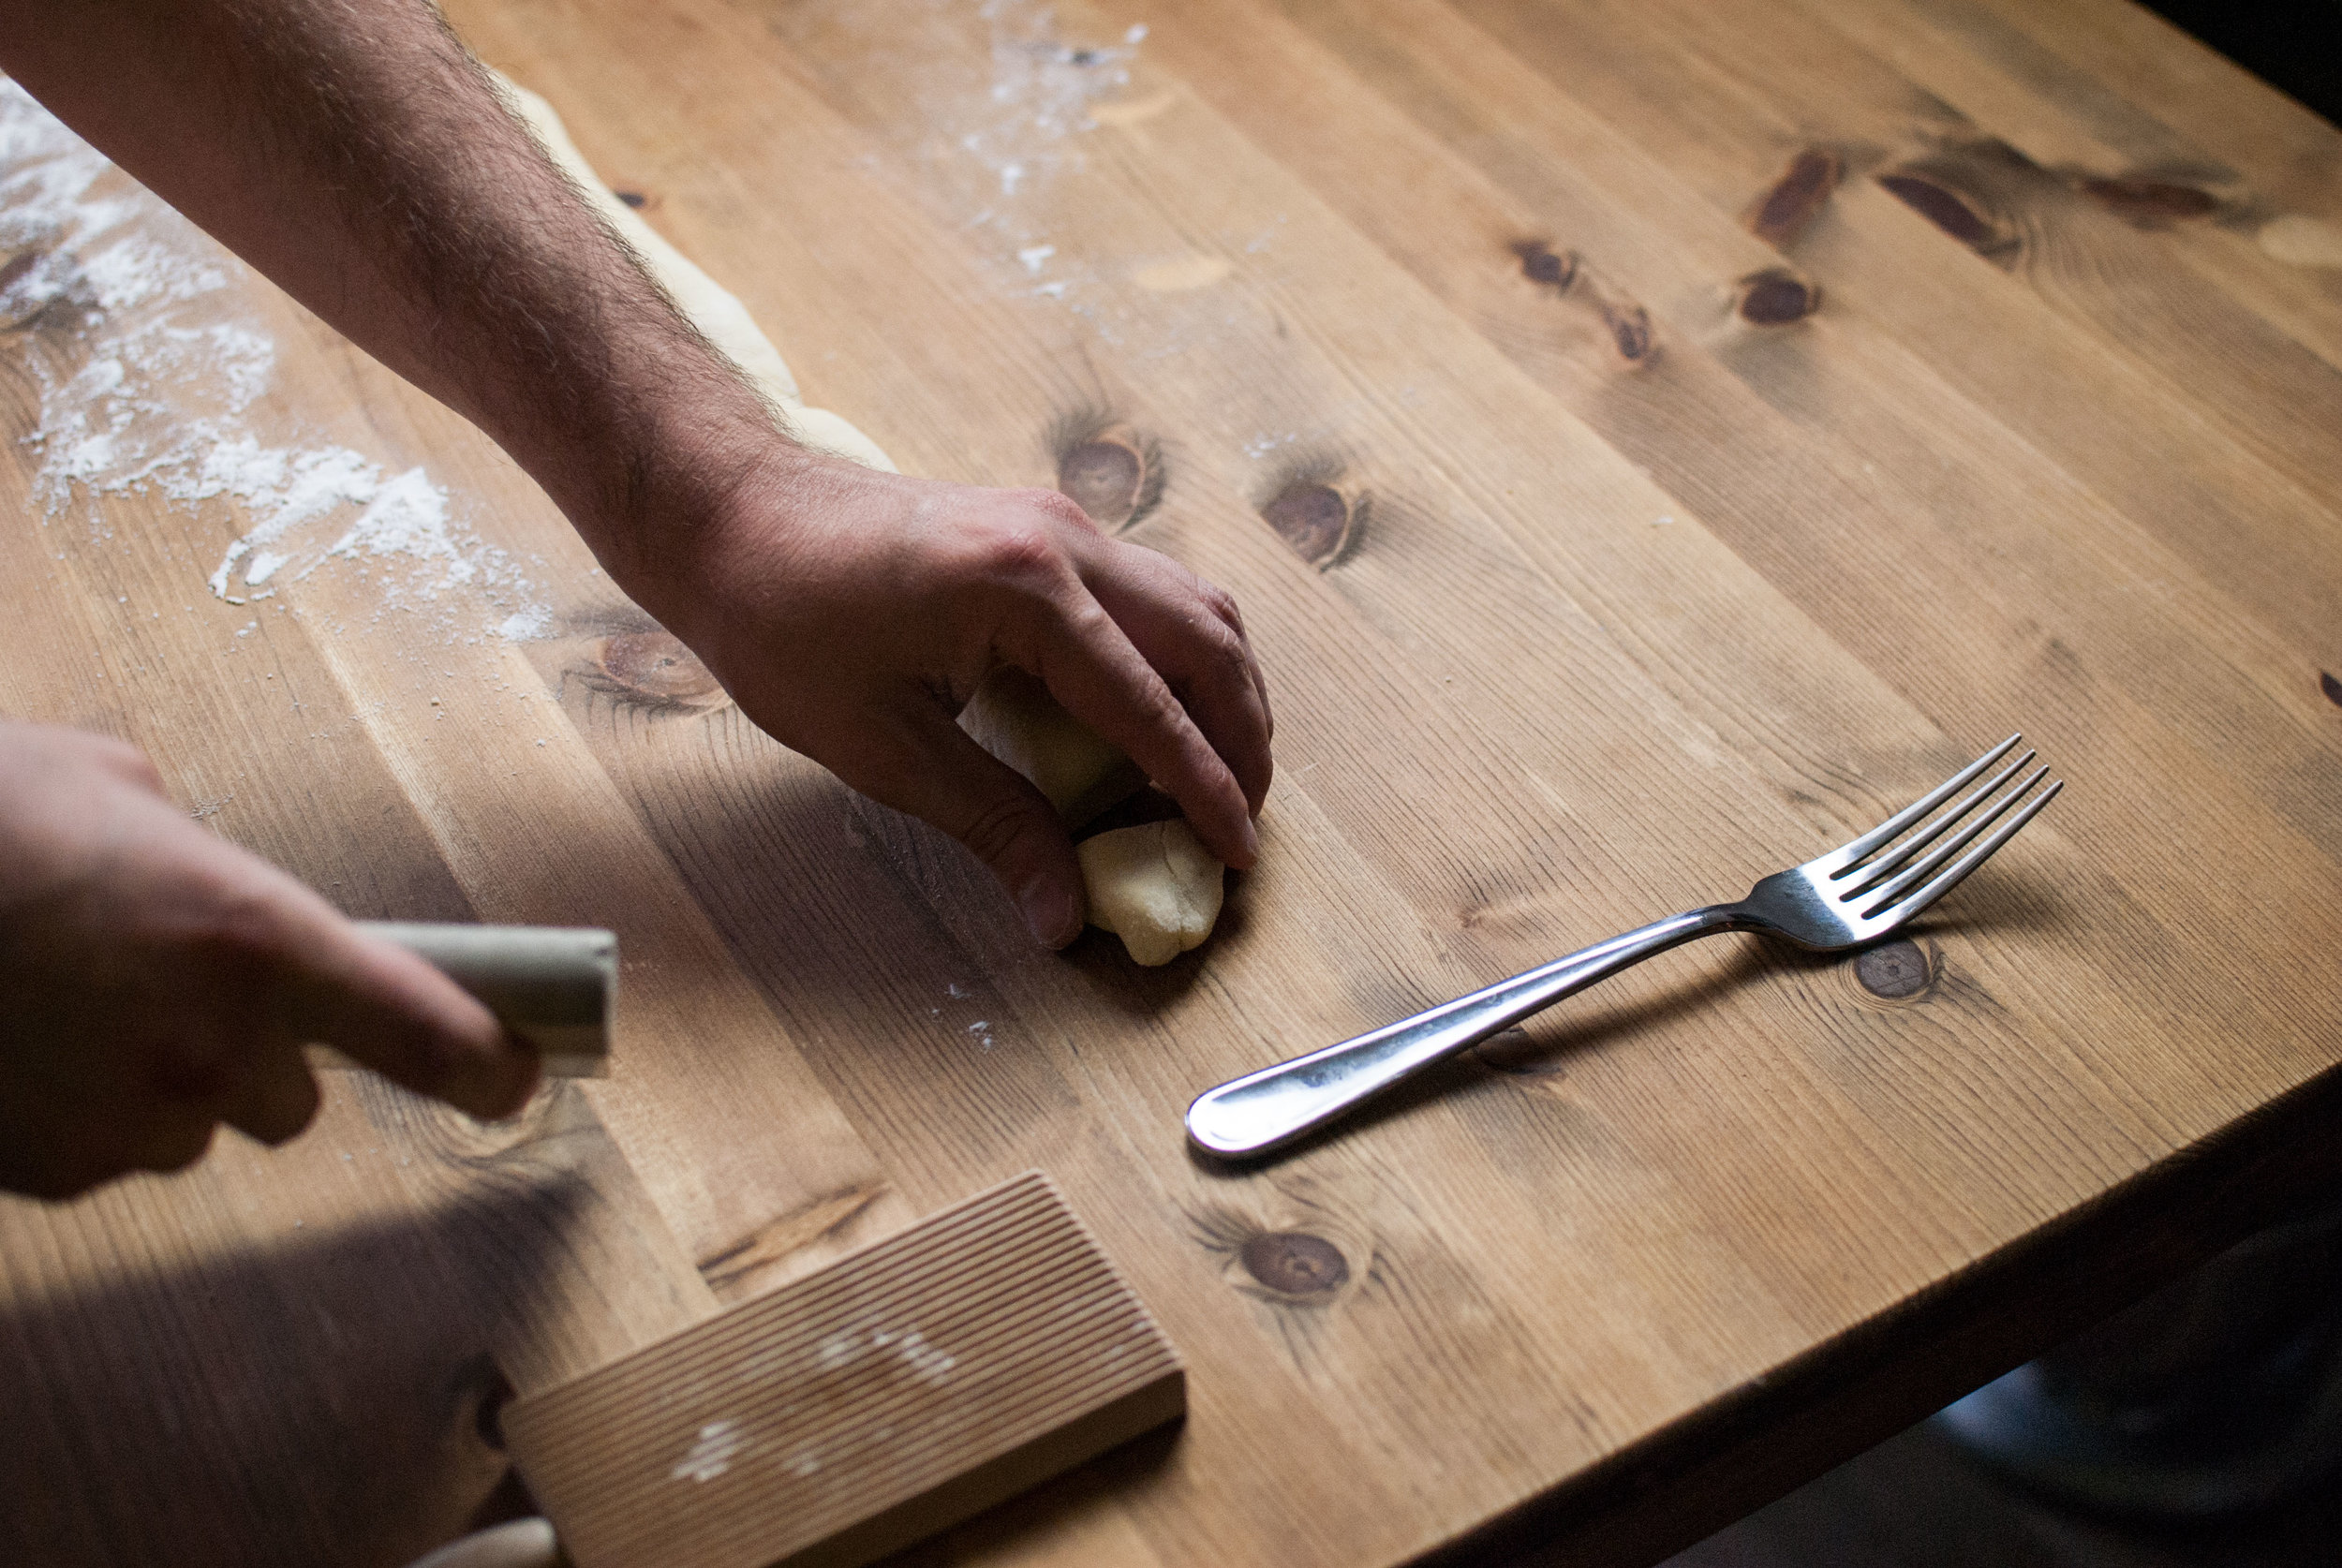
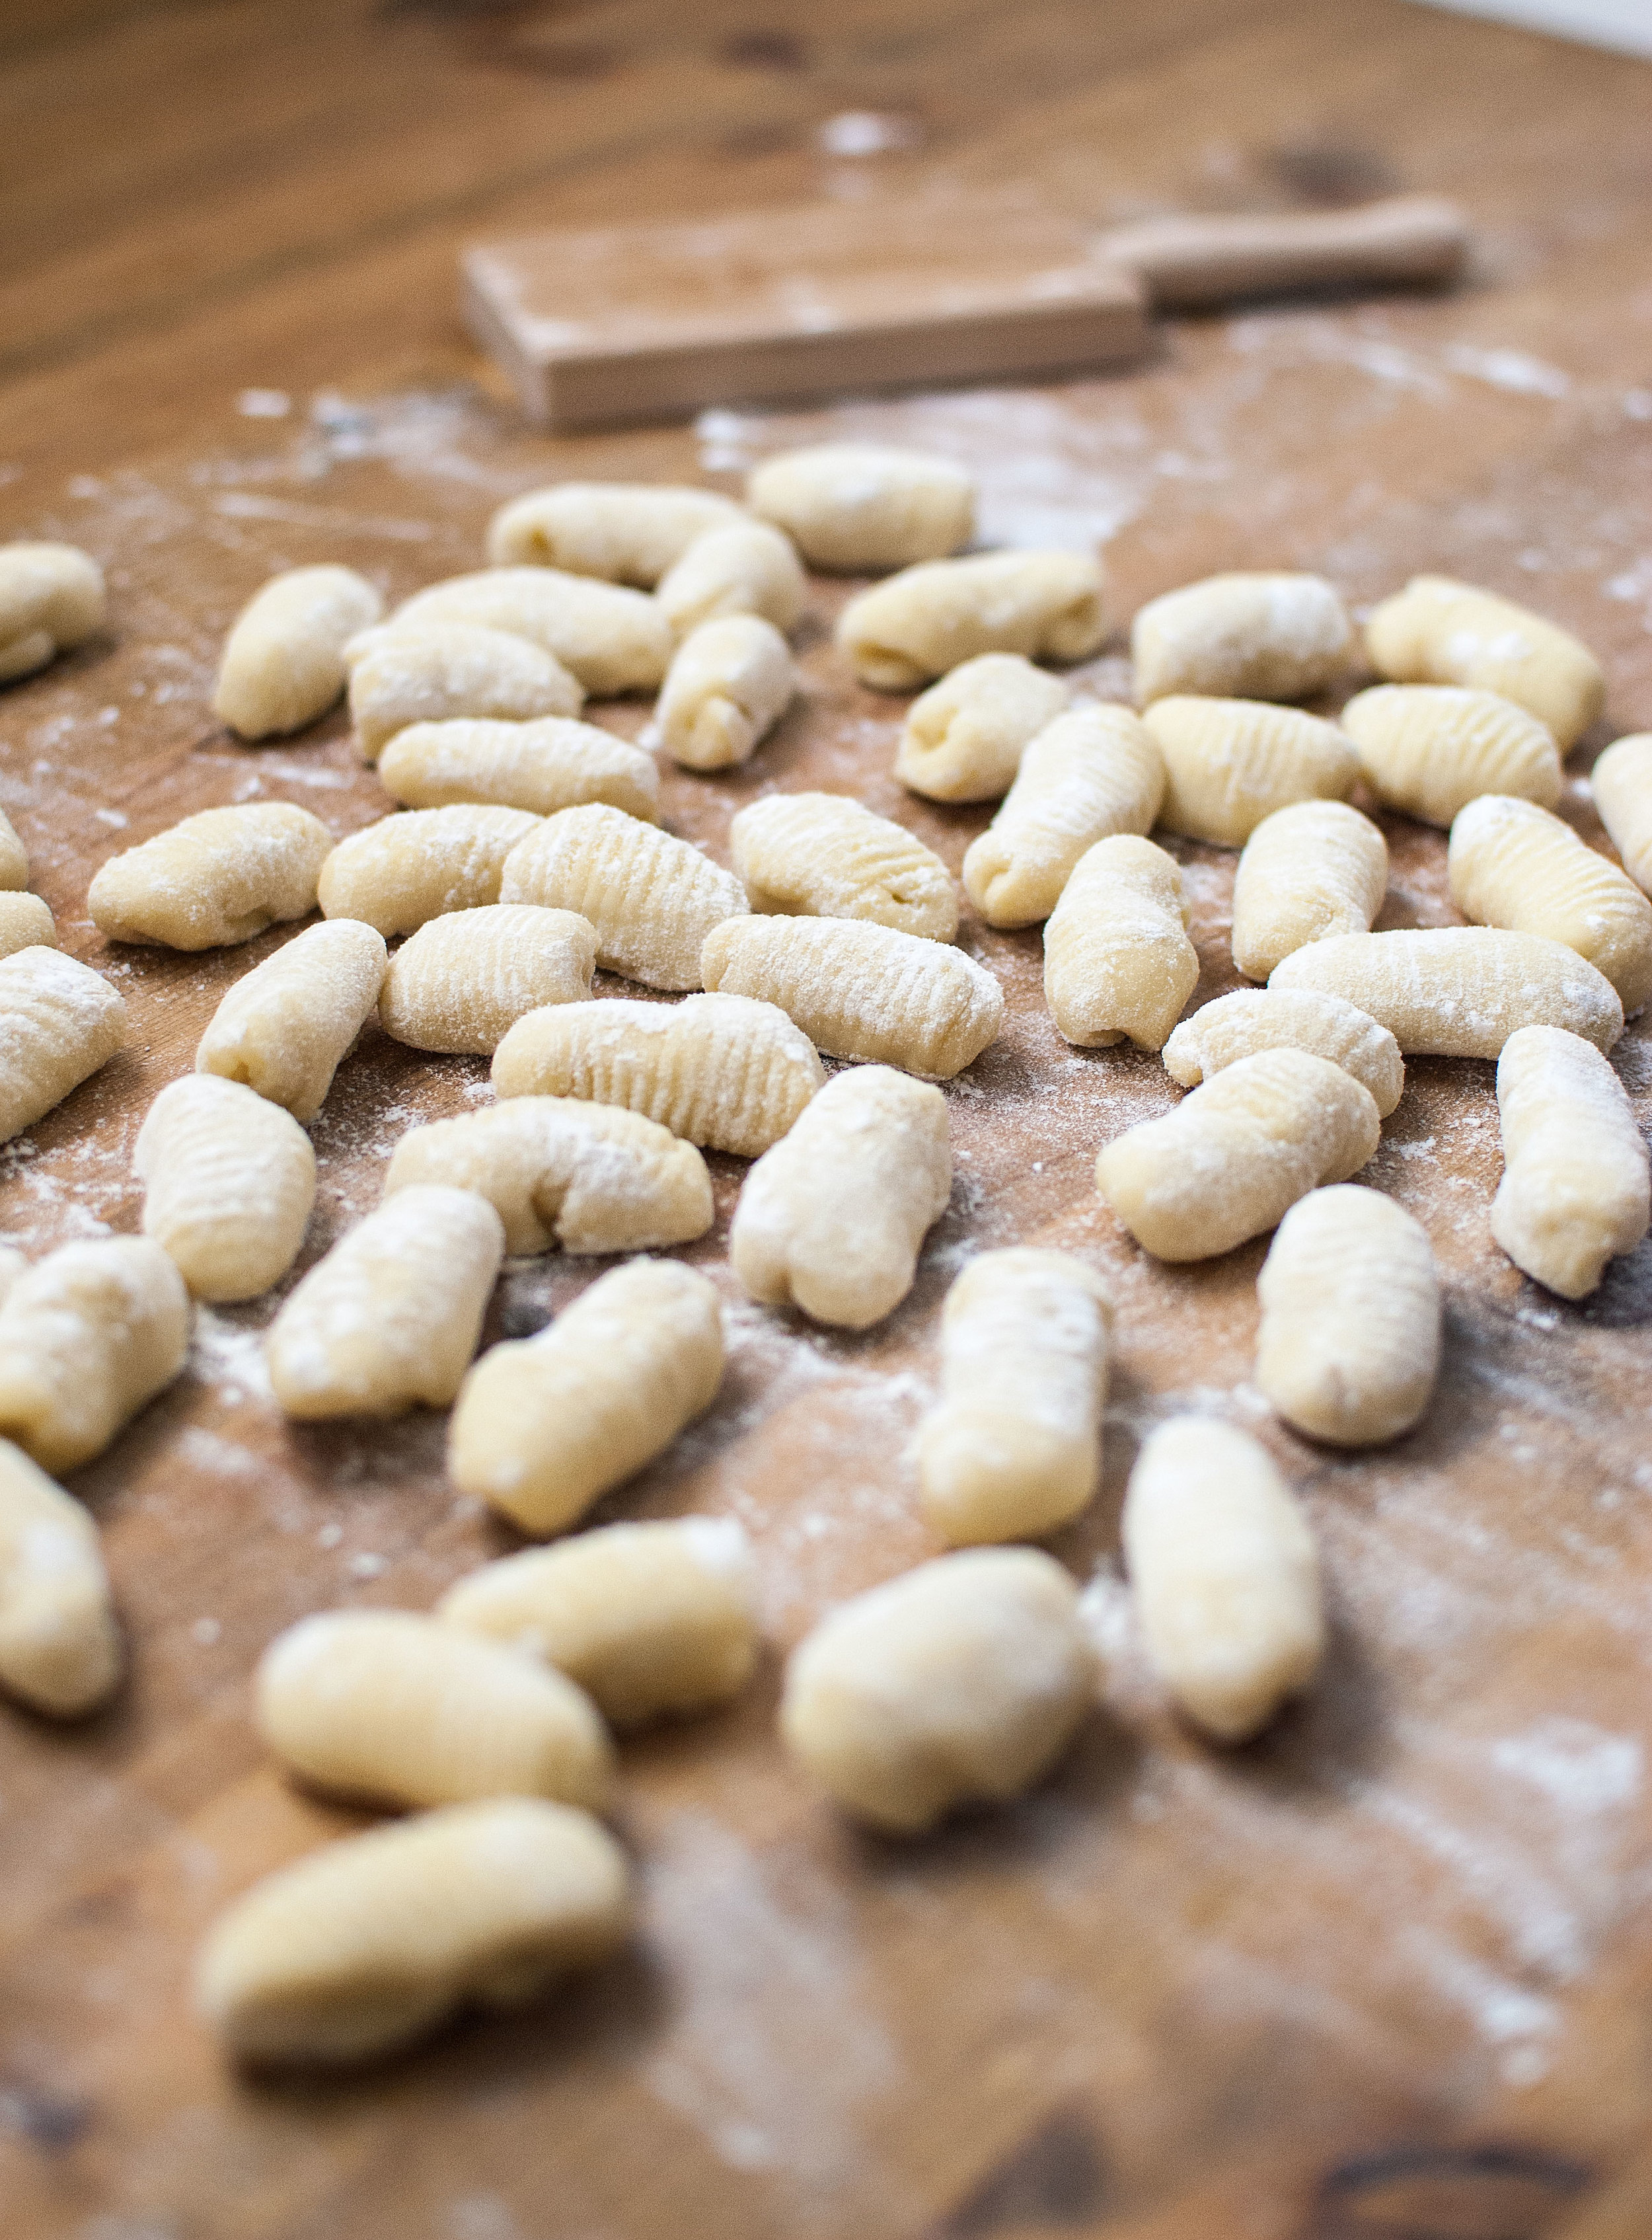
    Transfer the rested dough to a lightly floured table or counter and begin to roll it into a long snake-like shape; it should be a little less than an inch in circumference when you’re finished. The dough will be quite tough and glutinous, so I’ve found that letting gravity stretch it a bit by pulling it and letting it hang in the air (as well as giving a few good thwacks on the table) works quite well to elongate it. Once you’ve got it rolled, take a knife or dough cutter and cut the dough into little nubs. The ideal size of a single gnocch for us is about the size of your thumb pad, so when you’re done, your table might look like it’s covered in a bunch of little floury thumbs (not to be grotesque, but hey, it’s an image you won’t forget).

    Your gnocchi are ready. They’re good to boil in the moment, or just place them on a sheet tray lined with baking parchment and freeze them for later. They keep for…well, we don’t actually know how long they really keep for; we’ve never let them sit around for too long. Oh, well…

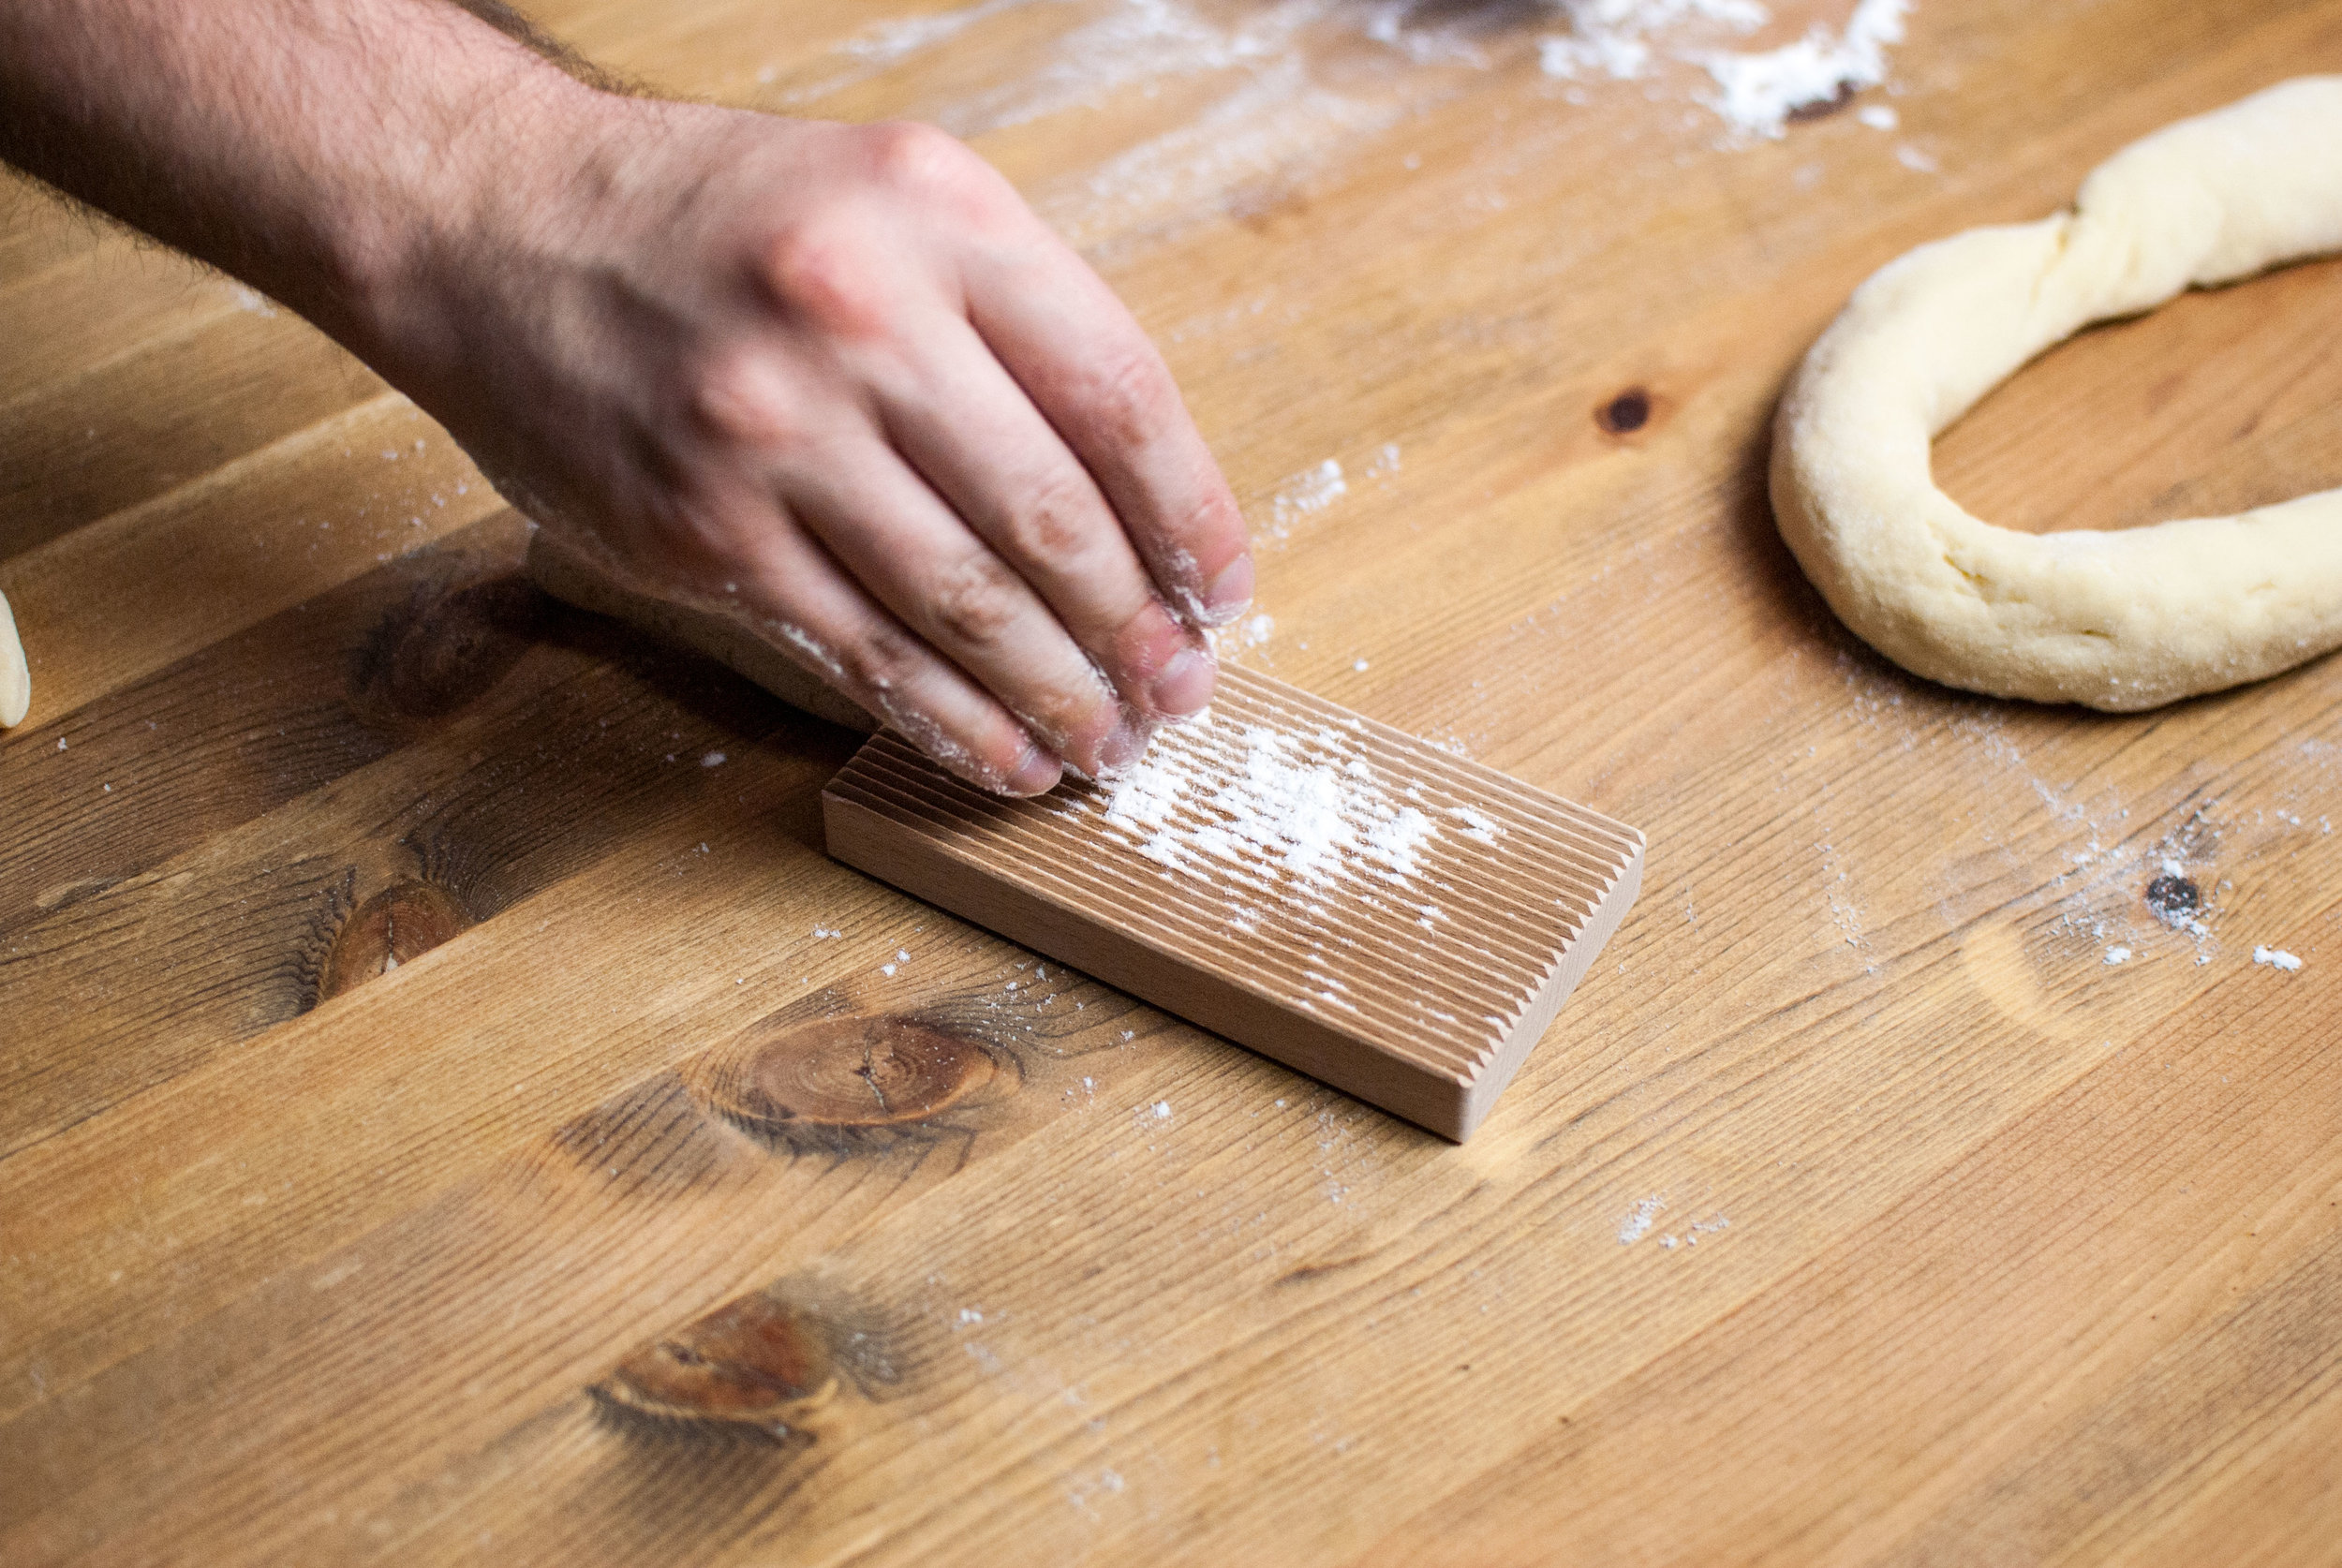
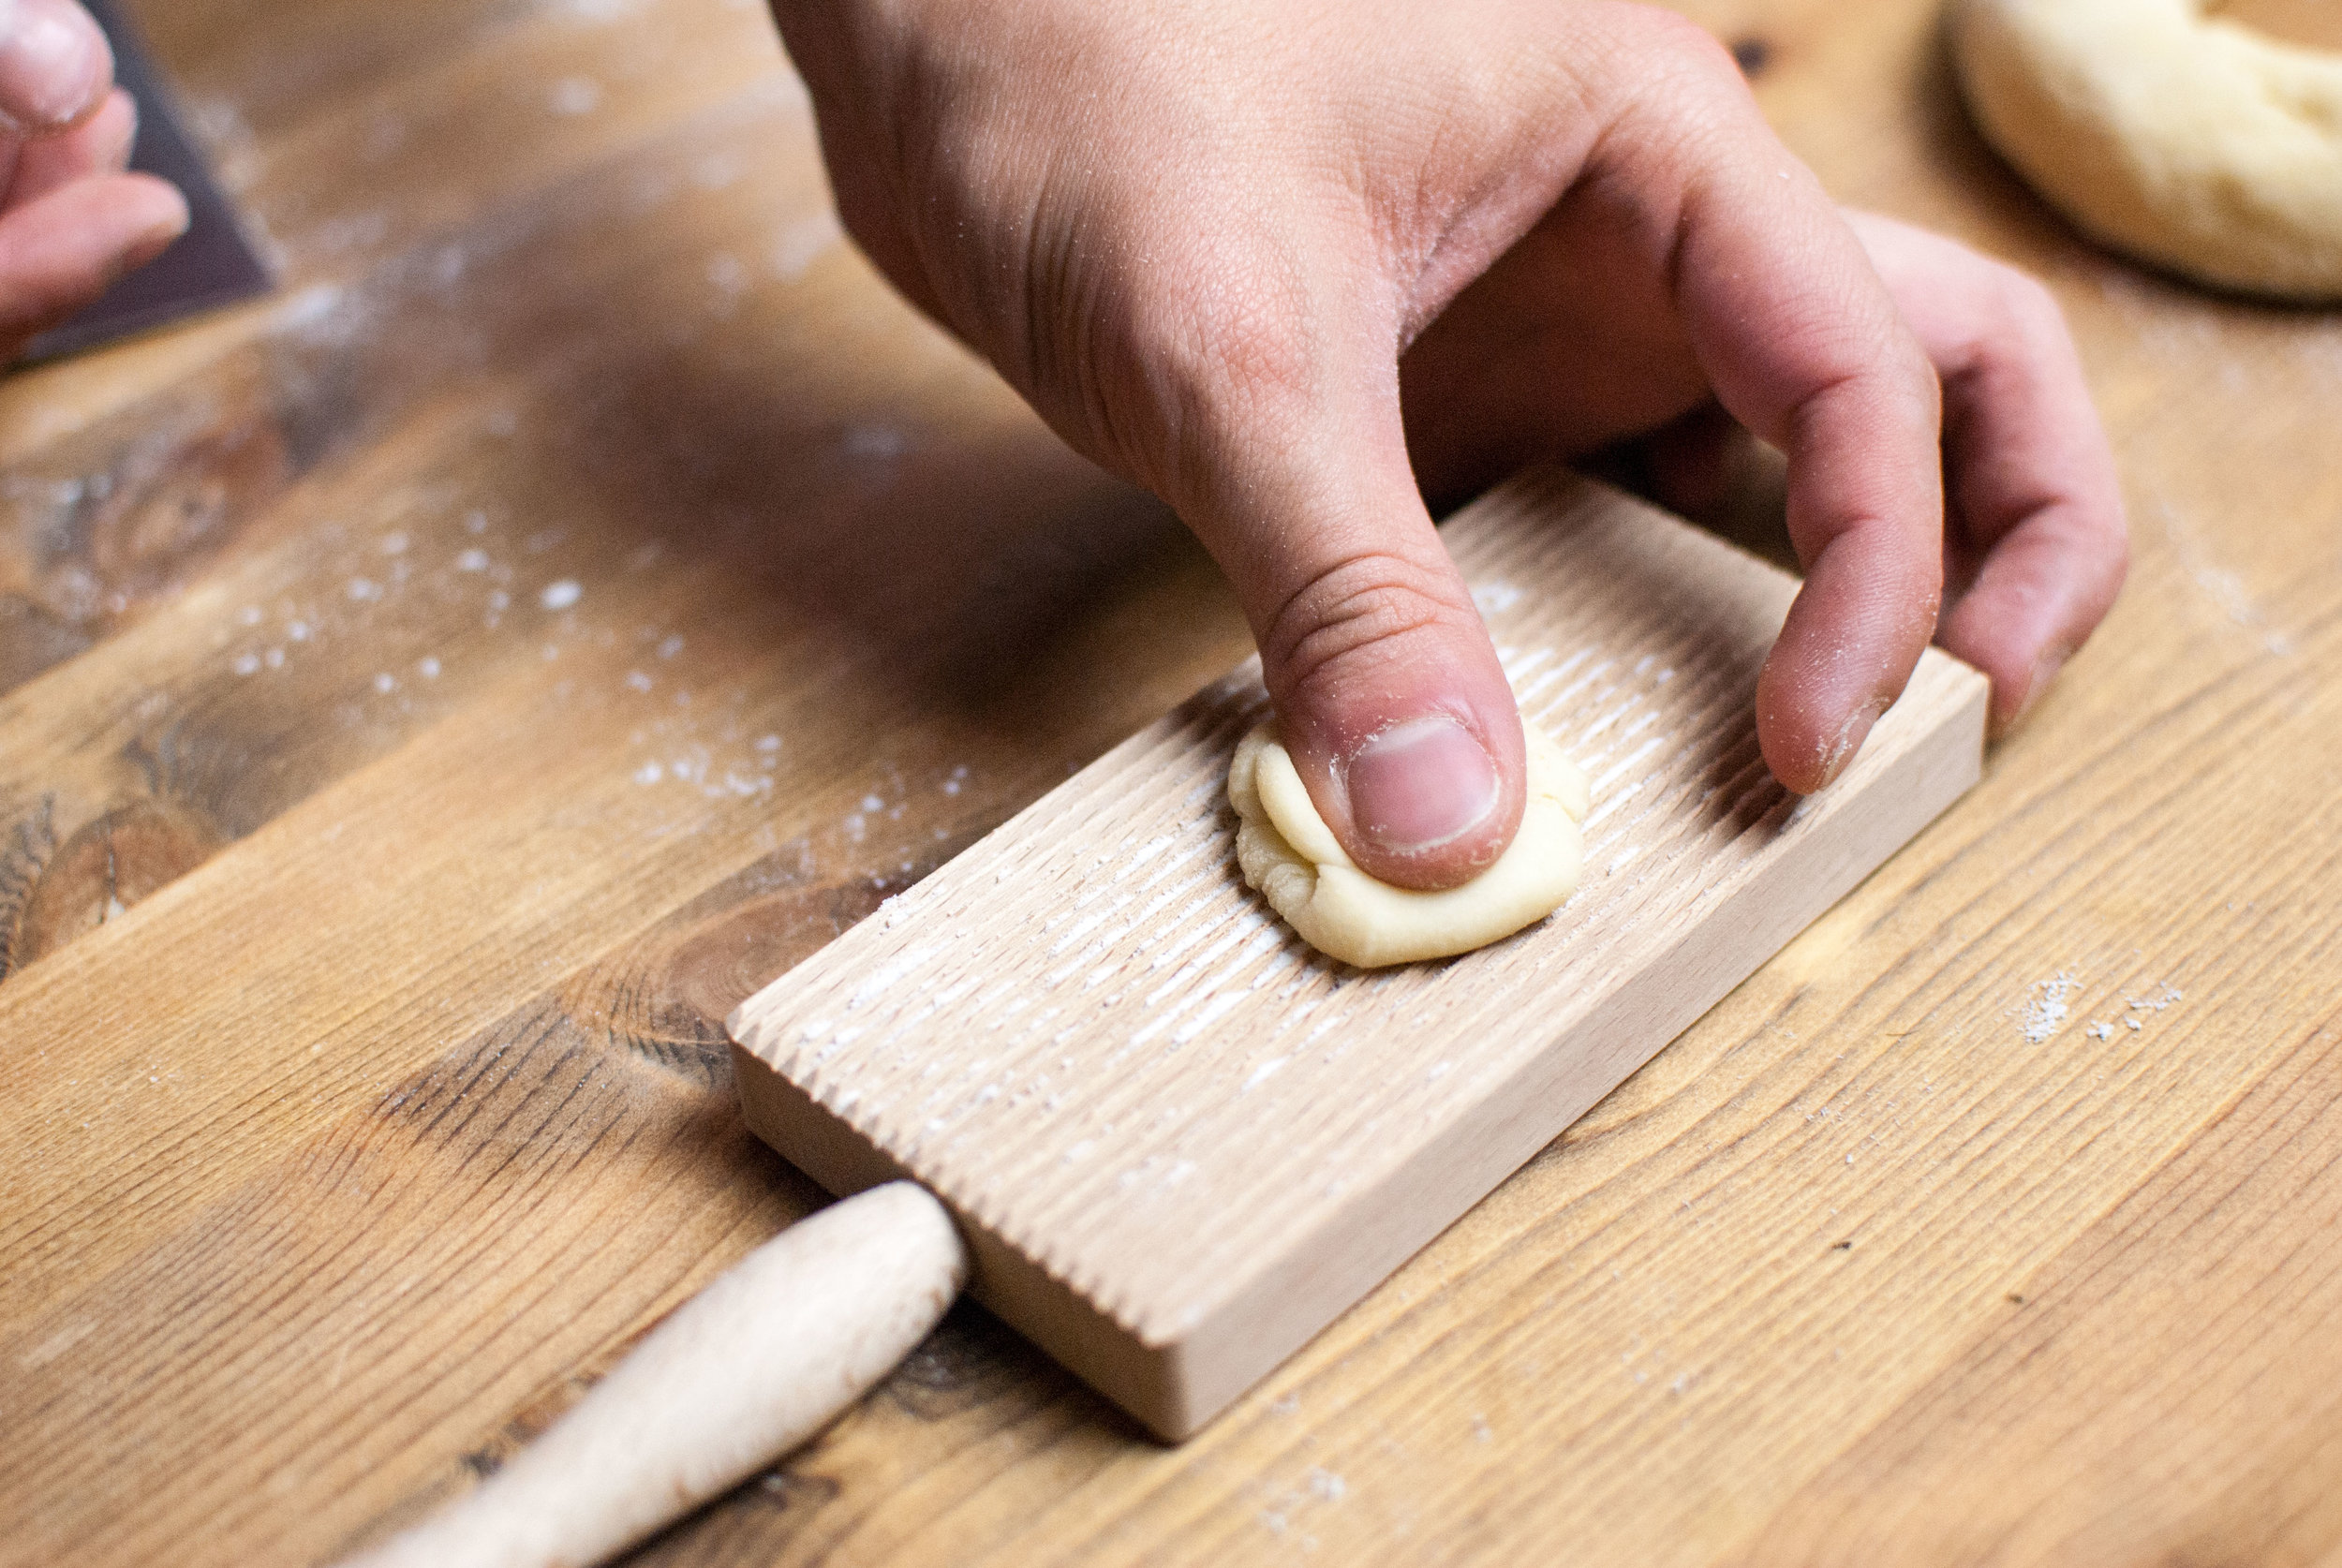
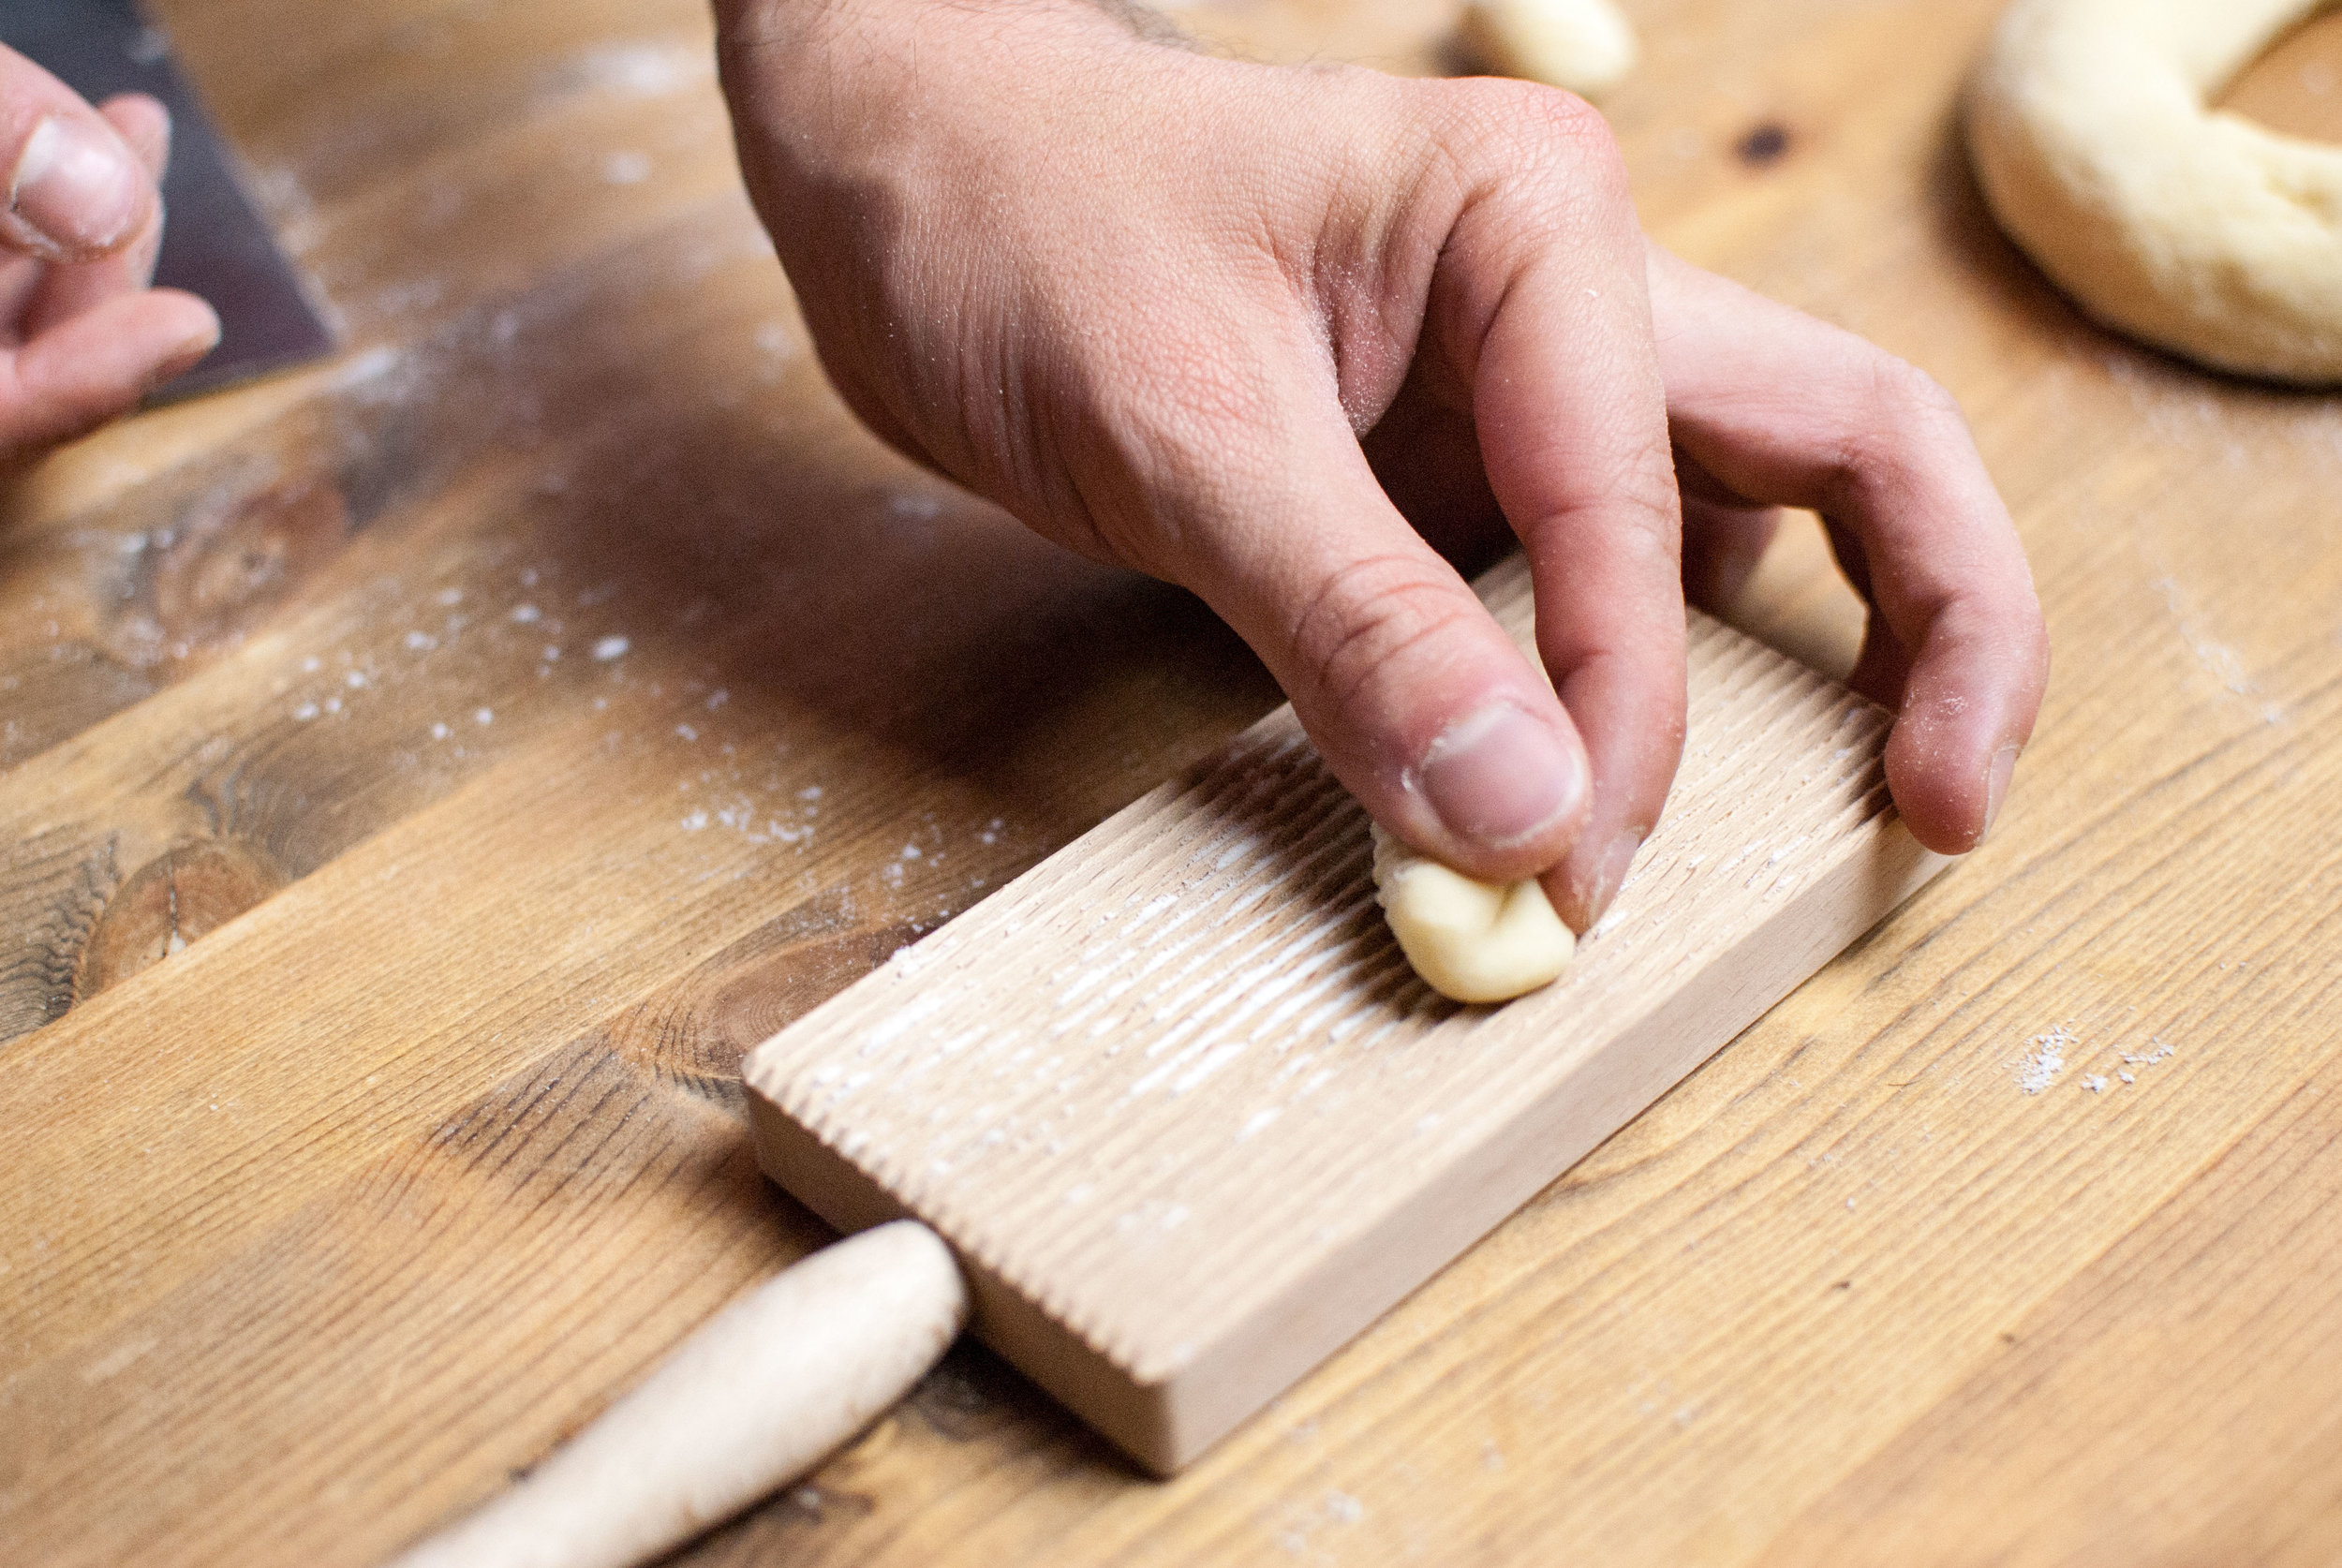
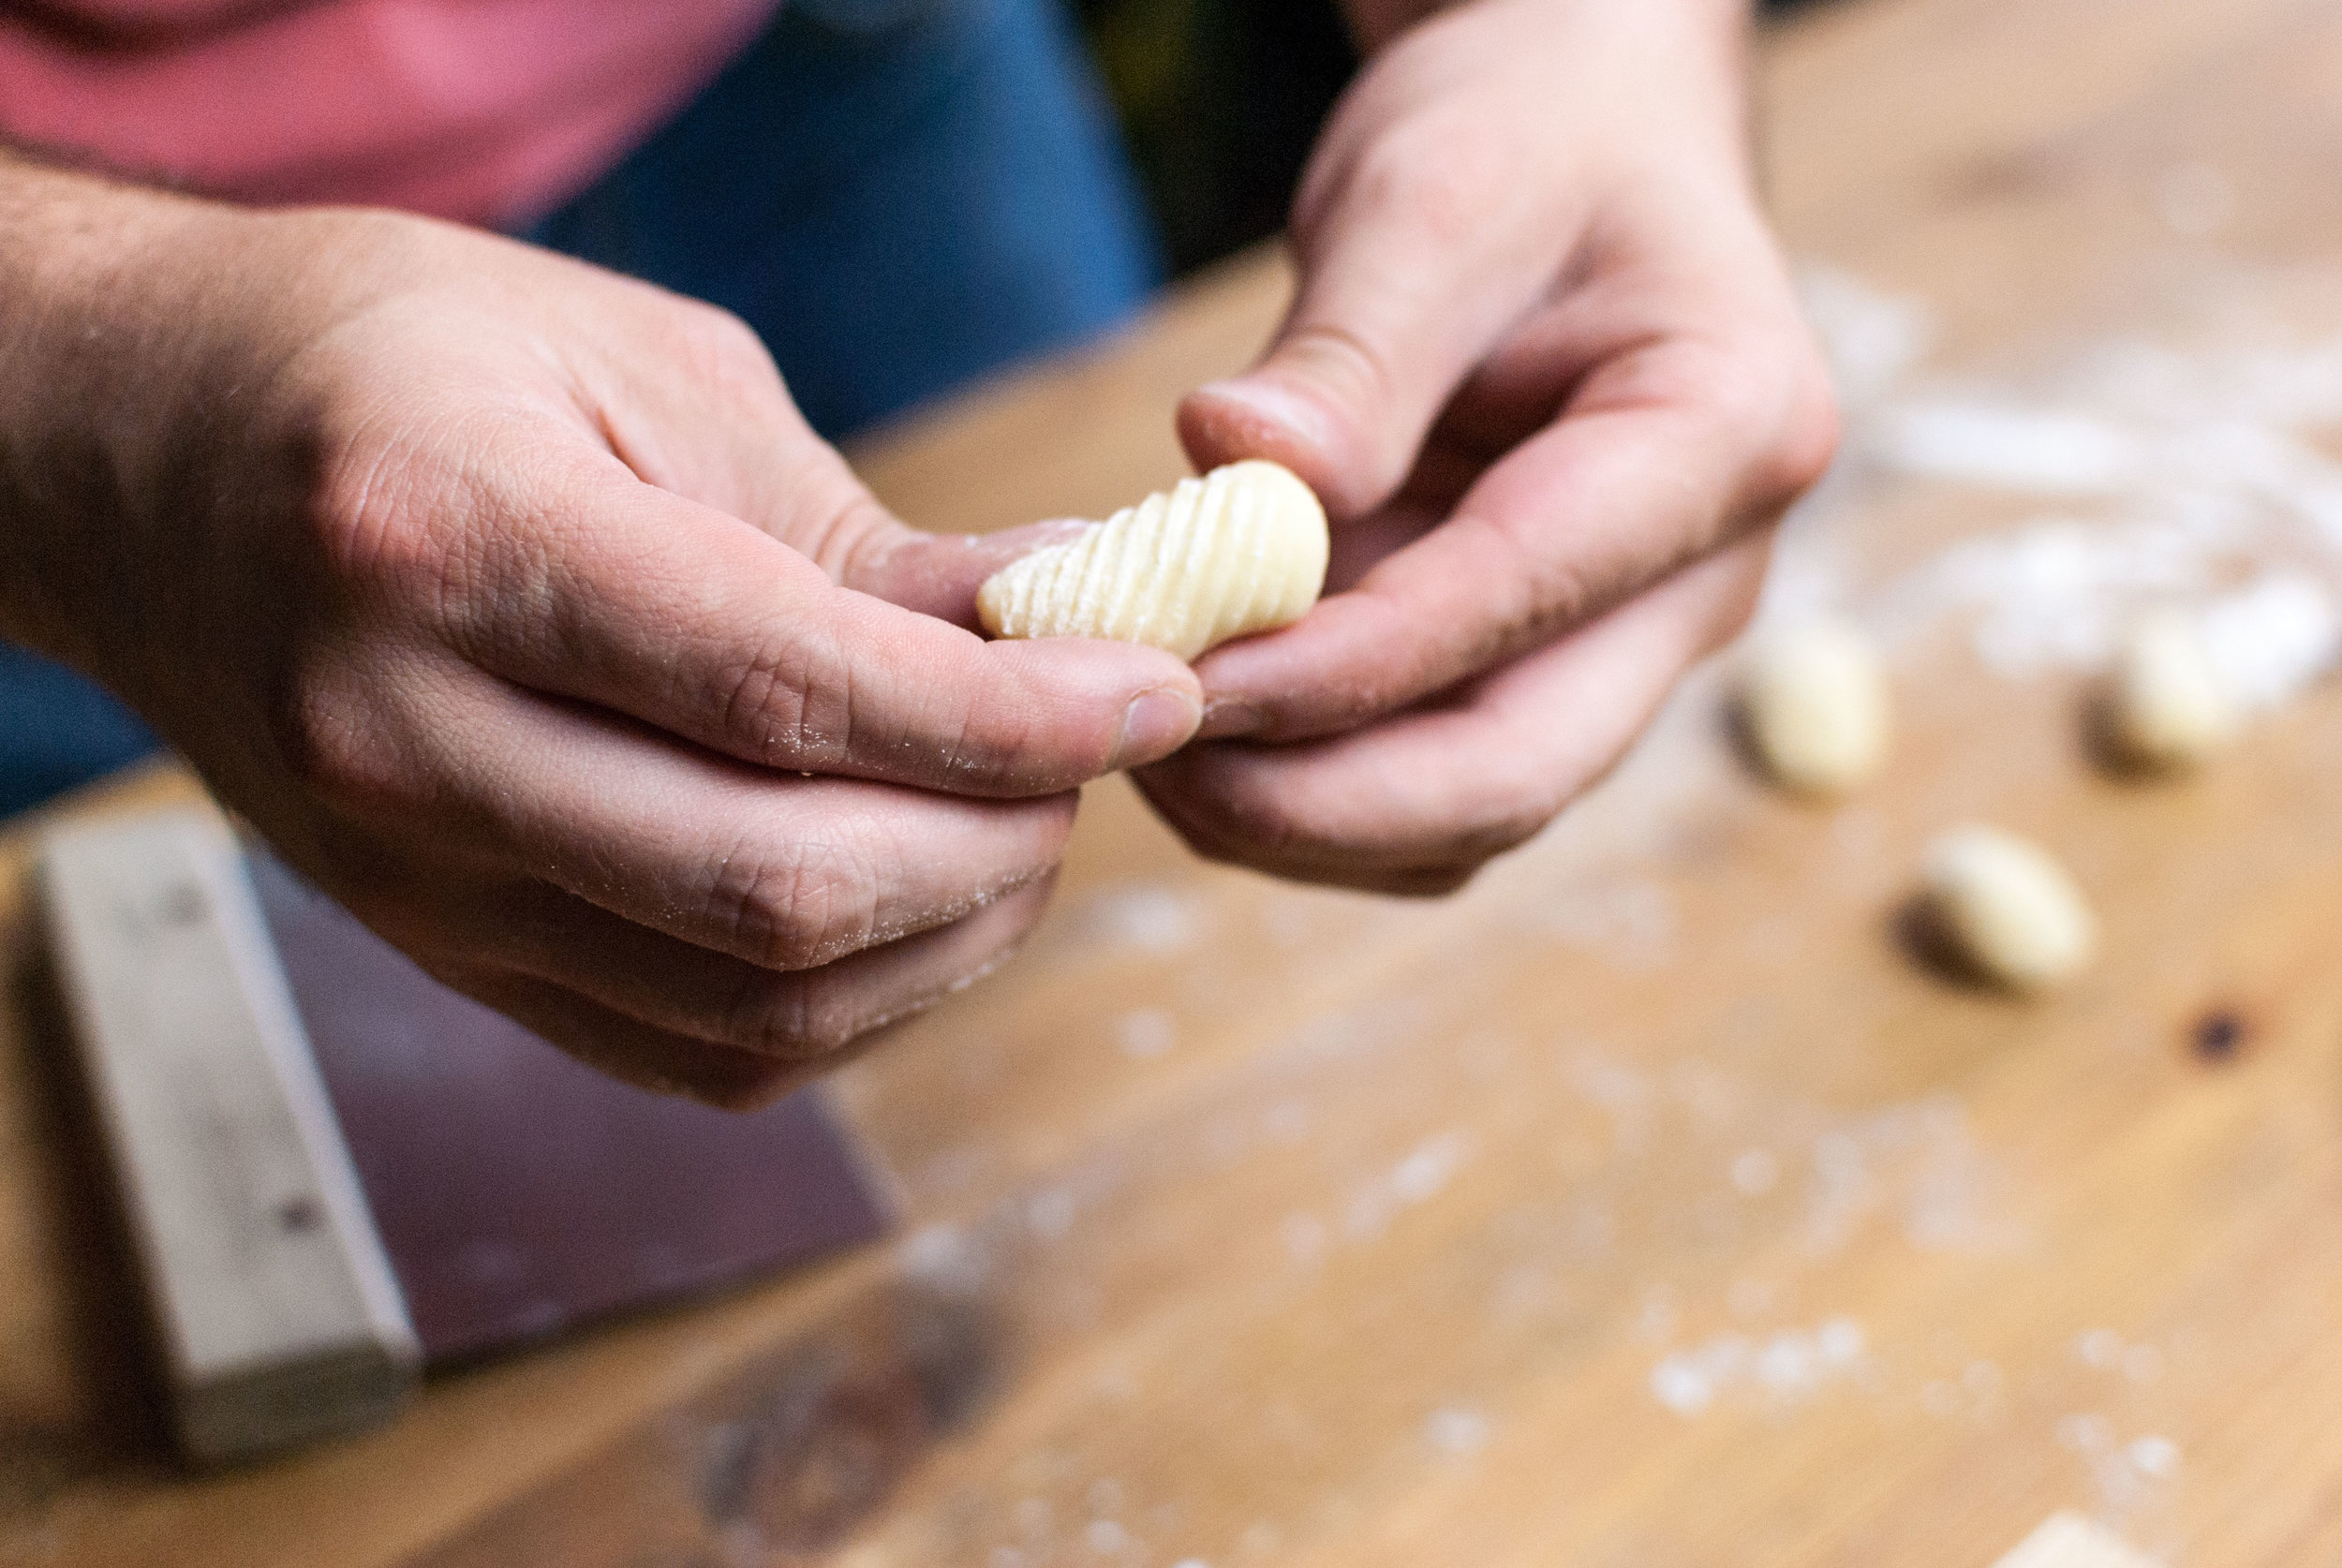
    Optional: After cutting the dough, you’re welcome to press your little gnocs onto a gnocchi board to get their groove on. Simply take a gnocch and press it with your thumb onto a floured board, almost like a thumb print cookie, then remove it and fold it into itself so it returns it’s round shape once again with the grooves facing outward (duh). I’ll admit, it’s a bit of a tedious process, but they do look lovely when they’re finished and they really do hold more sauce. I’d recommend this method if you’re tossing them in a tomato sauce.


    gnocchi_dough_19.jpg

    Yields about 65-70 gnocchi, roughly 4 servings.

  • Smoked Peanut Butter & Jelly Ice Cream


    Have you ever had an idea that you thought could be good, then when you finally manifested it, it turned out to be shockingly better than you ever thought? Have you ever been so taken off guard by the deliciousness of something you prepared that all you can do is keep tasting it, wondering how you hadn’t found or heard of it before, as if it should’ve been something you knew you loved all along? When was the last time you cleaned your ice cream equipment with your face instead of your dishwasher (but please, never your freezer bowl!)?

    As you ponder these questions, we suggest that you prepare your ice cream maker and go out and get yourself some liquid smoke, because this recipe is too easy and too delicious to sit on your screen and be stared at. This bold, savory, satisfying ice cream demands to be made, to be devoured.

    The inspiration for this came from a simple fact: smoke bonds to fat. While that usually is expressed through savory fats, there’s almost always that little wiggle room for a crossover, and that wiggle room is where we live; it’s our neighborhood. Peanuts are roasted anyway, so the rationalization of enhancing the smoke flavor didn’t seem too far-fetched. But then showcasing that in ice cream? Well, we’re just crazy enough to try a stunt like that, and boy, did it pay off.

    Play in your kitchen. Trust your instincts. You won’t win every time, but when you do—oh, when you do—you get something like this.


    Smoked Peanut Butter & Jelly Ice Cream:

    • 1 cup salted natural creamy peanut butter (look for one that tastes less sweet, like Trader Joe’s)
    • 2 cups heavy cream
    • 1 cup milk
    • ½ cup sugar
    • ½ tsp salt
    • ⅛ teaspoon of liquid smoke
    • ½ cup jam
      • Note: the type of the jam is up to you on this one; just imagine what kind of flavor you’d love to have on your peanut butter and jelly sandwich, and that’s probably the flavor you should go with. We used a homemade raspberry jam and it was a religious experience, so…

    In a bowl large enough to hold all the ingredients except the jam, add the peanut butter, sugar, and salt, then whisk together until completely incorporated. Add the milk and whisk together until the sugar has completely dissolved; you shouldn’t hear any scratching noises coming from the bottom of the bowl. Proceed to add the cream and the liquid smoke, then mix together until just incorporated. You don’t want to mix the cream anymore than you need to.

    Pour the mixture into your ice cream churner that has been prepared according to your models instructions and churn. If you’re using a frozen bowl, like ours, you’ll want to churn it for around 25 minutes, checking frequently after the 22 minute mark to make sure that it’s not over-churning. (Beware over-churning because you don’t want to make frozen butter!)


    When the ice cream resembles thick soft serve, turn off the ice cream maker and dump it into a large container for freezing. Ladle in spoon-fulls of the homemade ice cream into the container while ribboning your jam of choice over the top of it in layers. Be sure to do this process as quickly as you can so that your just churned ice cream doesn’t melt. Spread the jam out in a fashion that it would create a balance scoop as consistently as possible; not too much and not too little anywhere, and be sure to put a little bit of jam on top to make a good first scoop when it’s finally ready! After it’s all in the container, cover the ice cream in a layer of plastic wrap, followed by the lid, then pop it in the freezer for at least 4 hours, although overnight seems to work best when we make ice cream.

    Yields about 1.5 quarts.


  • Shaoxing Baby Bok Choy


    The shaoxing wine (Chinese cooking sherry; a pantry staple for us) and soy reduction in this recipe provides just enough salt to season the vegetable as well as just a hint of sweetness, but not enough to overwhelm the delicate flavors the bok choy is already bringing to the dish. This is a delicious appetizer, side dish, or vegetable course meal suitable for 2–10 people. It’s the kind of plate that people will want to gather around and demolish the moment it comes out of the wok. Oh, and if you’re snappy, it can be ready in about seven minutes. Yeah. Seven.


    The law with smaller vegetables is that usually their flavor is concentrated, which proves true here. Bok choy keeps a lot of water in its stalks, so when it’s cooked correctly it can be really succulent, almost like celery. Its grassy flavor is refreshing and delicious, and its leaves wilt nicely when cooked to absorb any sauce you mix with it.


    Shaoxing Baby Bok Choy:

    Serves 2

    • ½ pound cleaned baby bok choy, stems removed

    • 1 teaspoon oil with a high smoking point (we used vegetable oil)

    • 2 tablespoons shaoxing wine

    • 1 teaspoon dark soy sauce

    • 1 large green onion, chopped

    • ½ teaspoon sesame oil

    • 1 hefty pinch of sesame seeds

    Heat a wok on high until it just starts to smoke, then add the oil and swirl it around the pan. Add the bok choy to the hot wok and toss well, coating it in oil as well as instantly wilting the green leaves. Let the bok choy sit on high heat for about 30 seconds to achieve a little bit of singing, then flip the vegetables over like one would with an omelet (or just give it a good stir if you’re not comfortable flipping).

    Add the shaoxing wine and the soy sauce to the wok, then let the bok choy sit as the sauce reduces, about 1–2 minutes depending on your stove; you’ll want the liquid to reduce by about half. After the sauce has reduced enough and the stalks have become a much deeper green color, add the chopped green onion and give everything in the wok a quick stir; cook for another 30 seconds or so to wilt the green onion.

    Remove the wok from the heat and stir in the sesame oil. Transfer the the warm bok choy to a serving plate and garnish with some sesame seeds. Serve immediately.


  • Smoky Baba Ghanouj


    The baba ghanouj recipe is a little nod to the only Middle Eastern restaurant from my Oregonian hometown of Coos Bay/North Bend, simply named Cafe Mediterranean. My family is reasonably certain that when they first opened that we generated a venerable chunk of their revenue. Back in the early 2000’s, living in such a small town, we hadn’t really ever been exposed to food like that before, and it was such a welcome influence that it sent us on a mezze kick in our own kitchen that lasted for years. They had a strong menu, but for us, the star of the show was their baba ghanouj. One day, we asked for the recipe, and they graciously revealed the secret ingredient that made it so addictive: a little kiss of liquid smoke. It ties everything together so nicely, opening up a larger dialogue between the eggplant and the garlic.

    Since then, we’ve tweaked it to make it our own, for instance, roasting the eggplant longer for a deeper flavor and adding a lot more garlic. We also boost the smoky flavor by garnishing the dish with a little dusting of smoked paprika.


    Smoky Baba Ghanouj:

    • 1 large eggplant, halved
    • ¼ cup tahini
    • 4–5 cloves garlic, crushed
    • 1 teaspoon ground cumin
    • Juice of 1 lemon
    • A drop of liquid smoke
    • Salt to taste
    • Olive oil for garnish
    • Smoked paprika for garnish


    Preheat oven to 350°F. Cover a baking sheet in aluminum foil then lightly oil the surface. Roast the eggplant on the baking sheet skin side up for about 2 hours or until the flesh of the eggplant is very tender.

    When the eggplant is cool enough to handle with your hands, scoop the flesh out of the skins and place into a food processor with the tahini, garlic, cumin, lemon juice, and liquid smoke. Pulse at first, breaking everything up into more manageable sizes for the blades, then blend steadily until completely smooth. Taste test and add salt to your liking. When finished, place the baba ghanouj into a serving dish and drizzle with a little bit of olive oil and a light dusting of smoked paprika.


  • Warm Broccolini Salad


    It really is a shame that people don’t eat more vegetables. Too often they take the back seat, pushed to the side of the plate only to be overshadowed by protein, and we think that this mentality is problematic. Yes, protein is important, but if that’s all you think about, that’s all you really get. Nothing you decide to eat (or cook, for that matter) deserves to be an afterthought.

    This is a case argument for the multi-course meal at home. Not only does it create more of an experience for what you’re about to eat, it shifts the focus of the eater. You aren’t barraged with a bunch of things together on one plate that you’re forced to eat all at once, and often convinced to prioritize. Instead, you take your time, savoring one thing after another. The multi-course meal affects the cook as well. If you’re creating things to be eaten one at a time, then every course needs to be independent and be as delicious as possible. A vegetable dish meant to stand out on its own is far better than a vegetable side that is meant to compliment something else, and that’s exactly what this dish we’ve made does: it stands out.

    This salad is really simple, but still possesses many of the primary flavors needed to feel “complete.” While it can certainly be made in a large skillet or frying pan, our favorite method of cooking is actually a wok or a grill. These methods promote a good sear on the broccolini quickly, more easily avoiding the mushy side effects of over cooking. The vibrant and green stalks still have a little bit of a crunch as well as a slightly blistered exterior. You can make this for a group of people easily, but it also makes for a delicious finger food in about five minutes. We like picking up the stalks and eating the florets first that have sopped up the spicy garlic and lemon dressing and finishing with the crunchy stems.


    Warm Broccolini Salad:

    • 2 bunches broccolini
    • 1 teaspoon vegetable oil
    • Pinch red pepper flakes
    • ¼ teaspoon fennel seeds
    • 2 peppercorns
    • 1 large clove garlic, peeled
    • 1 tablespoon extra virgin olive oil
    • 1 tablespoon lemon juice
    • Salt to taste
    • ¼ cup fresh parsley leaves, packed, roughly chopped, for garnish
    • ½ ounce feta cheese, crumbled, for garnish

    In a mortar and pestle, pound the red pepper flakes, fennel seeds, and peppercorns until they become a powder. If you don’t have a mortar and pestle, just grind it all up in a spice or coffee grinder. Add the garlic clove to the spices and pound until the mixture becomes paste-like, or just finely chop the garlic and stir together with the spices. Transfer the paste to a small bowl and stir in the olive oil and lemon juice. Add salt to taste then set aside.


    Prepare the broccolini for cooking by slicing down the stalks, following the branches of the florets; you want nice long strands of broccolini, so let the natural growth of the stalks guide your knife. Heat a large pan (or wok) on high heat then add the vegetable oil and broccolini quickly, cooking until bright green and a little sear develops on some parts of the florets and stalk, about 2 minutes. Give the broccolini a quick stir/flip and cook for 2 more minutes after adding a teaspoon of water to the pan and putting a lid on the pan. Make sure the broccolini is cooked through, then remove from the pan and transfer to a bowl.


    While the broccolini is steaming, add the olive oil and lemon juice mixture as well as the parsley leaves and toss until the broccolini is thoroughly coated in the dressing and herbs, then top with the crumbled feta. Serve immediately.

    Serves 2–4.


  • Smashed Raspberry Grilled Cheese


    Our challenge of savory seasonal eating continues!

    Raspberry season is upon us, and we quickly discovered through our research process that there’s not a whole lot of savory raspberry recipes out there, which we found simultaneously disappointing and alluring. We found plenty of jams, jellies, cookies, pavlovas (Christ, so many pavlovas) and cakes, but no one seemed interested in figuring out how raspberries could make their way out of the realm of dessert.

    But if there’s a way to make something savory, we will find it. As usual, the key was cheese.

    Grilled cheese sandwiches are essentially a step below pizza ingredient-wise, so they’re near the top of the favorite food list for us. Few things can compare to crisp and thickly sliced rustic bread (Nate makes the best) with melted cheese. However, there is one thing that these sandwiches usually lack to create what is more commonly accepted as a “complete taste” on its own, and that’s acid. That’s why you see grilled cheese and tomato soup paired together all over the place.

    So we thought…why not switch up the acid?


    Berries and cheese go way back, so we weren’t too scared about them intermingling. Our acidic subject? Fresh raspberries. Our cheese? We eventually decided to go with a blend of chèvre for flavor and Jarlsberg for texture. So we smashed some raspberries we got from Sauvie Island Farms after a lovely day of berry picking onto some of Nate’s homemade 50% whole wheat sourdough bread and got cooking.

    The results? Crunchy, fluffy, creamy, gooey, and tart. It was everything we hoped it would be and more. If you have any fruit laying around, especially incredibly fresh fruit, we wholeheartedly recommend you put your thinking cap on and find a cheese that’ll pair well with it, then immediately stuff it in a grilled cheese sandwich. You will not be disappointed. Sometimes it really is the simplest things that taste the best.

    Smashed Raspberry Grilled Cheese Sandwich:

    Makes 1.

    • 2 thick slices of good rustic bread (whole wheat sourdough was magical with this, but if you wanna try something else, it’ll still turn out awesome)
    • About 1 tablespoon of butter, room temperature
    • 8–10 ripe raspberries (enough to cover the surface of one piece of bread)
    • 2 ounces of Jarlsberg cheese, grated
    • 1 ounce chèvre, room temperature
    • A dash of freshly ground black pepper

    In a small bowl, mix the grated Jarlsberg and chèvre together along with the fresh black pepper. Set aside.

    Butter both pieces of bread on one side using ½ a tablespoon of butter each. On the unbuttered side of one of your pieces of bread, lay out your raspberries and smash them with a fork, moving the juices around until the entire surface of the bread is covered. Spoon the cheese mixture on top of the smashed raspberries and spread it until the cheese covers the surface of the bread. Put the other piece of bread on top, buttered side up.

    Preheat a non-stick pan on medium heat and put the sandwich in the pan. Allow each side to cook for roughly four minutes, adjusting heat as needed to cook the sandwich through, or until each side of the bread is golden brown and the cheese is melted. To help the melting process along, you can put a lid on the pan, keeping the heat trapped in, though you should limit this because you will lose that deep crispness with too much steam.

    Allow sandwich to cool, then go to town.


  • Fresh Strawberry Ice Cream


    Oregon’s berry bounty is impressive, especially in the summer. Wave after wave of variety comes into its own and it can seem overwhelming when the time comes to choose which one to work with, but after much deliberation, Nate and I think that we’ve finally decided on what our favorite is.

    Is it the plentiful, tart, and quintessential Pacific Northwestern blackberry?

    No.

    Is it the delicate, elegant, and high-brow dessert-loving raspberry?

    No.

    Is it the versatile, delicious, and nutritious blueberry?

    No. No it is not.


    For us, the most sublime berry is the one that welcomes us into the warmer months in Oregon. Hitting their peak in early summer, their season comes and goes quickly. It’s important to get them while you can because, as summer develops, they just aren’t the same anymore, then they disappear altogether, waiting for late spring once again. We are, of course, talking about what might be the most popular berry in America: the strawberry.

    One might think to oversimplify this common ingredient; after all a strawberry is a strawberry is a strawberry, right?

    Noooooope.

    There are so so many species of these little beauties, and they all taste a little different from one another. However, there are two that rise above the rest for us: Hoods and Seascapes. I’d be impressed if anyone went wrong with either one of them if you get them at the right time, and the time is now, but as this recipe suggests, like so so many things in this world, we believe that they should be drowned in cream and churned.

    P.S. This fresh fruit ice cream proportion works magic with these strawberries, but don’t let that stop you from getting creative. If you apply the same amount of any fresh fruit into this recipe, it will work. Let this be a way for you to experience all the best fruit this summer. I mean, that’s what we will be doing…

    Fresh Strawberry Ice Cream:

    • About 1½ cups (335 grams) fresh, ripe strawberries, tops removed (Hoods or Seascapes if you can get them)
    • A pint (472 grams) heavy whipping cream
    • 1¼ cups (263 grams) whole milk
    • ¾ cup plus 1 tsp (161 grams) sugar
    • Scant ¼ cup (67 grams) light corn syrup
    • A dash xanthan gum

    Blend strawberries in a food processor or using an immersion blender, then transfer into a large bowl big enough to hold all ingredients. Whisk in the cream, milk, sugar, corn syrup, and xanthan gum.

    Ready your ice cream maker (if you have a freezer bowl type make sure the bowl is completely frozen! This usually takes at least 24 hours.), and begin churning immediately. Churn for 25–30 minutes, or until the mixture resembles thick soft serve ice cream. Transfer ice cream to an airtight container, but before putting on the lid, cover it with a layer of plastic wrap, allowing it to stick to the entire surface of the ice cream. Seal the container and place in the back of the freezer for at least 4 hours prior to serving. For best consistency, freeze overnight.

    Temper about five minutes before devouring.


  • Cookies & Cream Grows Up


    This monstrosity was borne out of wondering what to make for National Ice Cream Day. There were two schools of thought at first. I was thoroughly excited about making our very first chocolate ice cream, while Nate had his eye on experimenting with a cookies ’n’ cream. The time came to when we were wandering the aisles of a grocery store near our house and we knew we had to make up our minds soon. At the last moment, Nate had the utterly genius idea of…simply not choosing.

    data-animation-override>
    ‘¿Por qué no los dos?’ he said to me.

    “¿Por qué no los dos?” he said to me.

    He’s a madman, I thought.

    We bought good chocolate, Oreos, and heavy cream and went home.

    What transpired was a combination of a rich chocolate ice cream that resembled chocolate mousse—spiked with a little bourbon because we found it raiding the pantry and also why wouldn’t you do that? Then, in it’s last moments of churning, we crammed it full of crumbled Oreos.

    There’s no possible way we can prepare you for how delicious this is. I almost got angry the first time I tasted it because it was so delicious. Angry. Lesson learned from making this ice cream: when you’re deliberating between two things, sometimes the best possible outcome for the choice is, in fact, choosing both. And I have to say, this is the best tasting compromise I’ve ever come across in my life.

    ¿Por qué no los dos?

    Boozy Dark Chocolate Cookies & Cream Ice Cream

    • 1 pint heavy cream
    • 1 cup whole milk
    • ½ cup sugar
    • ¼ tsp. good sea salt
    • 8 oz. good dark chocolate, 60% cacao or higher (we recommend Valrhona or Woodblock)
    • Scant ⅛ tsp. xanthan gum
    • 1½ tbsp. bourbon or rye whiskey
    • 10 Oreo cookies, crumbled (plus more to snack on, because porqué no?)

    In a heavy bottomed 2-quart pan, heat cream, milk, sugar, and salt until simmers and the sugar and salt completely dissolve. Place chocolate into the bowl of a large food processor. Pulse until broken into small chunks, the smaller the better. Add 1 cup of the hot cream-milk mixture while the food processor is running. Blend until chocolate is melted, making a rich ganache.

    In a medium bowl, pour the rest of the cream-milk mixture. Add the ganache to the cream and whisk until fully incorporated. Add the whiskey. Add the xanthan gum, and stir until dissolved. Chill mixture for at least 2 hours before churning.

    In your ice cream machine, churn the mixture for 25–30 minutes or until it thickens enough to stick to the churn or a spoon. Right before you stop churning, slowly add the cookies and churn for about a minute. Quickly transfer to a freezer-safe container. Cover with plastic wrap and the lid, and freeze until desired hardness is achieved. We recommend overnight, but this depends on how cold your freezer is.

    Yields about 1.5 quarts.

  • Leek Powder Pierogis


    Leek-Powder-Pierogi-5.jpg

    We are very often products of our upbringing. This recipe is a really fun blend of my mother’s culinary curiosity and my father’s Polish ancestry.
    Leek powder was borne out of my mother getting sick of throwing out leek greens, so she found a way to use them and even make them keep for a long time. Gastronomically she was gifted with preserving things, and she was willing to give anything a chance. Anything.

    My father loves feeling connected to his Polish roots, and one of the main ways that he returns to them is through food. It’s the little things like sauerkraut, a well-made kielbasa, or the richness of sour cream that take him back.

    Naturally, I inherited both of these compulsions, so here we are. Pierogis are just about the most Polish thing I can think of, and I love the crap out of them. Crispy and cheesy potato dumplings. What’s not to like? To bring this to another level, I decided to try adding a little bit of my mother’s evil genius influence. The leek powder gives the dough a fun color and a wonderful herb-like flavor that’s perfect for its potato counterpart.

    Leek powder pierogi dough

    • 2½ cups (300 g) all-purpose flour, plus more as needed
    • ½ cup lukewarm water
    • 1 egg, room temperature
    • 2 tbsp. sour cream
    • 1 tsp. salt
    • 1 tbsp. leek powder

    Potato filling

    • 2 cups mashed red potatoes (about 1 lb raw potatoes)
    • 2 tbsp chives, chopped
    • 1 tsp. salt
    • 2 oz. cheddar, shredded
    • 1 tbsp. butter
    • ½ tsp. fresh ground pepper

    Knead all the ingredients for the pierogi dough together until combined. The dough should be only slightly sticky, so add more flour as needed. Refrigerate for 30 minutes to let the leek flavor infuse and the flour bind to the moisture.

    While the dough rests, boil quartered potatoes until soft. Strain and mash, adding cheese, butter, salt, and pepper. Mix until fully incorporated. Allow the mixture to cool slightly before adding the chives; they shouldn’t cook.

    Roll out the dough to about ⅛” (thinner is okay) and use a cookie or biscuit cutter to cut out the dough. Use two pieces of dough per pierogi, spooning about ½ tbsp. (think half a ping pong ball) of potatoes on one. Wet your fingers and dab it around the edges, sealing it.

    Heat a skillet with 1/2 tbsp. butter over medium heat. Cook until golden brown on both sides. Serve with sour cream, applesauce, fresh dill, or caramelized onions.

    Makes 24 pierogis.

  • Leek Powder


    Leek-Powder-Pierogi-1.jpg

    As odd as this may seem, this recipe is actually quite personal for me. My mother taught me how to make this. My mother was a very strange woman. She would pick wild mushrooms and bring them into the house to examine what colors they might make if you turned them into dyes, sometimes leaving them on paper to create intricate designs with their spores. She was a master preserver, confident in her ability to can or process anything. Her library of mason jars would line the walls of my childhood home, holding the little secrets of her fearless flavor experiments and prized recipes. She could eliminate the daunting space between a stranger and a friend in a matter of seconds. I learned the majority of what I know about food from her. She taught me how to see that everything is connected, no matter how obscure the link may be at first. If you can maintain your sense of wonder in this world, you can always find a way to make something into something else; something you need, something you want. She taught me that humble things are beautiful, and if treated correctly, they can be turned into something even more beautiful; something you love.

    I miss her so much.

    Leek Powder:

    • 2 whole leeks, roots removed, cleaned

    Preheat oven to 170.

    Cut the leeks into smaller segments (including the greens) then place them in the food processor. Blend until they resemble finely minced onions. If you don’t have a food processor, just do this by hand with a sharp knife. Be careful since the greens are fibrous and might be hard to cut.

    On a baking sheet with parchment paper, spread the minced leeks as thinly and evenly as you can. Place them in the oven and allow them to “bake” for about 6 hours, or until all the moisture in them is gone. They should be light and crispy, like dead autumn leaves.

    Place the dehydrated leeks in a coffee grinder and grind until it becomes a fine powder. Store in an airtight container. Keeps for months.

    Yields about ½ cup of leek powder.