Tag: vegetarian recipe

  • Skordalia


    I have a fascination with recipes that utilize ingredients that seem to have lost their value: vegetable tops and bottoms, stalks and skins, bones and bits, crusts and scraps. I don’t like wasting food, so when I discover something that allows me to use these delicious rejects in a creative way, I get a little thrill out of it. And do you wanna know what’s laying around our home that’s sometimes challenging to use before it becomes hard as a rock and “useless?”

    Bread. Lots and lots of effing bread.

    My partner bakes some of the best damn bread around and posts saliva inducing photographs of it on our Instagram, but alas, we can only eat so much of it at once, and sometimes we don’t consume all of it before it goes stale. Toward the beginning of his bread kick, we actually started to give the bread away to our friends, but even that didn’t keep us out of the clear, and I was starting to hear creaky protests coming from our food processor that seemed to say, “Please, God, not one more batch of breadcrumbs. PLEASE, NO MORE.” Luckily for our food processor, and for us, I discovered a type of recipe that changed the way I cooked with bread.

    Bread sauces.

    There are several, actually. The Brits have one (it’s just called “bread sauce,” because of course it is). Romesco sauce is also technically a bread sauce, utilizing stale bread to bind all its parts together. There’s even a Peruvian stale bread and cheese sauce that’s intended to be served with potatoes. I cycled through a few of different variations of this style of disposing of Nate’s hearty loaves, but it didn’t take long for me to stumble upon what became far and away my favorite one of the bunch: skordalia. Skordalia is easy to make, versatile in its use, keeps for a long time, and it focuses on two of my all time favorite flavors: garlic and lemon.

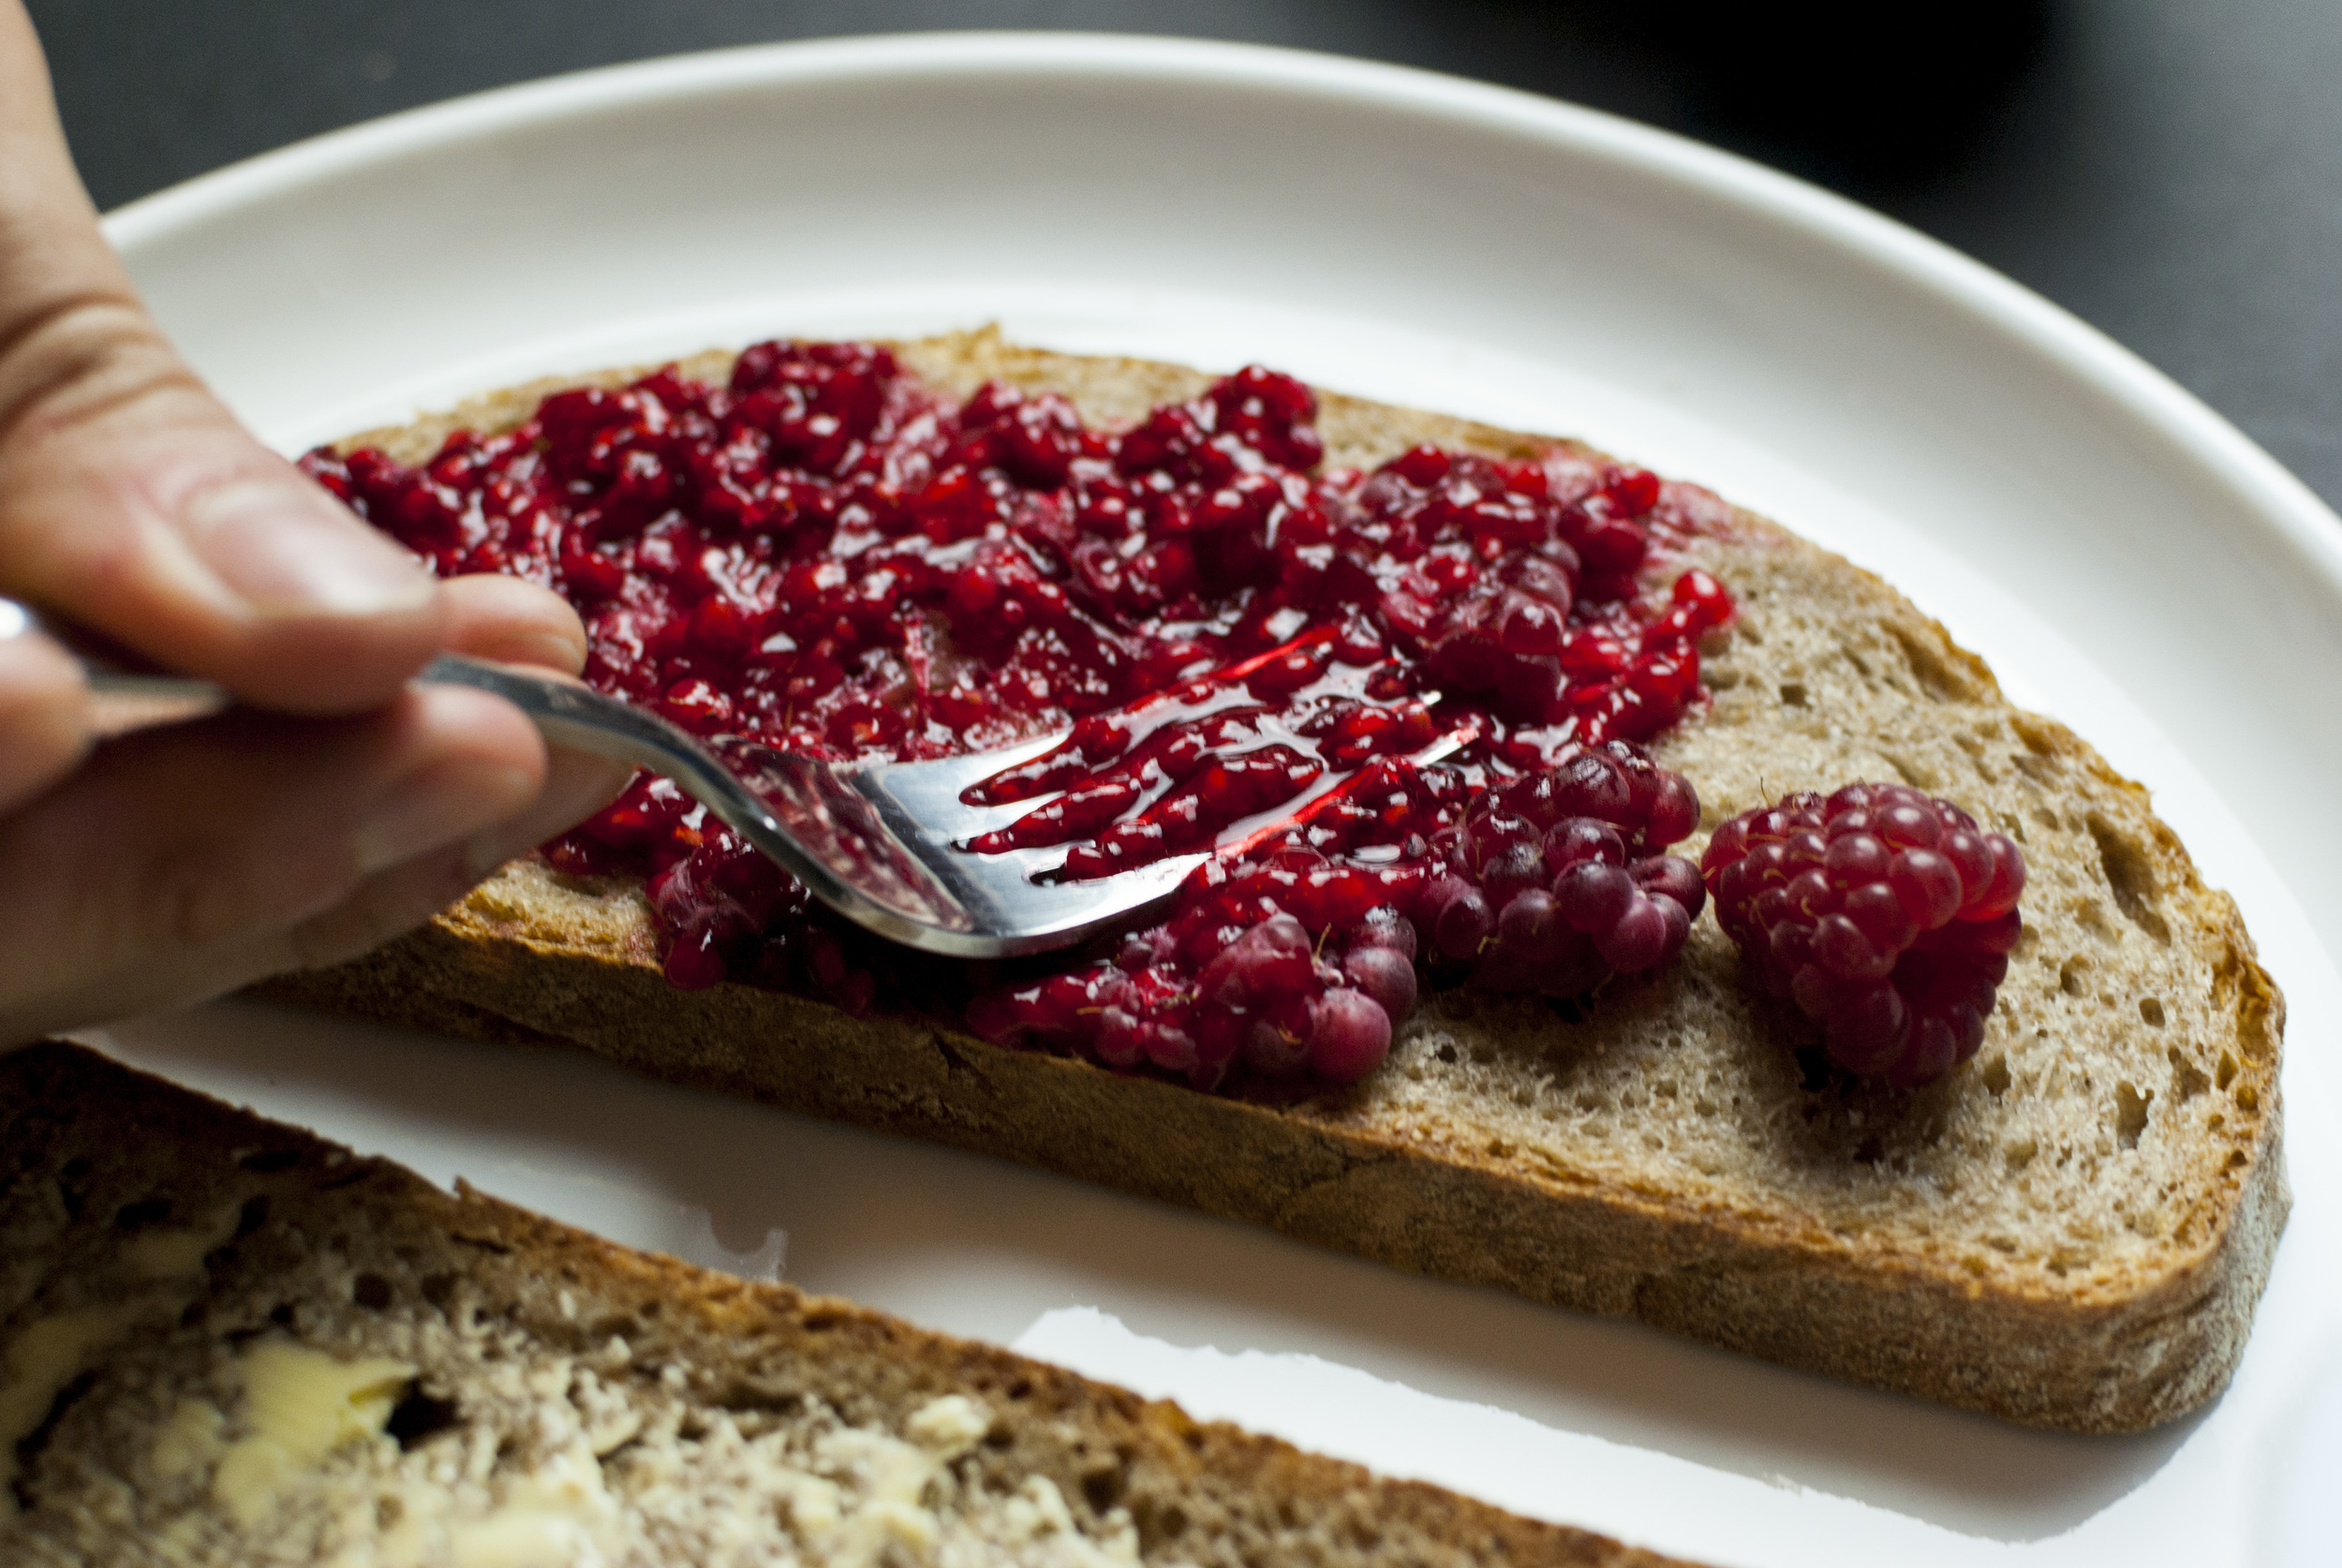
    Side note: using a good stale French loaf would be great for this, but in our house, we like sourdough. It really latches onto the lemon flavor, which is the backbone of the sauce. Also, you don’t even need to use stale bread for this recipe, just know that you can. I mean, you’re dousing it in oil and lemon juice and water then blending it into oblivion, so don’t get too hung up on that.

    Skordalia:

    • One 1” slice of stale bread from a large, hearty loaf of bread (we like sourdough)

    • 6–8 cloves of garlic (or, like, more if you’re into that)

    • A heaping ½ cup of slivered almonds

    • ½ cup olive oil, divided

    • Juice of one whole juicy lemon

    • ¾ cup of water

    • Salt to taste

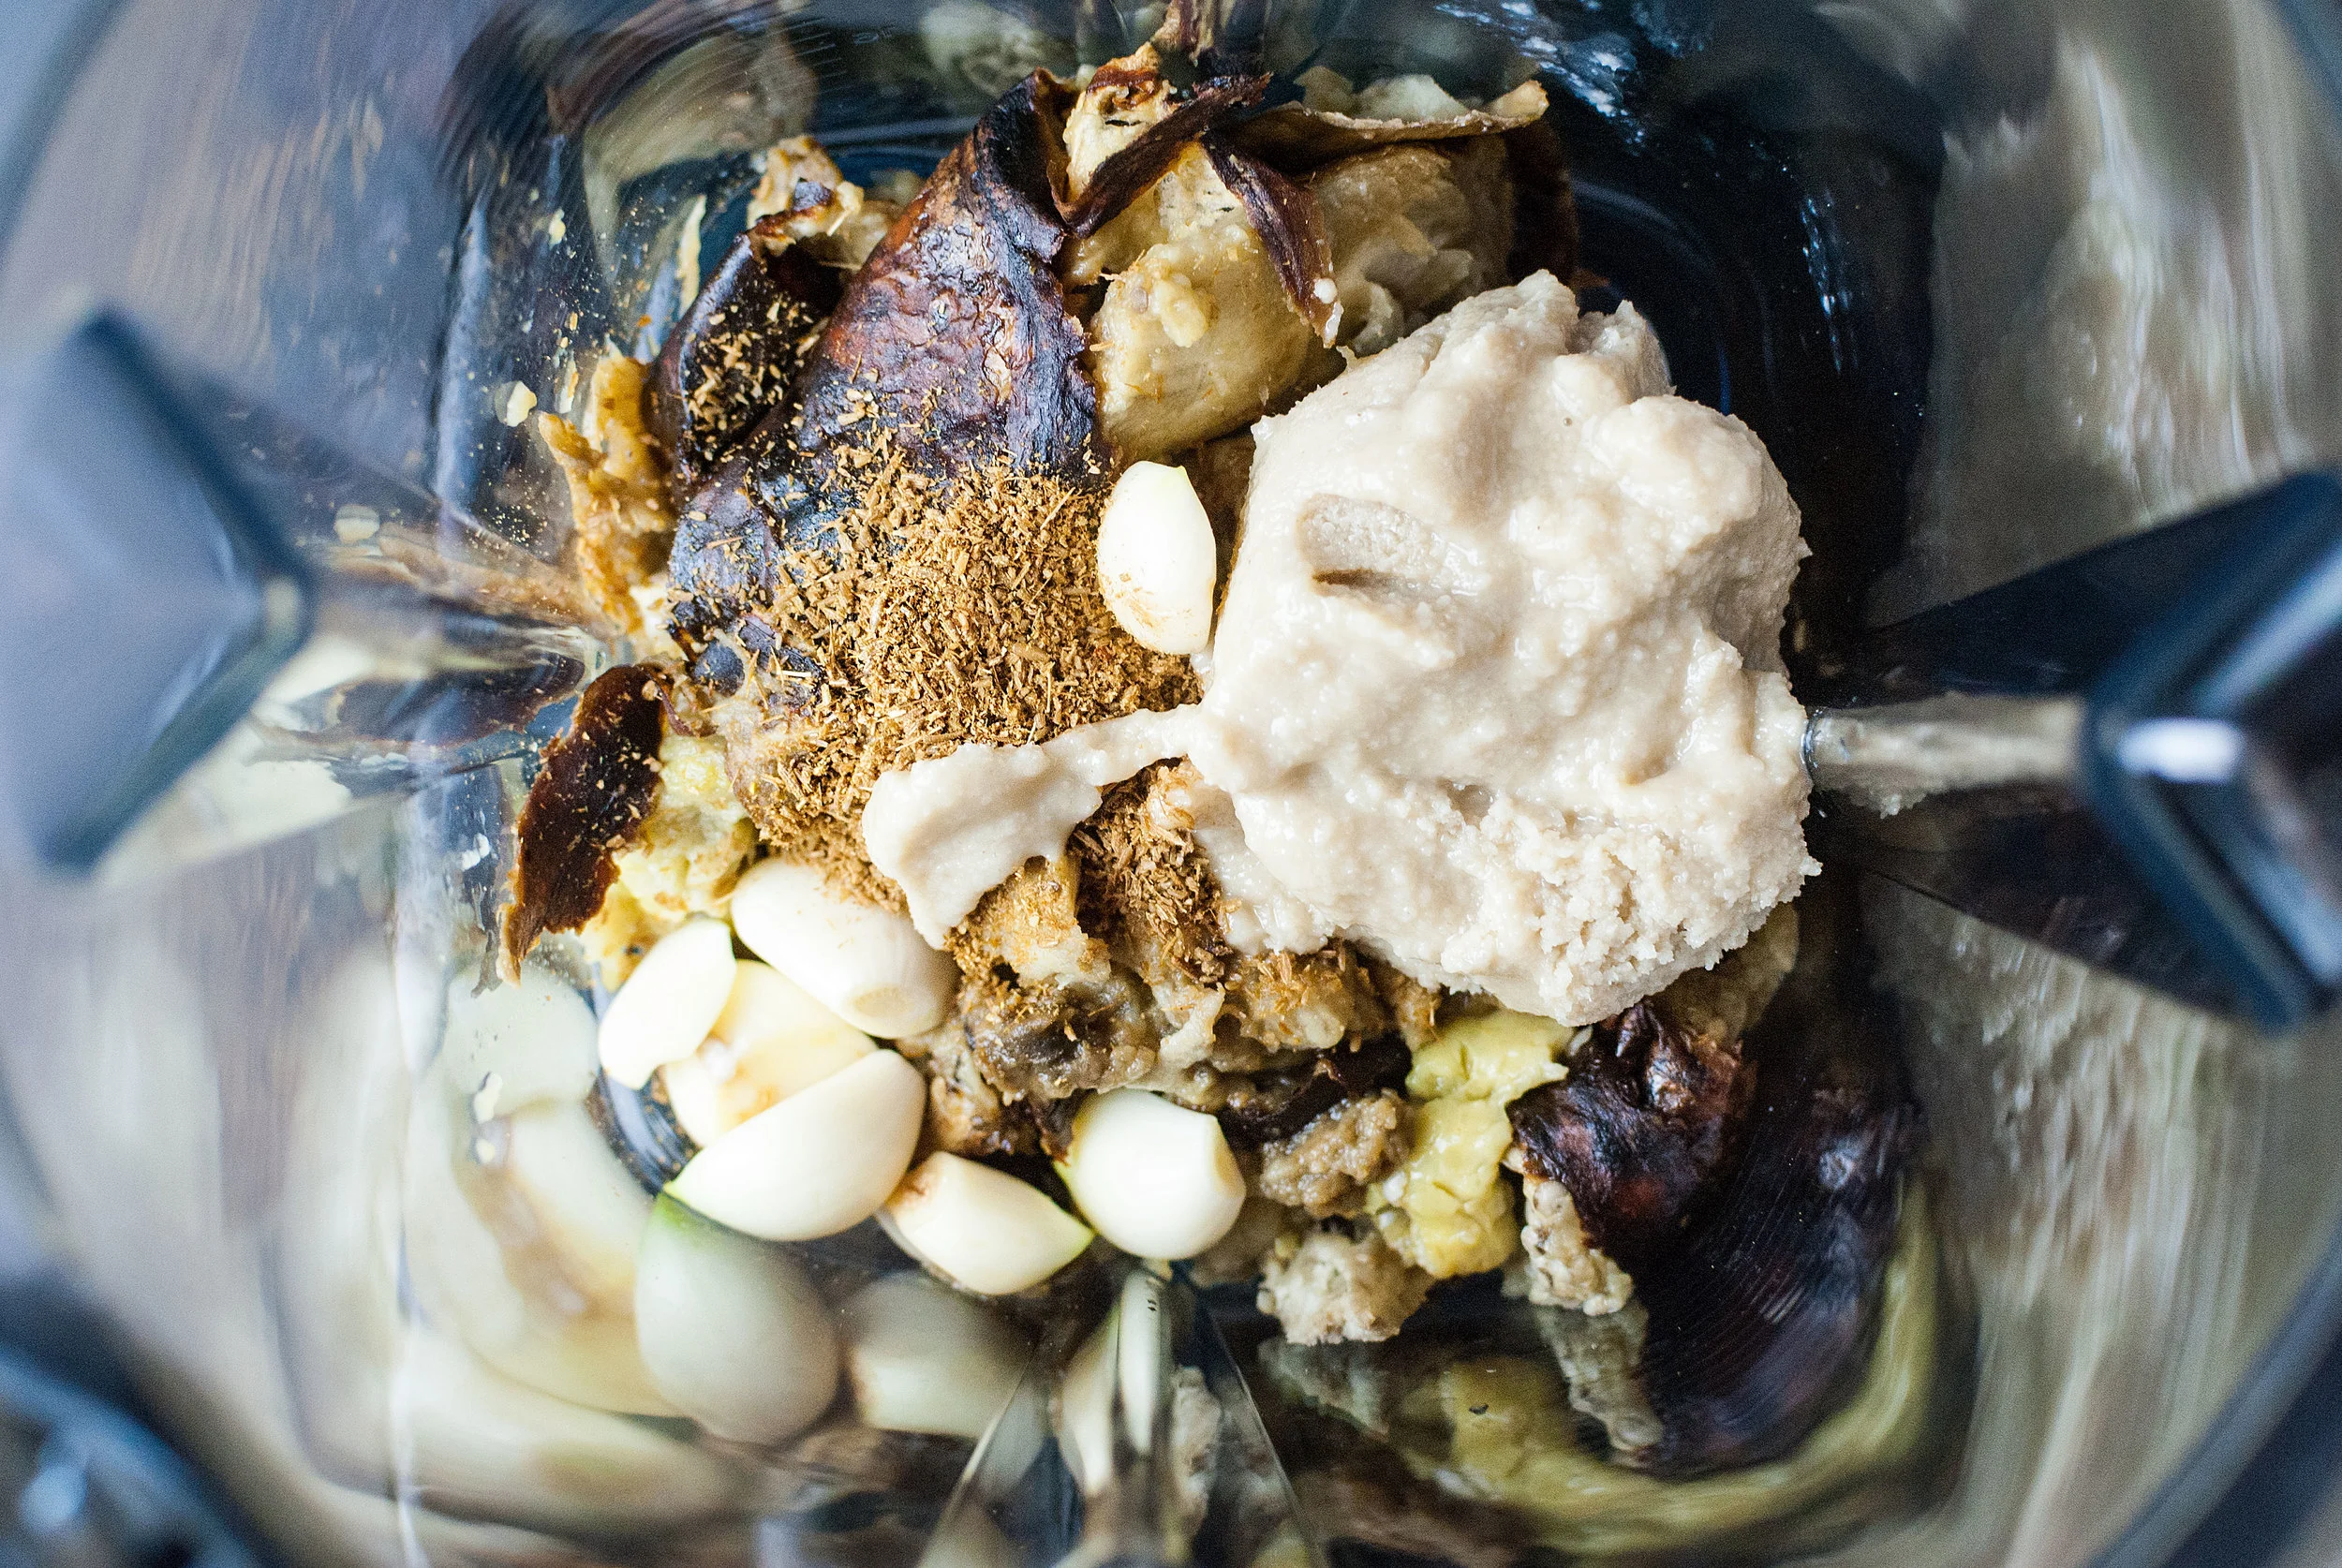
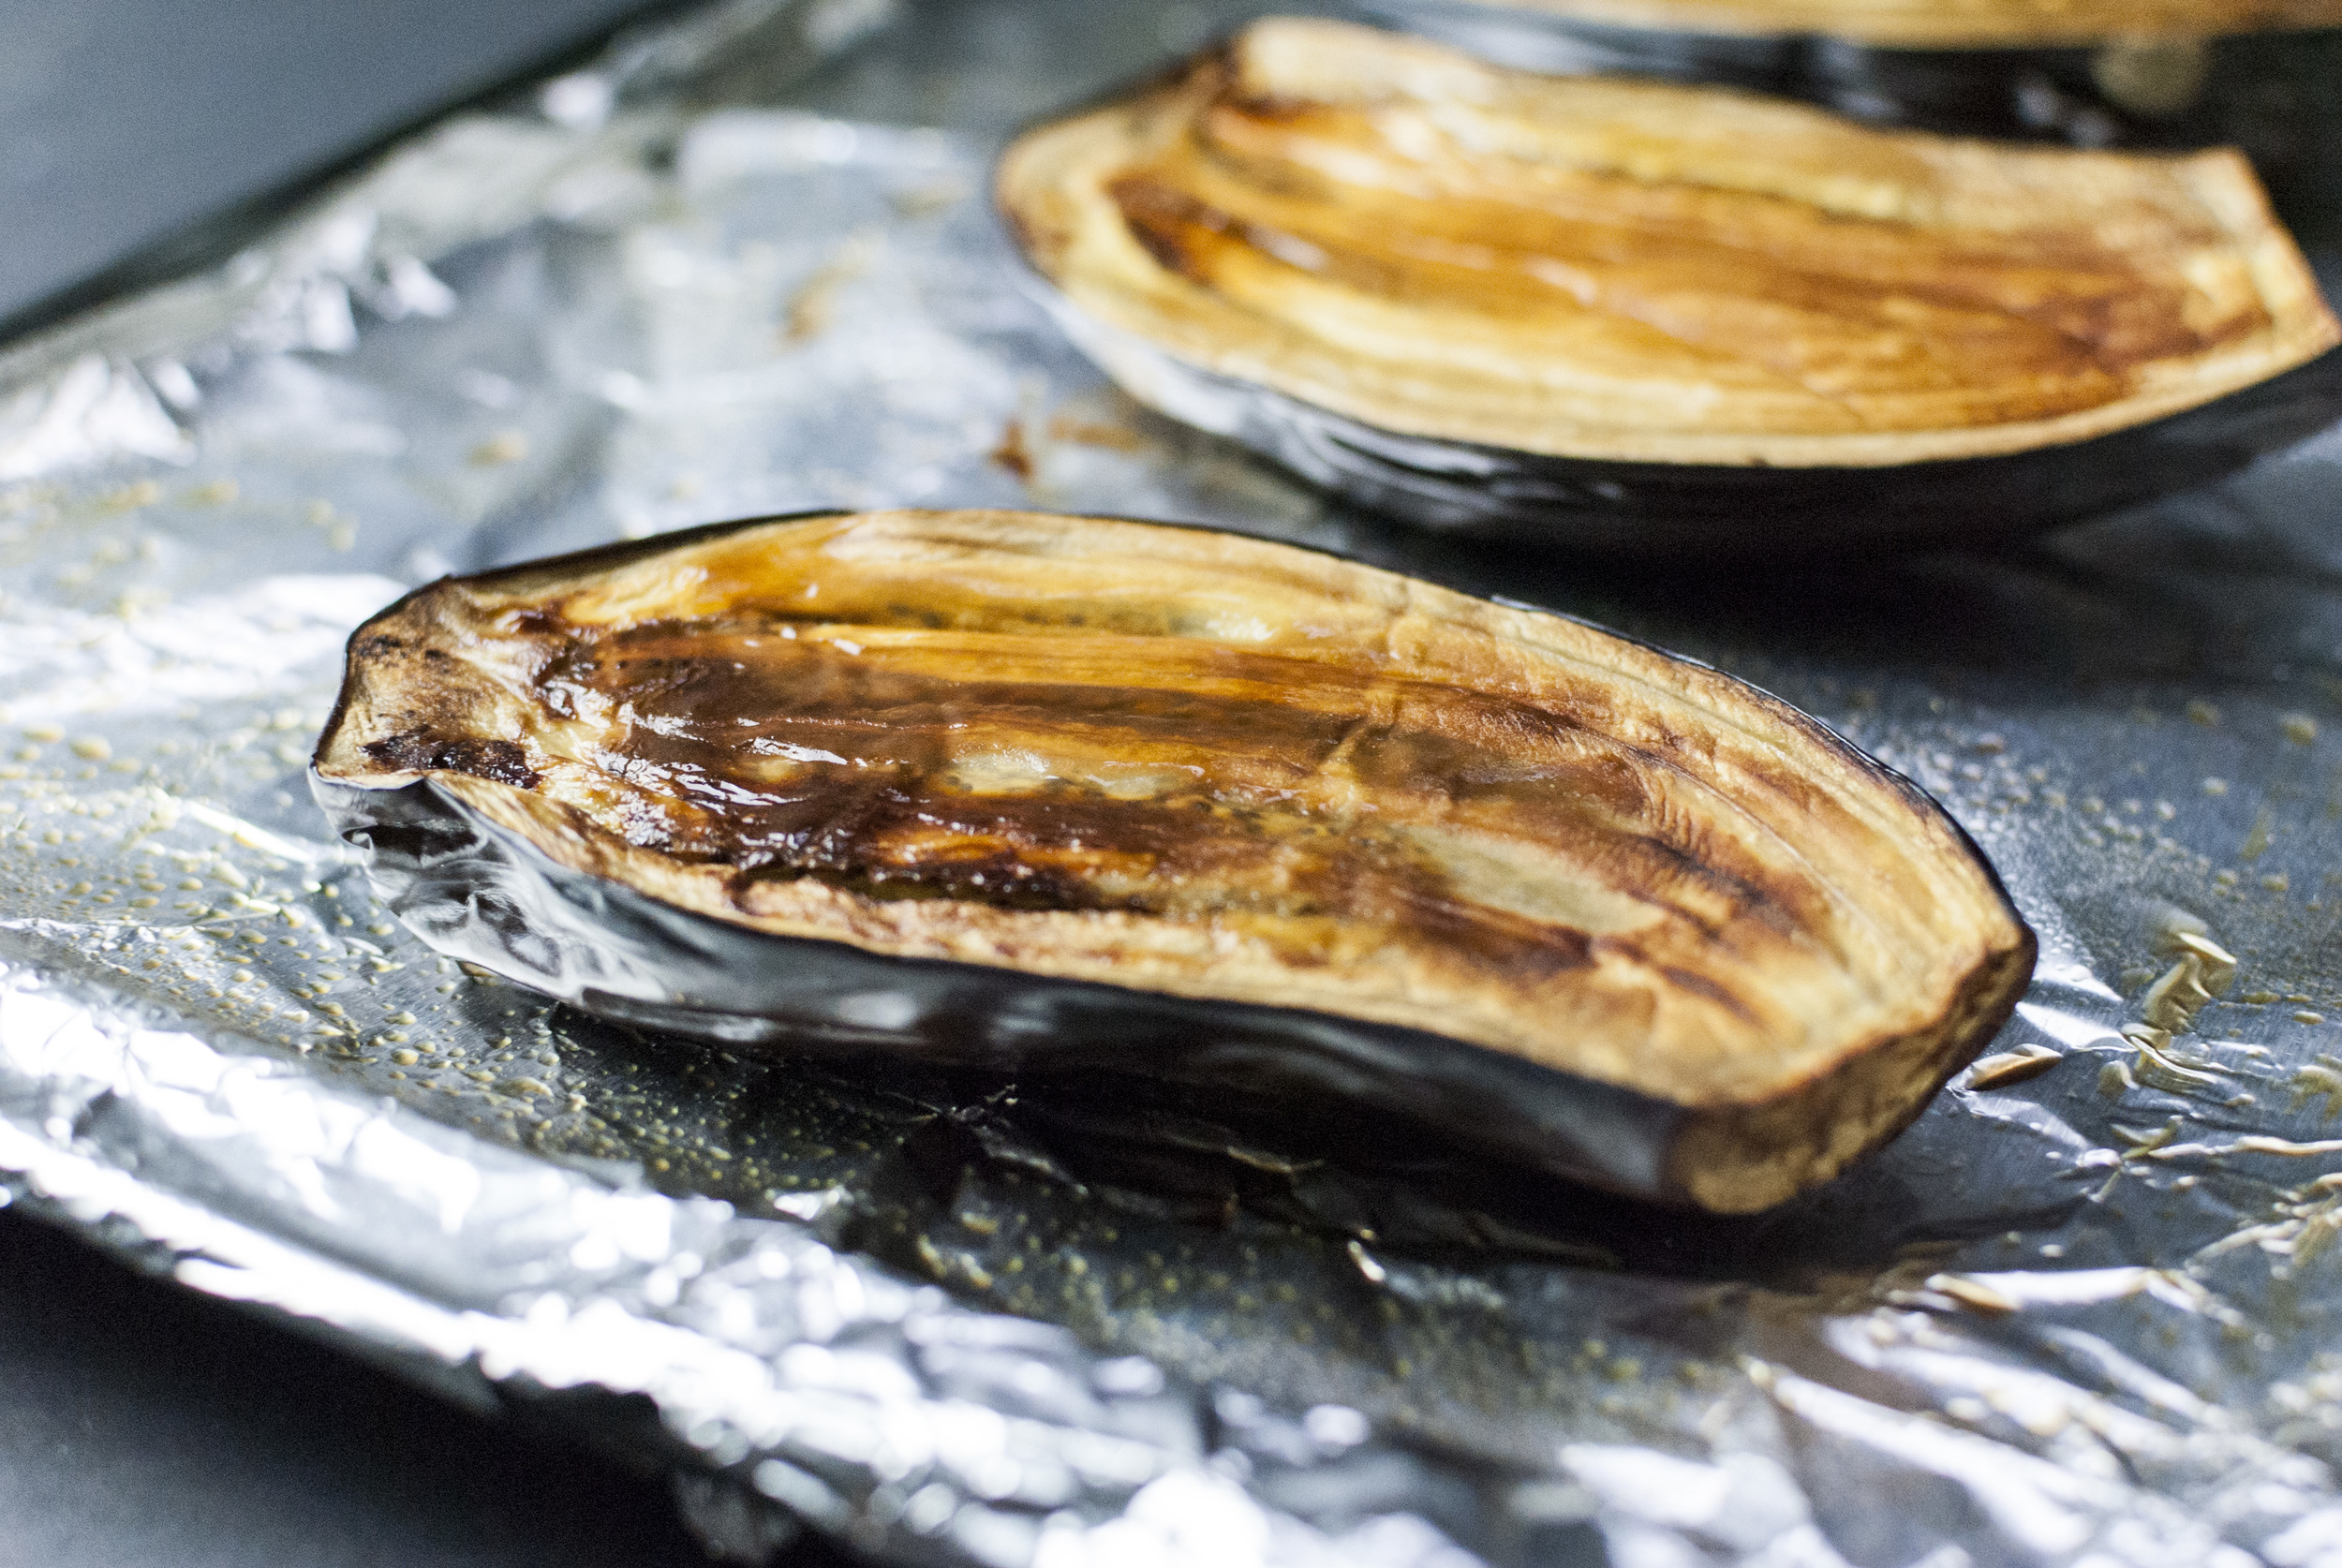
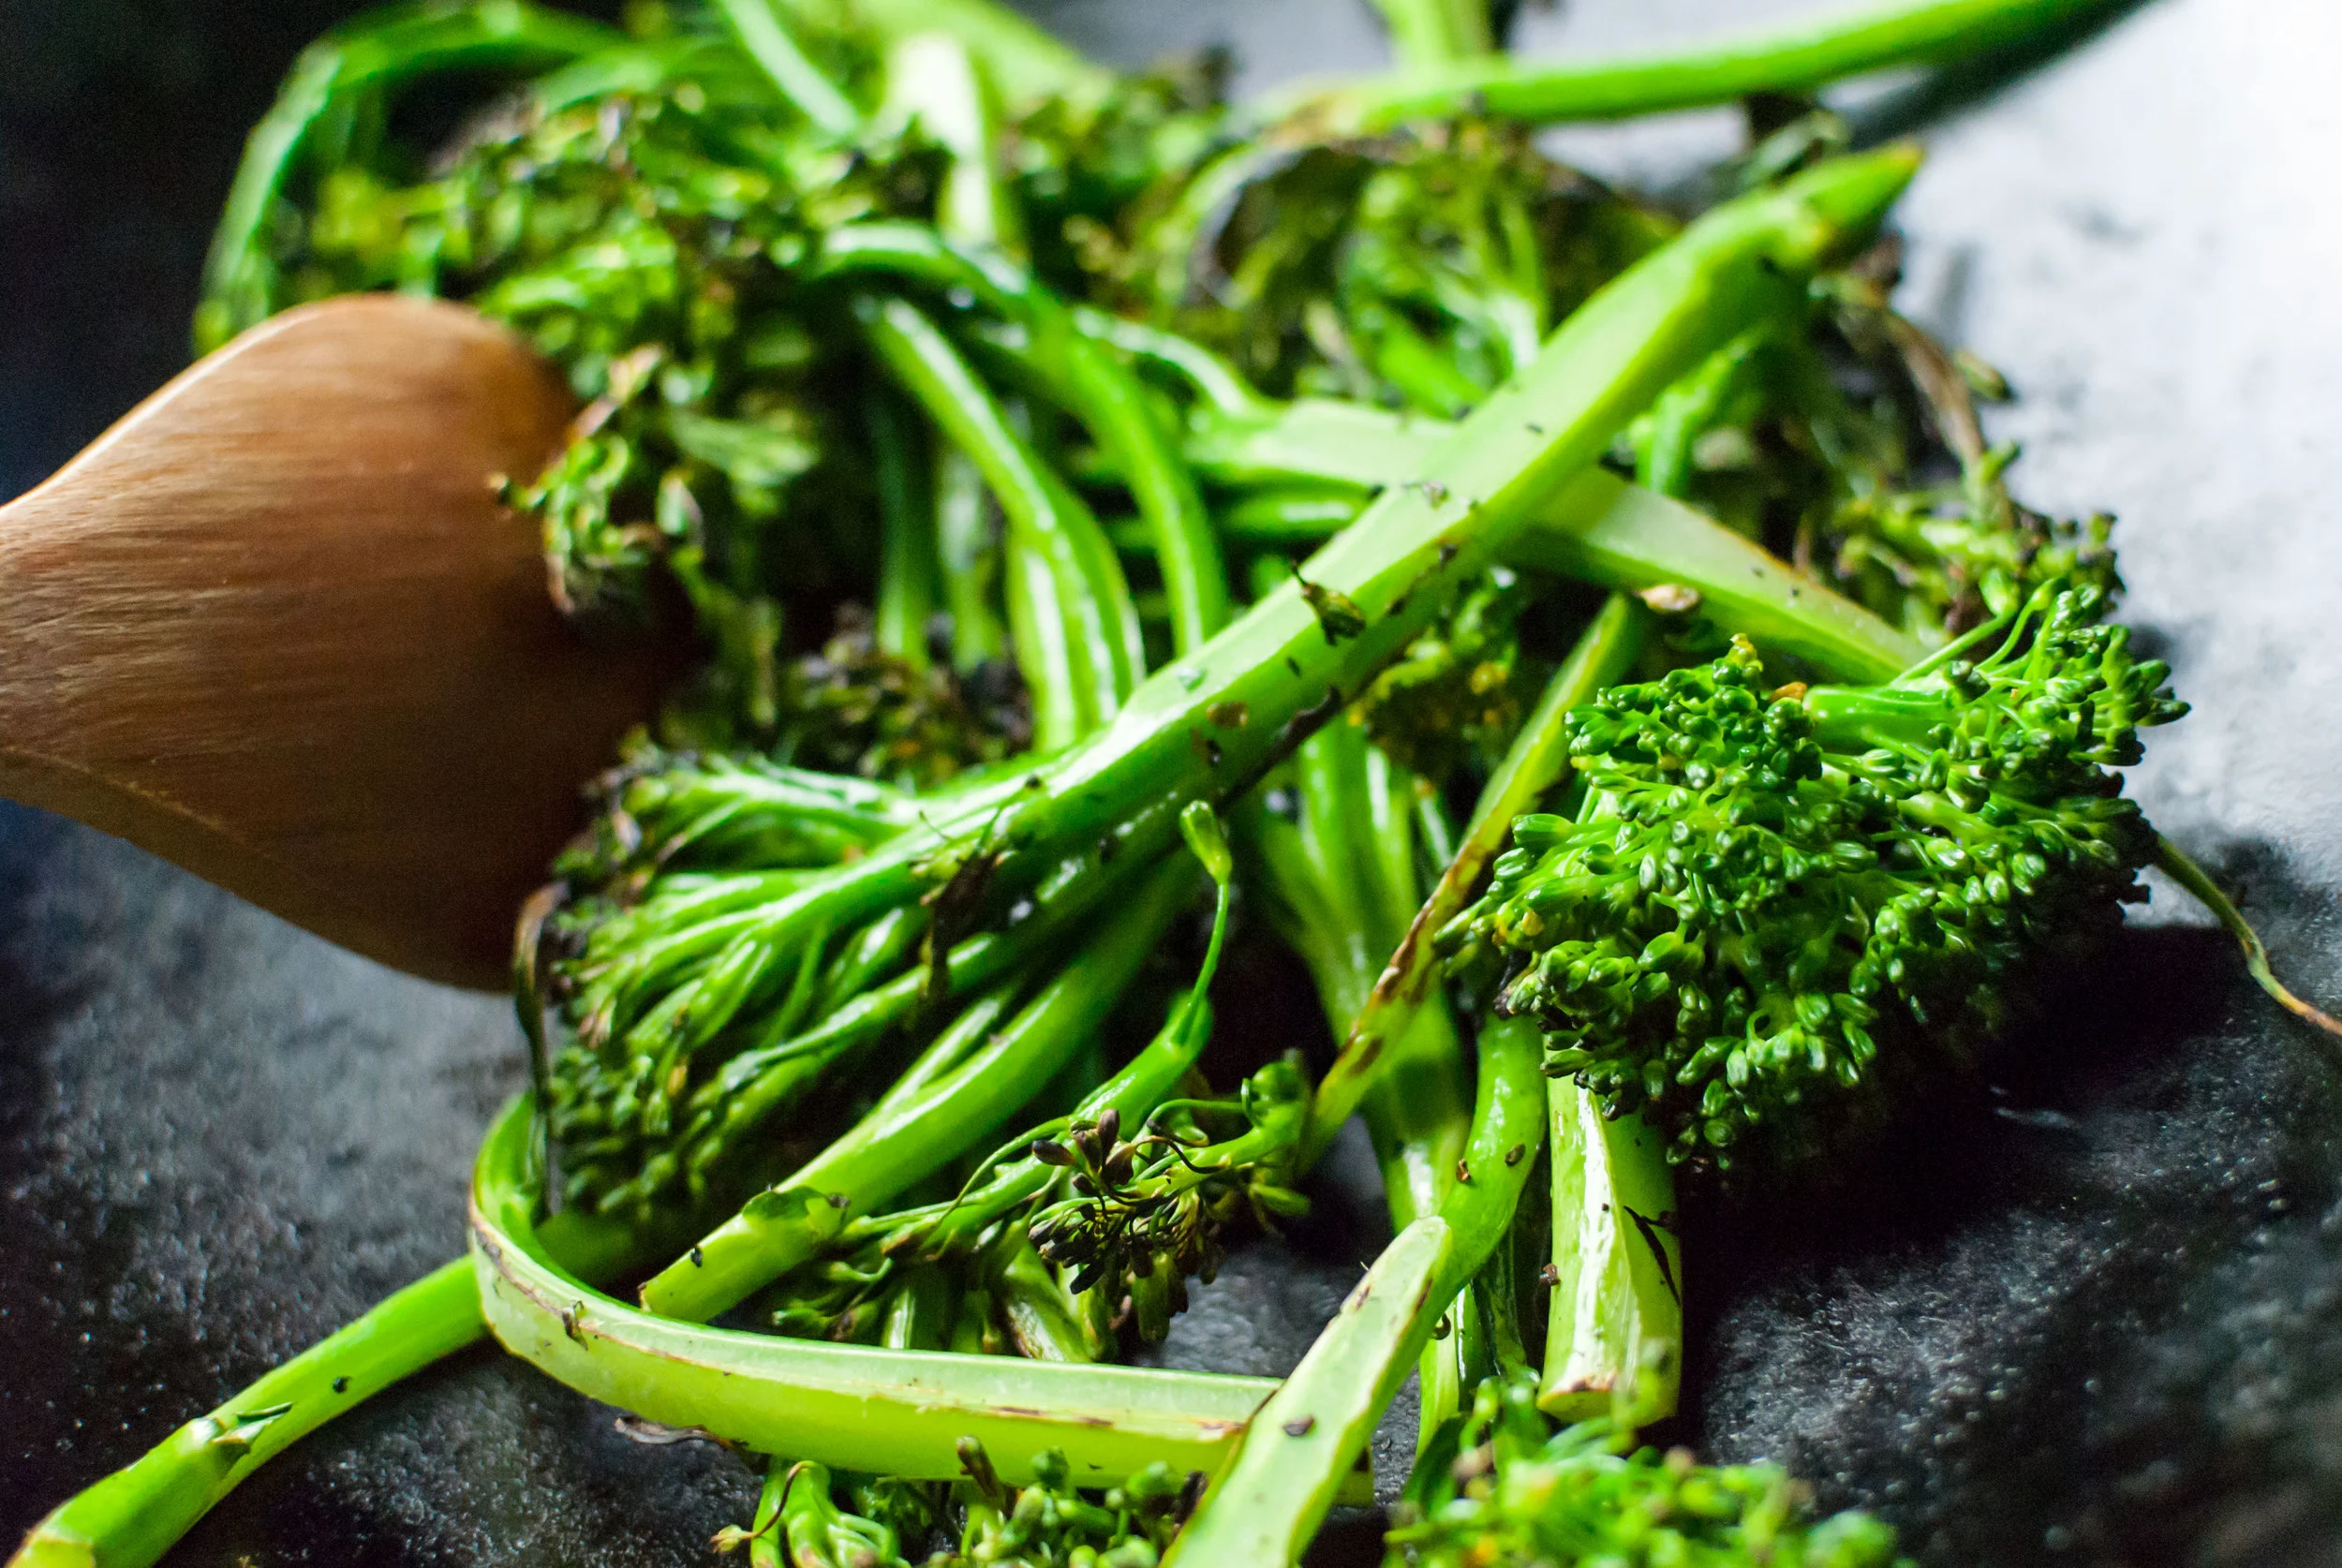
    In a skillet on medium heat, warm ¼ cup of the olive oil until it begins to shimmer. While the pan is coming up to heat, cut your stale bread into 1-inch cubes. Think of it like you’re making some big-ass croutons, because, well, you kind of are. When the oil is ready, add the bread to the pan. It should begin to fry immediately, making a satisfying “deep frying” noise (you know what I’m talking about). If it doesn’t, remove the bread and wait until it gets hotter and try again.

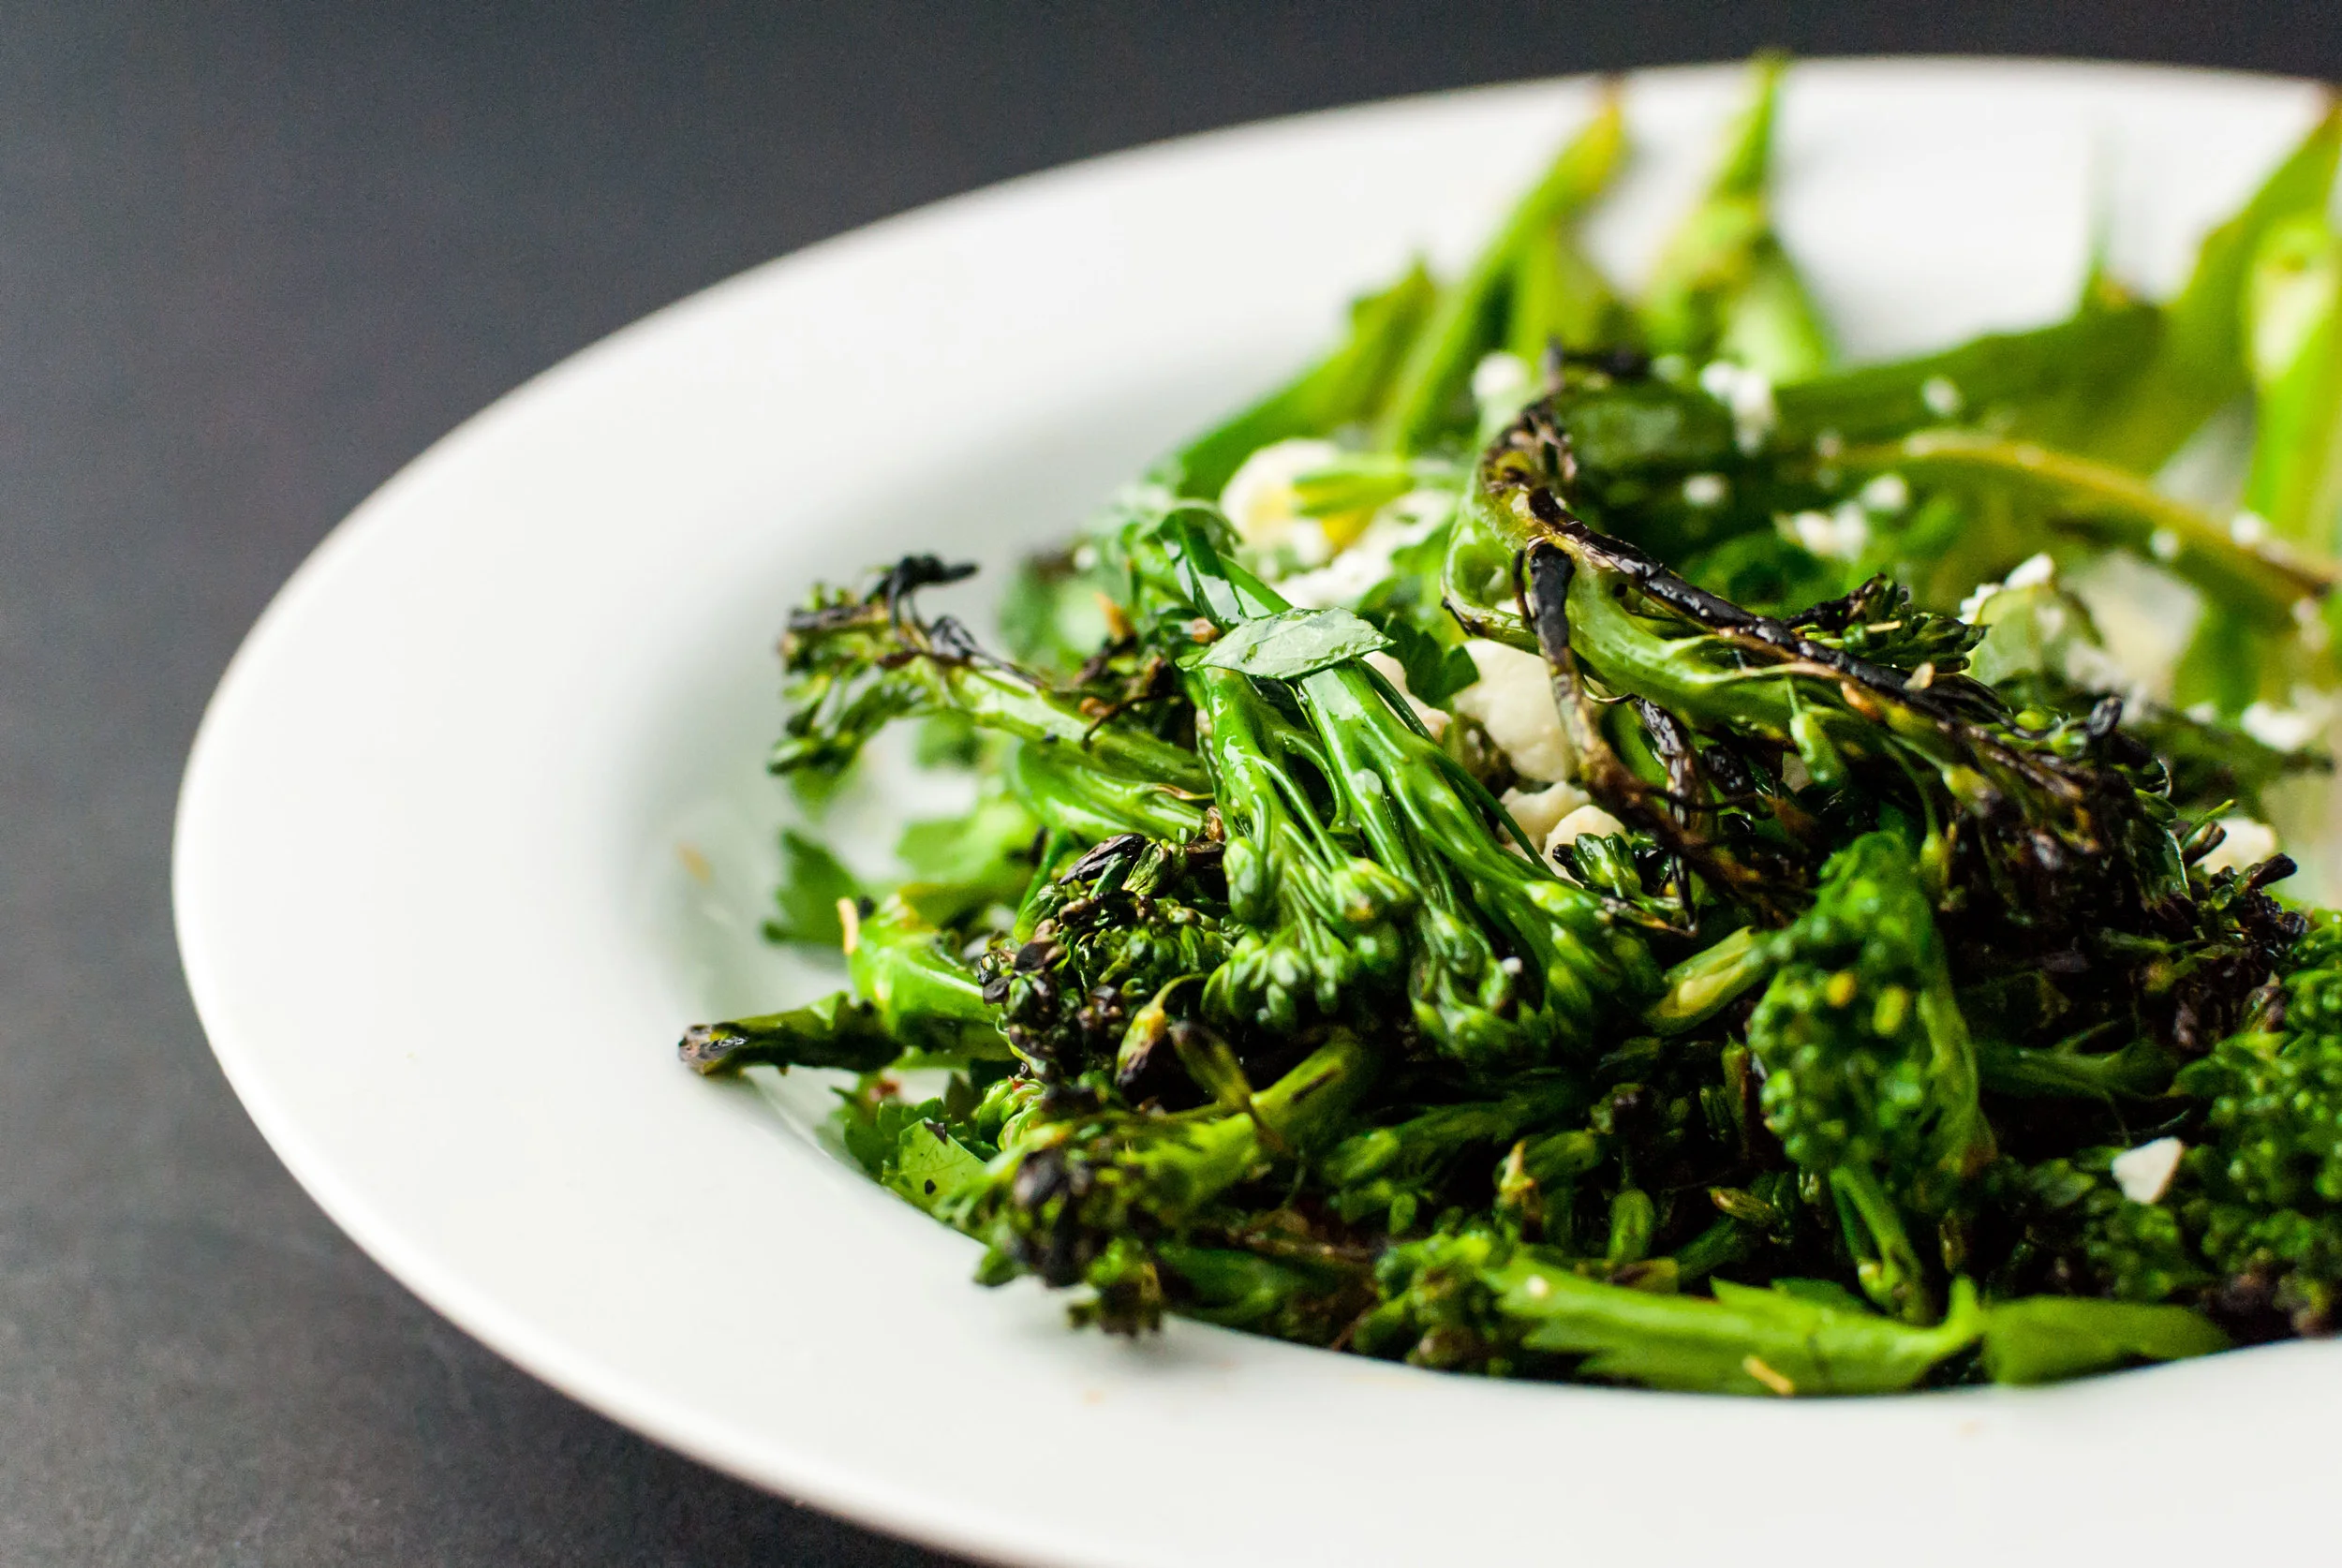
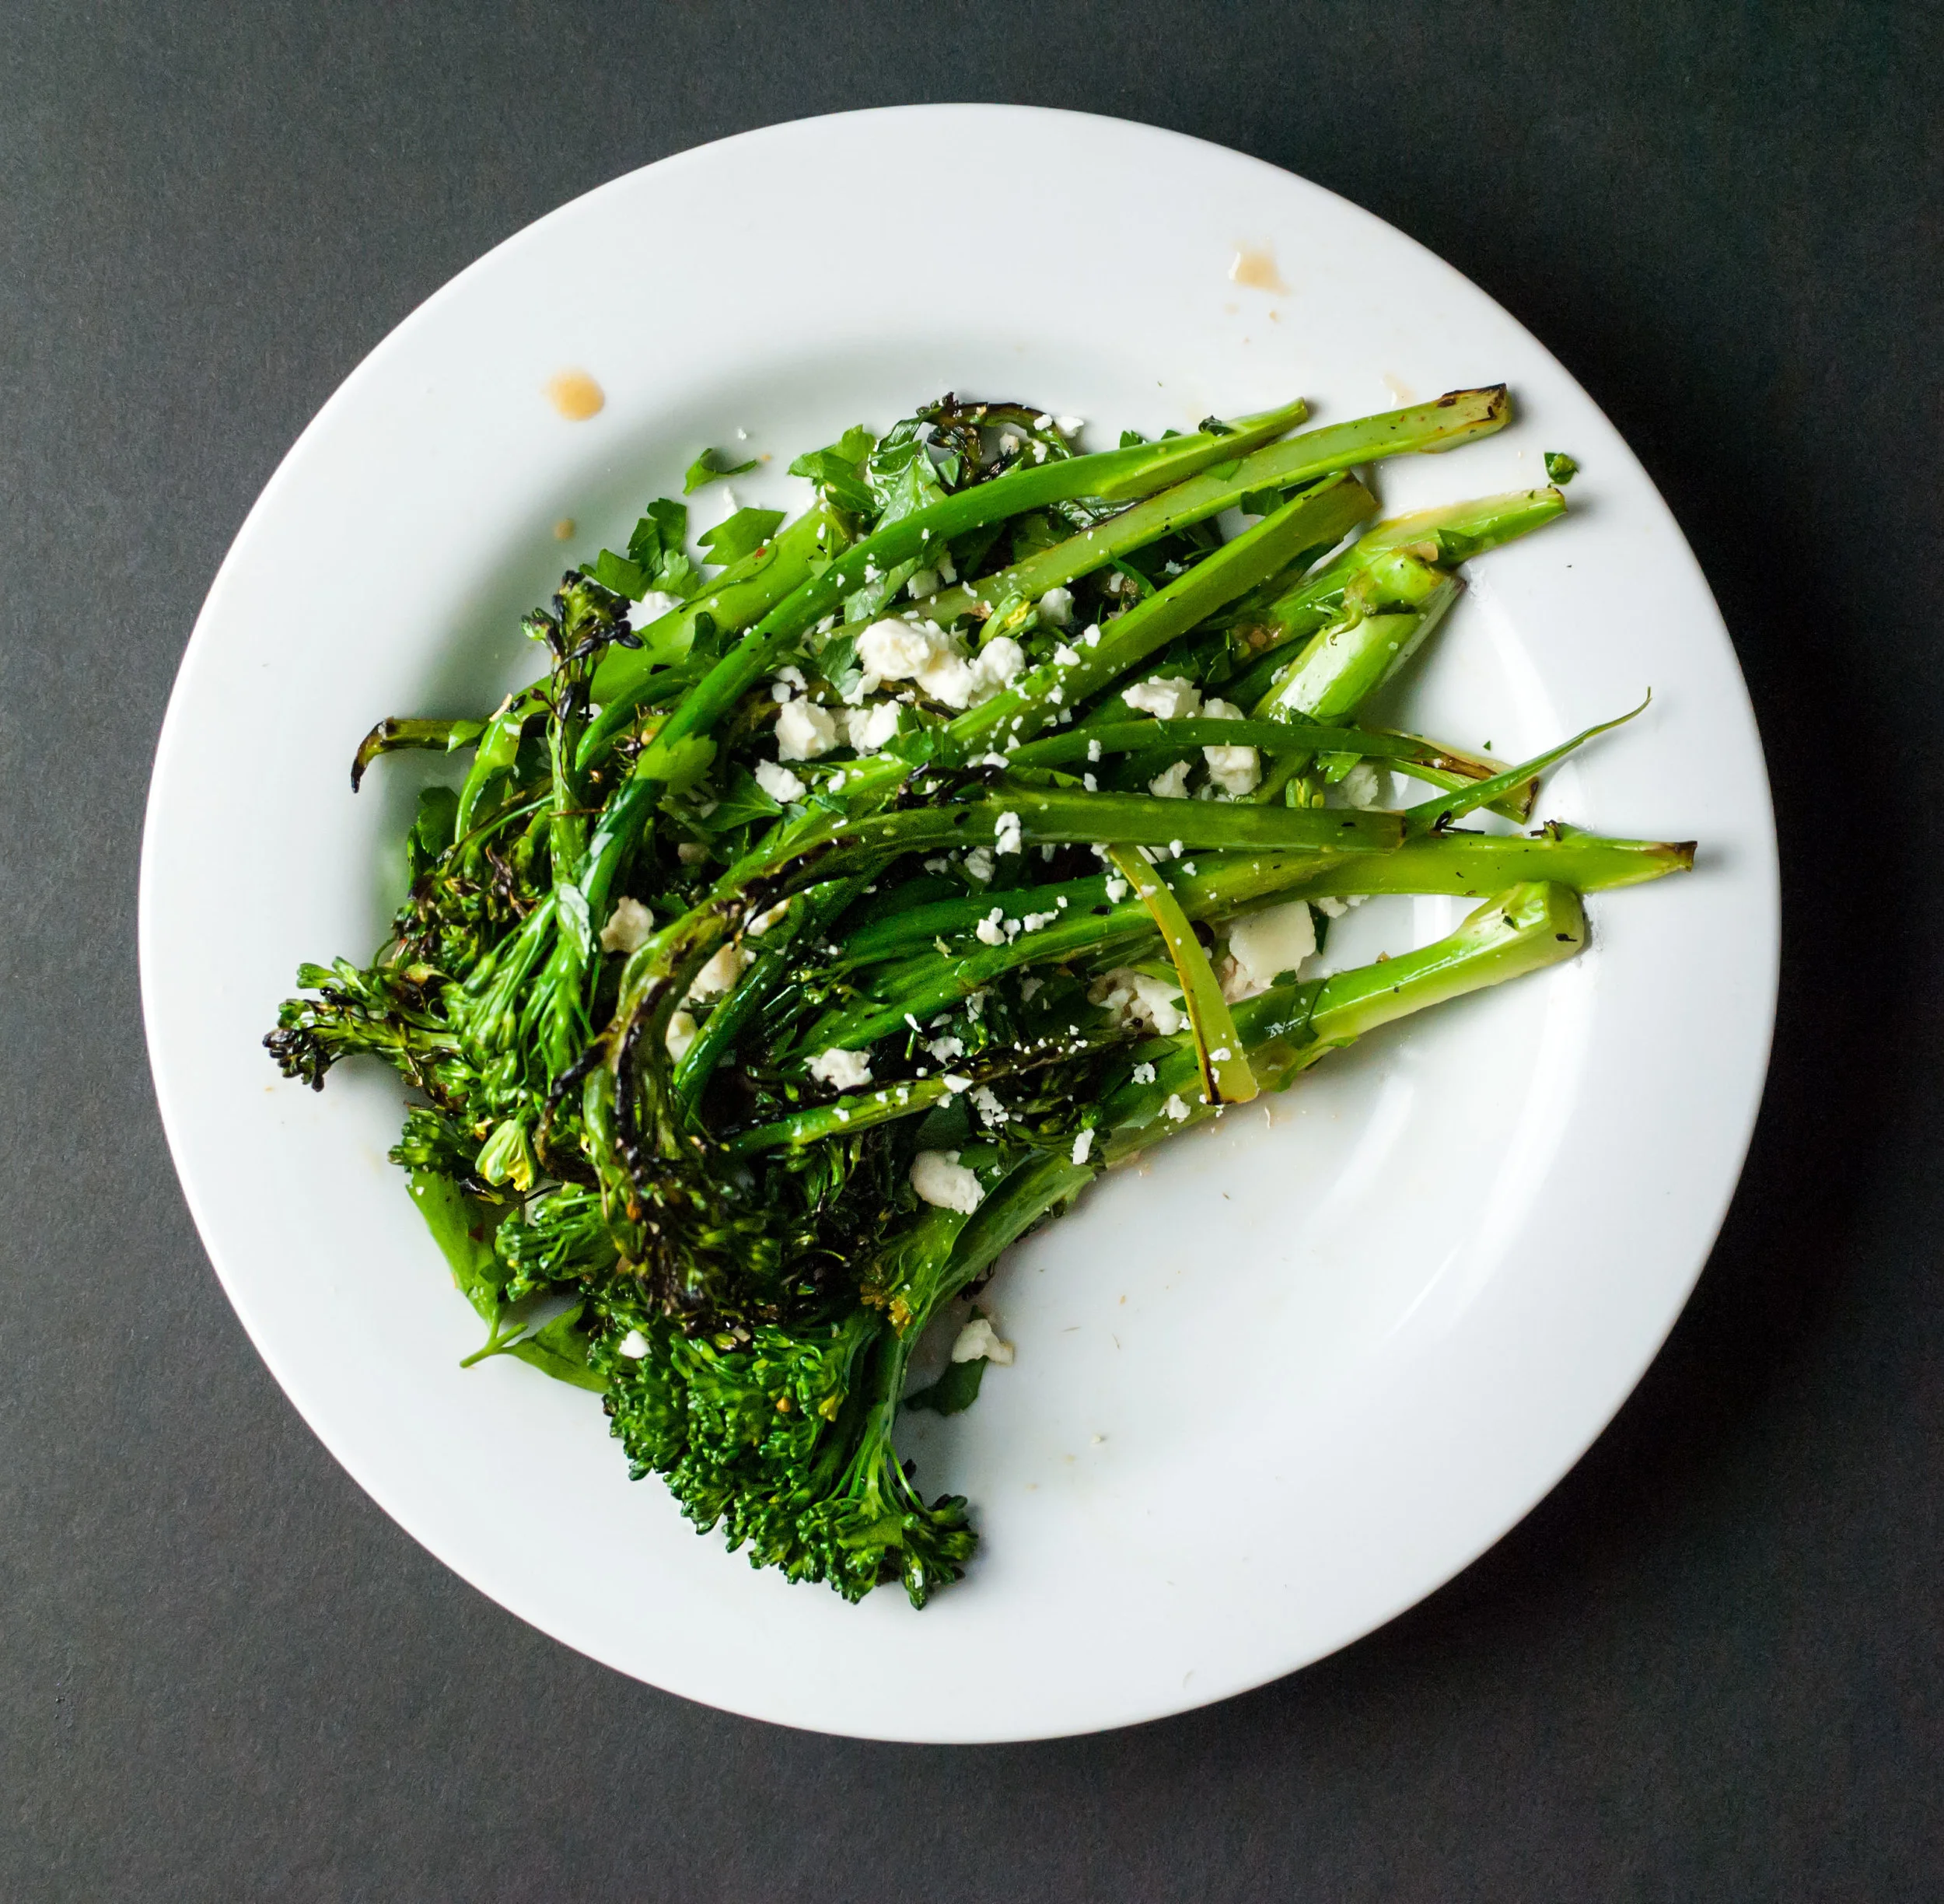
    Fry the bread cubes on all sides, moving them around the pan from time to time. You have a couple options here: fry the bread until it’s golden brown OR until it’s just a little more than that. This will determine the flavor character of your skordalia. Golden brown bread will be a nuttier, milder, and buttery skordalia whereas slightly charred bread will be a more sour, punchy, and smoky skordalia; they both have their place. If you’re using your skordalia as a dip, meant to be eaten more on its own, I’d opt for golden bread since it’ll be milder. If you’re using your skordalia to accompany a meal as a hearty bread sauce component, then I’d do charred bread since it’ll stick out a little bit more. The sourness of the charred flavor bonds with the lemon really nicely, and the smokiness responds really well to meat or roasted vegetables.


    skordalia_01.jpg

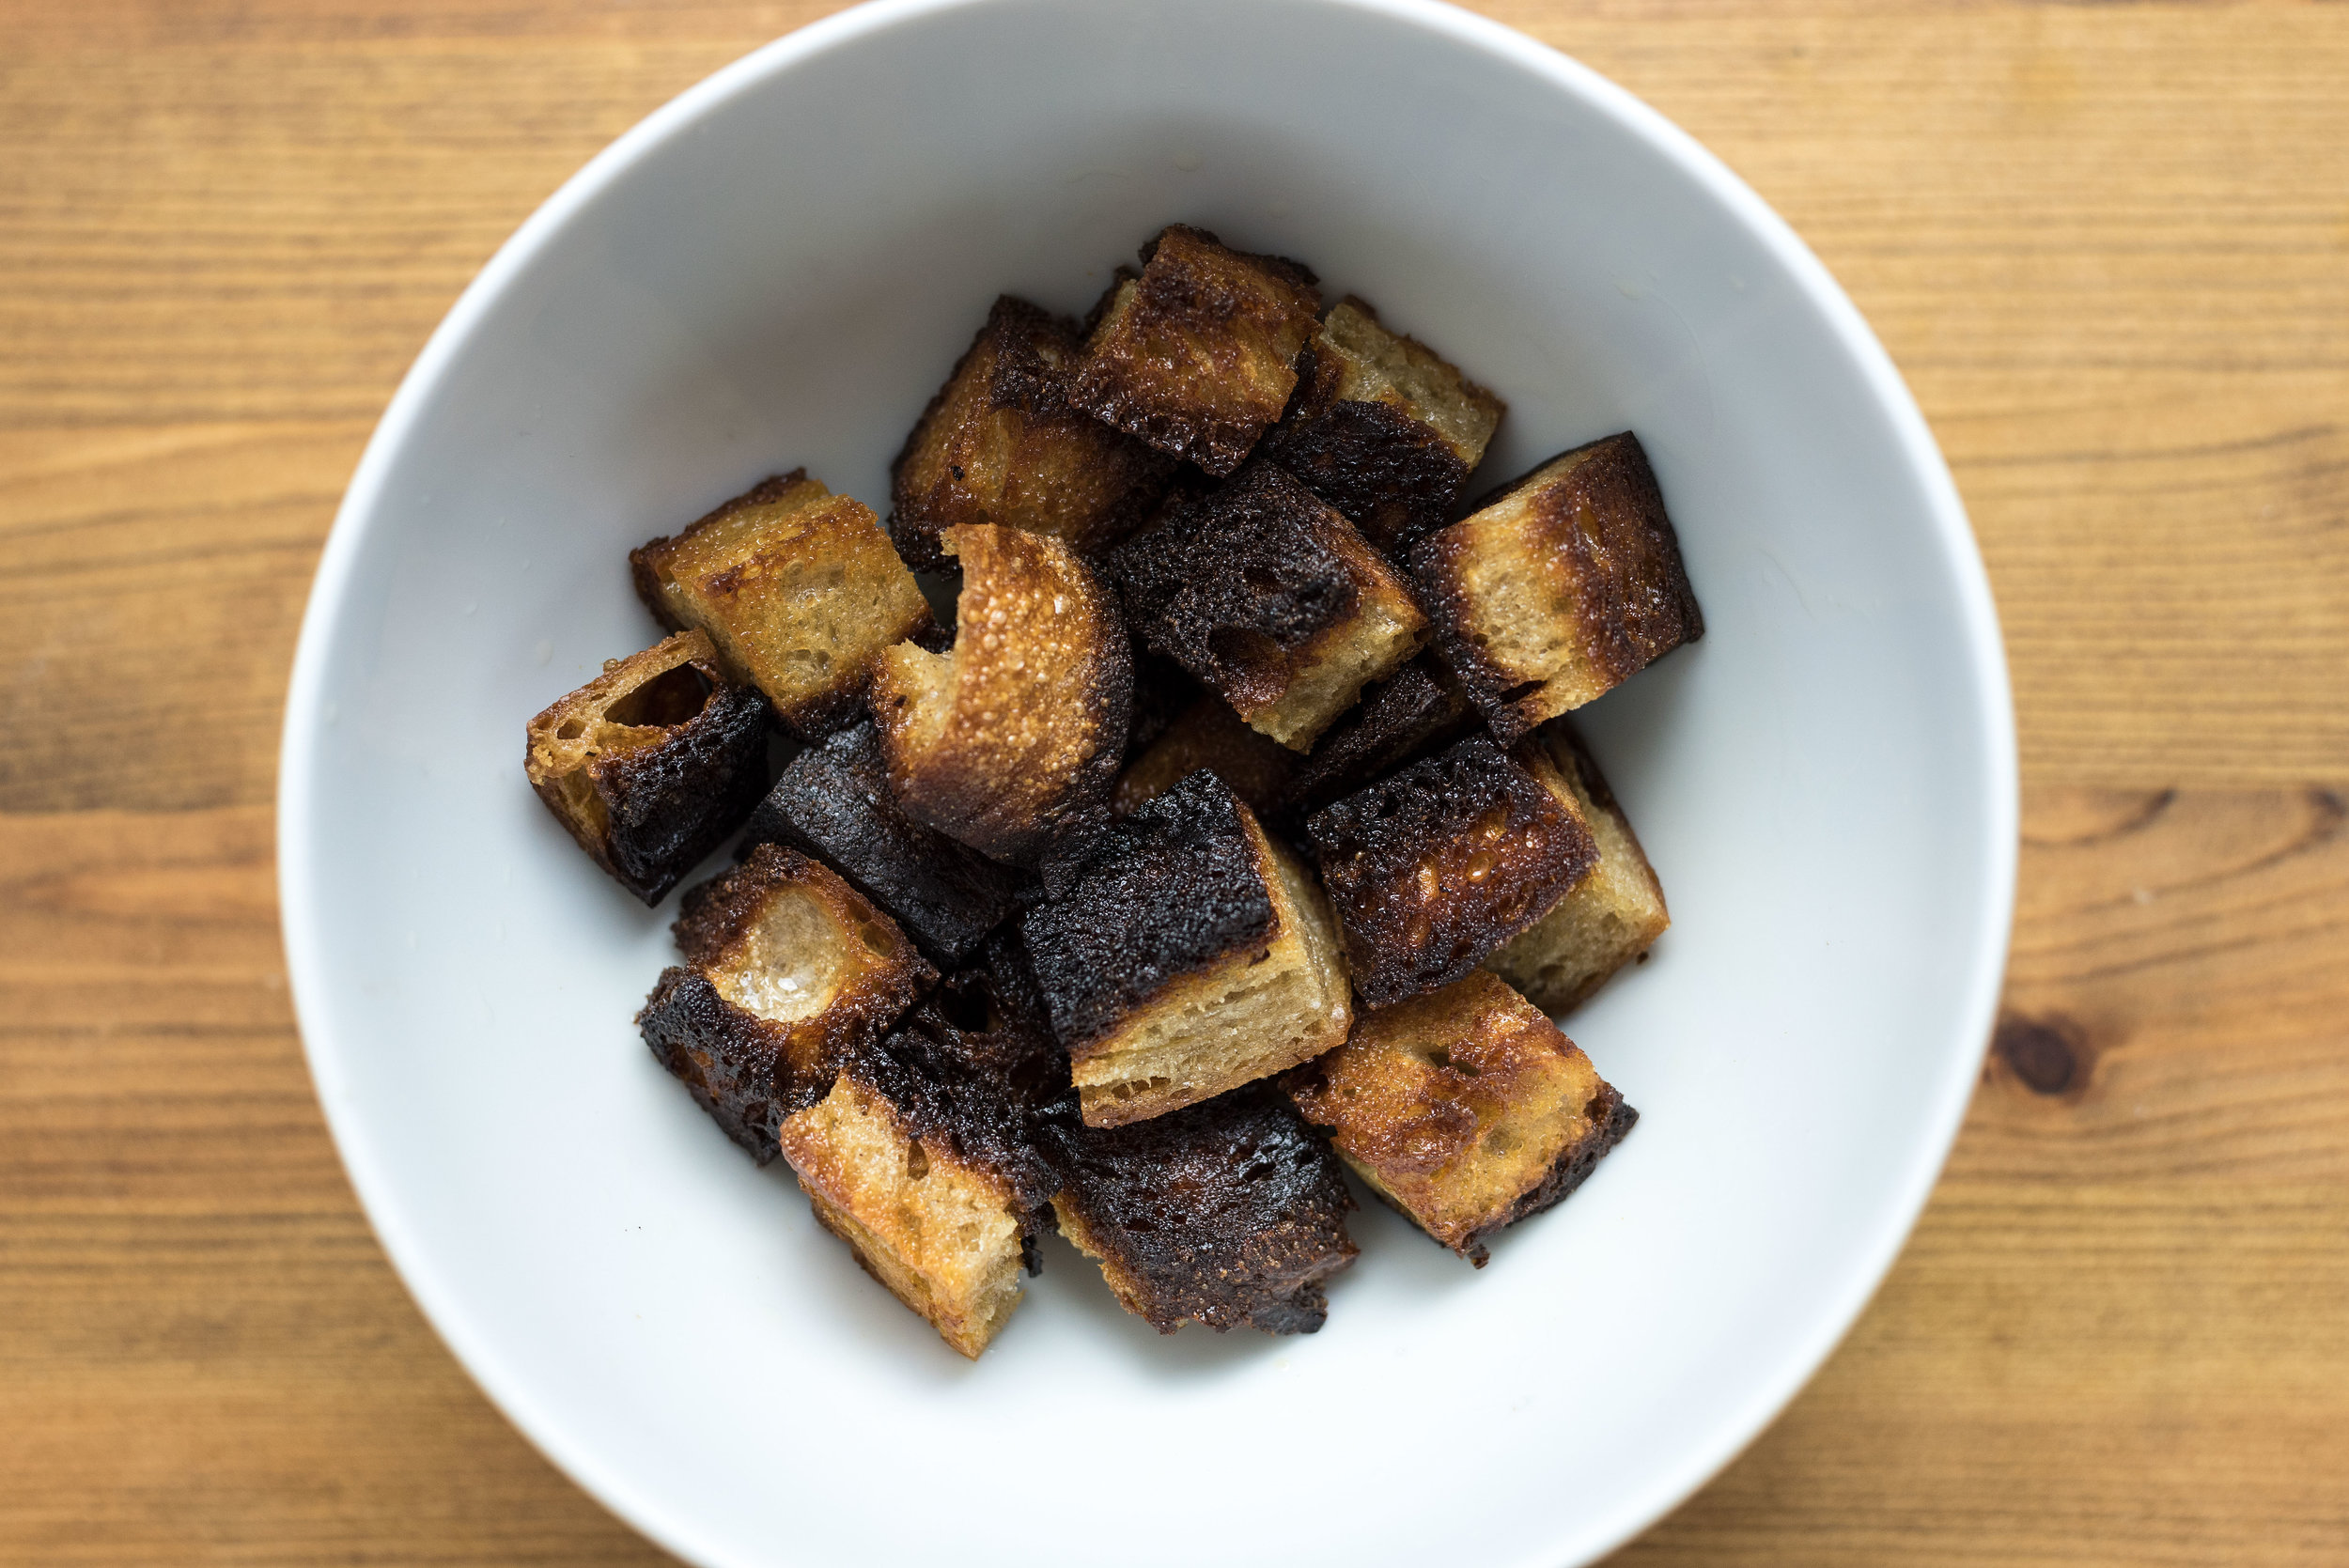
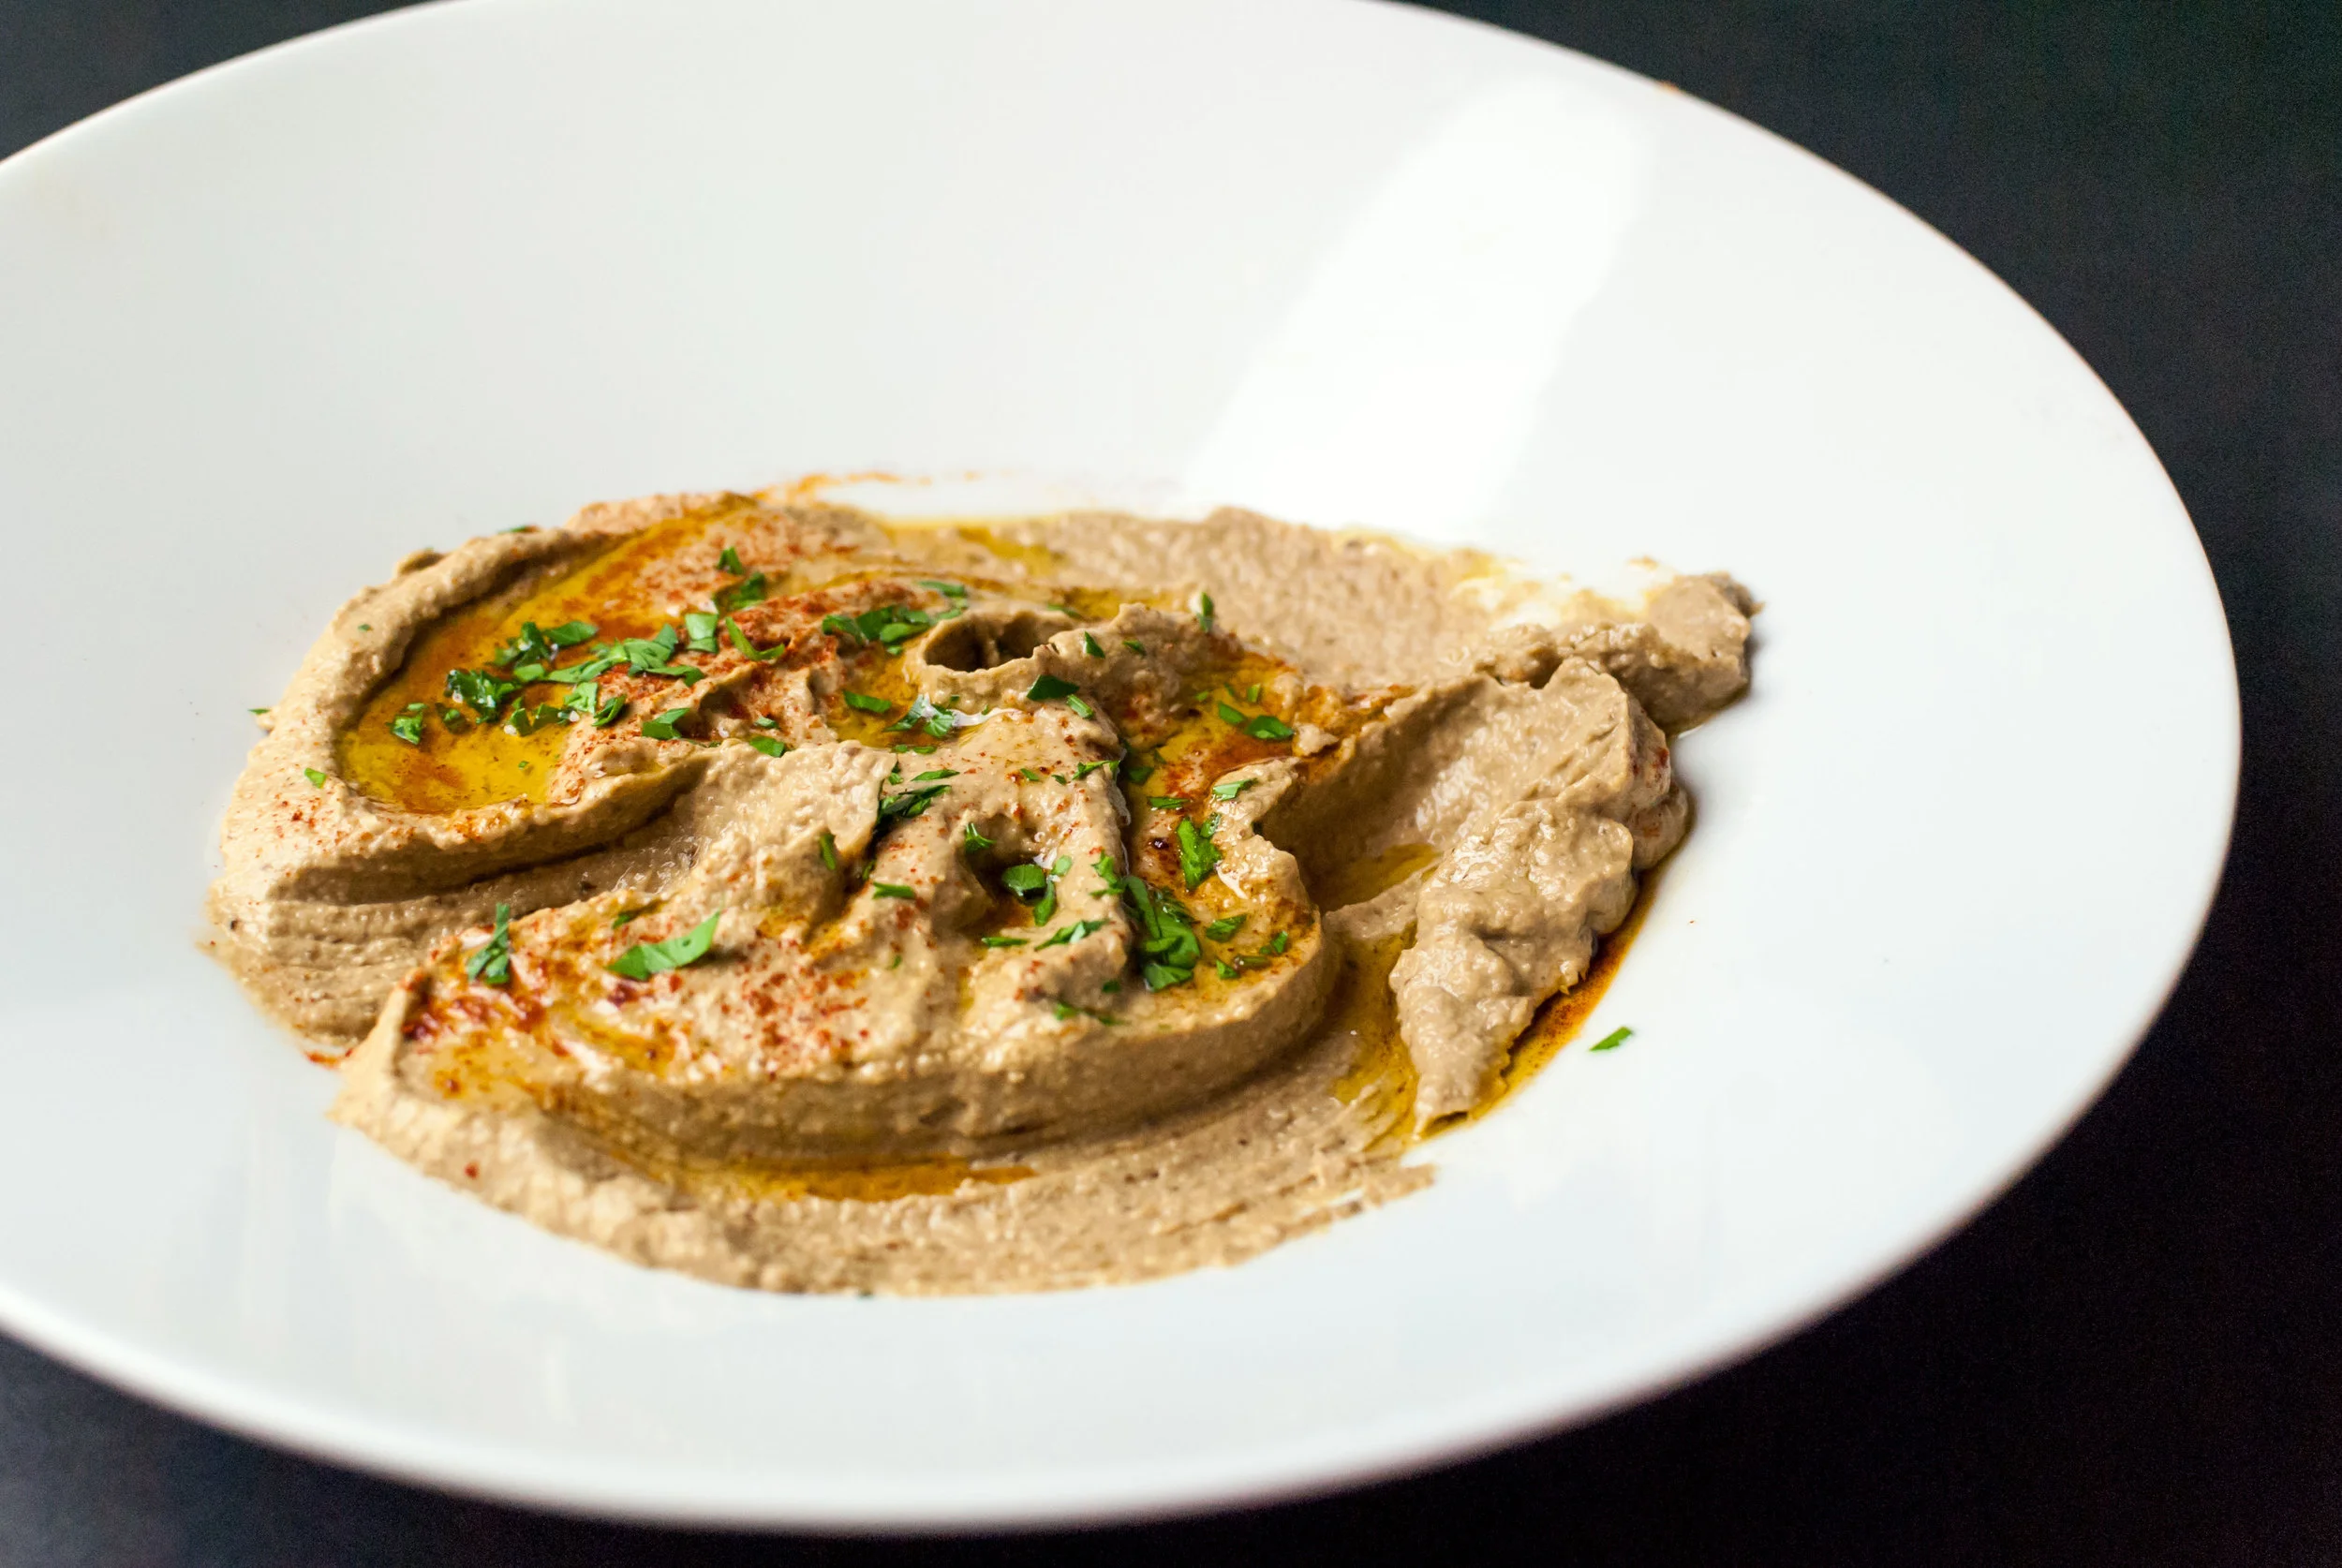
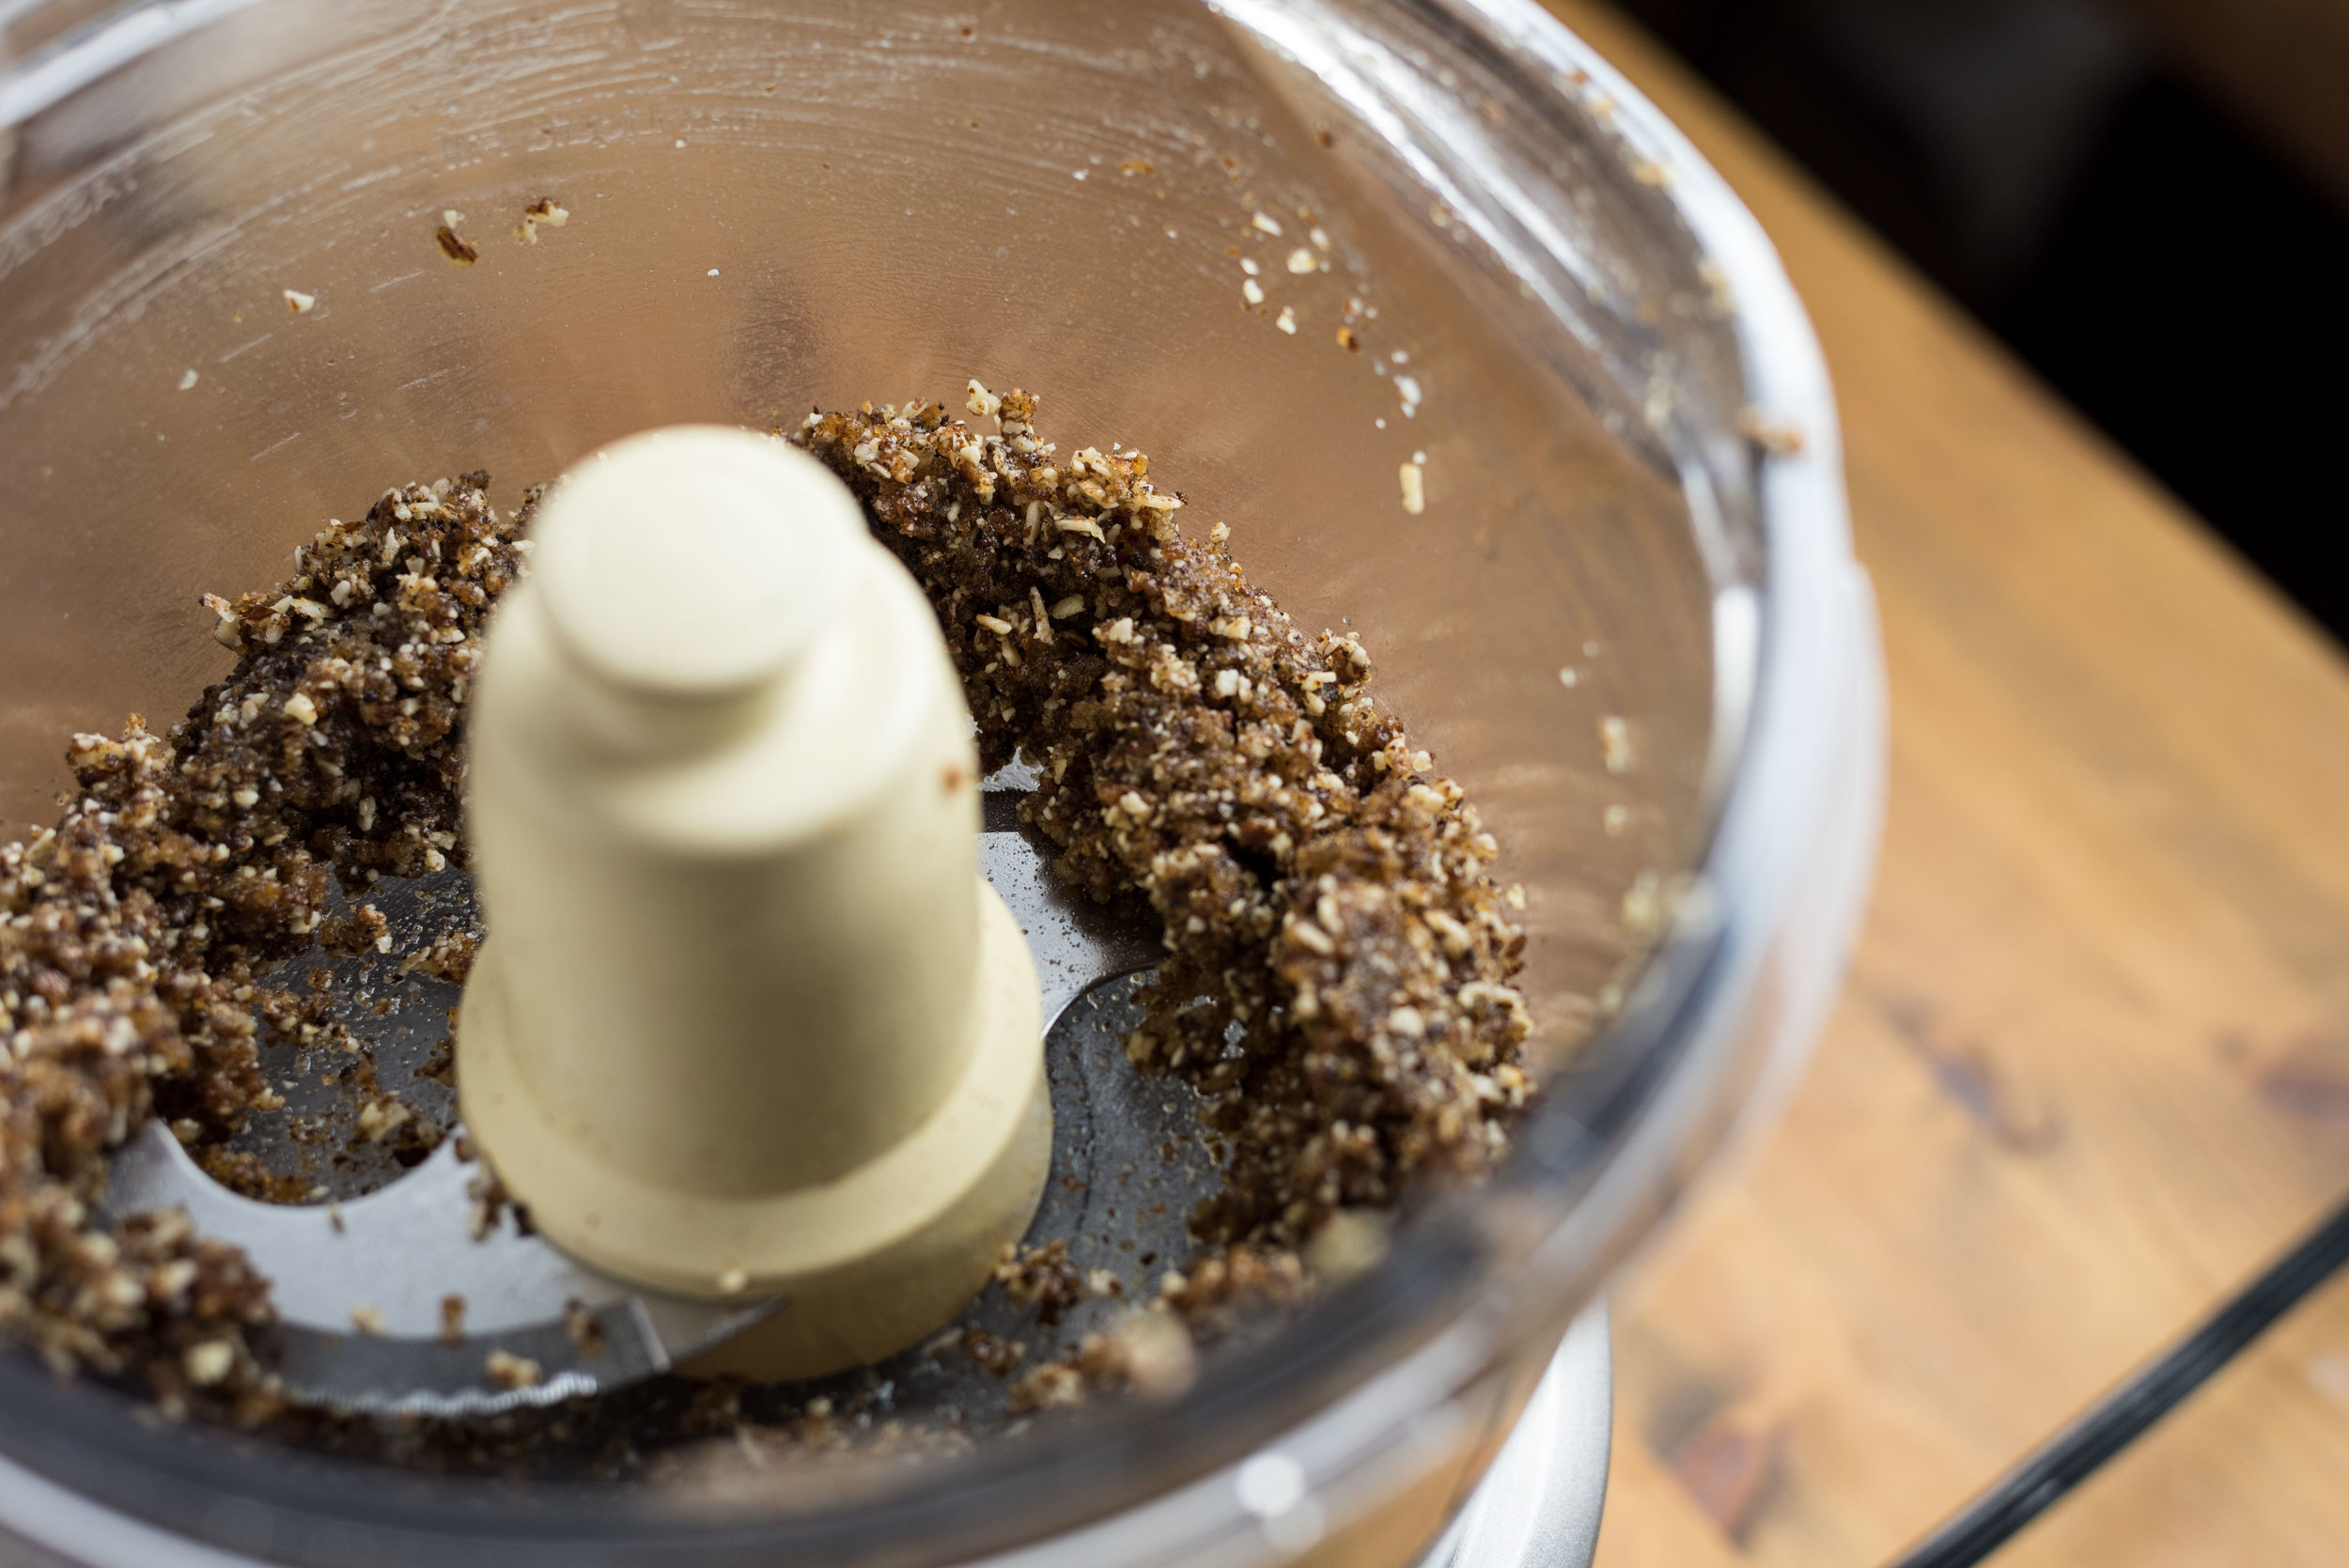
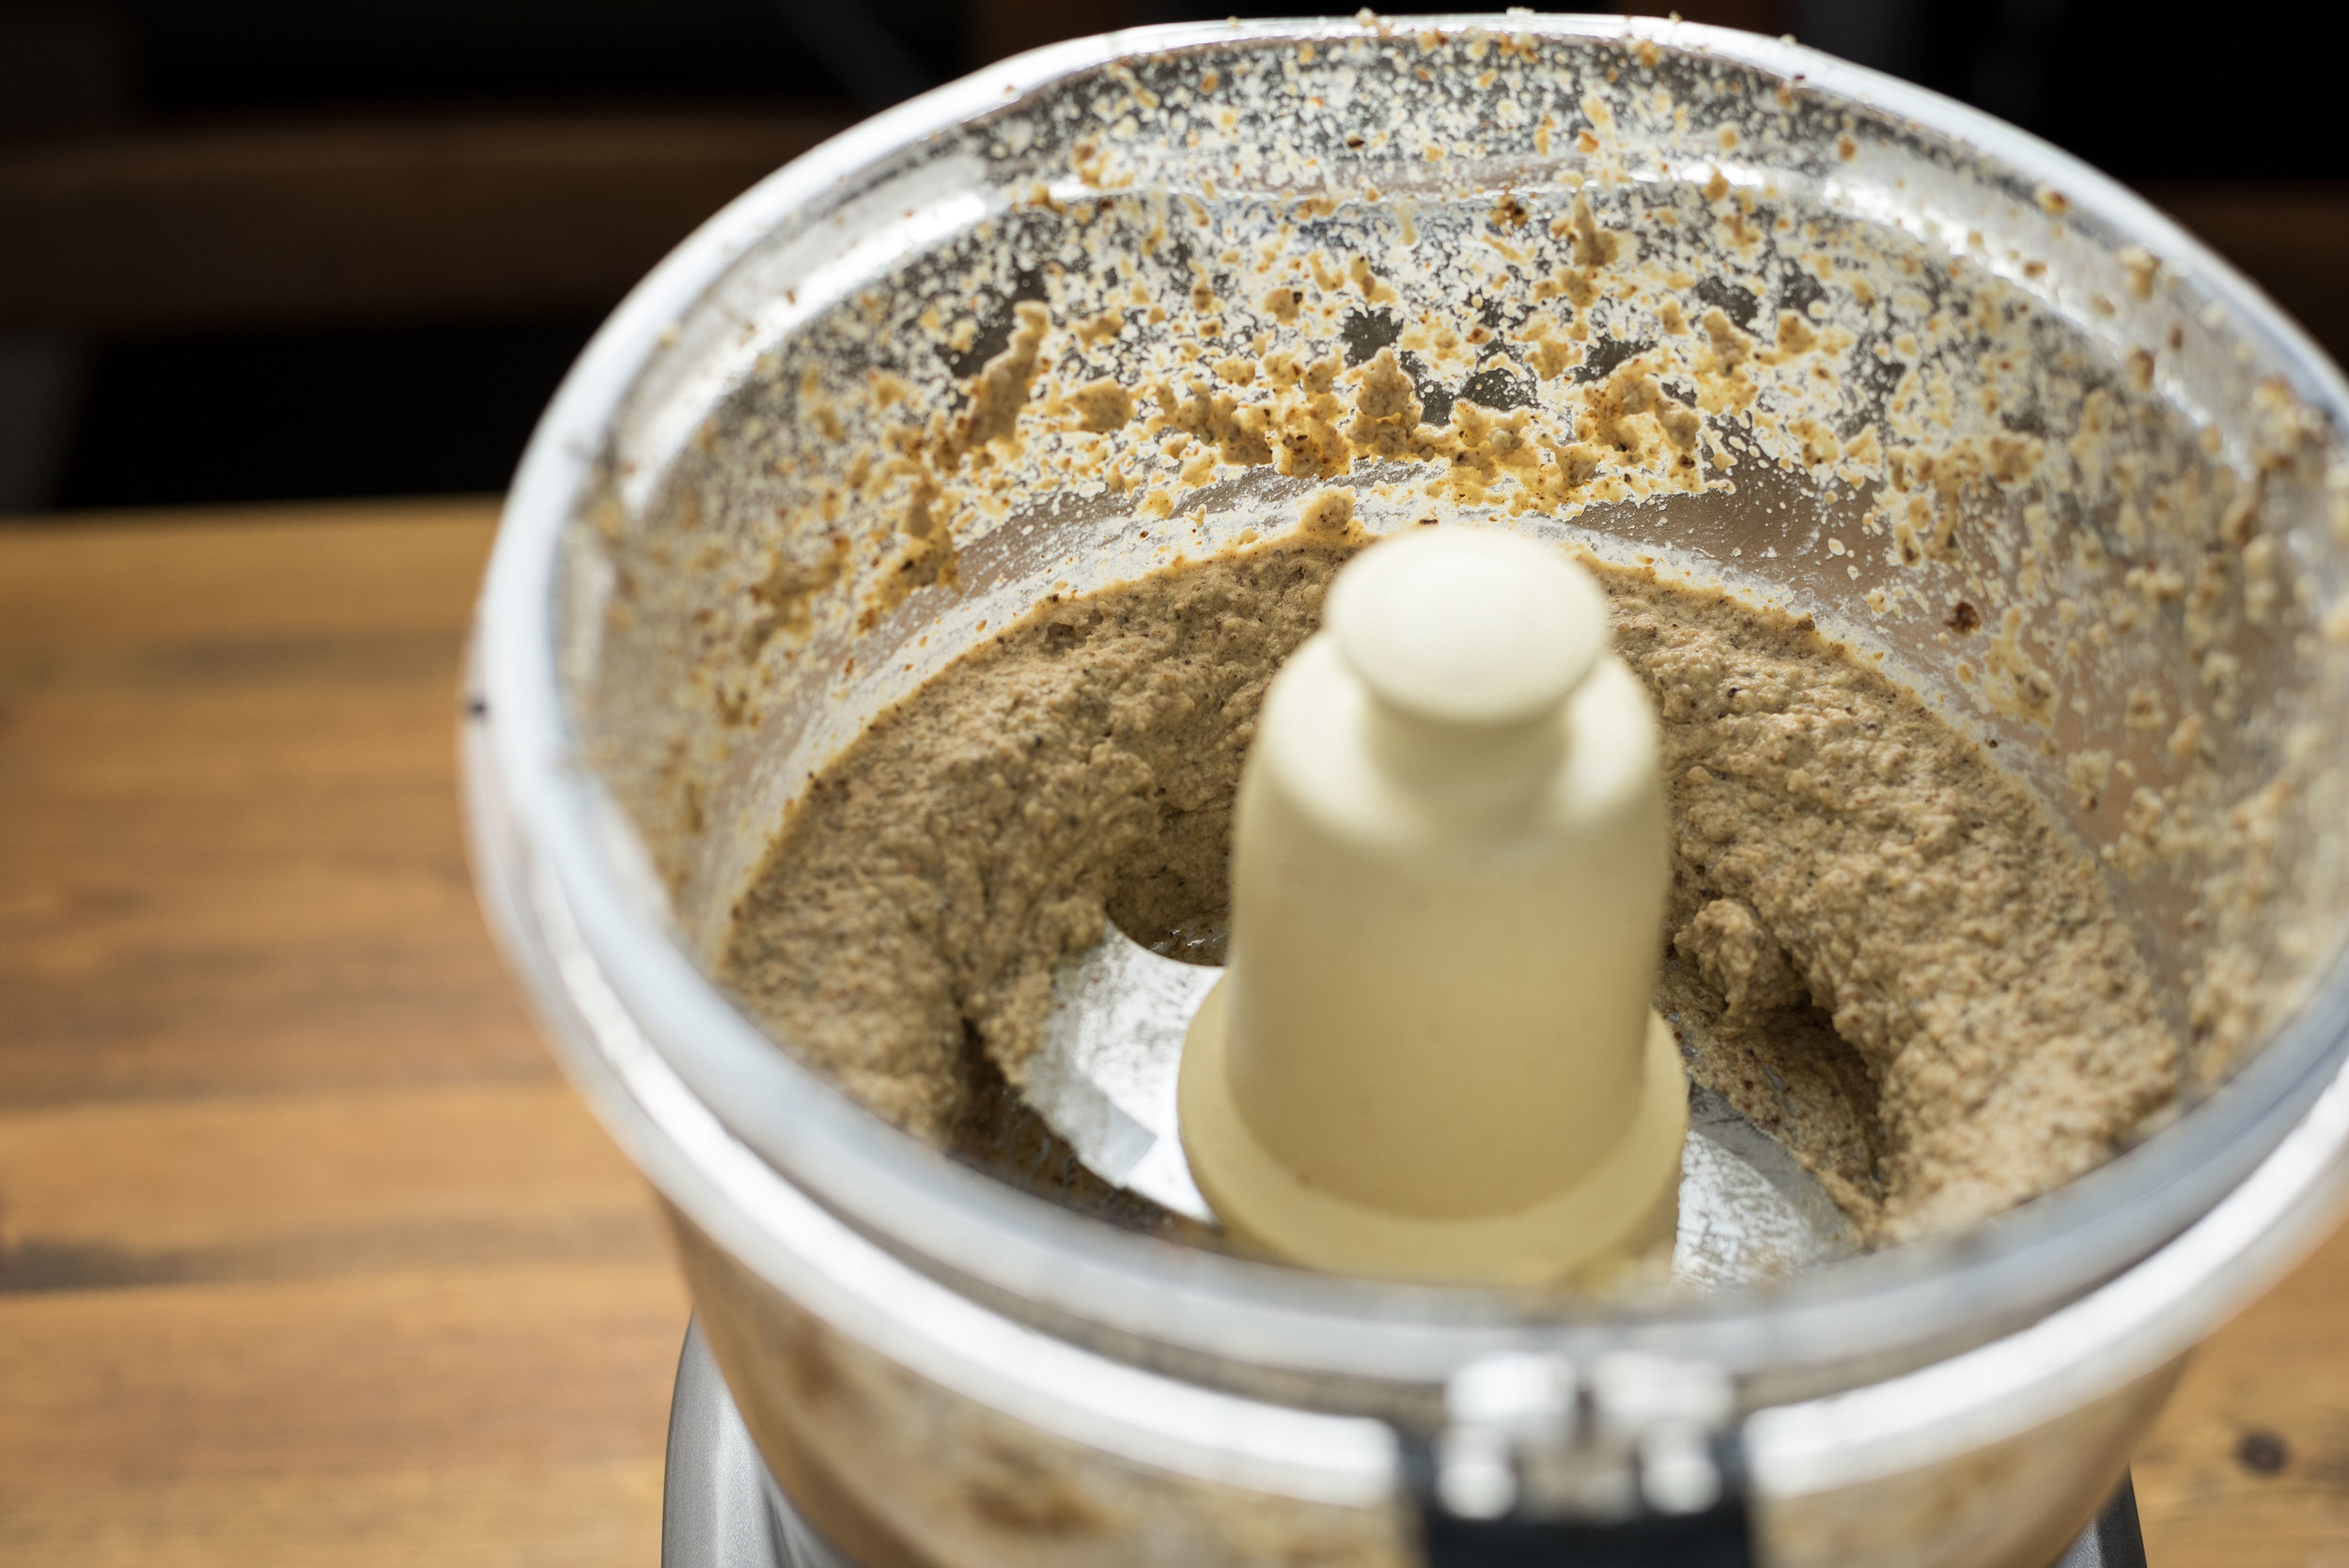
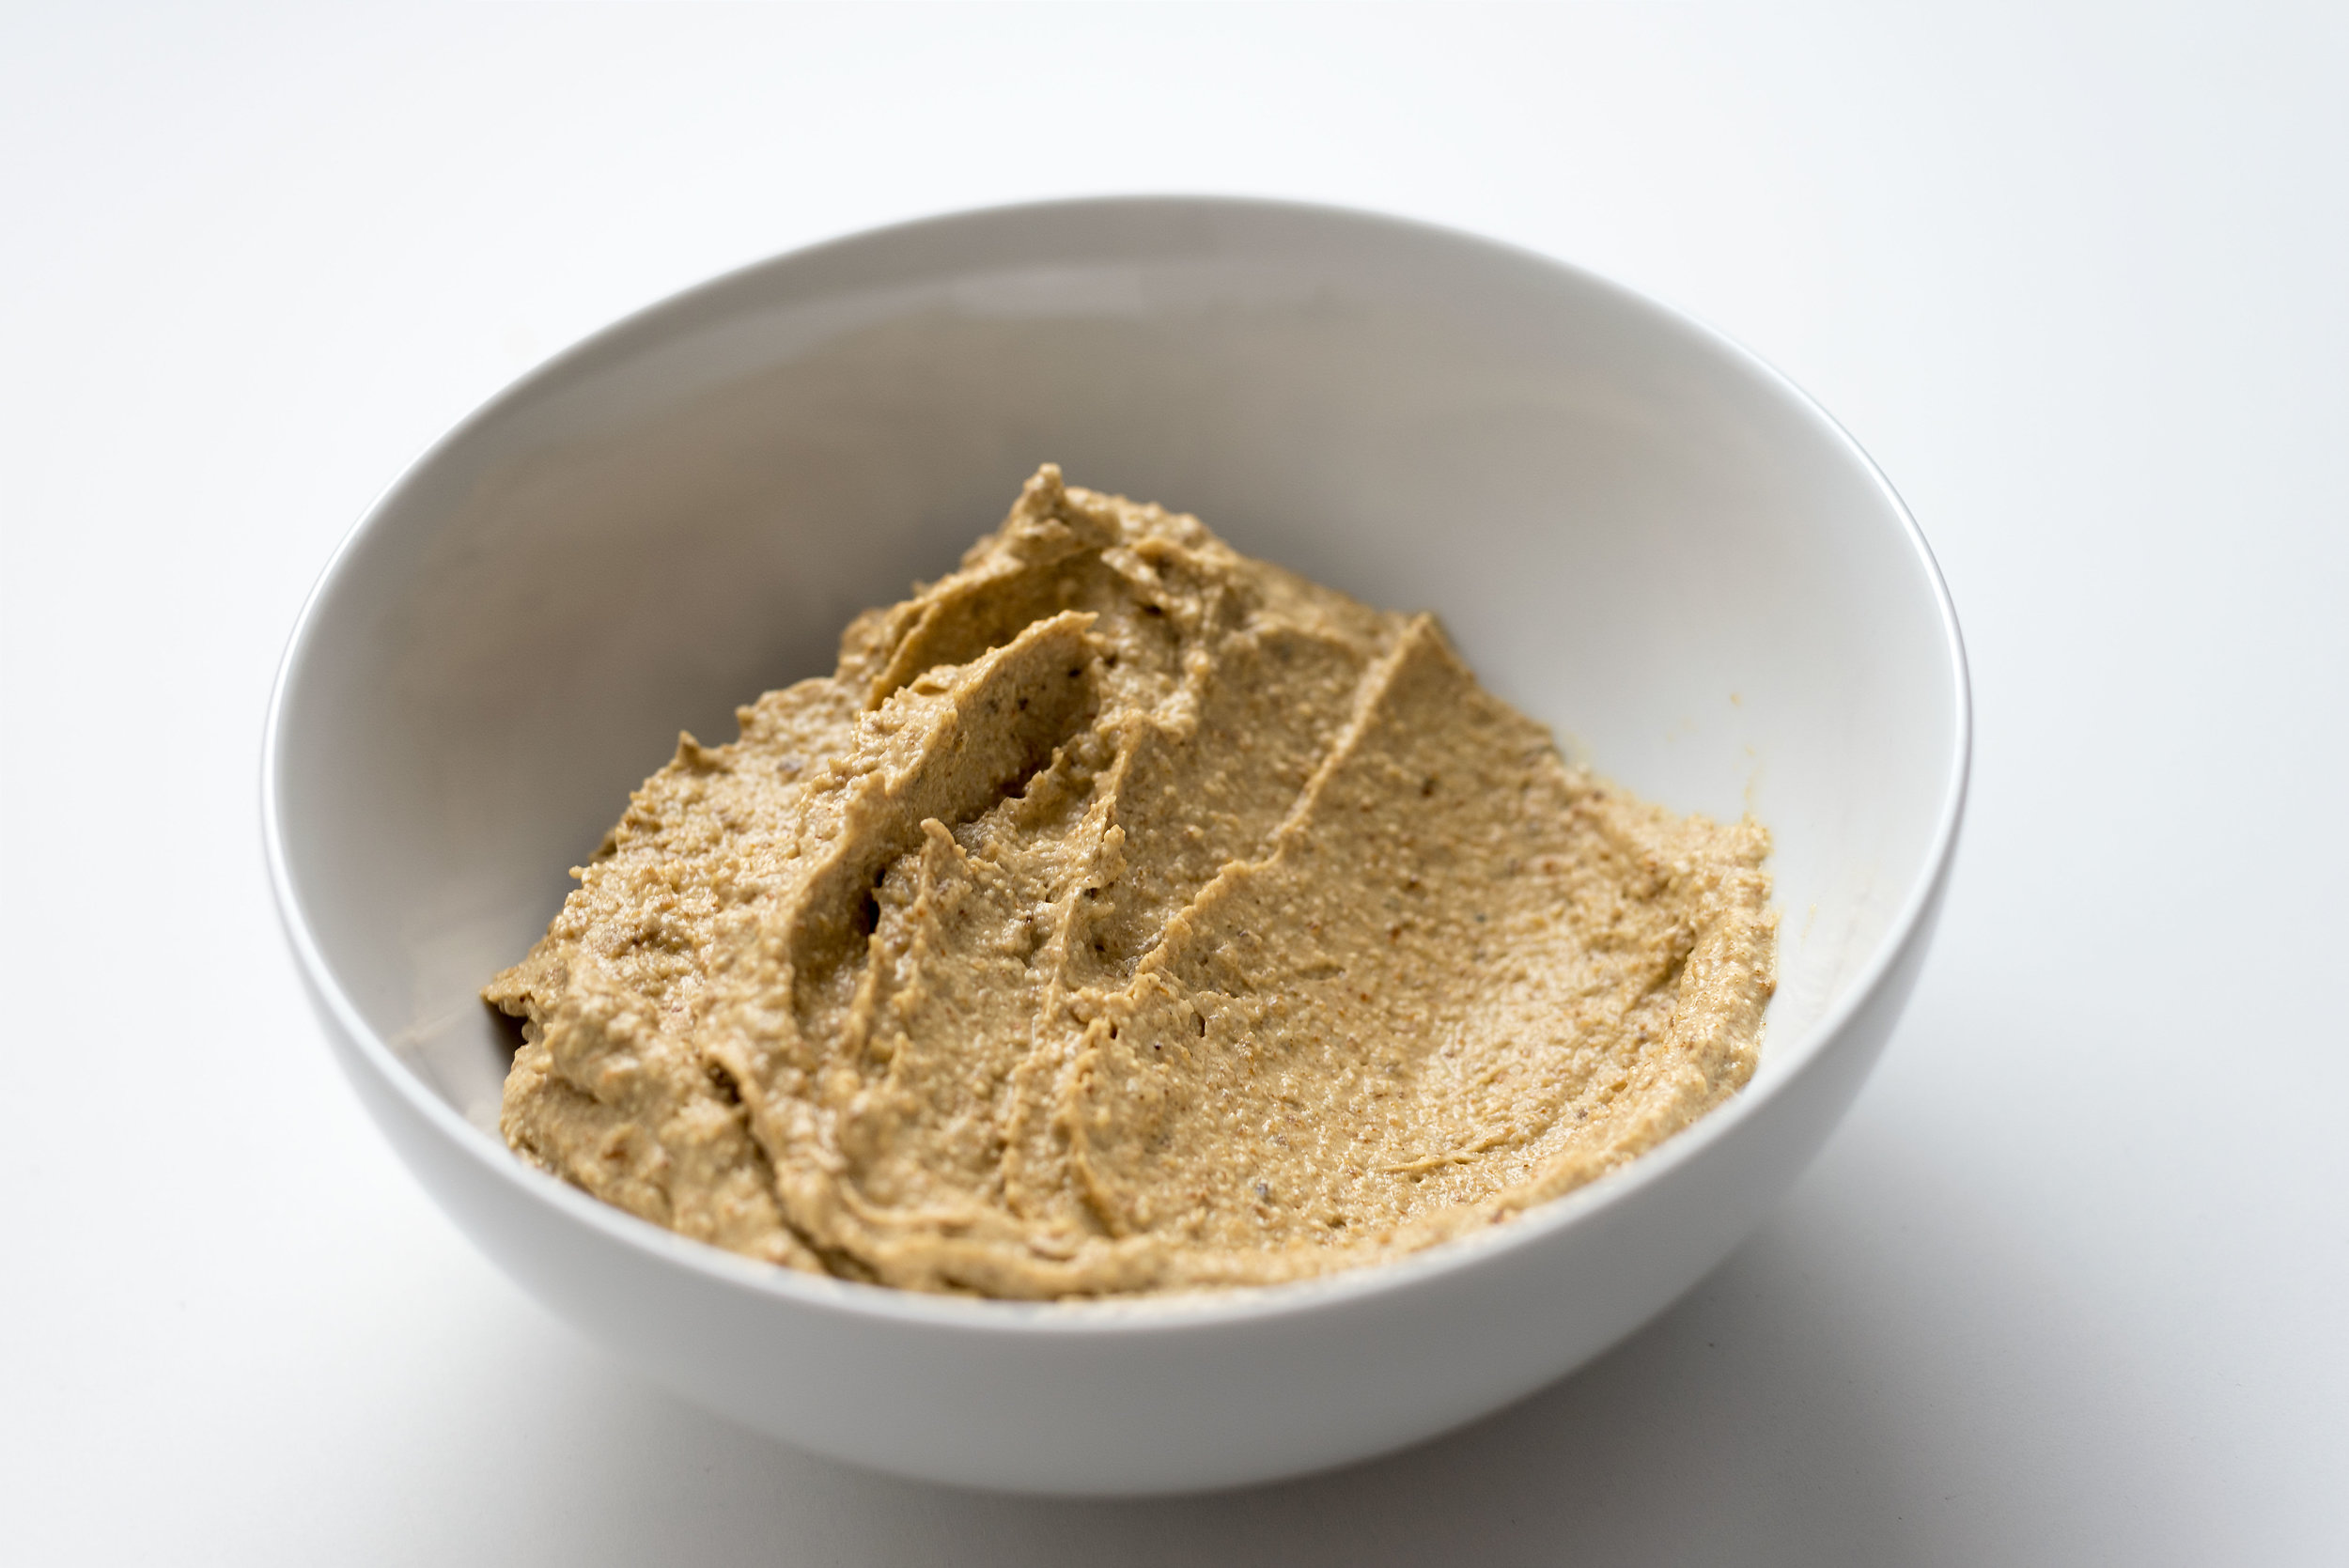
    Once your bread is fried to your desired shade of sexiness, remove it from the pan and add it to a food processor or blender along with all the remaining oil in the pan, the garlic, and slivered almonds. Pulse the ingredients to break them down, scraping the sides of the bowl frequently, then give it a good long blend to get them as fine as you can. While the ingredients are whirring away, consolidate the remaining ¼ cup of olive oil, water, and lemon juice into a vessel with a lip so you can slowly pour it out in a steady stream without making a mess. Through the opening at the top of the food processor or blender, slowly add all of the liquid, allowing your skordalia to loosen up and emulsify. You’ll probably need to let it blend on its own for a minute or two afterwards to break down the last few chunks. When finished, your skordalia should be smooth and resemble hummus. Salt your skordalia to taste and pulse to incorporate. Serve immediately or store in your fridge for up to two weeks.

    Side note: if you’re taking your skordalia out of the fridge to use for later, we’d recommend having it come up to room temperature on its own as opposed to microwaving it, since the application of heat really alters the fresh lemon juice flavor. That being said, don’t let that stop you from adding a dollop of this goodness to a lunch on-the-go that you’ll heat up at work or wherever you go later. It’ll still be delicious, just know that it’ll be a little different. The garlic flavor will come out more and the lemon will play less of a role.


    skordalia_07.jpg

    Yield: about 2 cups

  • Smoky Baba Ghanouj


    The baba ghanouj recipe is a little nod to the only Middle Eastern restaurant from my Oregonian hometown of Coos Bay/North Bend, simply named Cafe Mediterranean. My family is reasonably certain that when they first opened that we generated a venerable chunk of their revenue. Back in the early 2000’s, living in such a small town, we hadn’t really ever been exposed to food like that before, and it was such a welcome influence that it sent us on a mezze kick in our own kitchen that lasted for years. They had a strong menu, but for us, the star of the show was their baba ghanouj. One day, we asked for the recipe, and they graciously revealed the secret ingredient that made it so addictive: a little kiss of liquid smoke. It ties everything together so nicely, opening up a larger dialogue between the eggplant and the garlic.

    Since then, we’ve tweaked it to make it our own, for instance, roasting the eggplant longer for a deeper flavor and adding a lot more garlic. We also boost the smoky flavor by garnishing the dish with a little dusting of smoked paprika.


    Smoky Baba Ghanouj:

    • 1 large eggplant, halved
    • ¼ cup tahini
    • 4–5 cloves garlic, crushed
    • 1 teaspoon ground cumin
    • Juice of 1 lemon
    • A drop of liquid smoke
    • Salt to taste
    • Olive oil for garnish
    • Smoked paprika for garnish


    Preheat oven to 350°F. Cover a baking sheet in aluminum foil then lightly oil the surface. Roast the eggplant on the baking sheet skin side up for about 2 hours or until the flesh of the eggplant is very tender.

    When the eggplant is cool enough to handle with your hands, scoop the flesh out of the skins and place into a food processor with the tahini, garlic, cumin, lemon juice, and liquid smoke. Pulse at first, breaking everything up into more manageable sizes for the blades, then blend steadily until completely smooth. Taste test and add salt to your liking. When finished, place the baba ghanouj into a serving dish and drizzle with a little bit of olive oil and a light dusting of smoked paprika.


  • Warm Broccolini Salad


    It really is a shame that people don’t eat more vegetables. Too often they take the back seat, pushed to the side of the plate only to be overshadowed by protein, and we think that this mentality is problematic. Yes, protein is important, but if that’s all you think about, that’s all you really get. Nothing you decide to eat (or cook, for that matter) deserves to be an afterthought.

    This is a case argument for the multi-course meal at home. Not only does it create more of an experience for what you’re about to eat, it shifts the focus of the eater. You aren’t barraged with a bunch of things together on one plate that you’re forced to eat all at once, and often convinced to prioritize. Instead, you take your time, savoring one thing after another. The multi-course meal affects the cook as well. If you’re creating things to be eaten one at a time, then every course needs to be independent and be as delicious as possible. A vegetable dish meant to stand out on its own is far better than a vegetable side that is meant to compliment something else, and that’s exactly what this dish we’ve made does: it stands out.

    This salad is really simple, but still possesses many of the primary flavors needed to feel “complete.” While it can certainly be made in a large skillet or frying pan, our favorite method of cooking is actually a wok or a grill. These methods promote a good sear on the broccolini quickly, more easily avoiding the mushy side effects of over cooking. The vibrant and green stalks still have a little bit of a crunch as well as a slightly blistered exterior. You can make this for a group of people easily, but it also makes for a delicious finger food in about five minutes. We like picking up the stalks and eating the florets first that have sopped up the spicy garlic and lemon dressing and finishing with the crunchy stems.


    Warm Broccolini Salad:

    • 2 bunches broccolini
    • 1 teaspoon vegetable oil
    • Pinch red pepper flakes
    • ¼ teaspoon fennel seeds
    • 2 peppercorns
    • 1 large clove garlic, peeled
    • 1 tablespoon extra virgin olive oil
    • 1 tablespoon lemon juice
    • Salt to taste
    • ¼ cup fresh parsley leaves, packed, roughly chopped, for garnish
    • ½ ounce feta cheese, crumbled, for garnish

    In a mortar and pestle, pound the red pepper flakes, fennel seeds, and peppercorns until they become a powder. If you don’t have a mortar and pestle, just grind it all up in a spice or coffee grinder. Add the garlic clove to the spices and pound until the mixture becomes paste-like, or just finely chop the garlic and stir together with the spices. Transfer the paste to a small bowl and stir in the olive oil and lemon juice. Add salt to taste then set aside.


    Prepare the broccolini for cooking by slicing down the stalks, following the branches of the florets; you want nice long strands of broccolini, so let the natural growth of the stalks guide your knife. Heat a large pan (or wok) on high heat then add the vegetable oil and broccolini quickly, cooking until bright green and a little sear develops on some parts of the florets and stalk, about 2 minutes. Give the broccolini a quick stir/flip and cook for 2 more minutes after adding a teaspoon of water to the pan and putting a lid on the pan. Make sure the broccolini is cooked through, then remove from the pan and transfer to a bowl.


    While the broccolini is steaming, add the olive oil and lemon juice mixture as well as the parsley leaves and toss until the broccolini is thoroughly coated in the dressing and herbs, then top with the crumbled feta. Serve immediately.

    Serves 2–4.


  • Smashed Raspberry Grilled Cheese


    Our challenge of savory seasonal eating continues!

    Raspberry season is upon us, and we quickly discovered through our research process that there’s not a whole lot of savory raspberry recipes out there, which we found simultaneously disappointing and alluring. We found plenty of jams, jellies, cookies, pavlovas (Christ, so many pavlovas) and cakes, but no one seemed interested in figuring out how raspberries could make their way out of the realm of dessert.

    But if there’s a way to make something savory, we will find it. As usual, the key was cheese.

    Grilled cheese sandwiches are essentially a step below pizza ingredient-wise, so they’re near the top of the favorite food list for us. Few things can compare to crisp and thickly sliced rustic bread (Nate makes the best) with melted cheese. However, there is one thing that these sandwiches usually lack to create what is more commonly accepted as a “complete taste” on its own, and that’s acid. That’s why you see grilled cheese and tomato soup paired together all over the place.

    So we thought…why not switch up the acid?


    Berries and cheese go way back, so we weren’t too scared about them intermingling. Our acidic subject? Fresh raspberries. Our cheese? We eventually decided to go with a blend of chèvre for flavor and Jarlsberg for texture. So we smashed some raspberries we got from Sauvie Island Farms after a lovely day of berry picking onto some of Nate’s homemade 50% whole wheat sourdough bread and got cooking.

    The results? Crunchy, fluffy, creamy, gooey, and tart. It was everything we hoped it would be and more. If you have any fruit laying around, especially incredibly fresh fruit, we wholeheartedly recommend you put your thinking cap on and find a cheese that’ll pair well with it, then immediately stuff it in a grilled cheese sandwich. You will not be disappointed. Sometimes it really is the simplest things that taste the best.

    Smashed Raspberry Grilled Cheese Sandwich:

    Makes 1.

    • 2 thick slices of good rustic bread (whole wheat sourdough was magical with this, but if you wanna try something else, it’ll still turn out awesome)
    • About 1 tablespoon of butter, room temperature
    • 8–10 ripe raspberries (enough to cover the surface of one piece of bread)
    • 2 ounces of Jarlsberg cheese, grated
    • 1 ounce chèvre, room temperature
    • A dash of freshly ground black pepper

    In a small bowl, mix the grated Jarlsberg and chèvre together along with the fresh black pepper. Set aside.

    Butter both pieces of bread on one side using ½ a tablespoon of butter each. On the unbuttered side of one of your pieces of bread, lay out your raspberries and smash them with a fork, moving the juices around until the entire surface of the bread is covered. Spoon the cheese mixture on top of the smashed raspberries and spread it until the cheese covers the surface of the bread. Put the other piece of bread on top, buttered side up.

    Preheat a non-stick pan on medium heat and put the sandwich in the pan. Allow each side to cook for roughly four minutes, adjusting heat as needed to cook the sandwich through, or until each side of the bread is golden brown and the cheese is melted. To help the melting process along, you can put a lid on the pan, keeping the heat trapped in, though you should limit this because you will lose that deep crispness with too much steam.

    Allow sandwich to cool, then go to town.


  • Fresh Strawberry Ice Cream


    Oregon’s berry bounty is impressive, especially in the summer. Wave after wave of variety comes into its own and it can seem overwhelming when the time comes to choose which one to work with, but after much deliberation, Nate and I think that we’ve finally decided on what our favorite is.

    Is it the plentiful, tart, and quintessential Pacific Northwestern blackberry?

    No.

    Is it the delicate, elegant, and high-brow dessert-loving raspberry?

    No.

    Is it the versatile, delicious, and nutritious blueberry?

    No. No it is not.


    For us, the most sublime berry is the one that welcomes us into the warmer months in Oregon. Hitting their peak in early summer, their season comes and goes quickly. It’s important to get them while you can because, as summer develops, they just aren’t the same anymore, then they disappear altogether, waiting for late spring once again. We are, of course, talking about what might be the most popular berry in America: the strawberry.

    One might think to oversimplify this common ingredient; after all a strawberry is a strawberry is a strawberry, right?

    Noooooope.

    There are so so many species of these little beauties, and they all taste a little different from one another. However, there are two that rise above the rest for us: Hoods and Seascapes. I’d be impressed if anyone went wrong with either one of them if you get them at the right time, and the time is now, but as this recipe suggests, like so so many things in this world, we believe that they should be drowned in cream and churned.

    P.S. This fresh fruit ice cream proportion works magic with these strawberries, but don’t let that stop you from getting creative. If you apply the same amount of any fresh fruit into this recipe, it will work. Let this be a way for you to experience all the best fruit this summer. I mean, that’s what we will be doing…

    Fresh Strawberry Ice Cream:

    • About 1½ cups (335 grams) fresh, ripe strawberries, tops removed (Hoods or Seascapes if you can get them)
    • A pint (472 grams) heavy whipping cream
    • 1¼ cups (263 grams) whole milk
    • ¾ cup plus 1 tsp (161 grams) sugar
    • Scant ¼ cup (67 grams) light corn syrup
    • A dash xanthan gum

    Blend strawberries in a food processor or using an immersion blender, then transfer into a large bowl big enough to hold all ingredients. Whisk in the cream, milk, sugar, corn syrup, and xanthan gum.

    Ready your ice cream maker (if you have a freezer bowl type make sure the bowl is completely frozen! This usually takes at least 24 hours.), and begin churning immediately. Churn for 25–30 minutes, or until the mixture resembles thick soft serve ice cream. Transfer ice cream to an airtight container, but before putting on the lid, cover it with a layer of plastic wrap, allowing it to stick to the entire surface of the ice cream. Seal the container and place in the back of the freezer for at least 4 hours prior to serving. For best consistency, freeze overnight.

    Temper about five minutes before devouring.