Tag: pasta

  • Master Post: Everyday Noods

    This is our first post for a campaign that we are calling “master posts.” The goal with these is to help people understand that they can cook the elemental building blocks of cuisine that are perceived to be more technically advanced. If you get comfortable with them (and you really can), they can become habits, routines, skills, and traditions. Learning how to make some of the things we want to teach you here will help you make better food no matter what recipe you choose to make, and better food means better quality of life.

    In this post, we will help you, dear reader, learn that you can do hard things. At least, you may think that they’re hard, but they’re not. Not even a little bit.

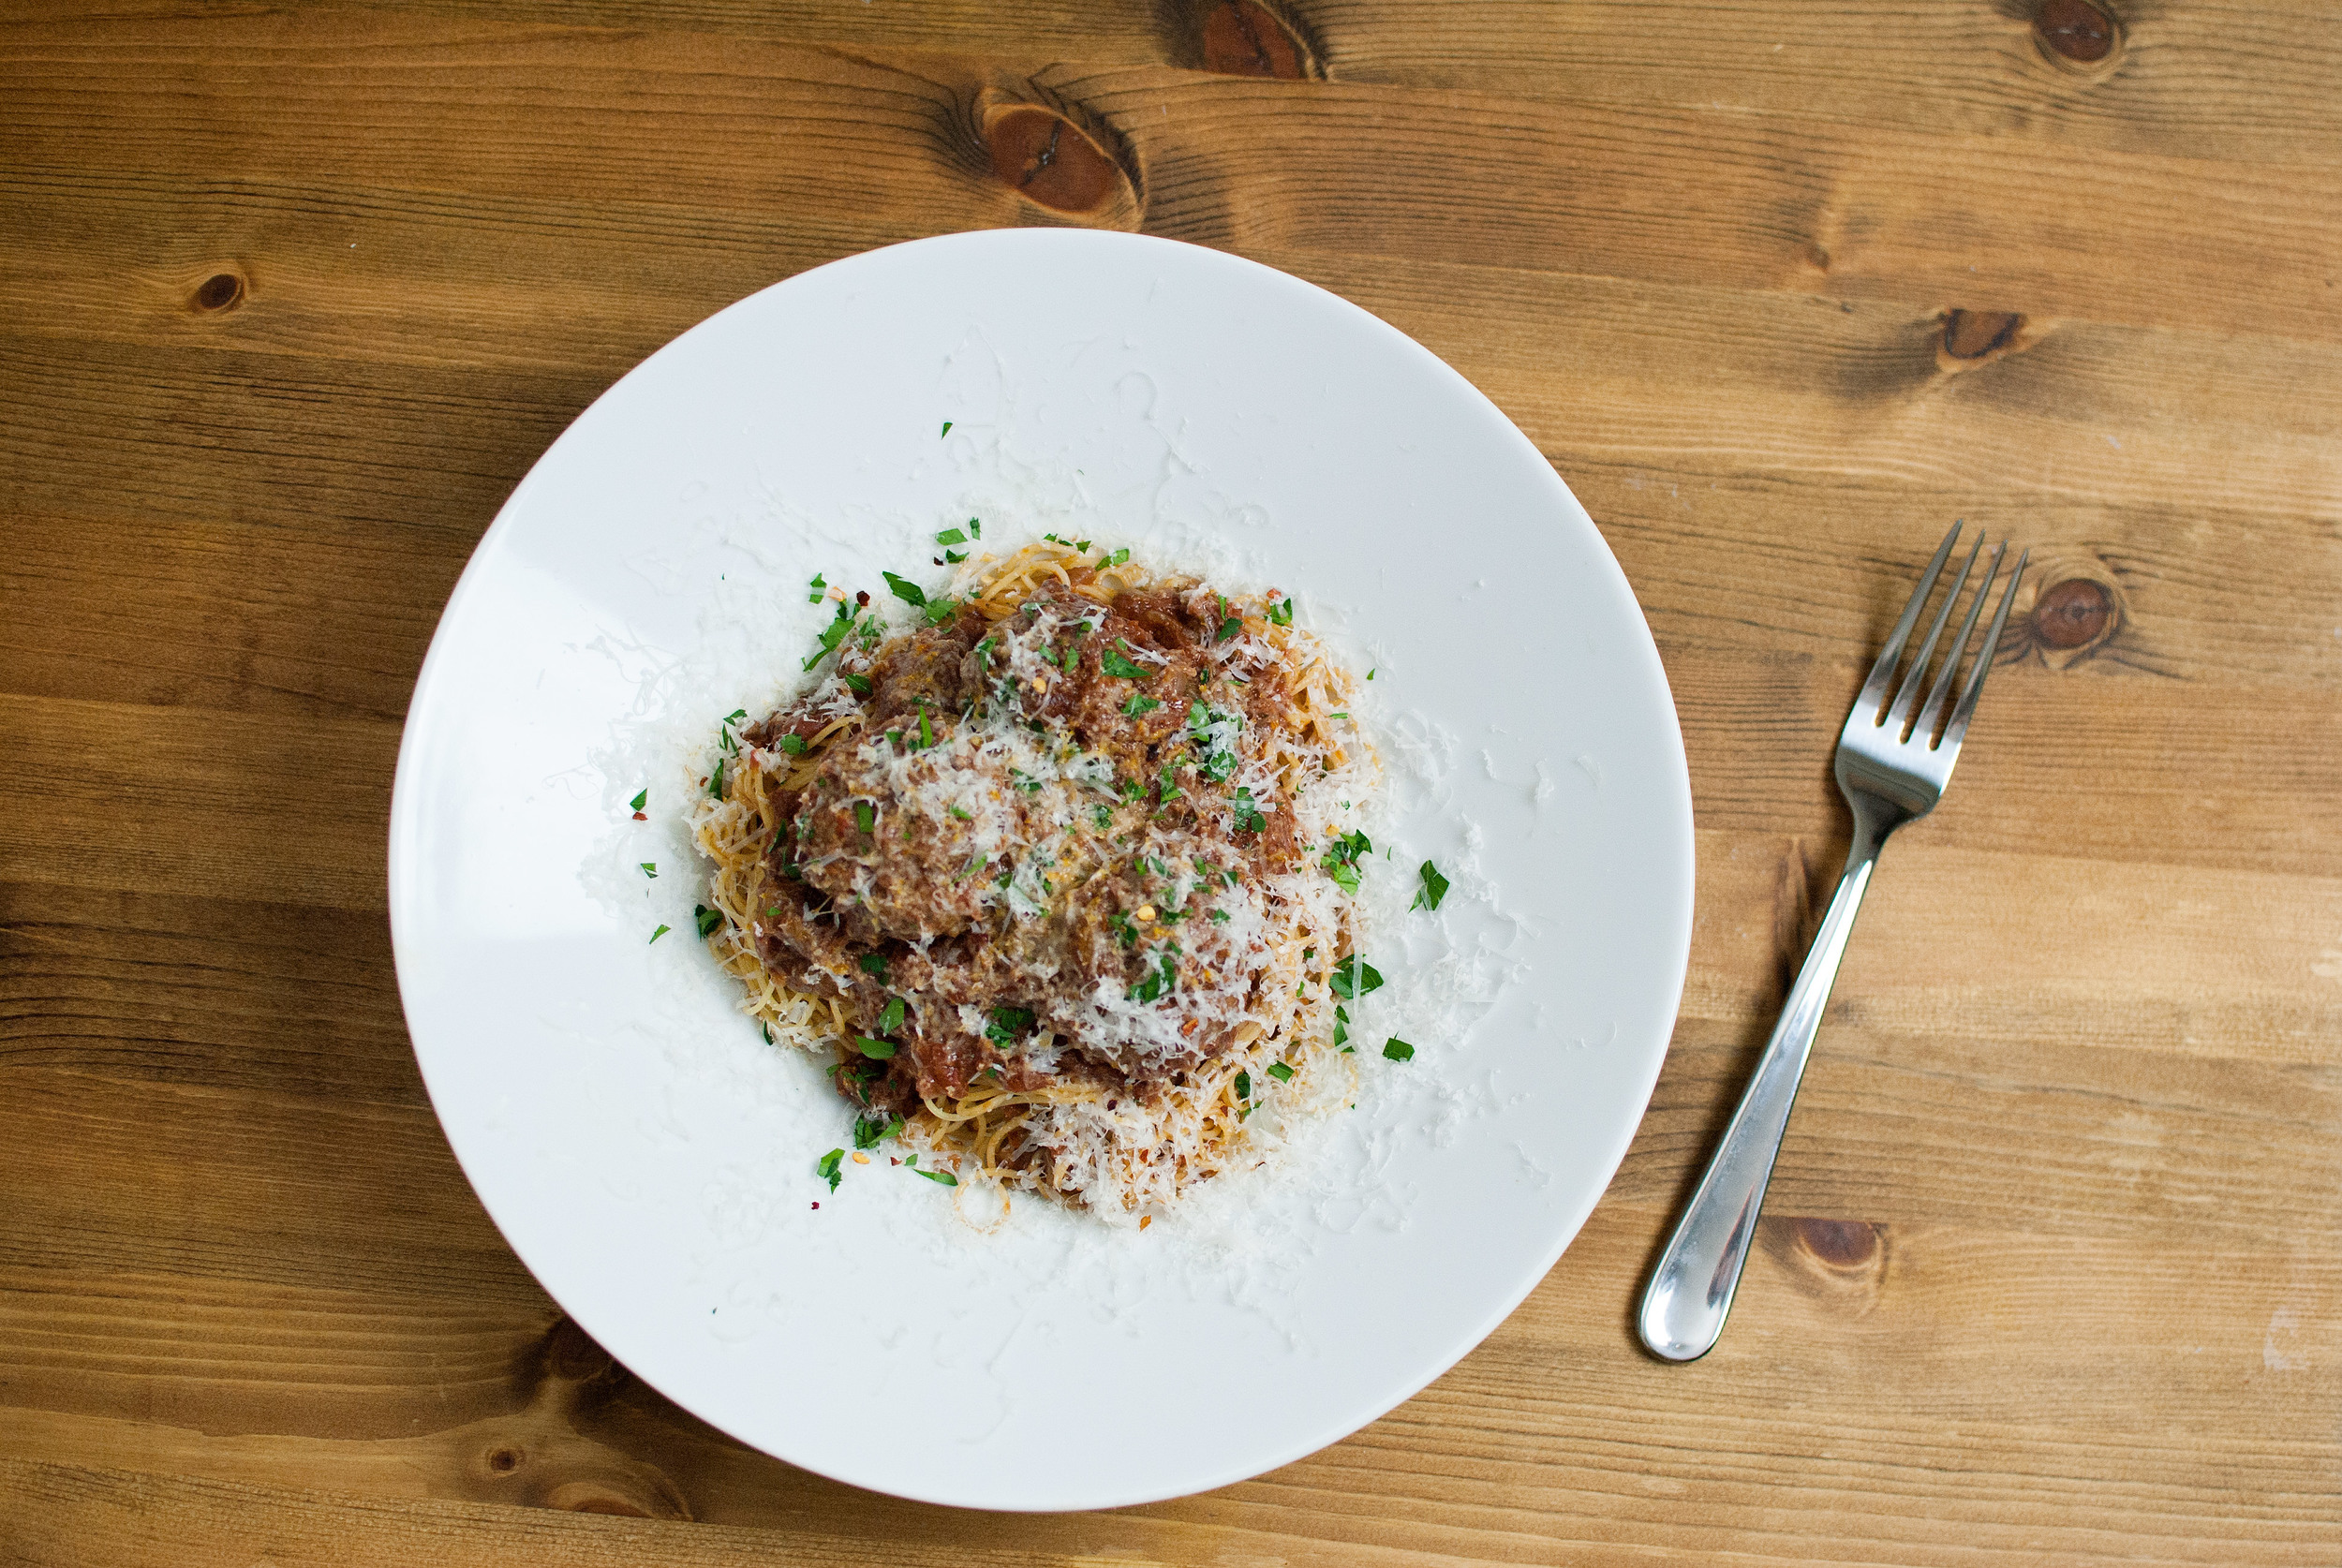
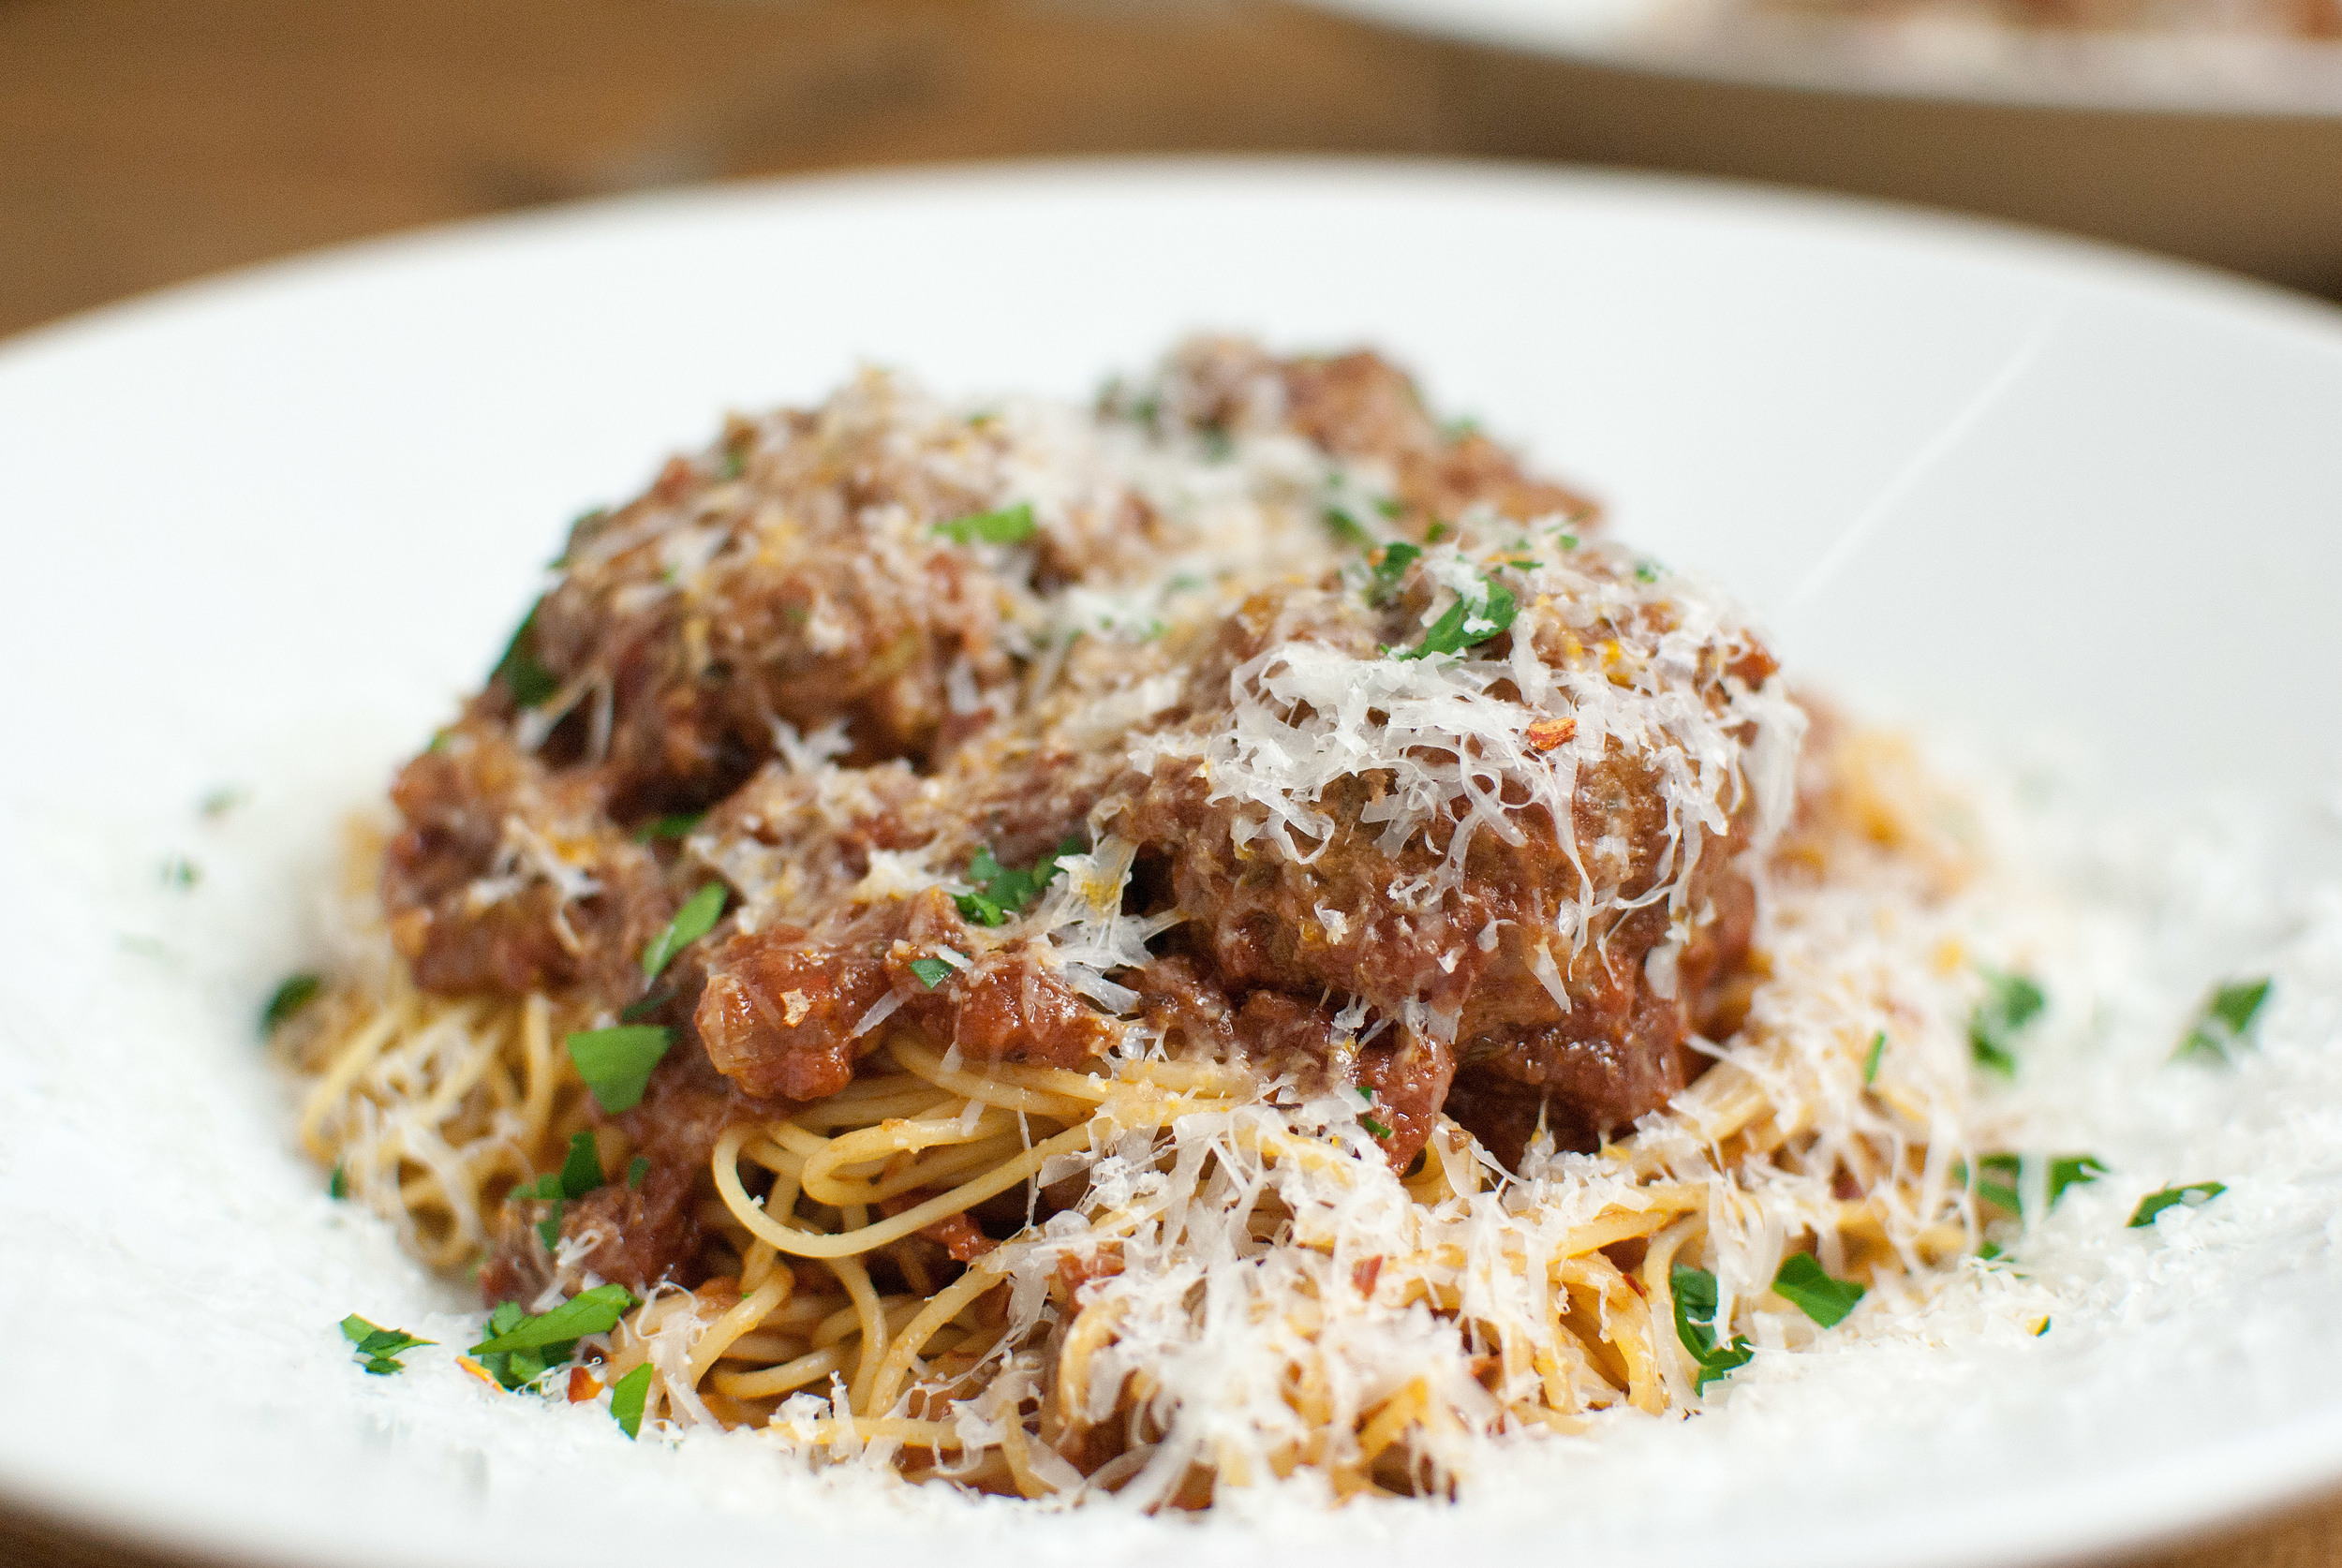
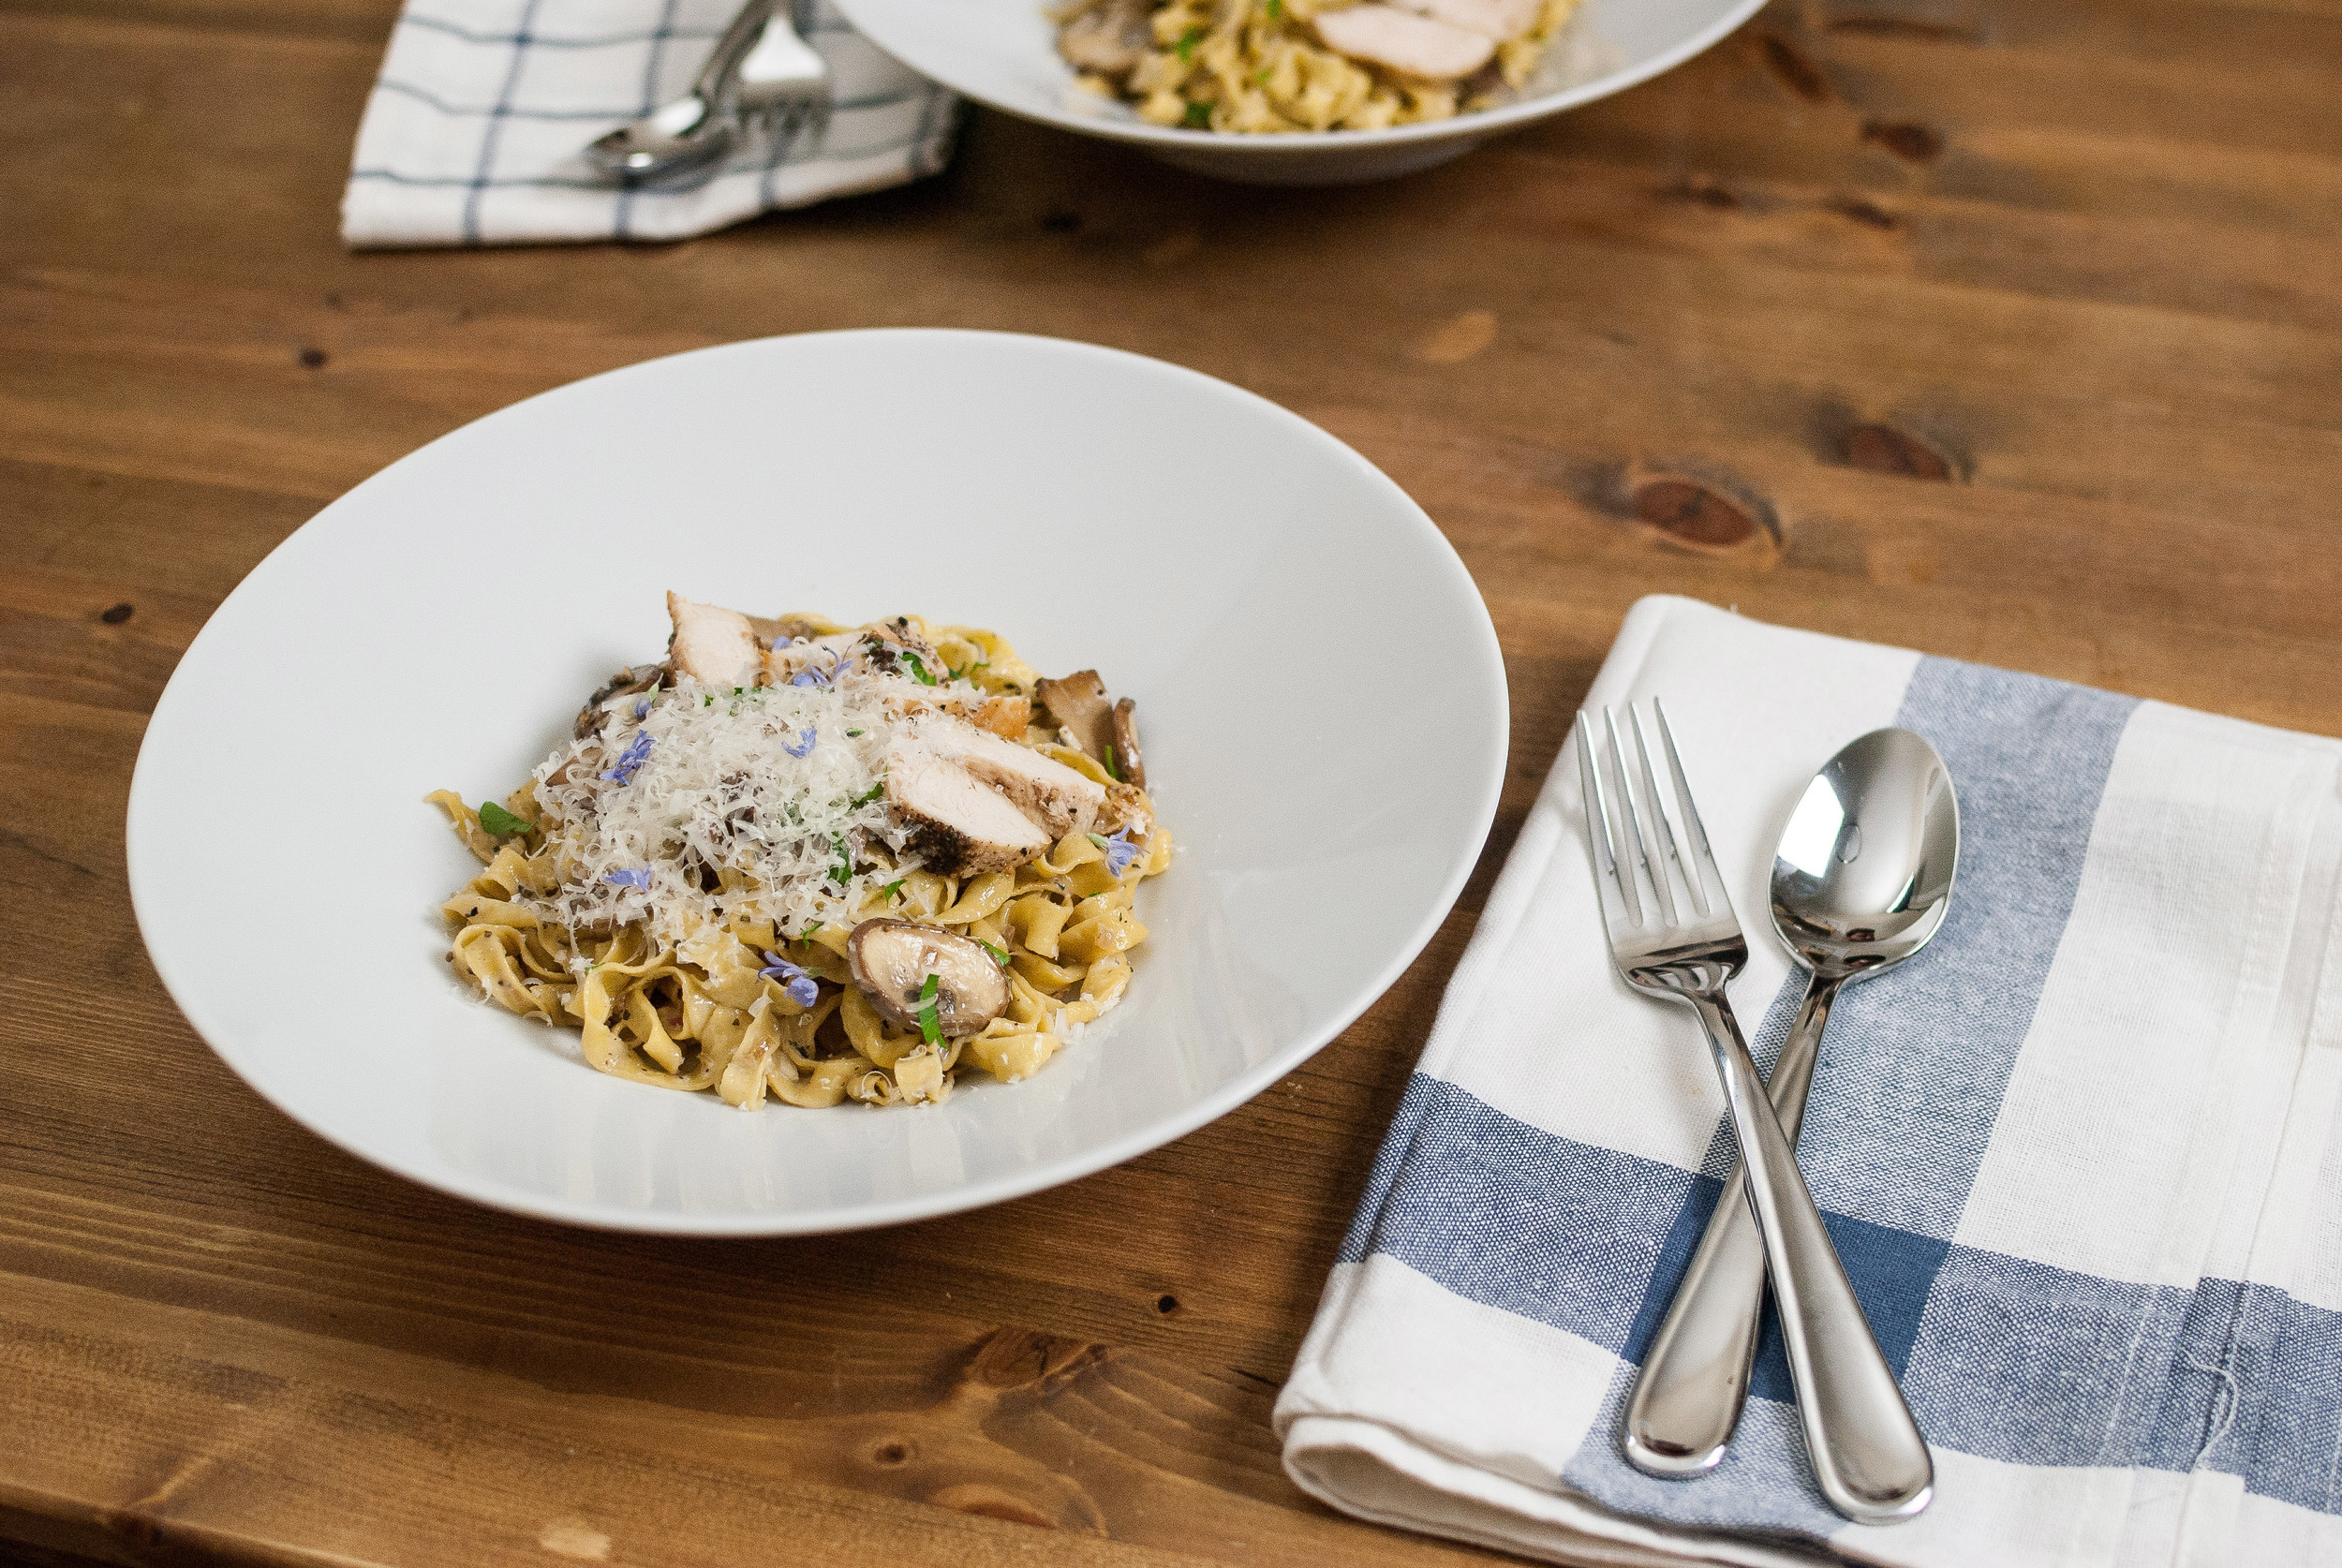
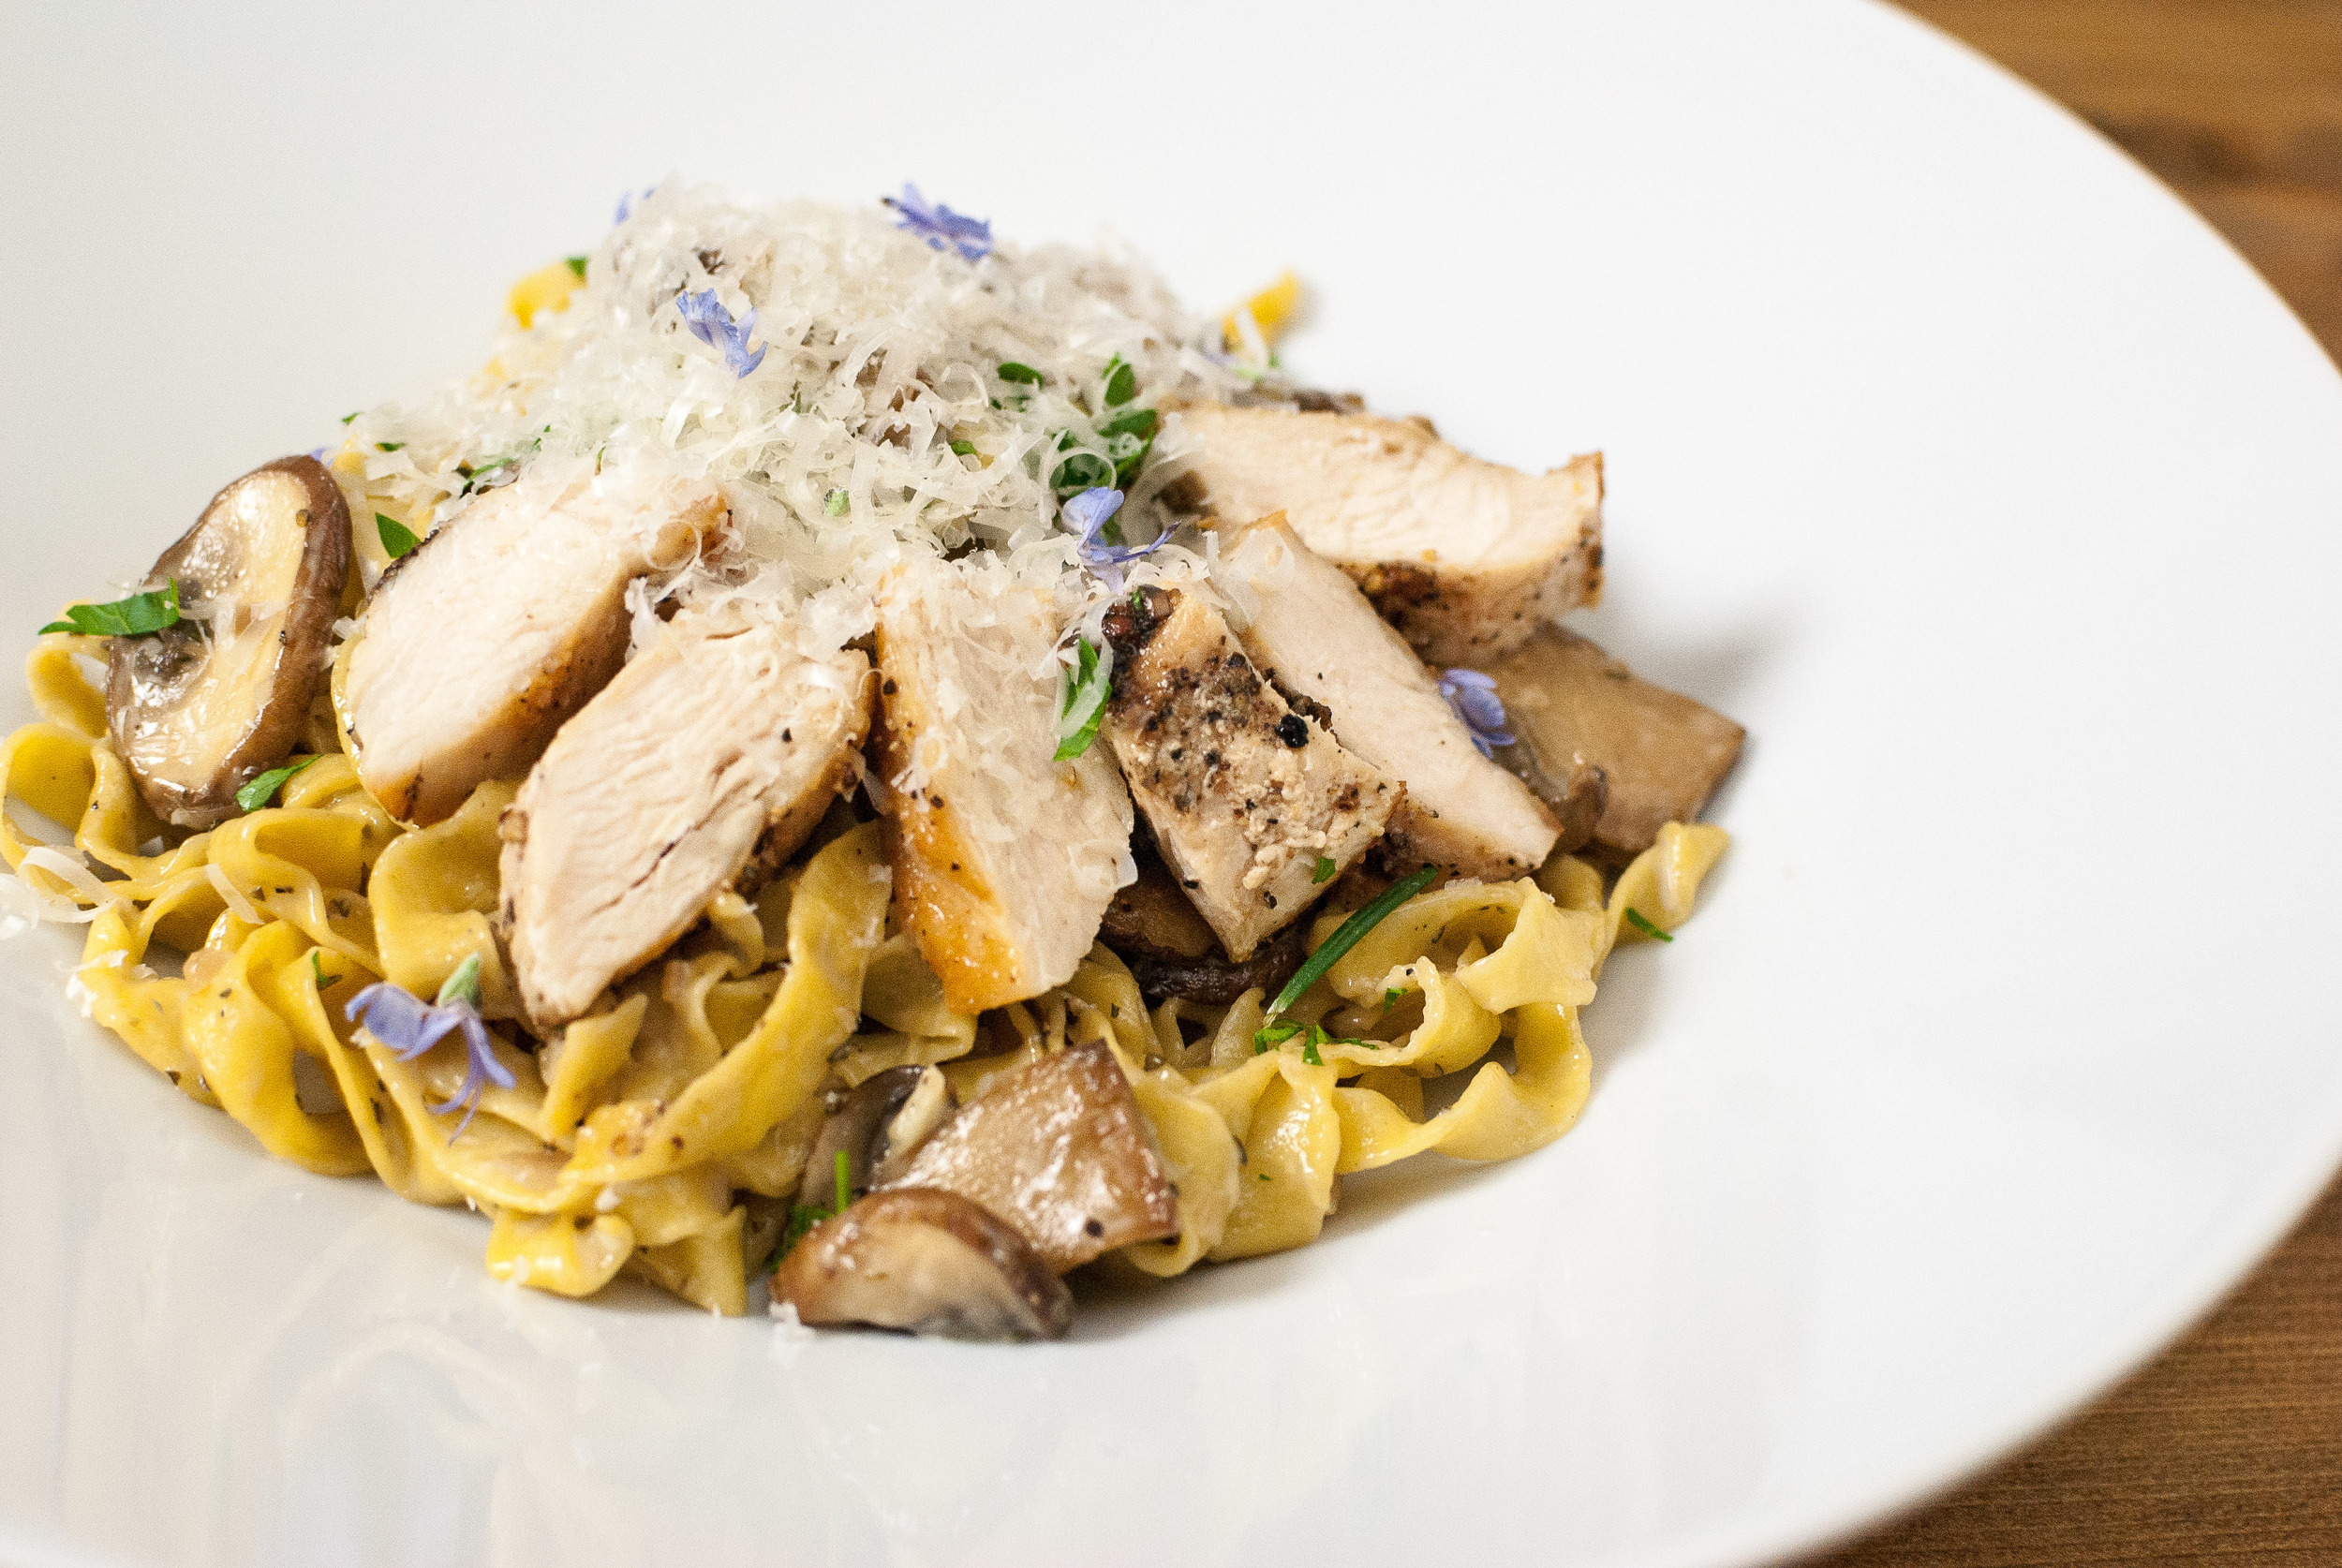
    You, yes you, can make noodles. Good ones. Ones that taste like you went out to eat. Maybe better. It won’t even cost you a whole dollar. Hands on time to make them is about ten minutes; maybe even less.

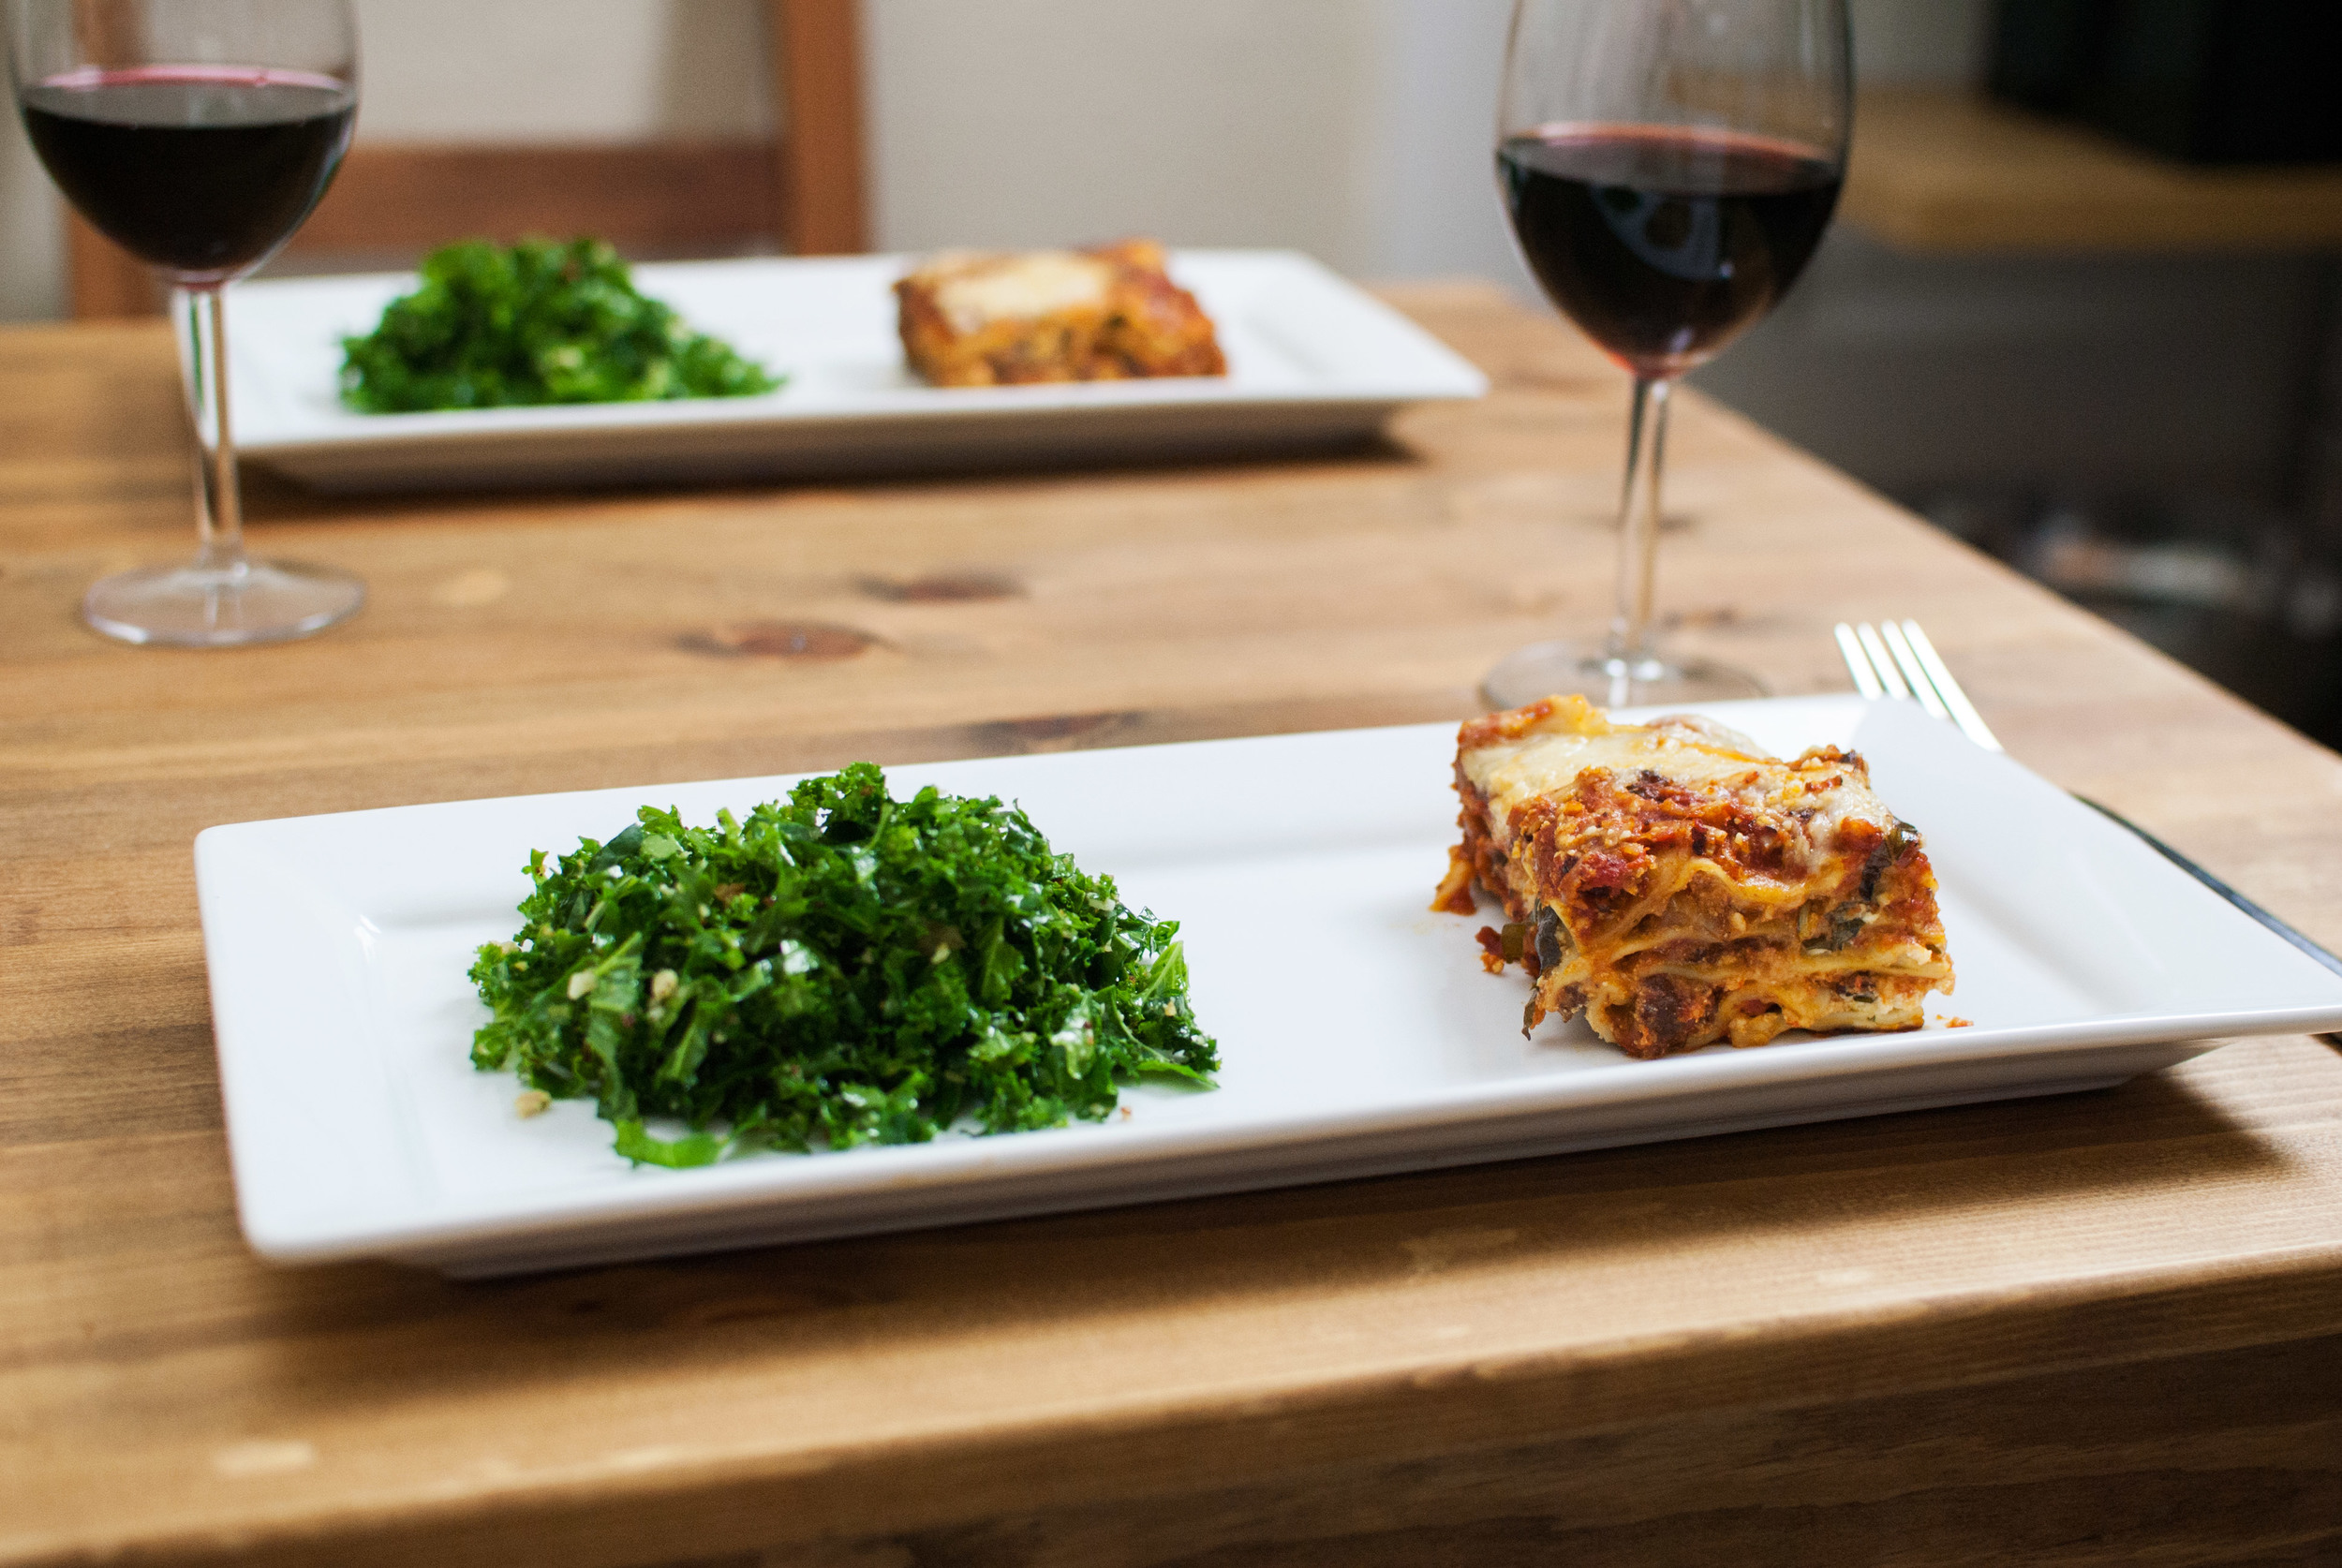
    You can use these noodles for pretty much anything you want.

    Pasta dish? Damn right.

    Stir fried noods? For sure.

    Noodle soups? Ramen? Guuurl, do it.

    Intrigued?
    Then keep reading and grab all of the TWO ingredients you need.
    You probably already have them.

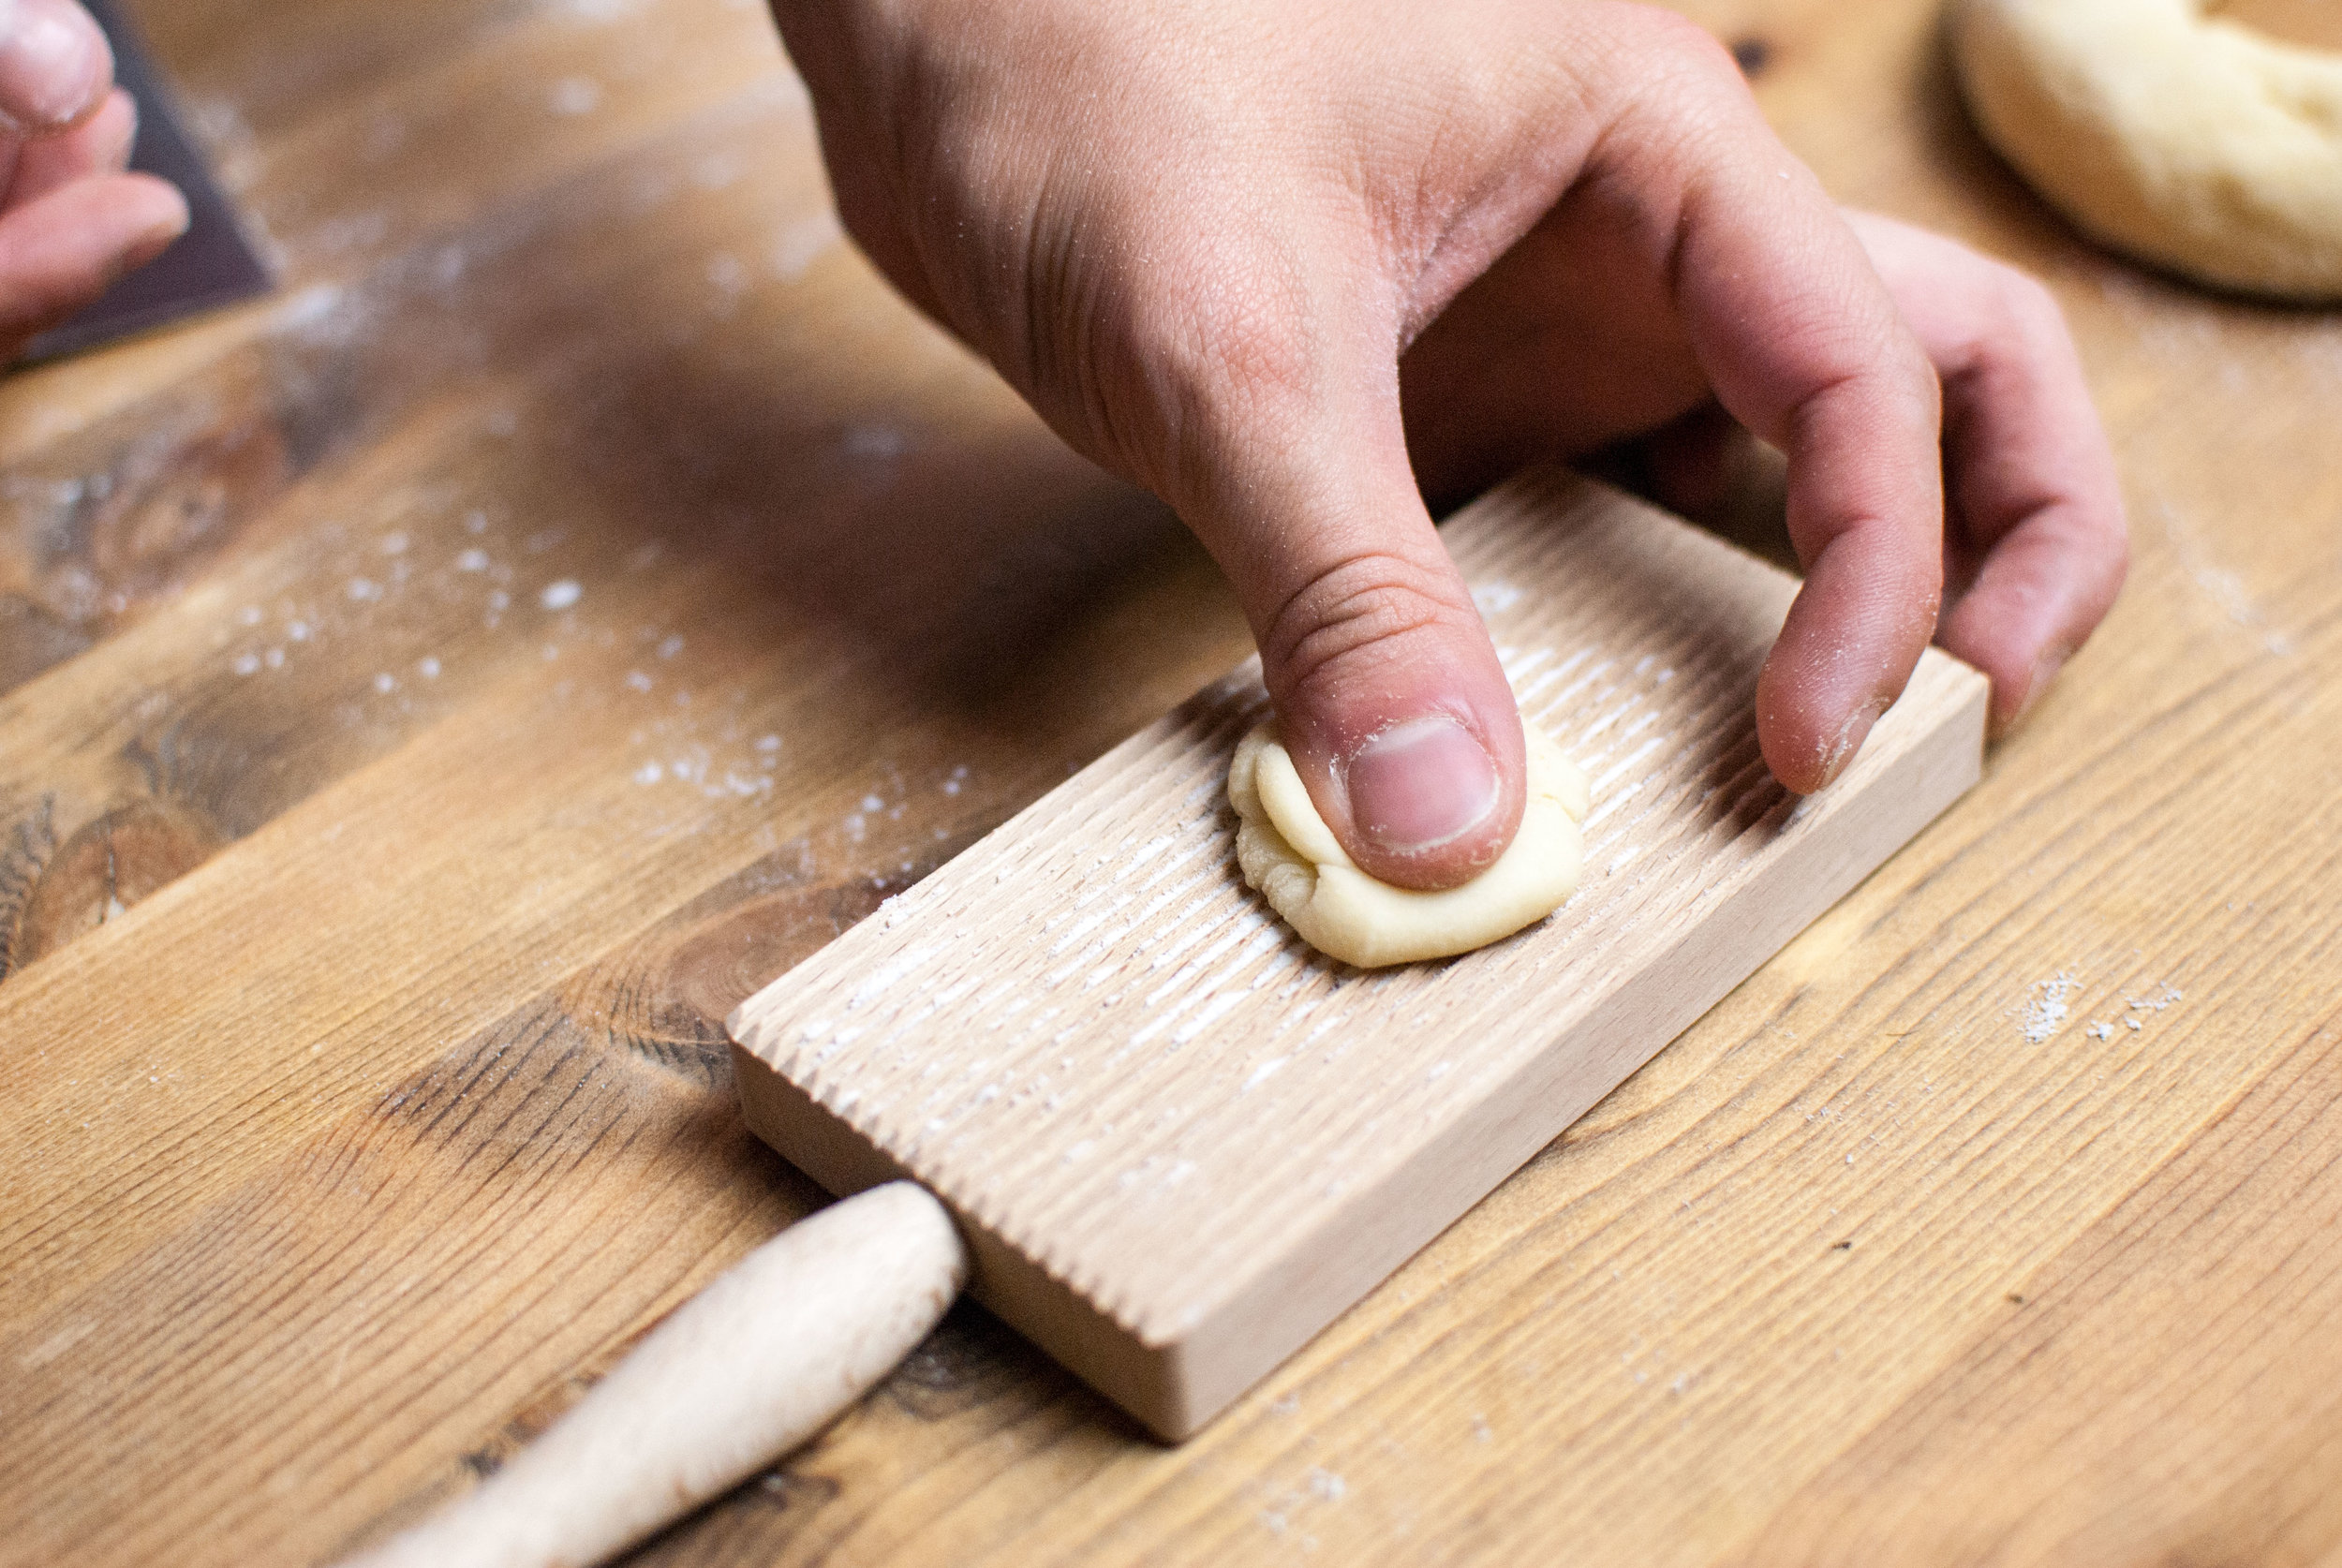
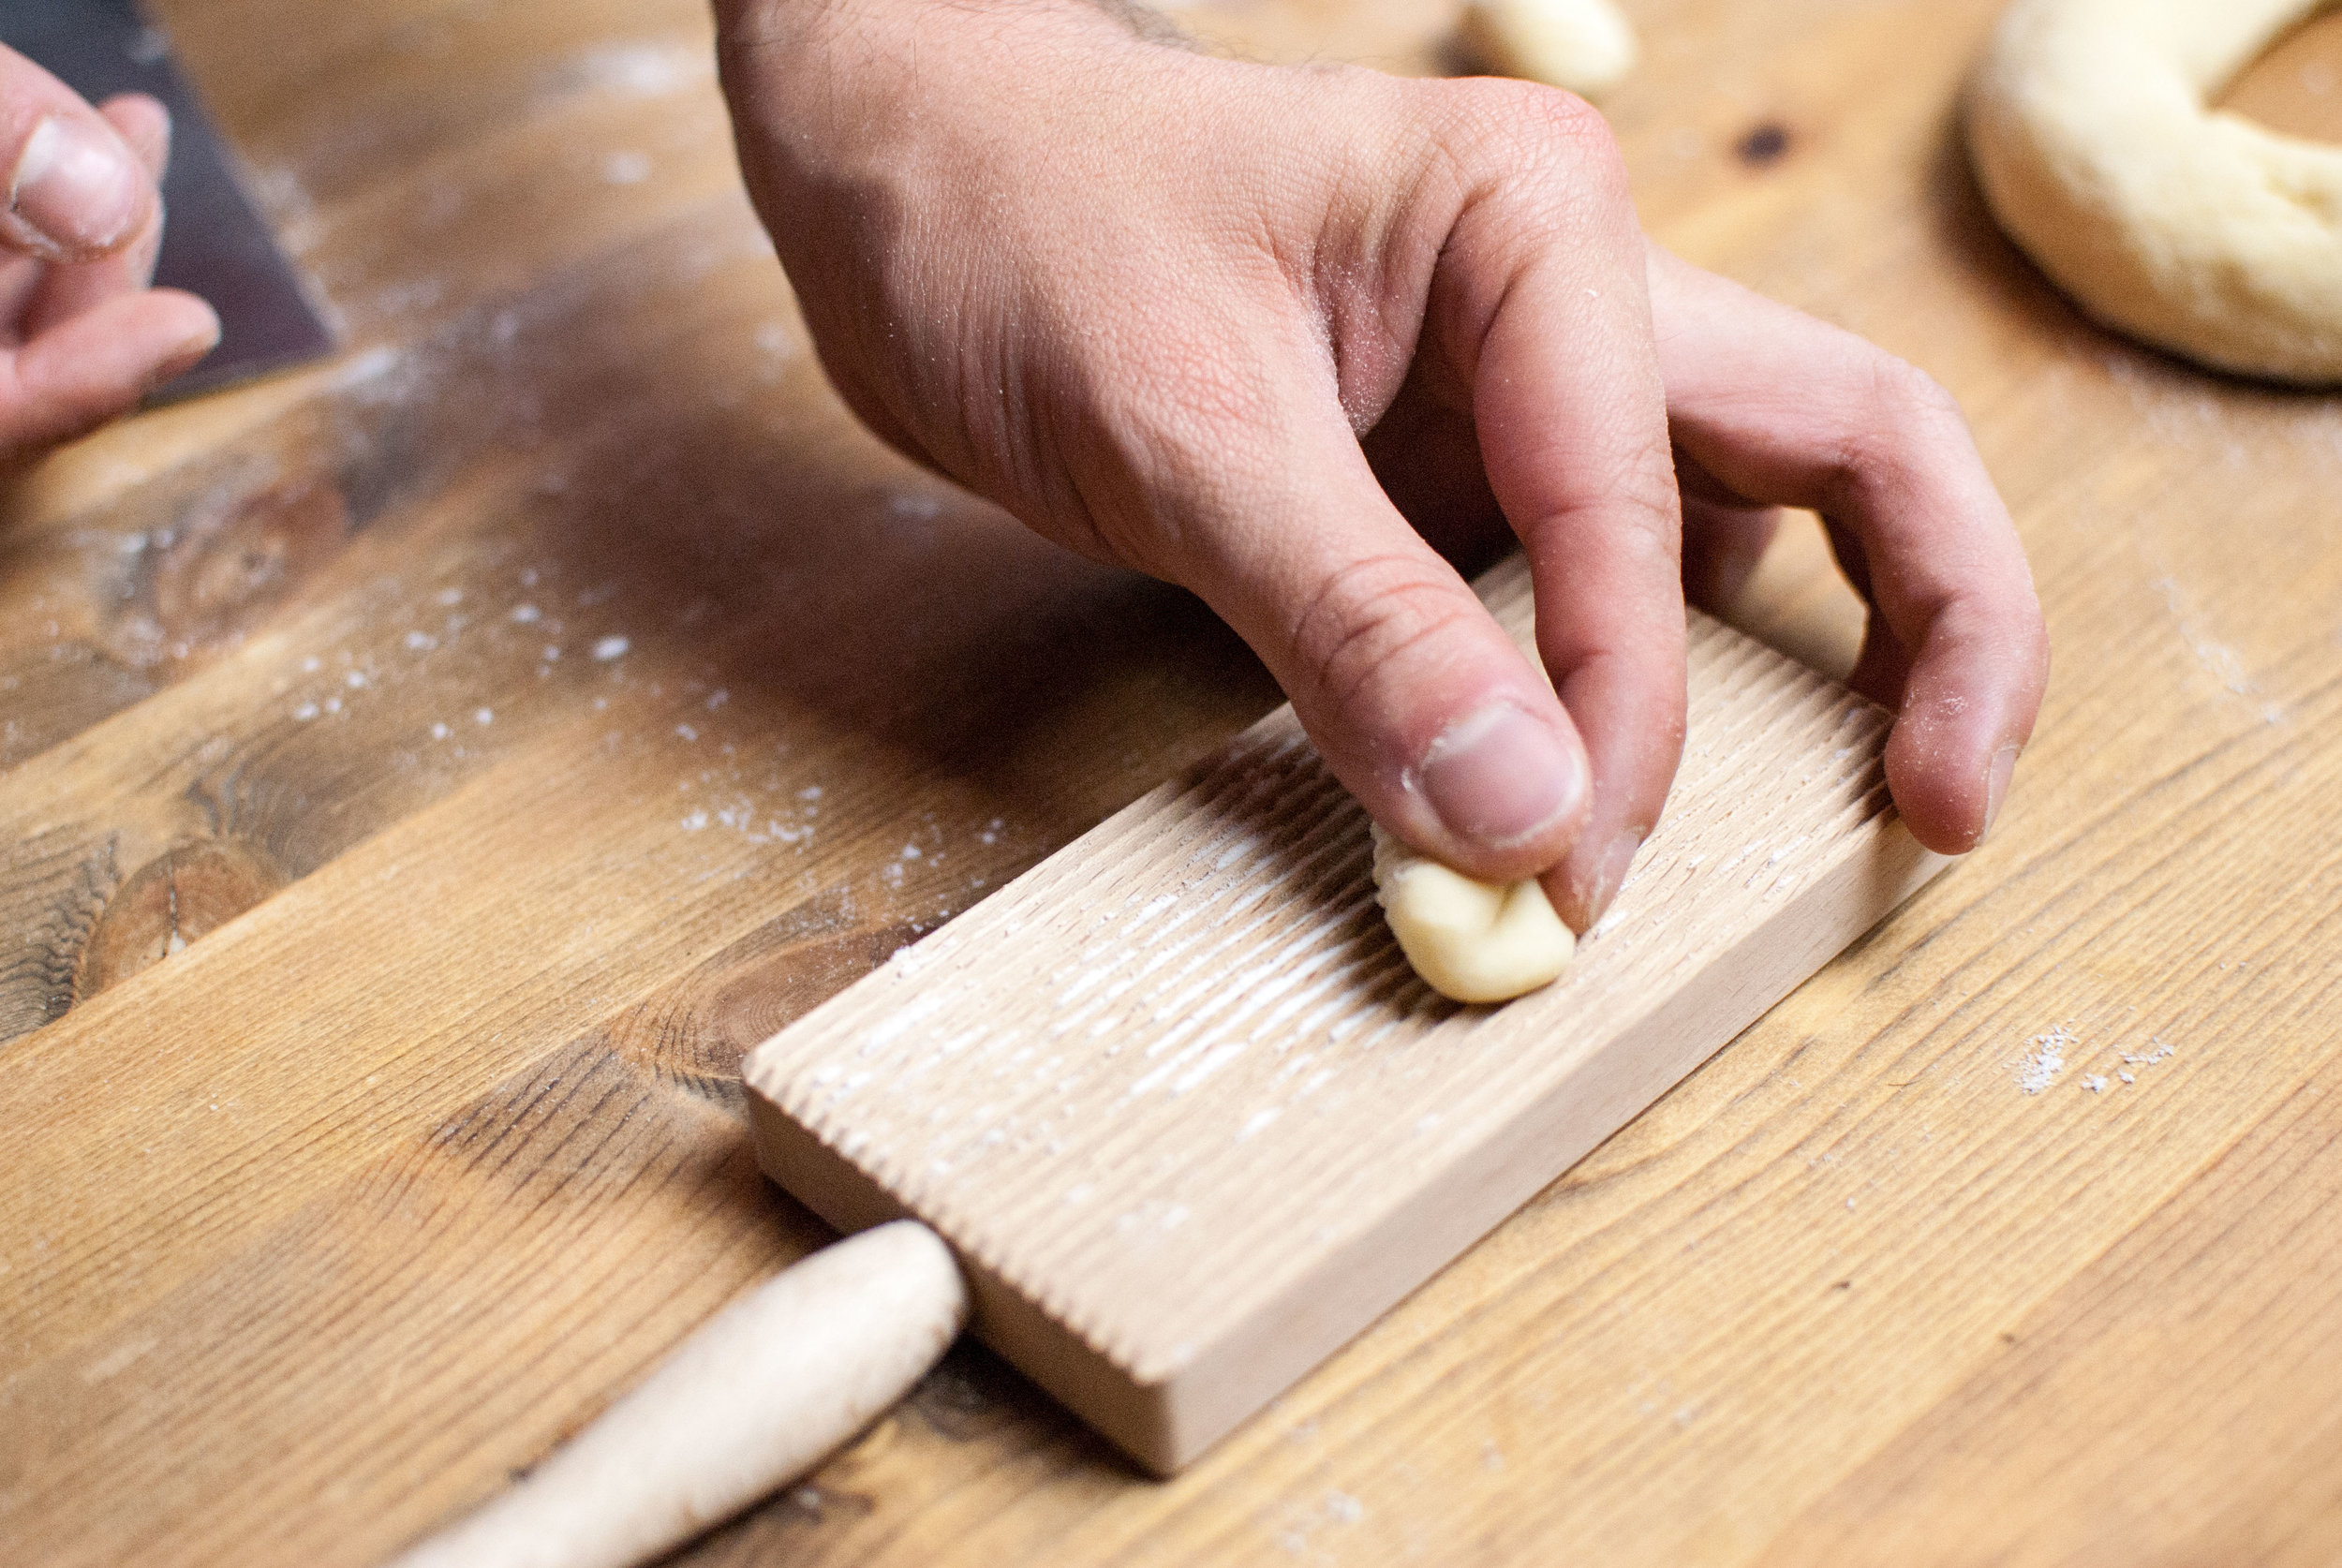
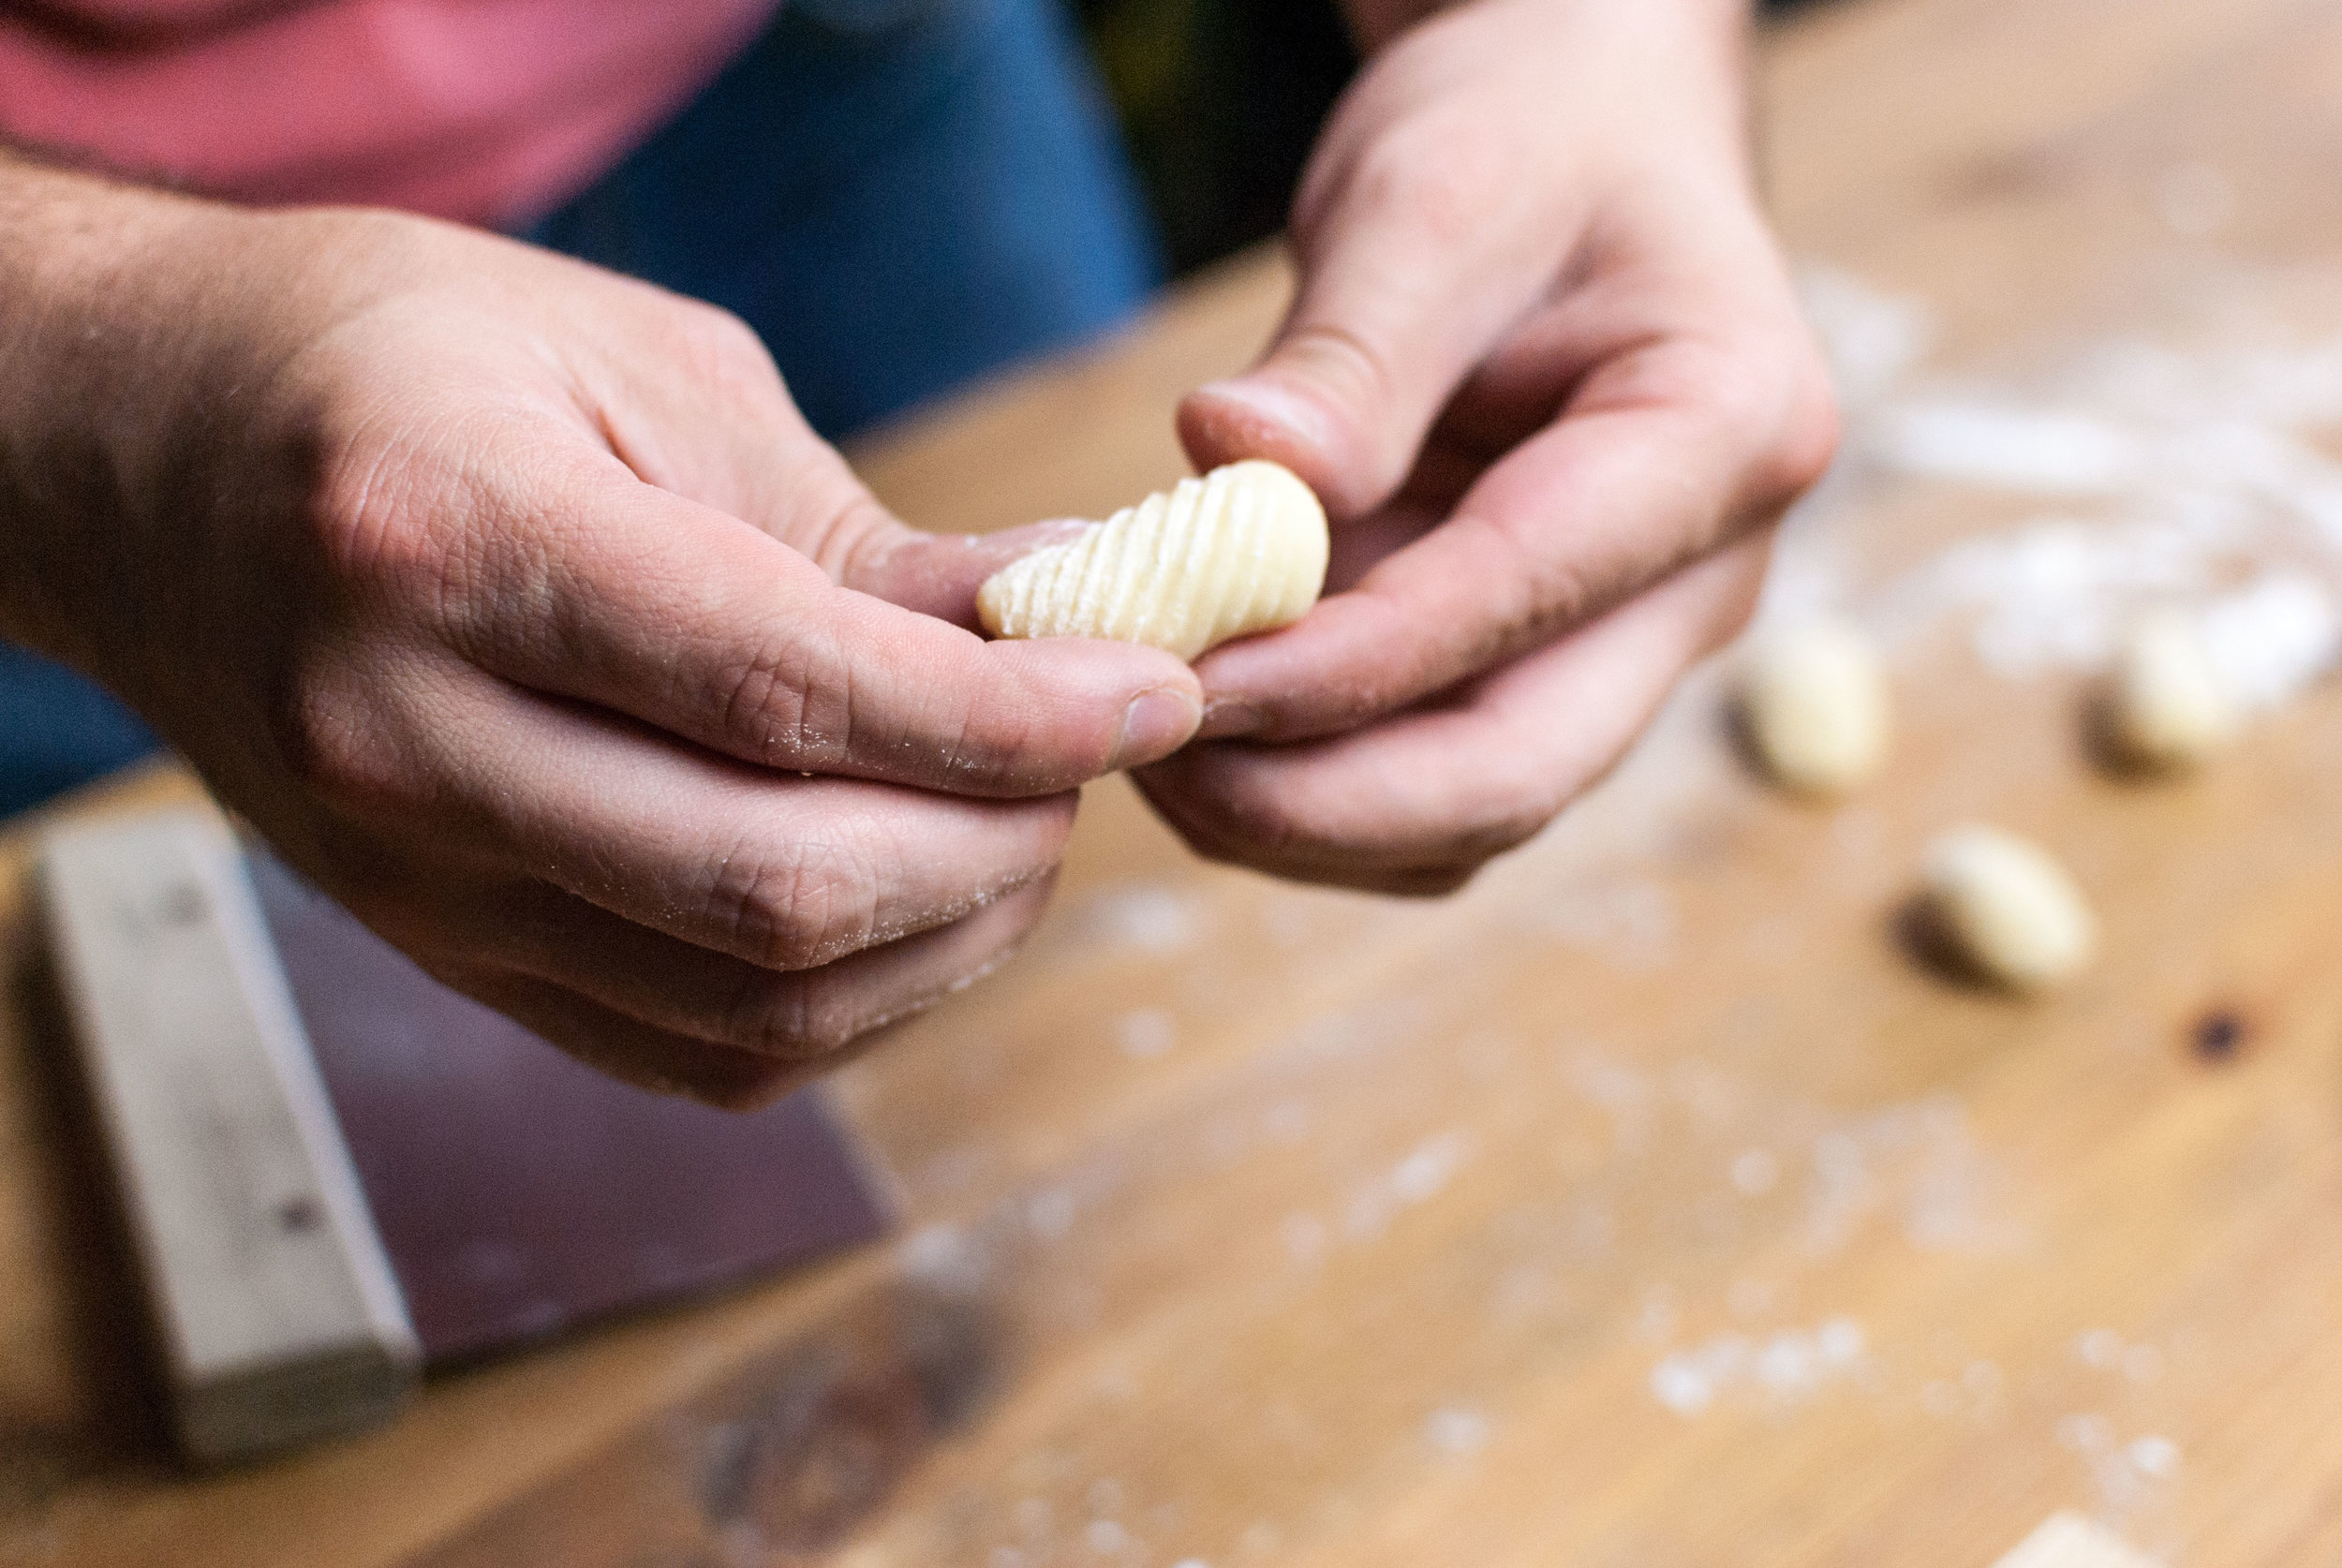
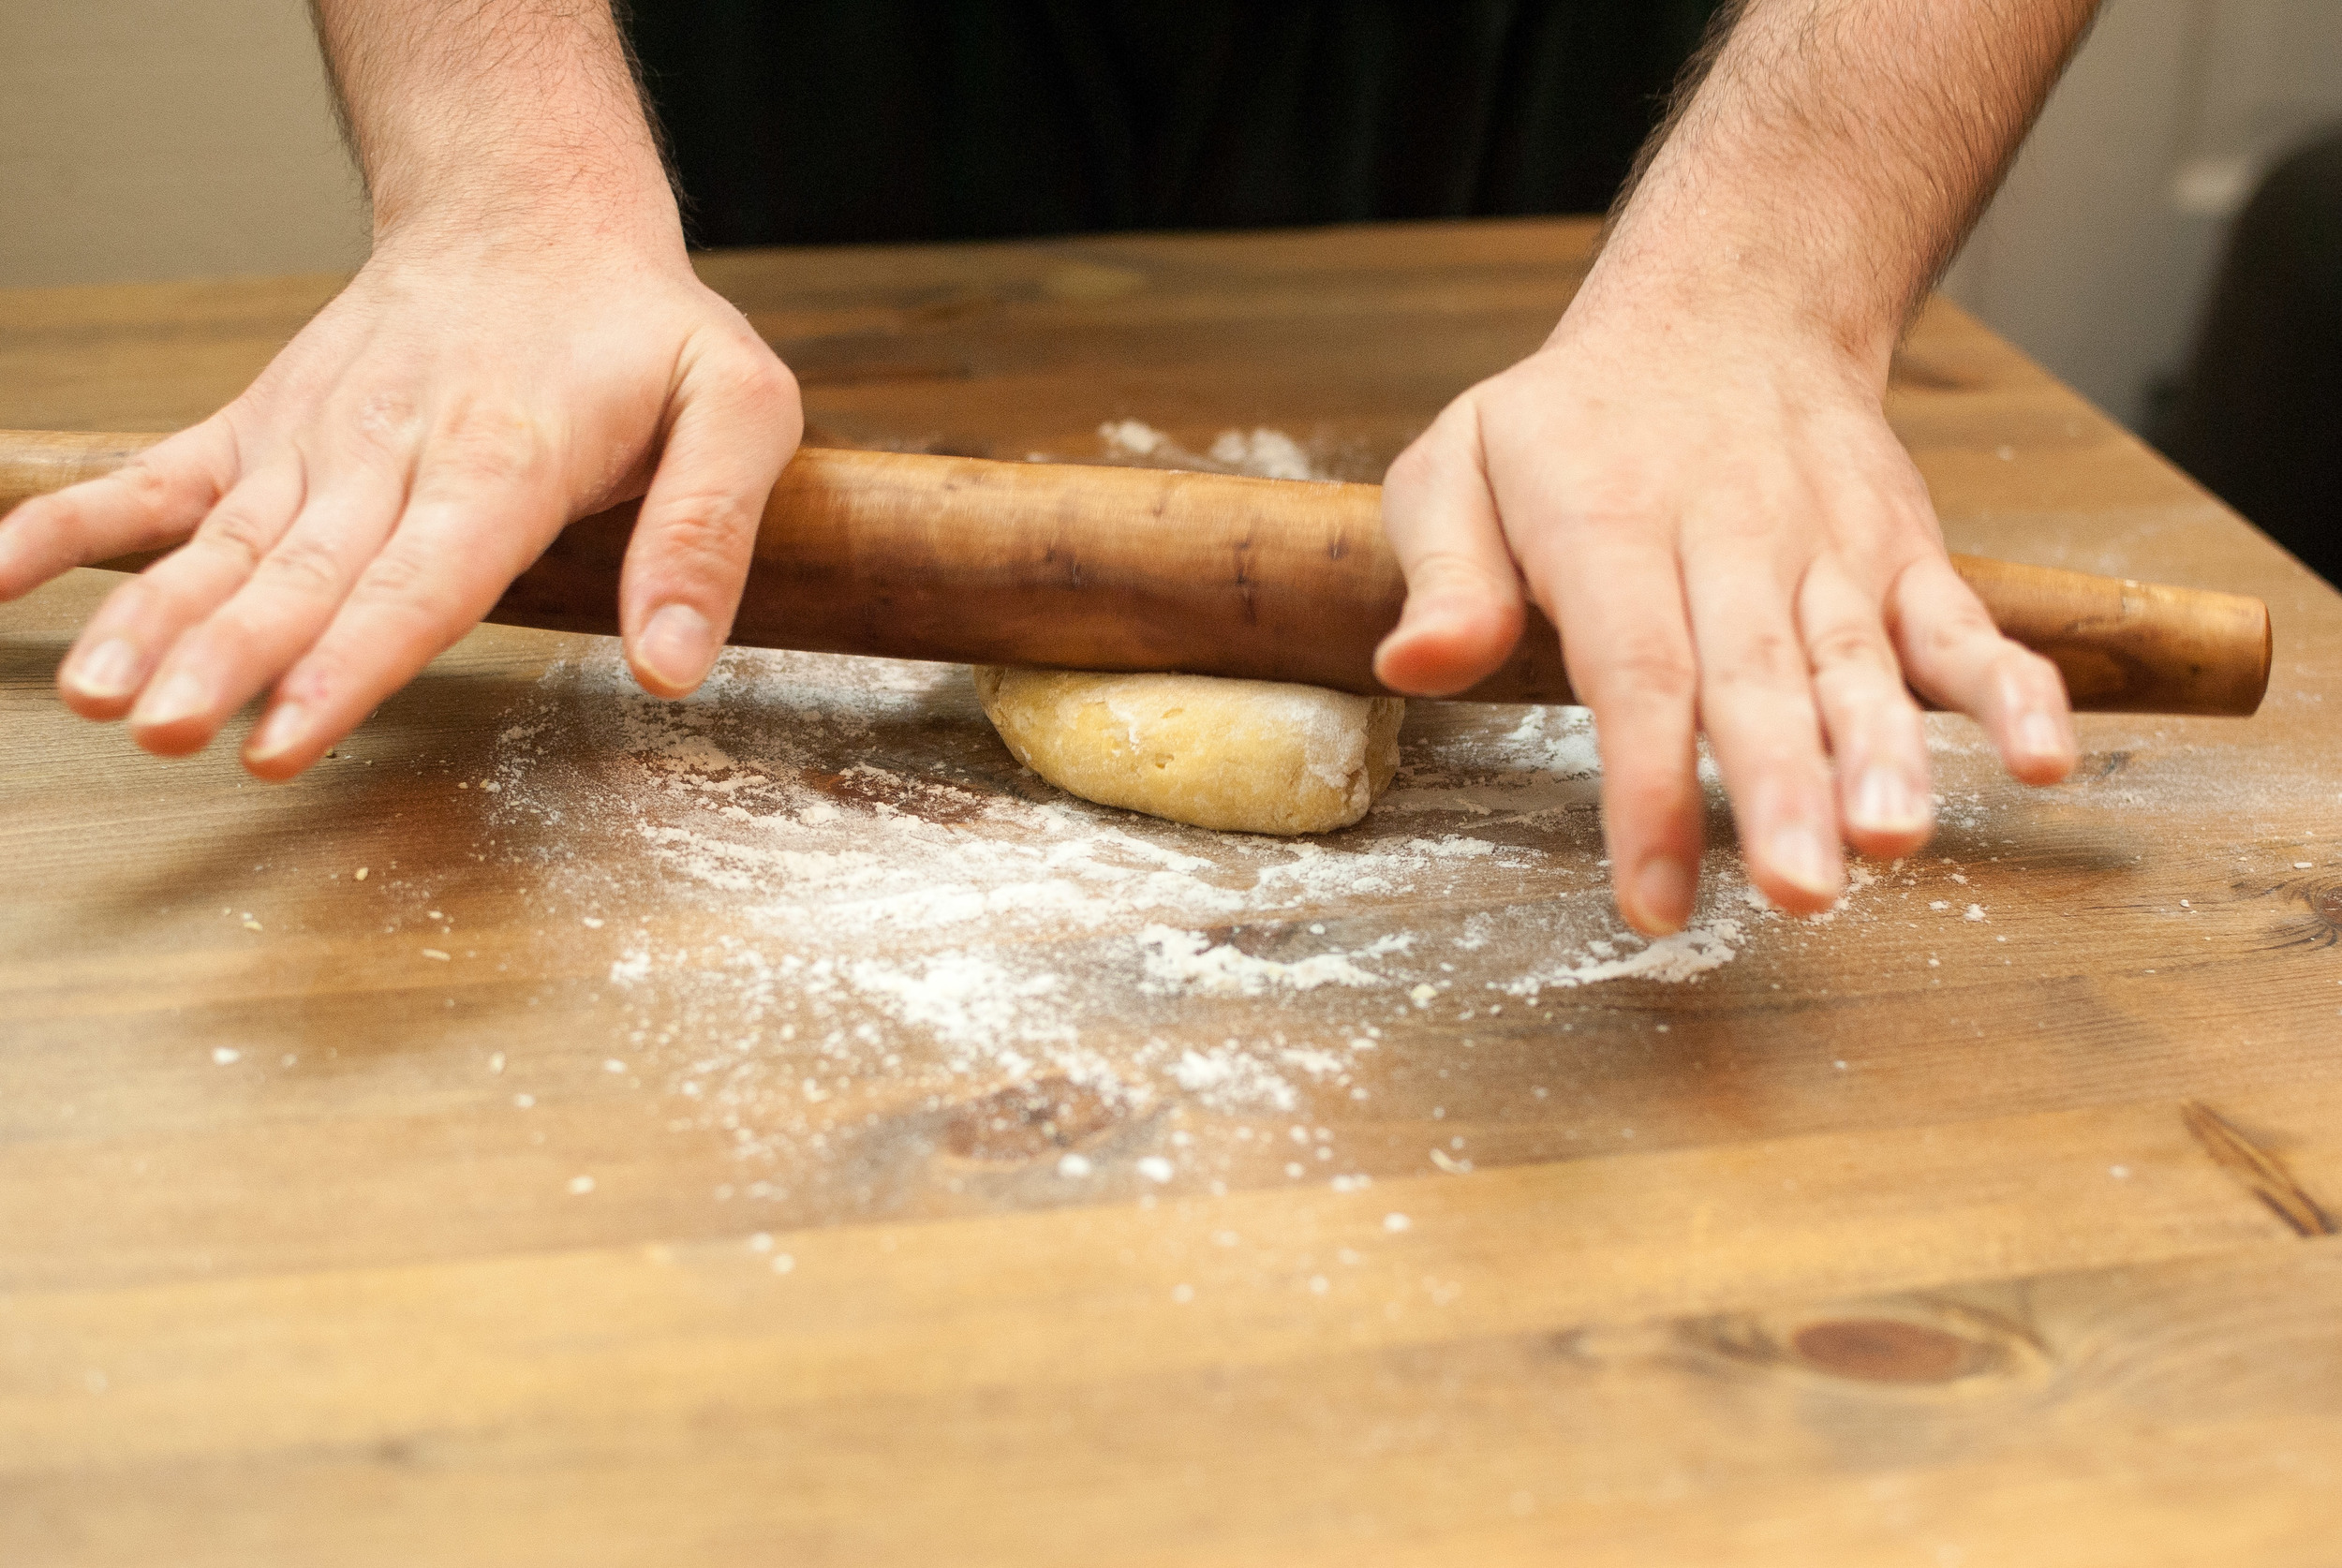
    Note: For this recipe, we wholeheartedly recommend that you get a pasta crank. No need for an extruder or any gadgets that cost hundreds of dollars. Just get a crank. They’re $30, and you might like this recipe so much that you’ll be making noodles a couple times a week. At that rate, it’ll more than pay for itself in time, and it opens up so many delicious doors for you. If you’re not totally sold on that idea, you can still roll this dough out by hand and cut it with a knife. Your noodles will probably be on the thicker side as a result, but thick noodles made with this dough make really excellent stir-frys, so keep that in mind if that’s the route you choose.

    Another note: This recipe is written for people without a Kitchen Aid, so it’s pretty hands on. But if you DO have one (like we do) just beat the eggs in the mixer with the paddle attachment, then add the flour and mix it until it all just starts to come together, then follow the resting and shaping instructions written below.

    Everyday Noods ingredients:

    • 2 cups flour

    • 3 fresh eggs

    Making the dough:

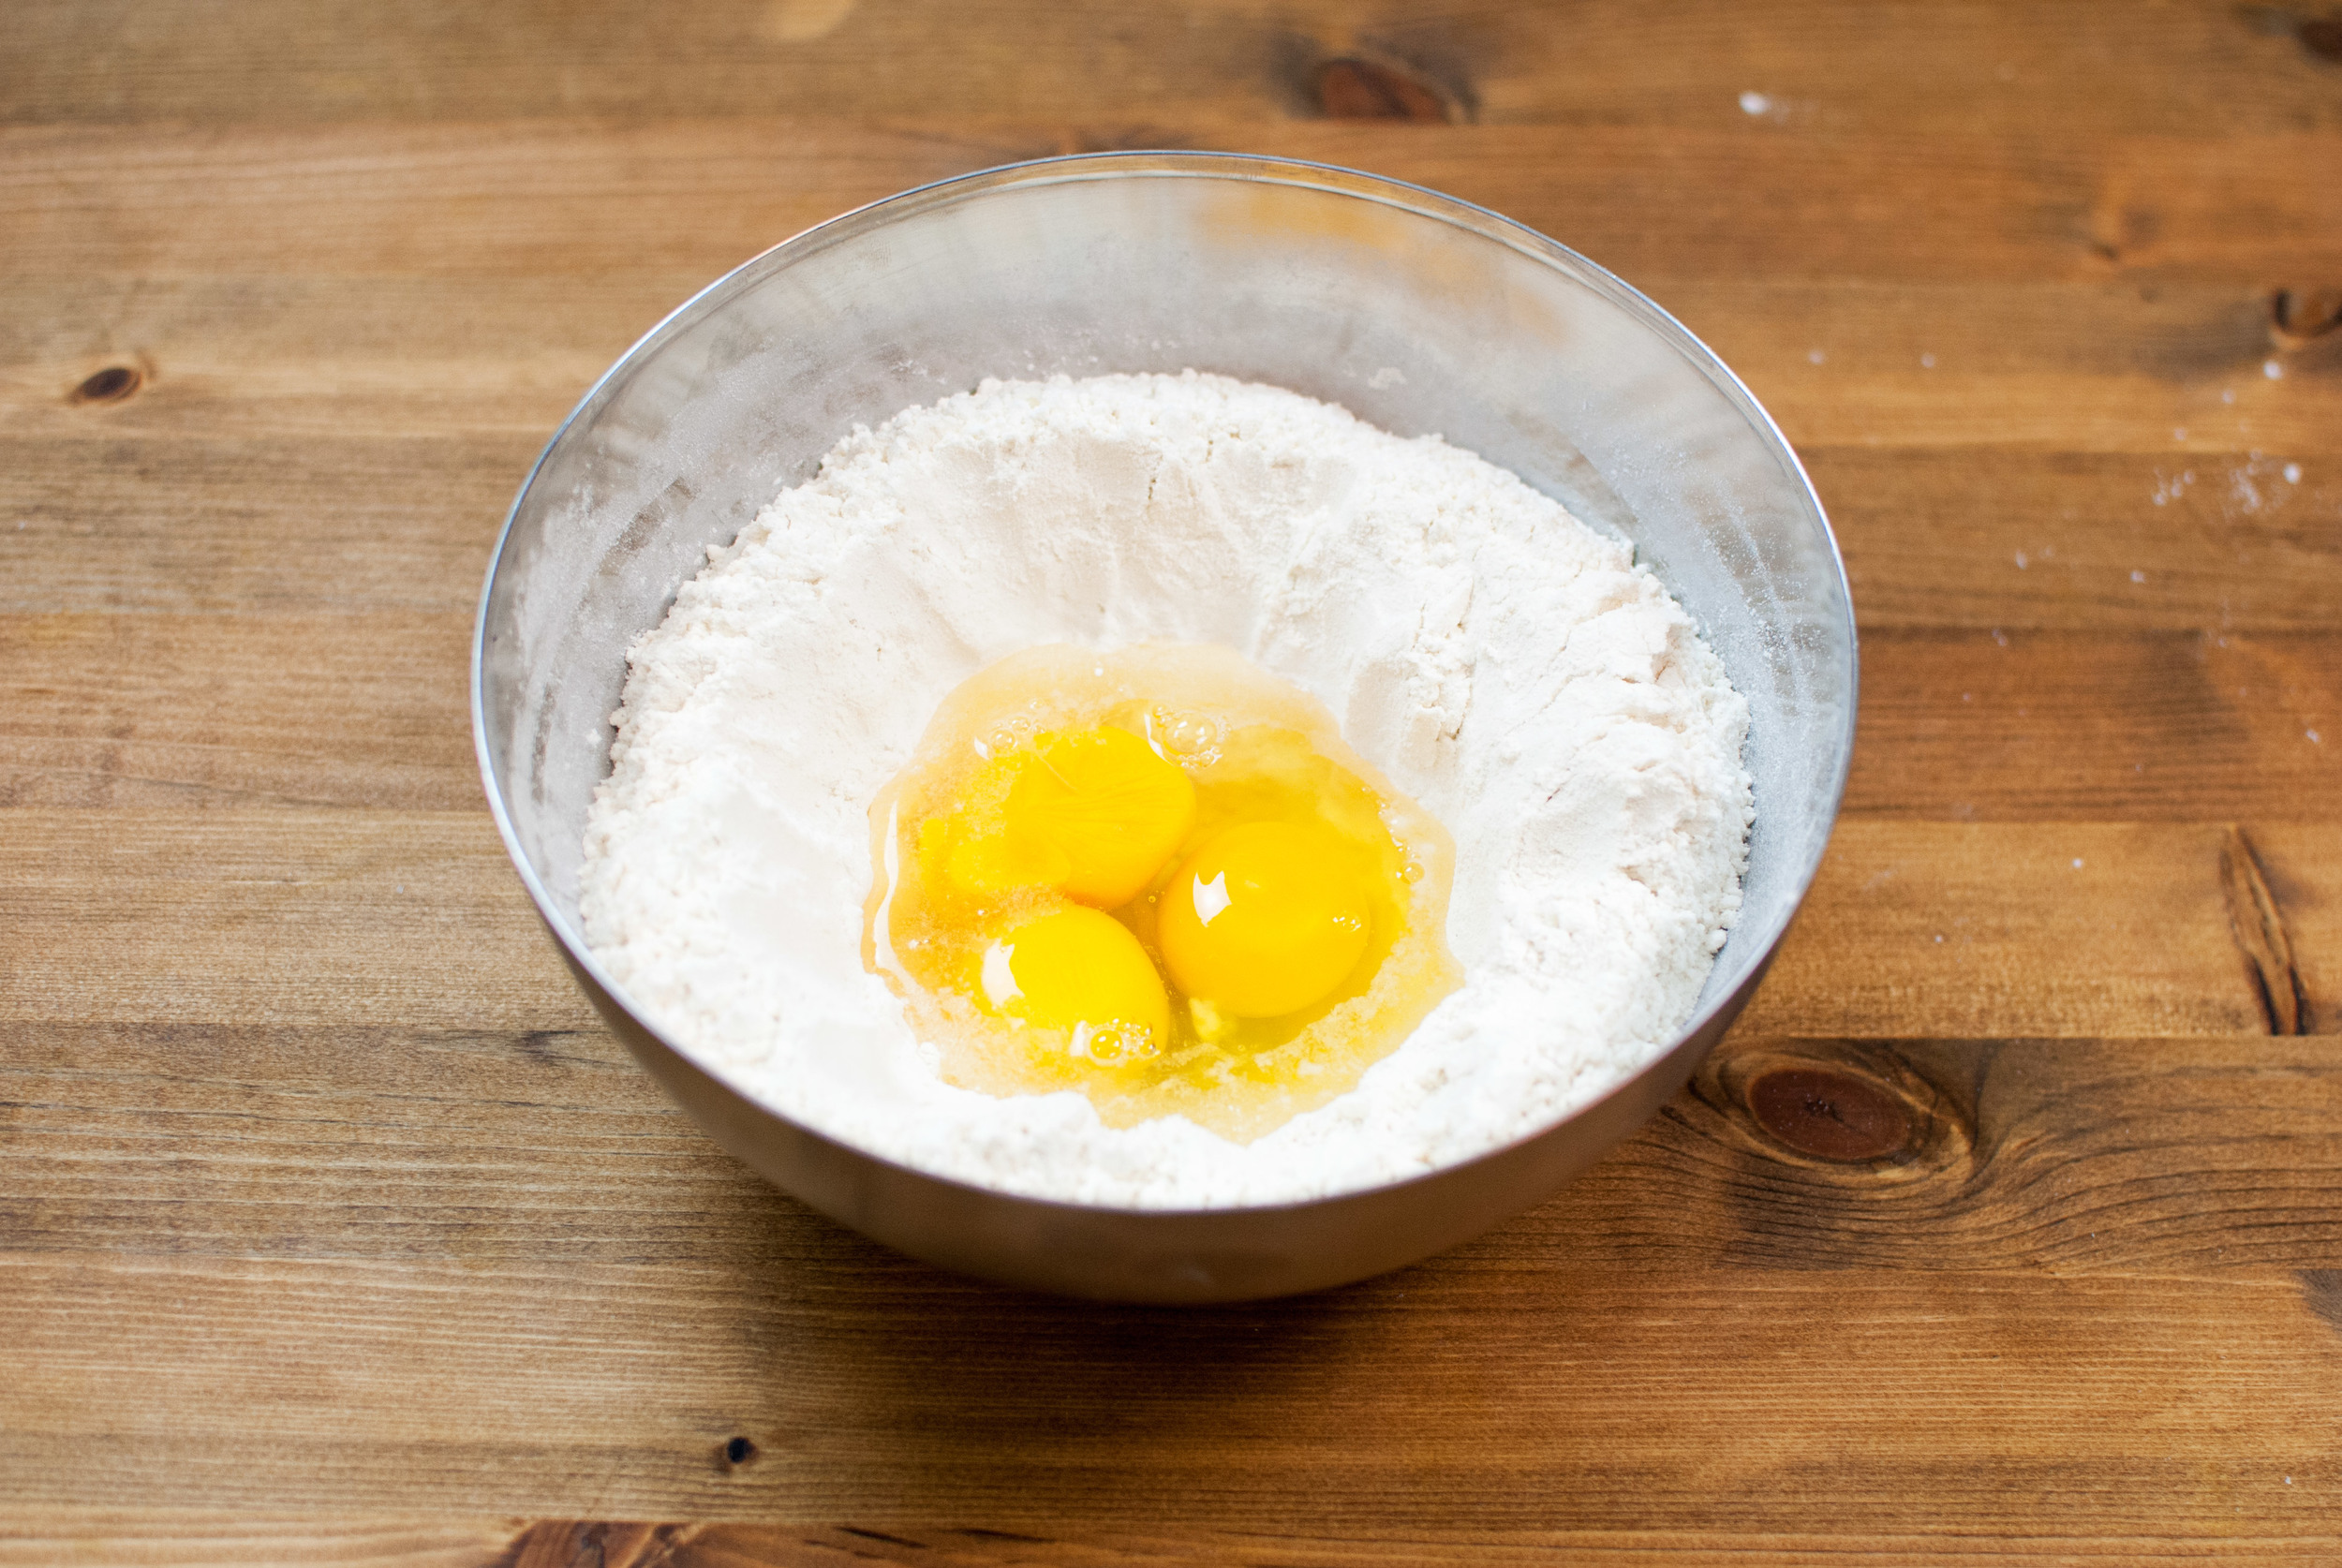
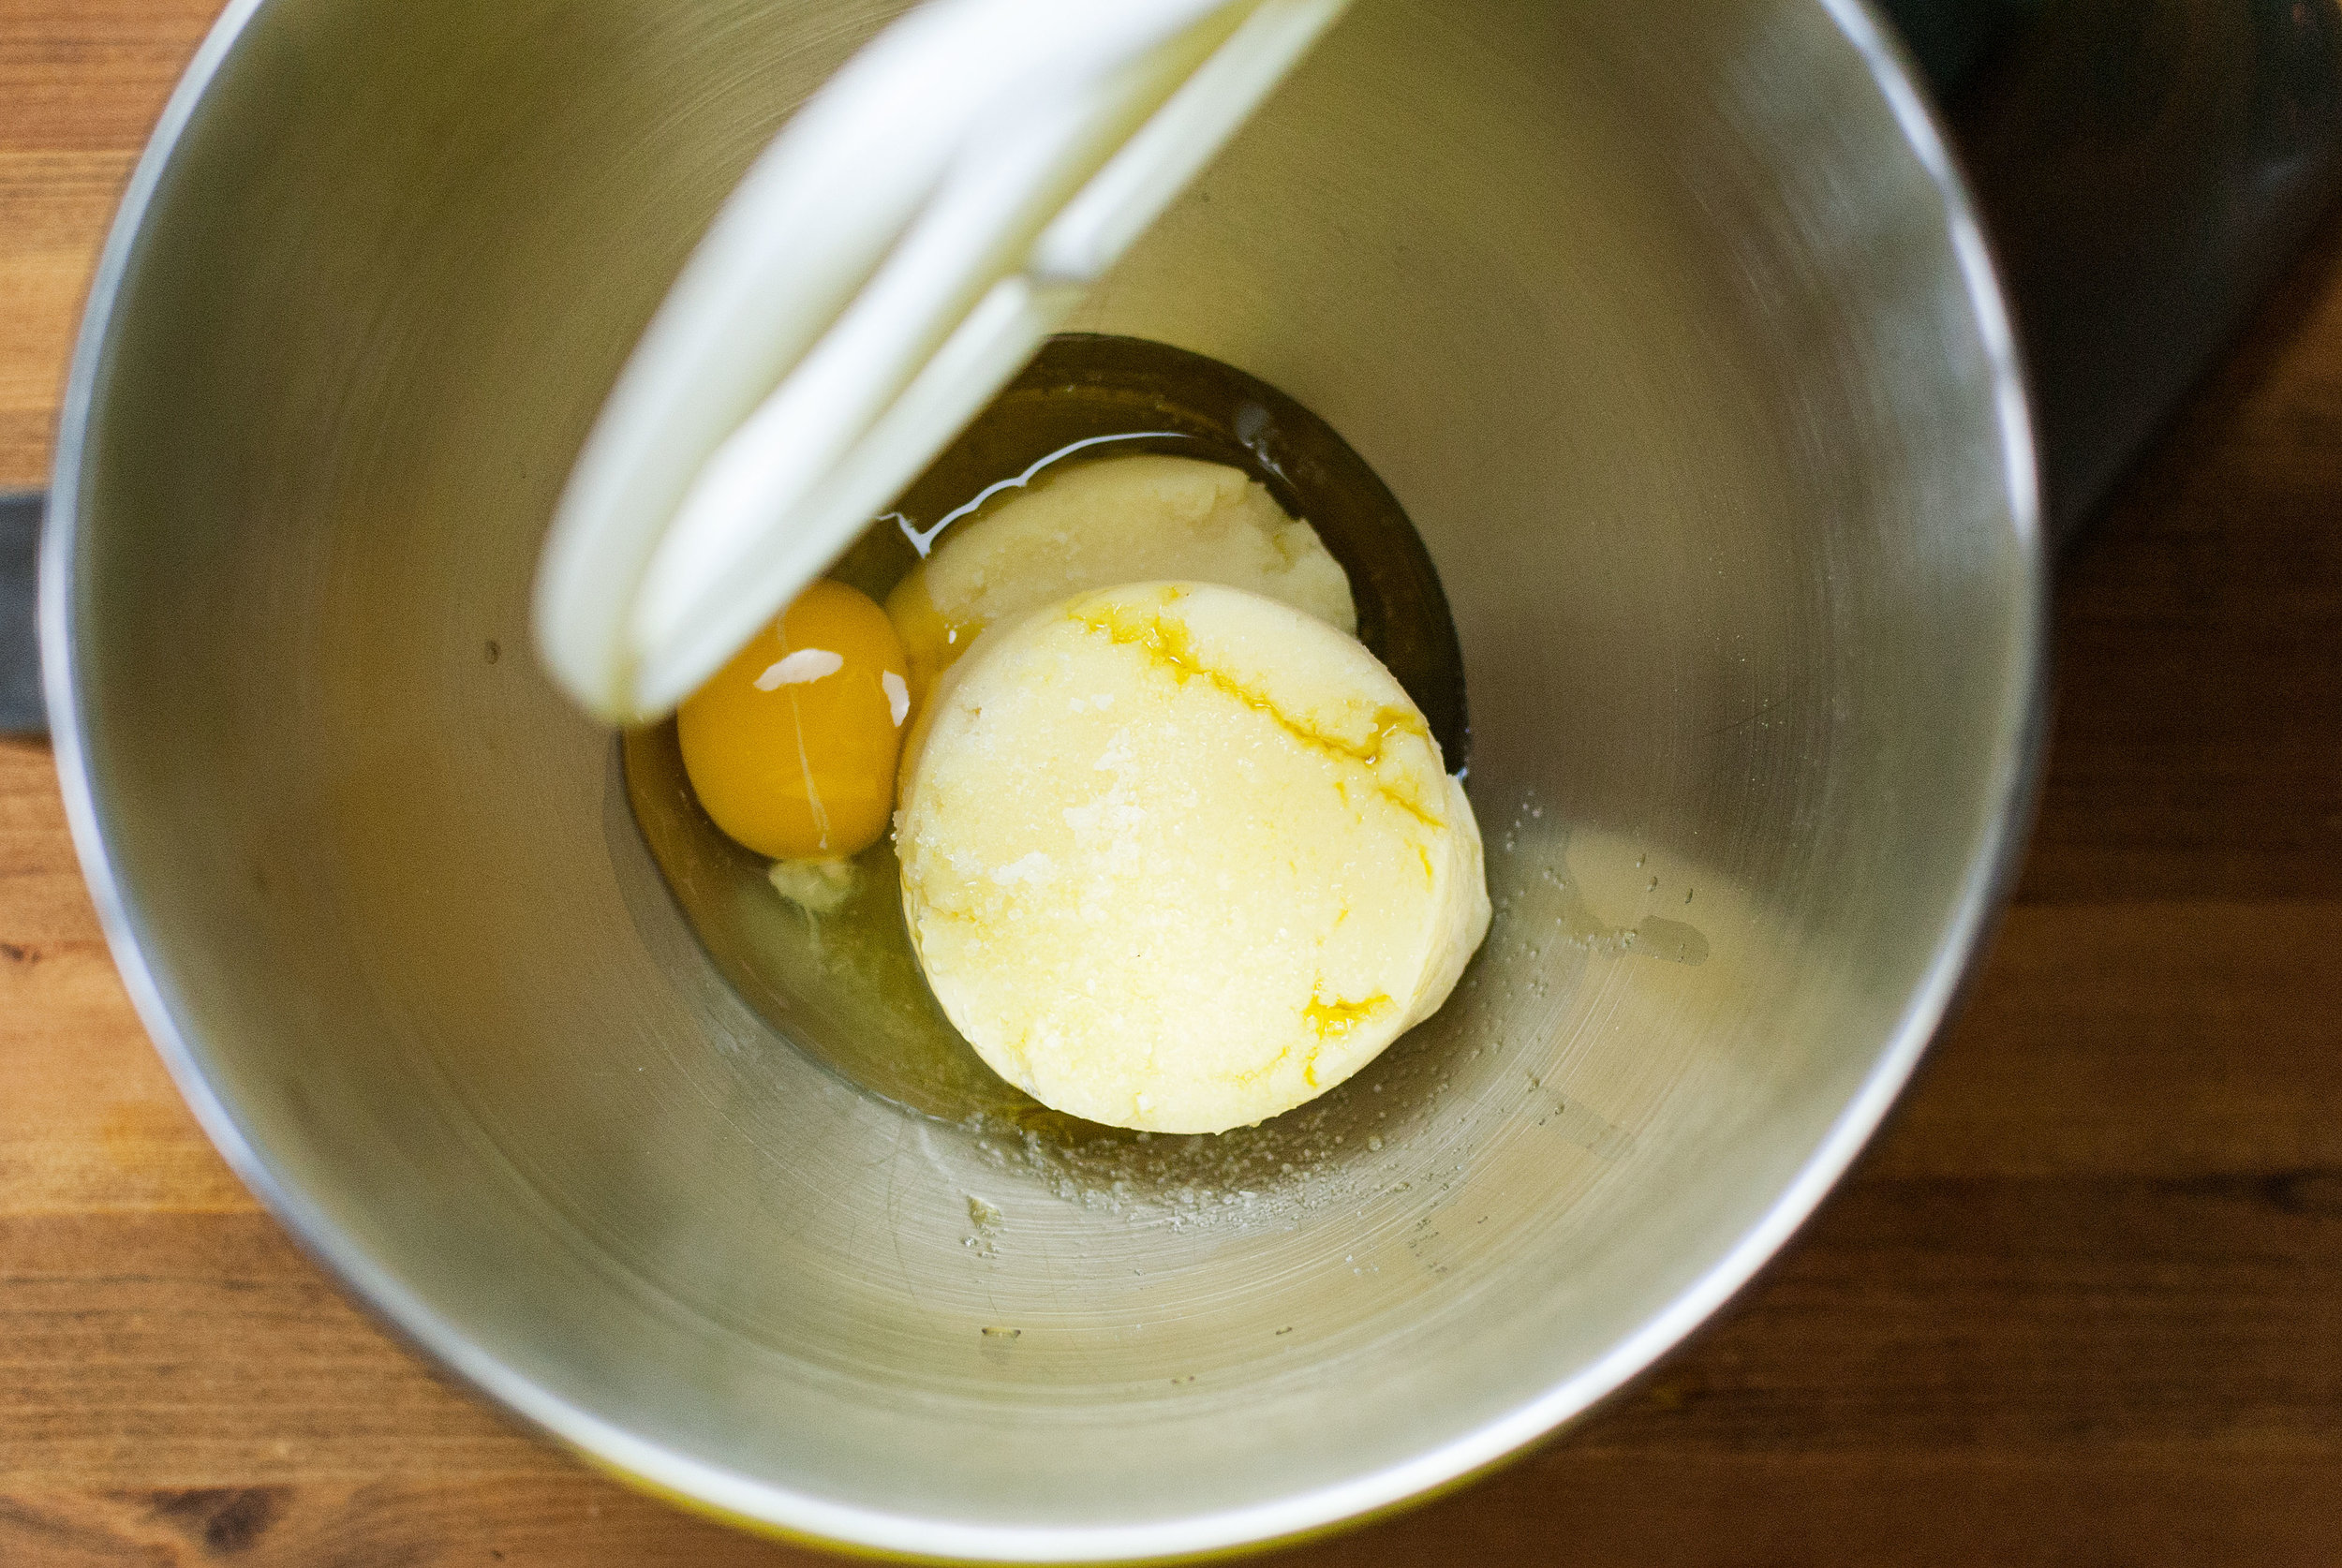
    In a bowl, add the flour and create a shallow well in the center with it for the eggs. Crack the eggs into the center of the well and beat them with a fork until they look like what you’d use for scrambled eggs.

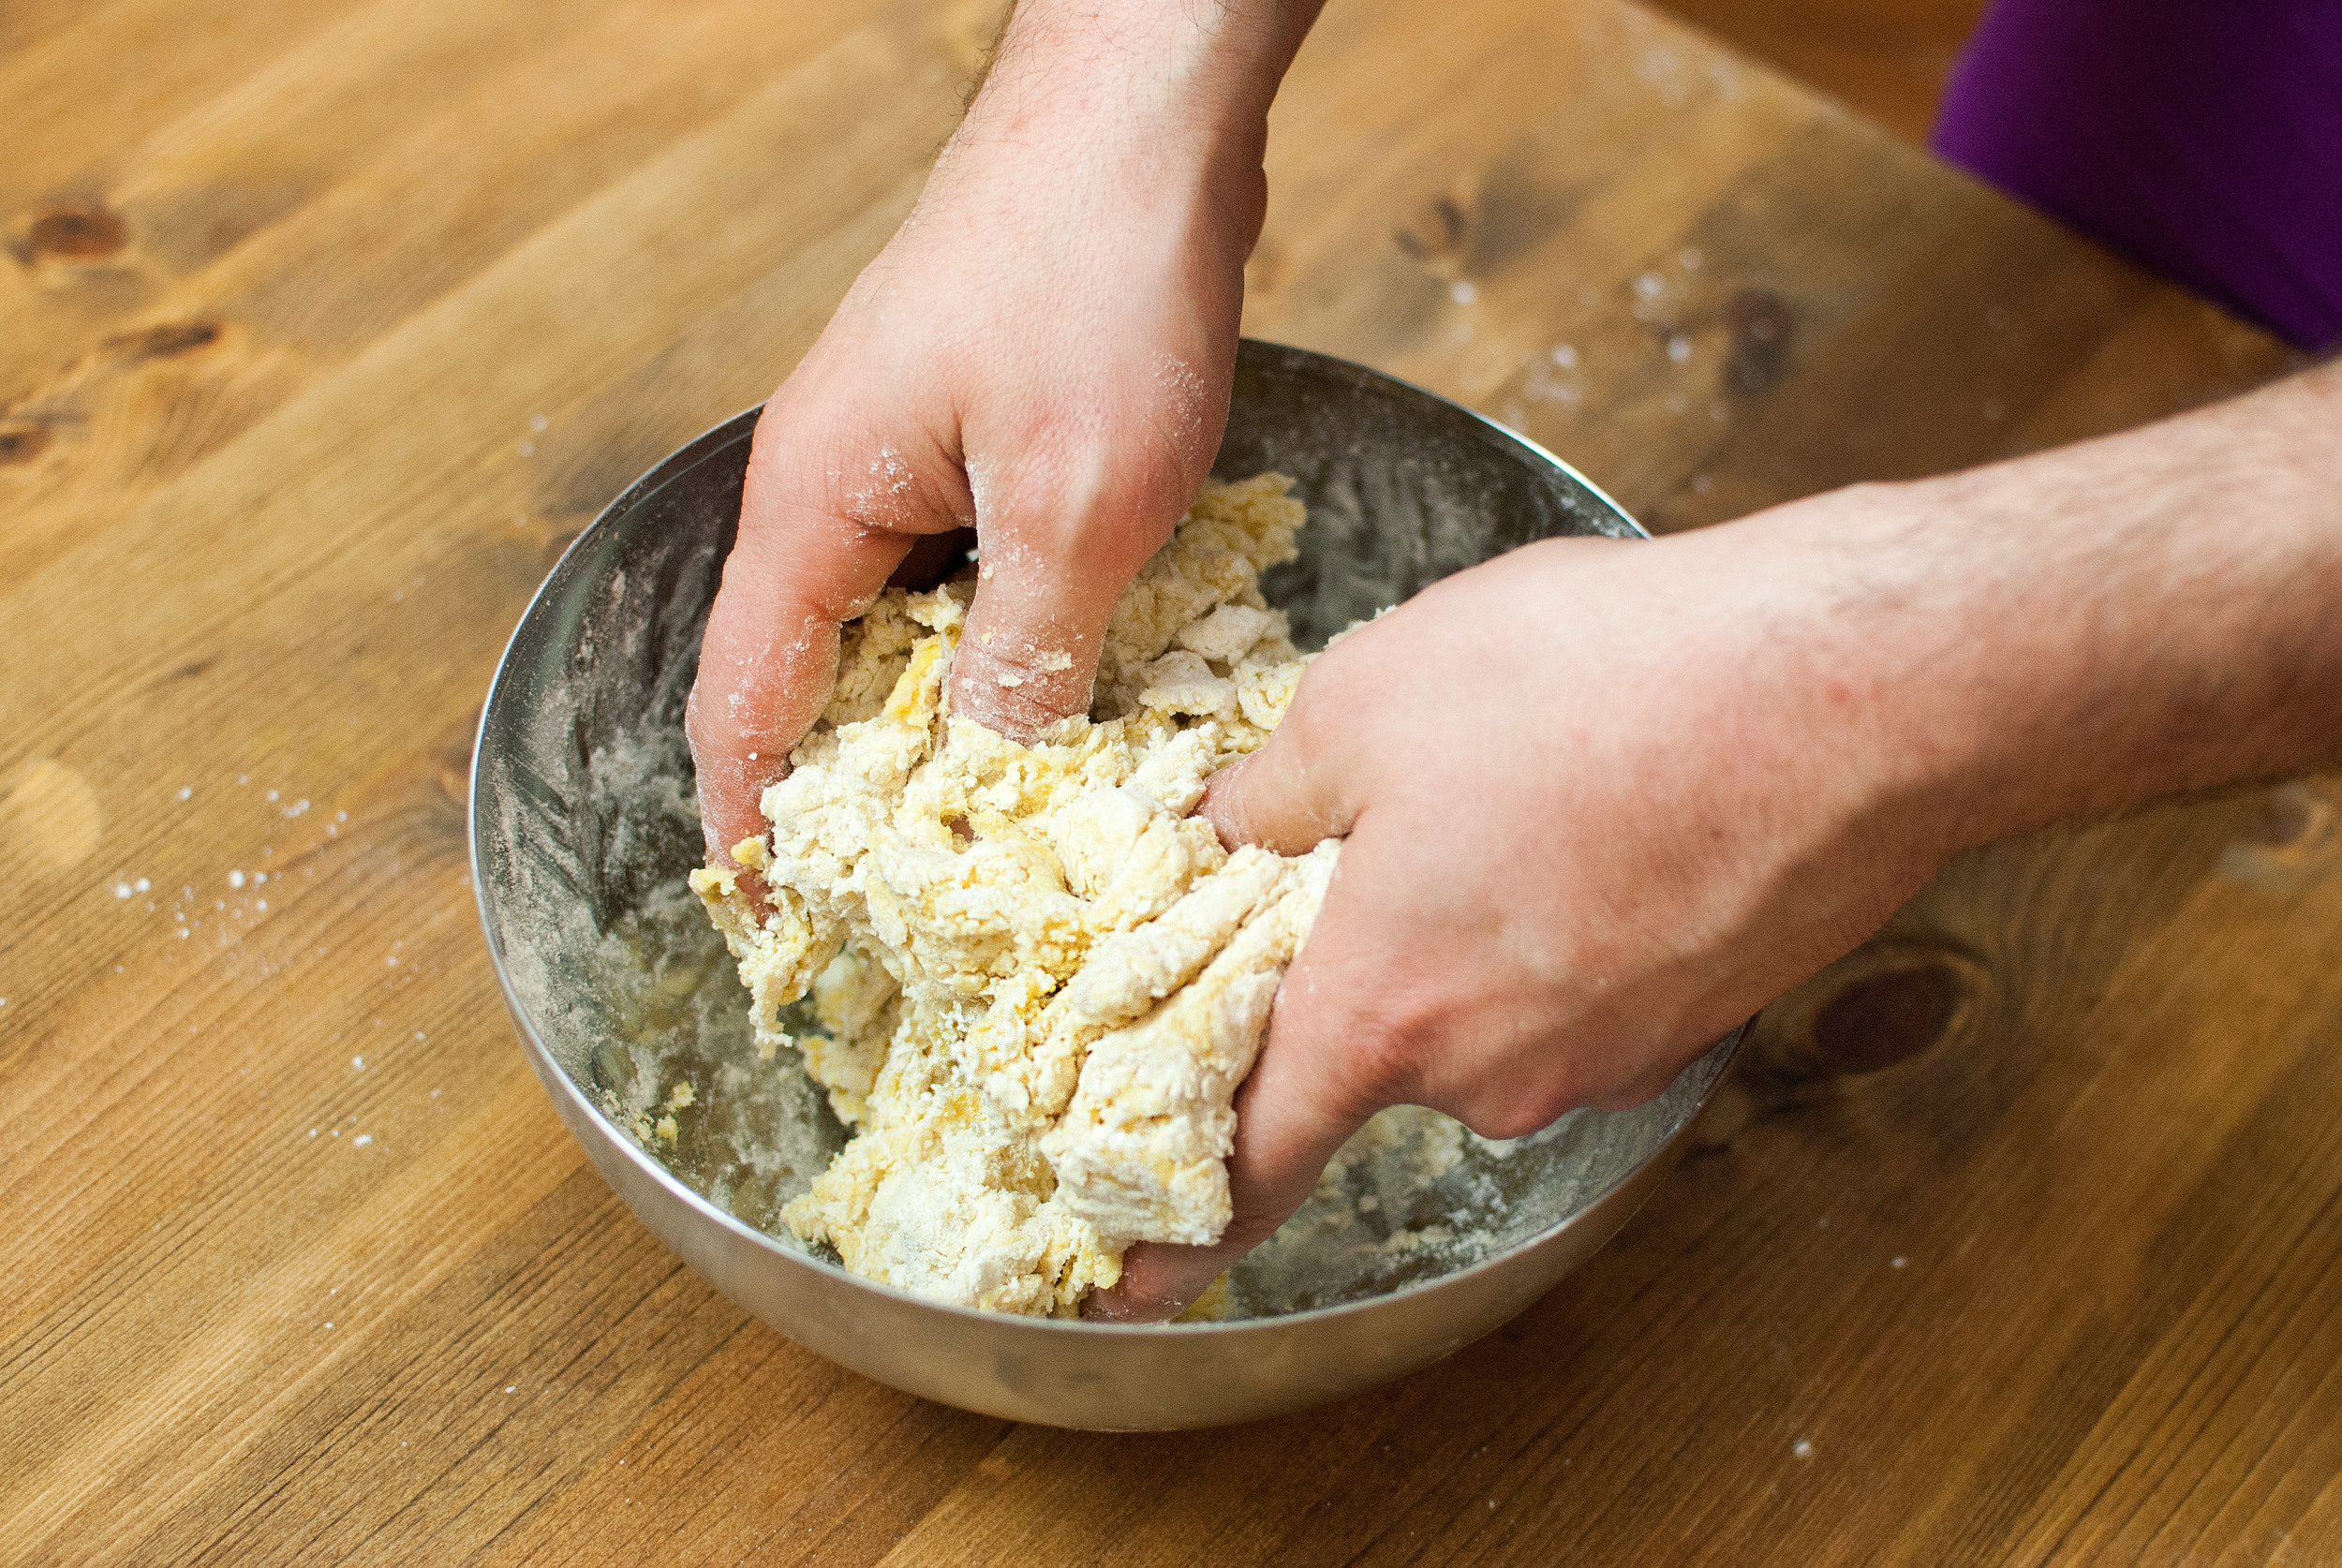
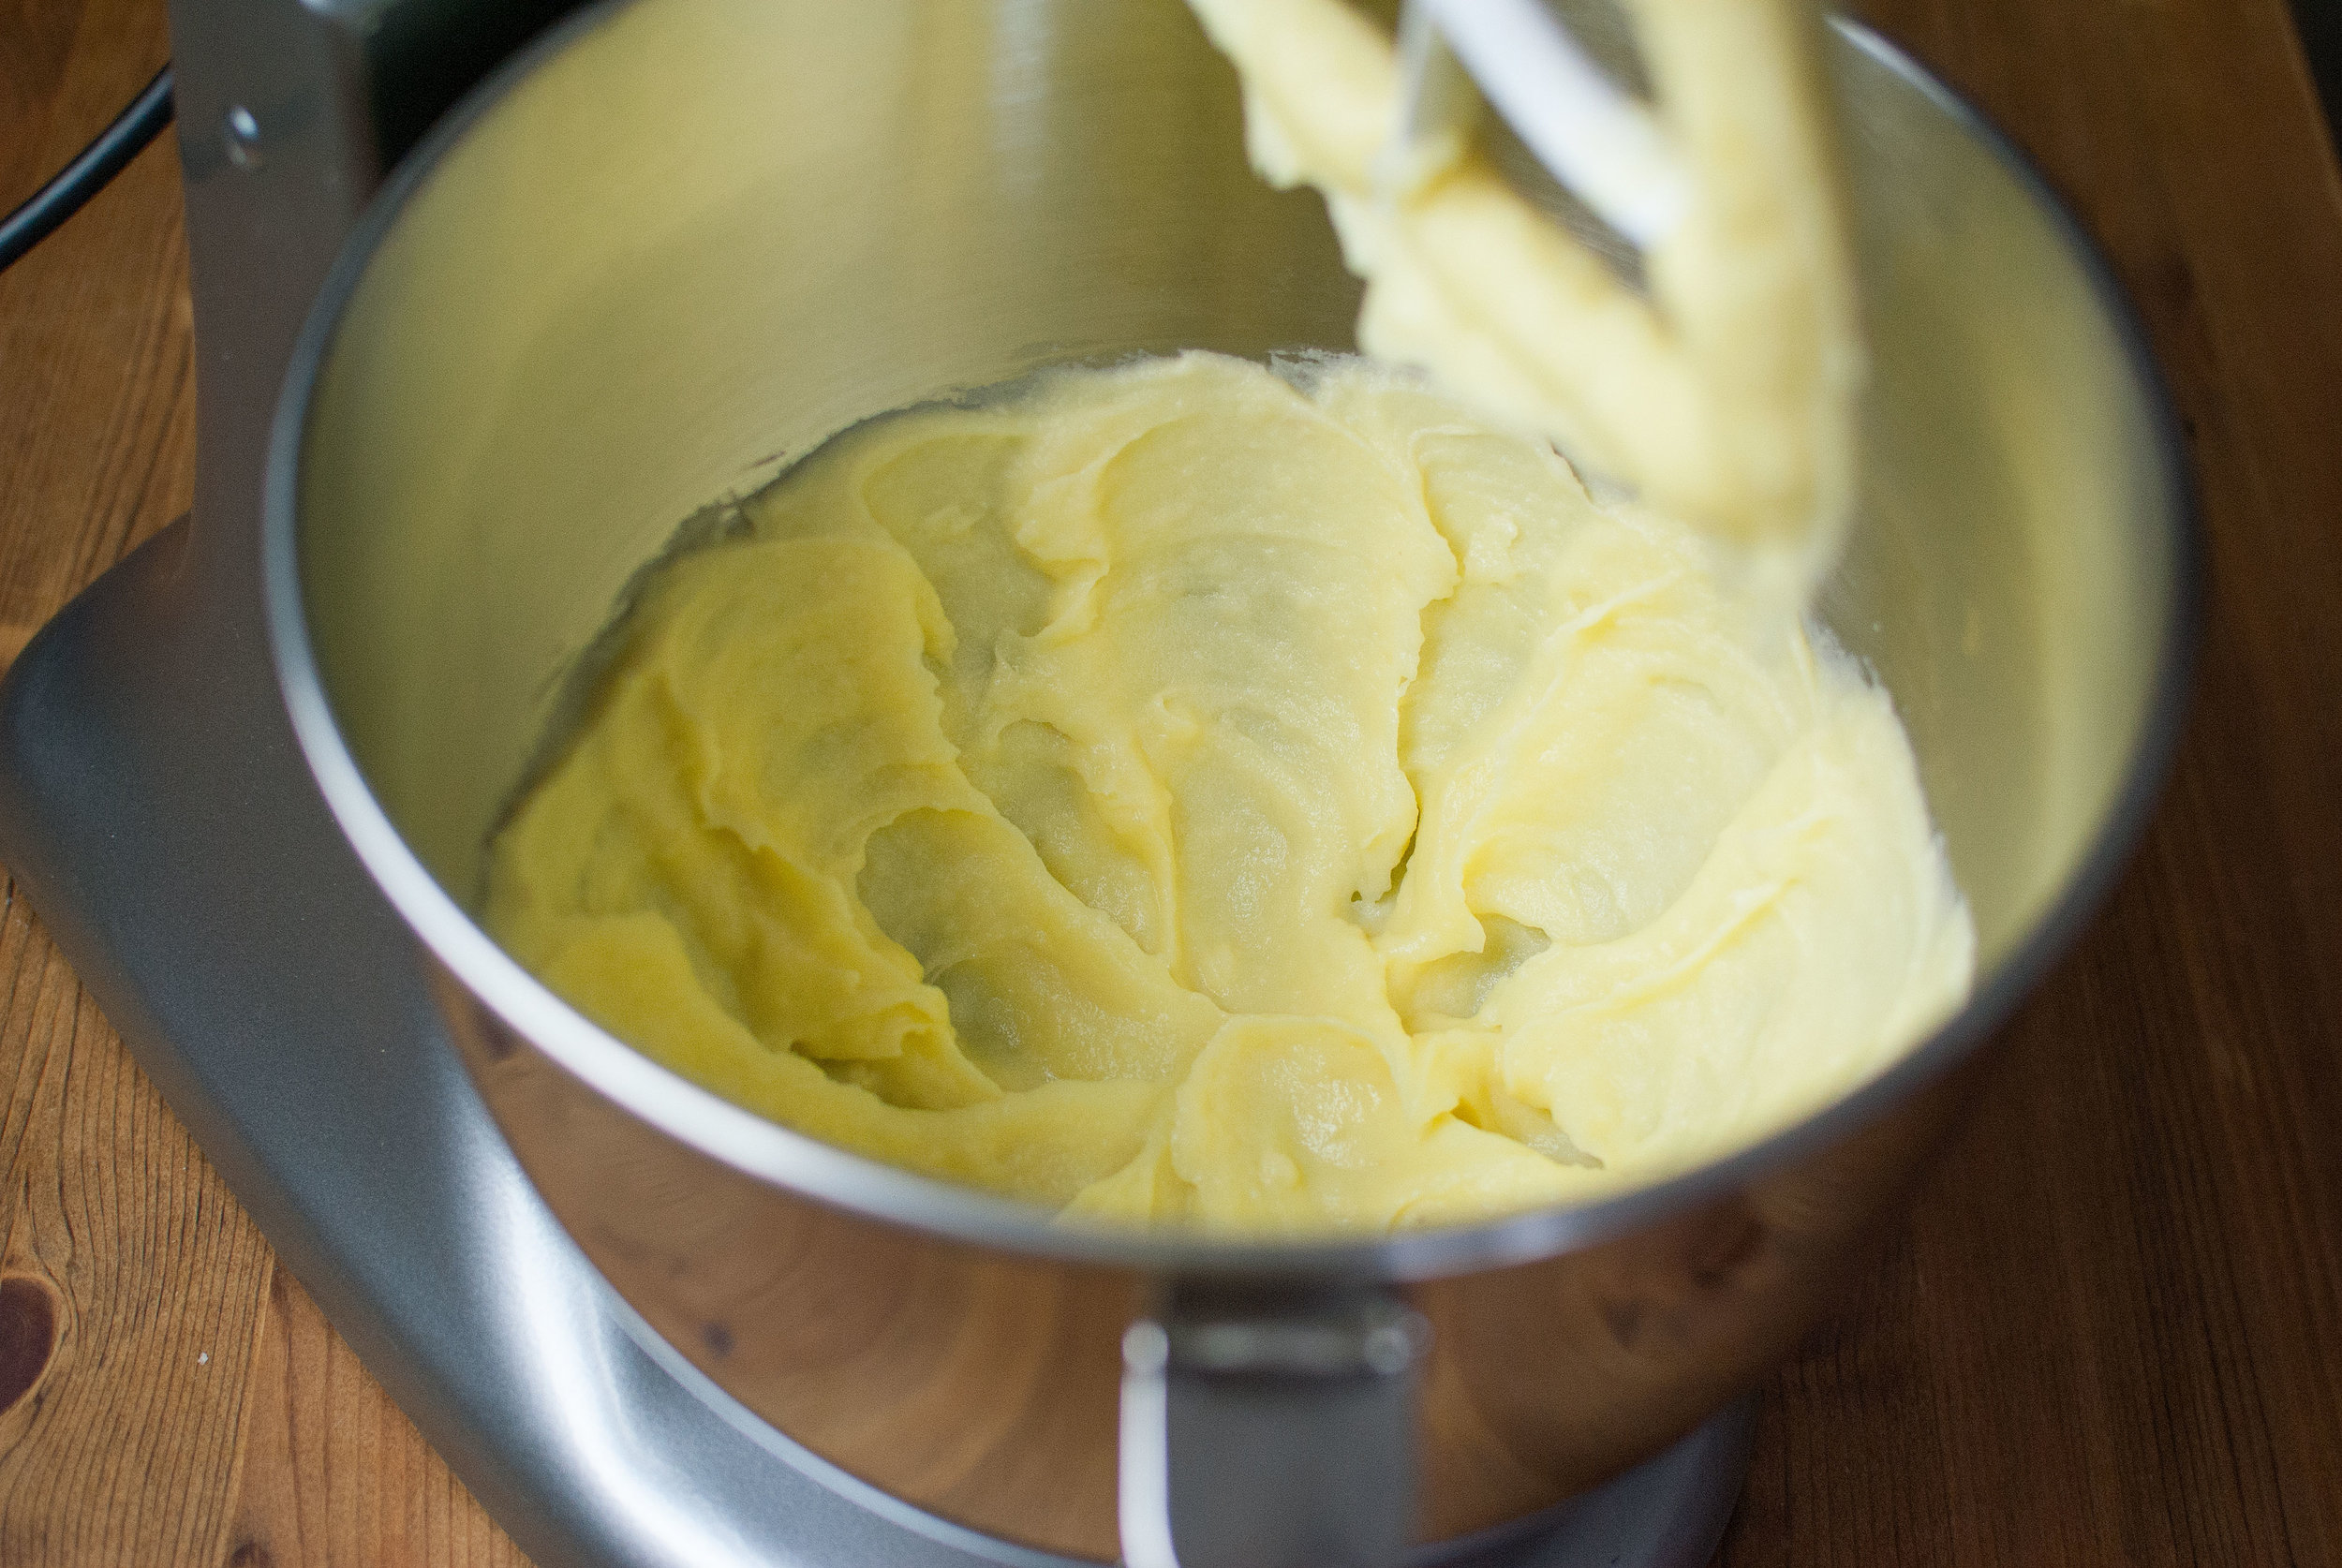
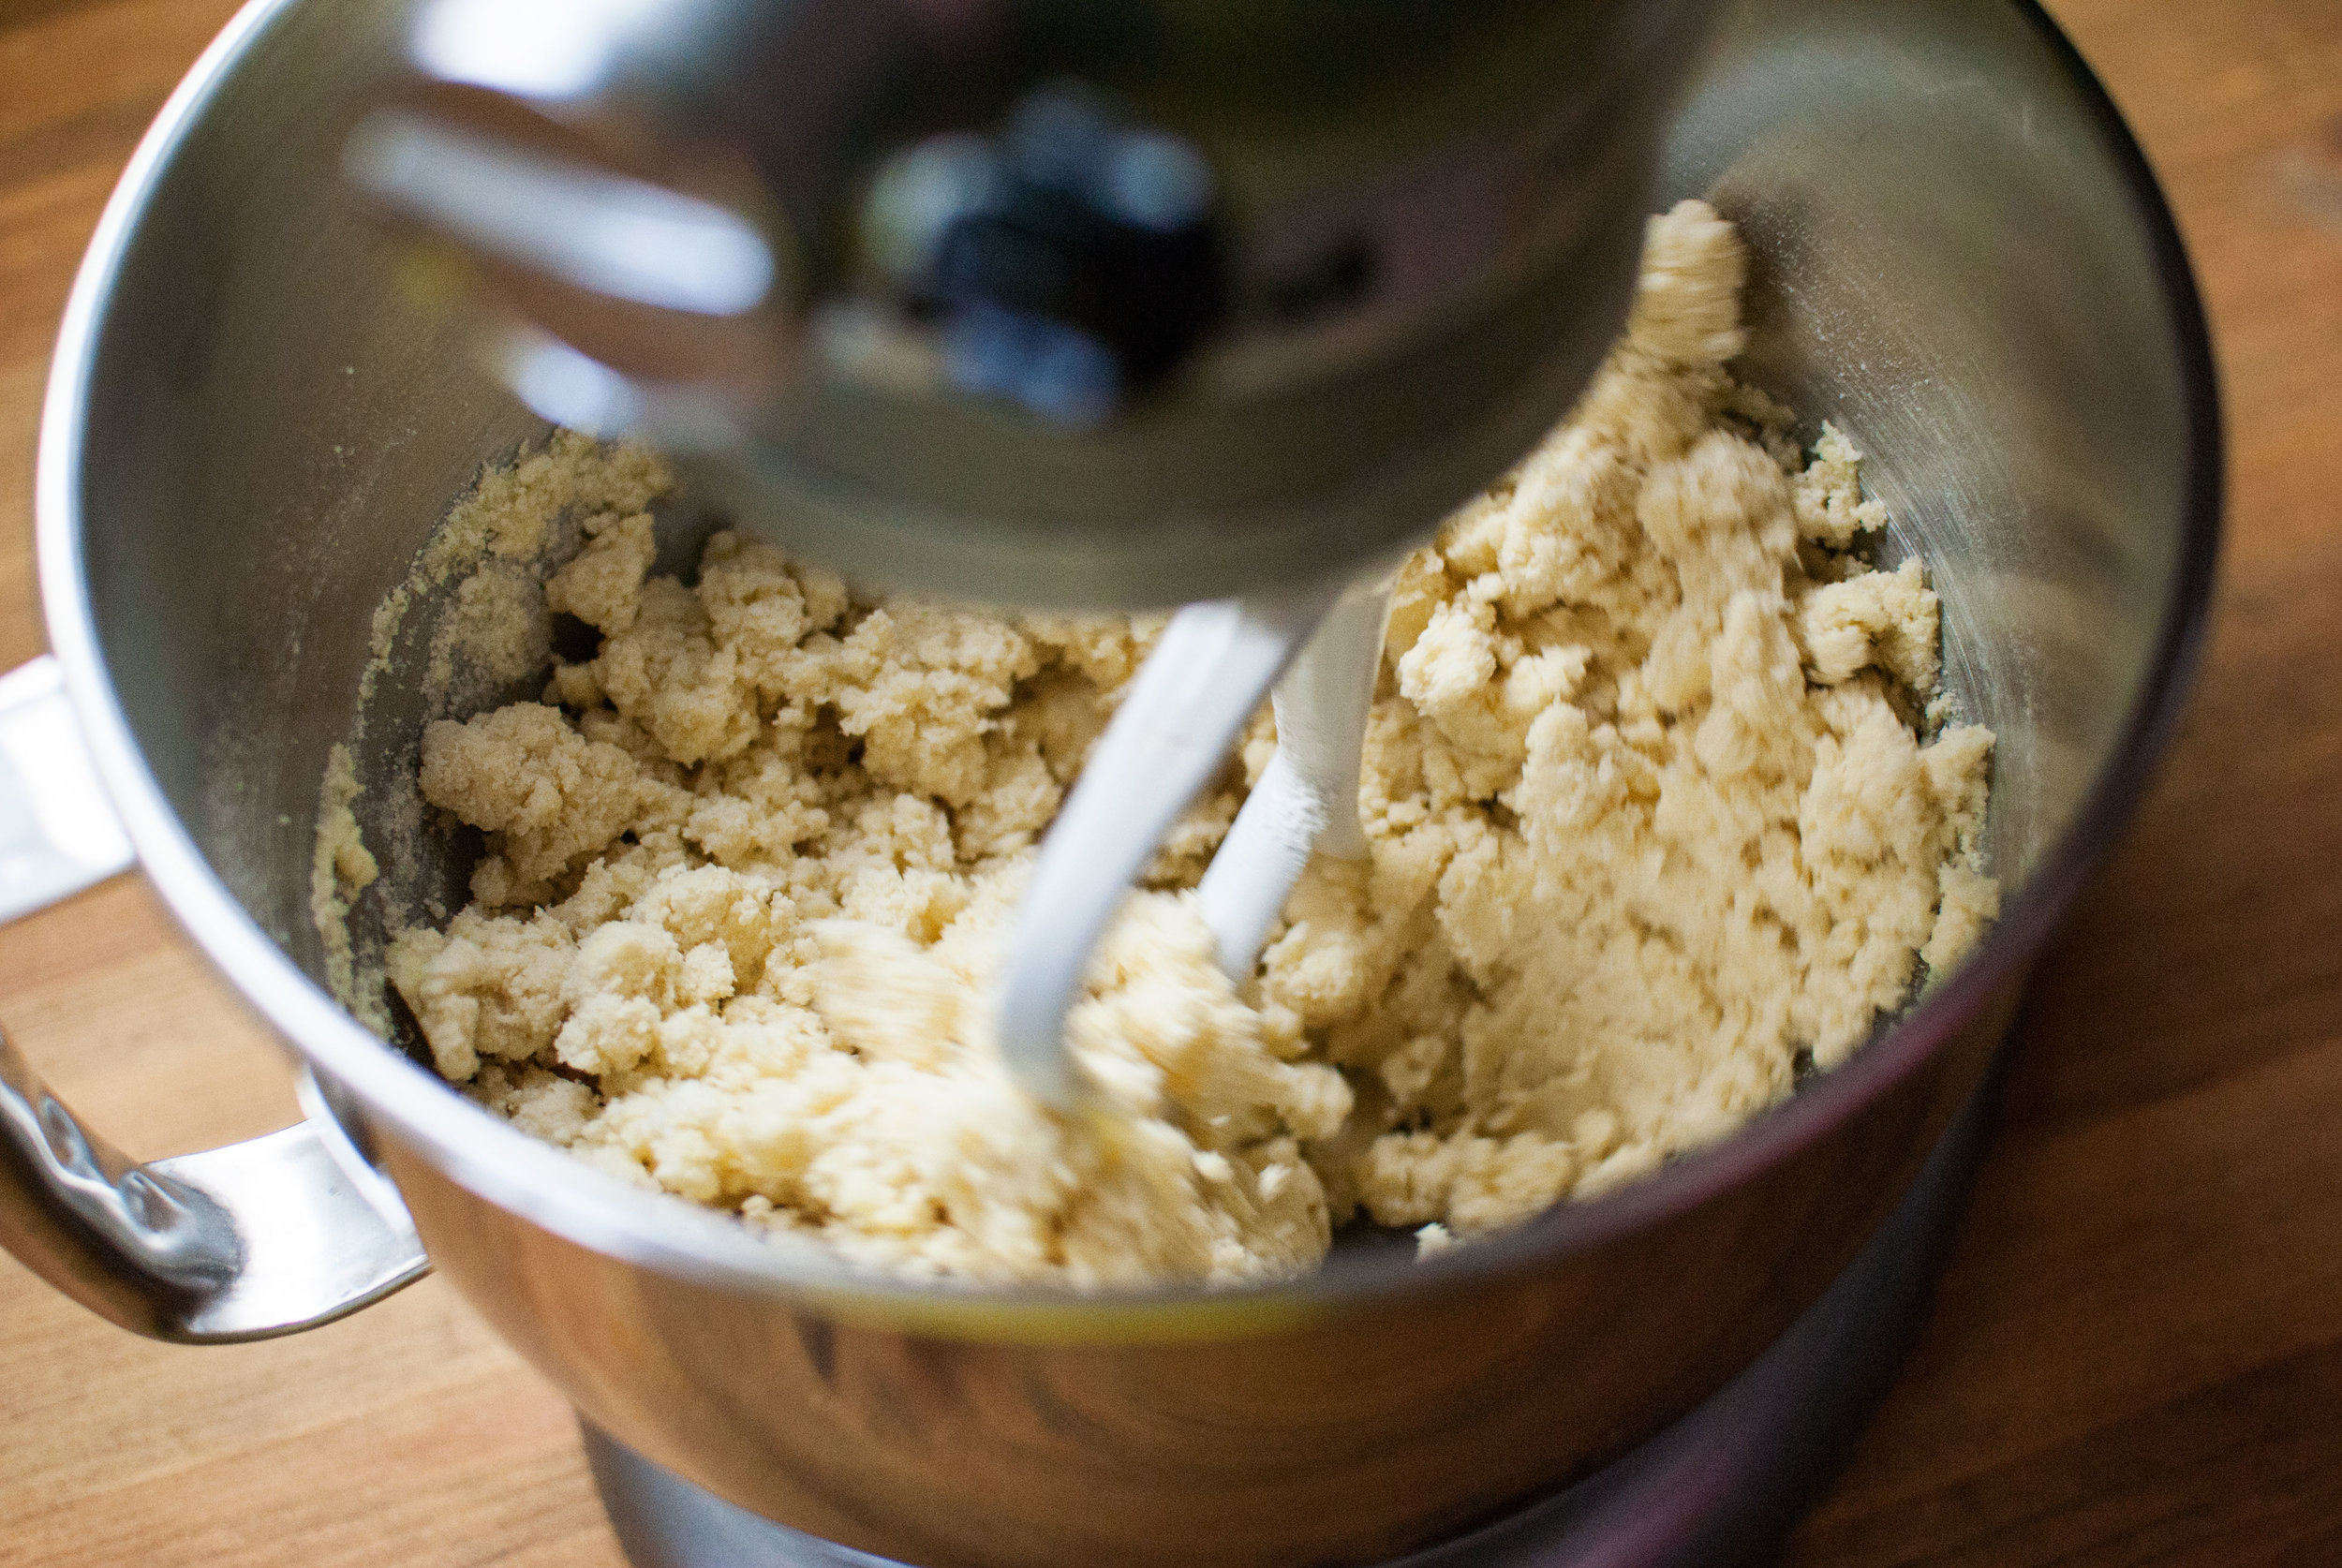
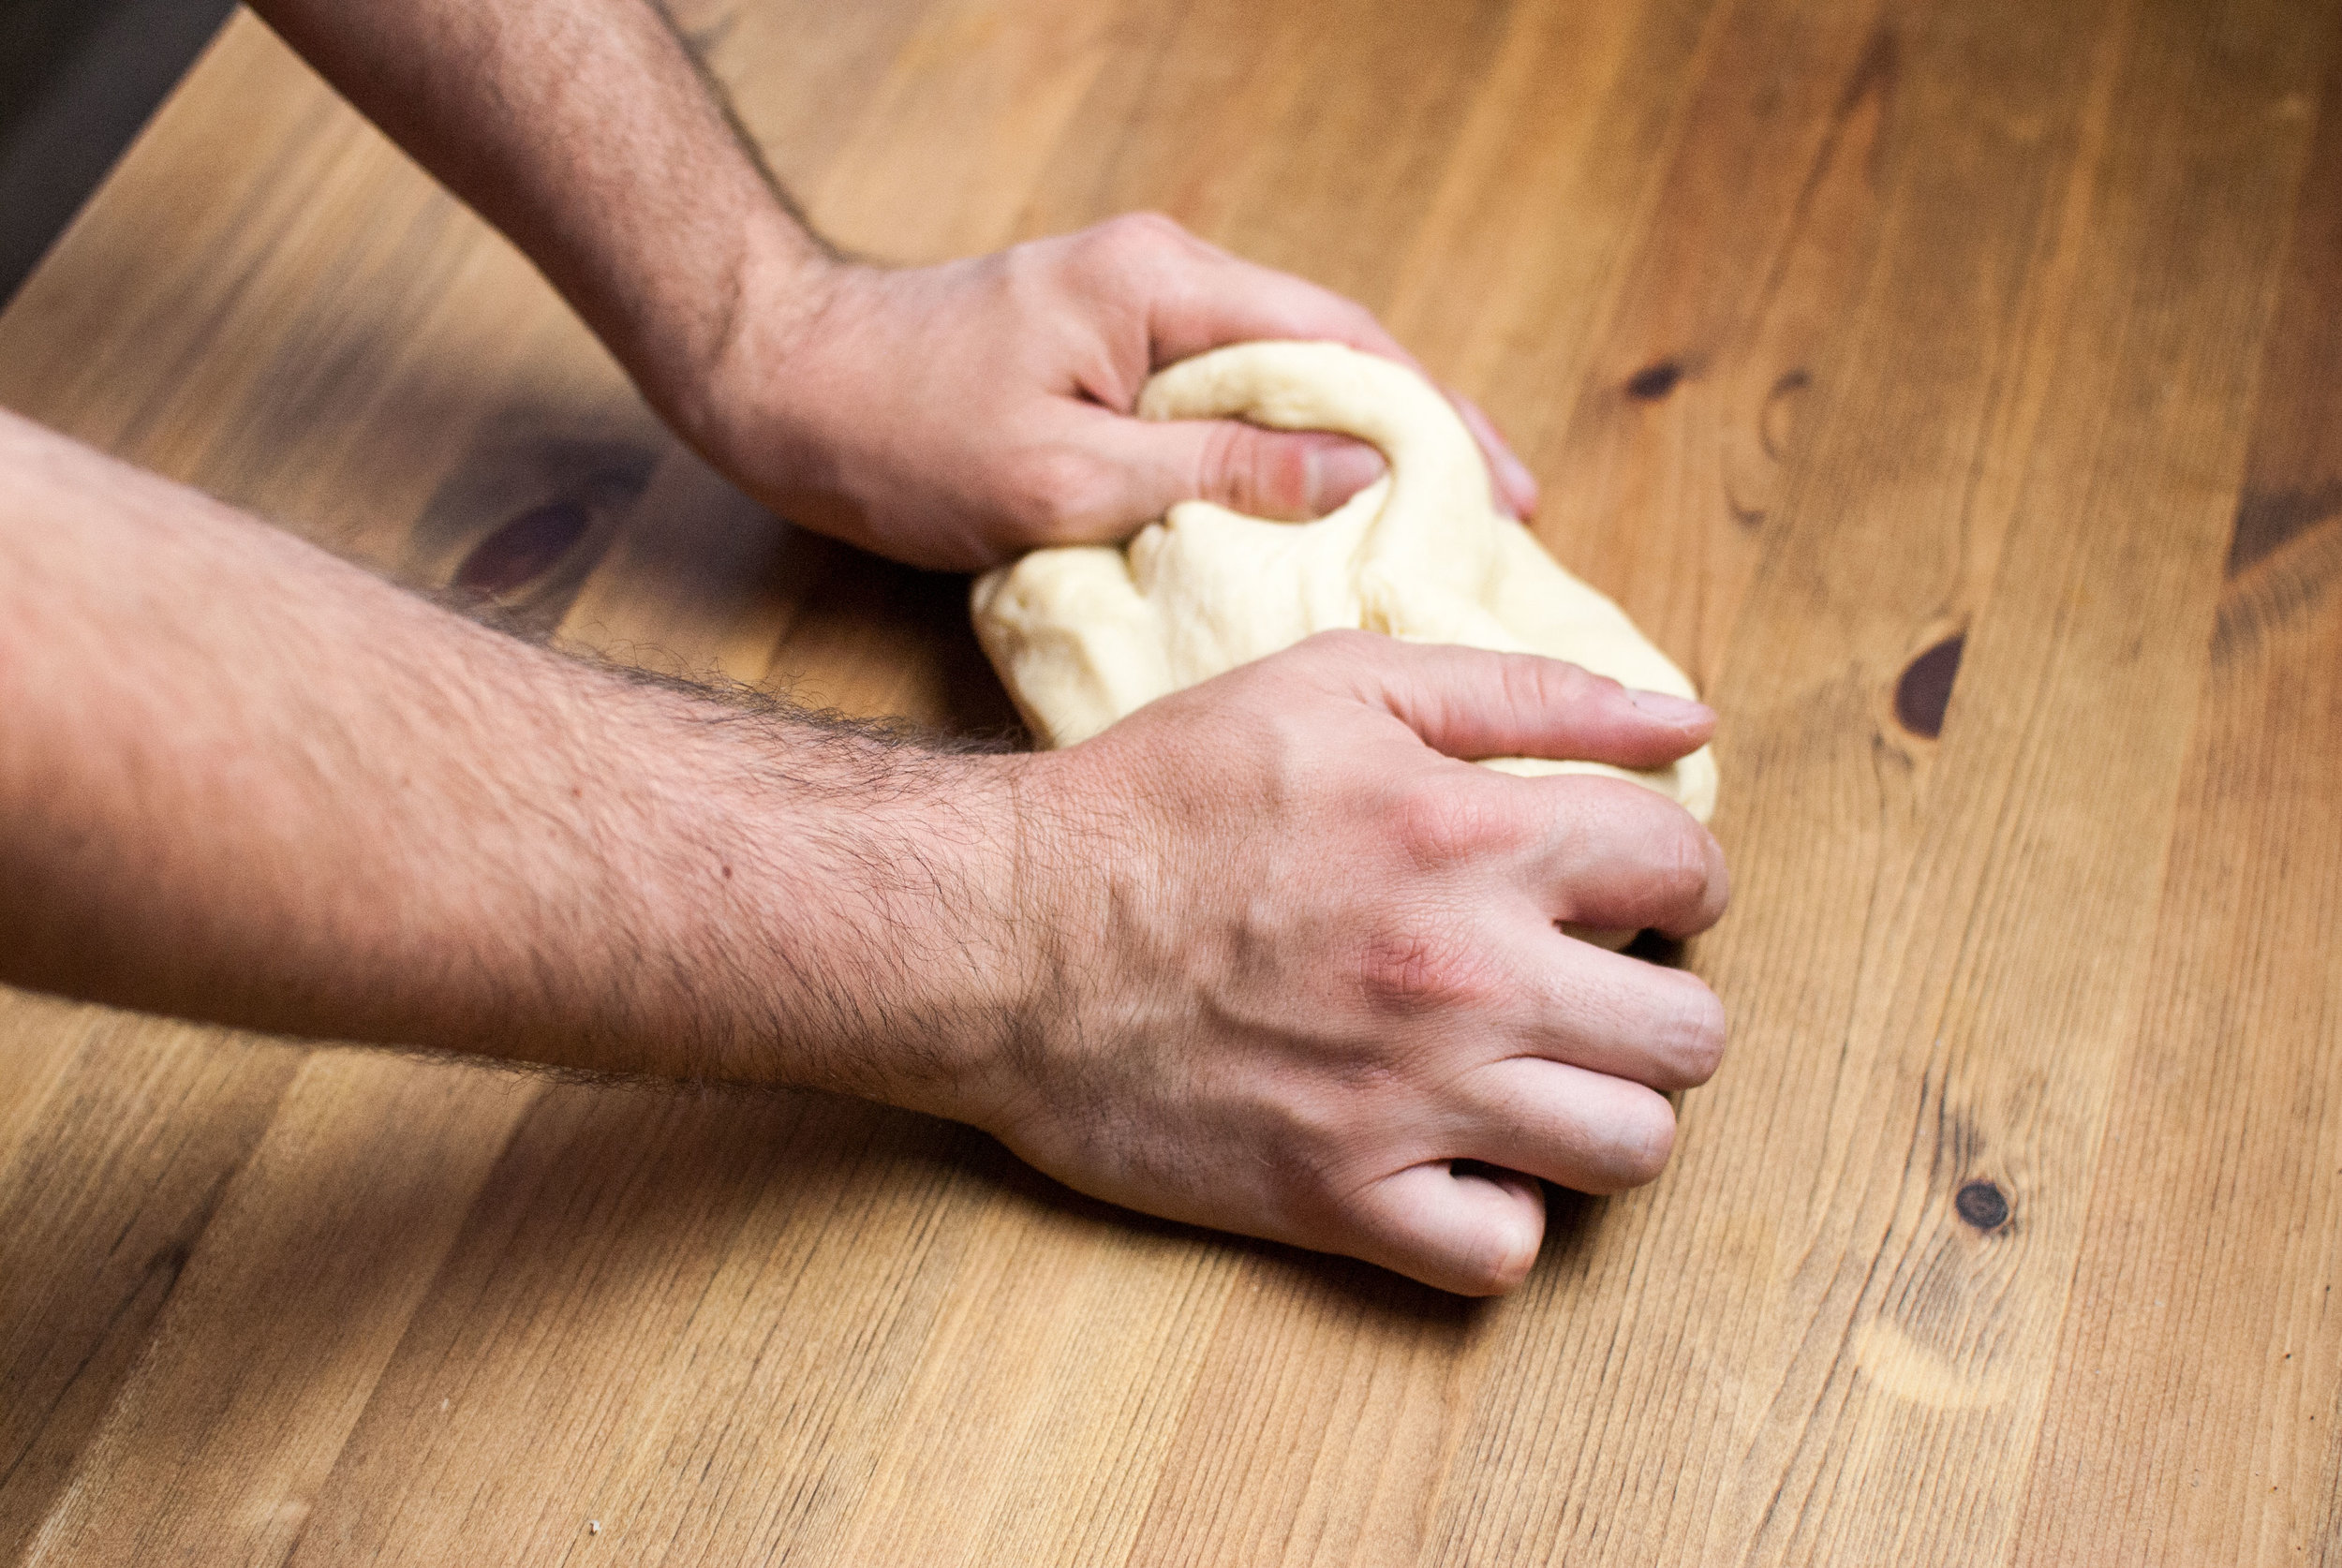
    Gradually stir the flour into the eggs with the fork, moving more and more flour to the center of the well. When the eggs have absorbed most of the the flour and the fork can no longer help you mix, use your hands and finish mixing the dough. Once everything is integrated, remove the dough from the bowl and place it onto a working surface with a small dusting of flour.

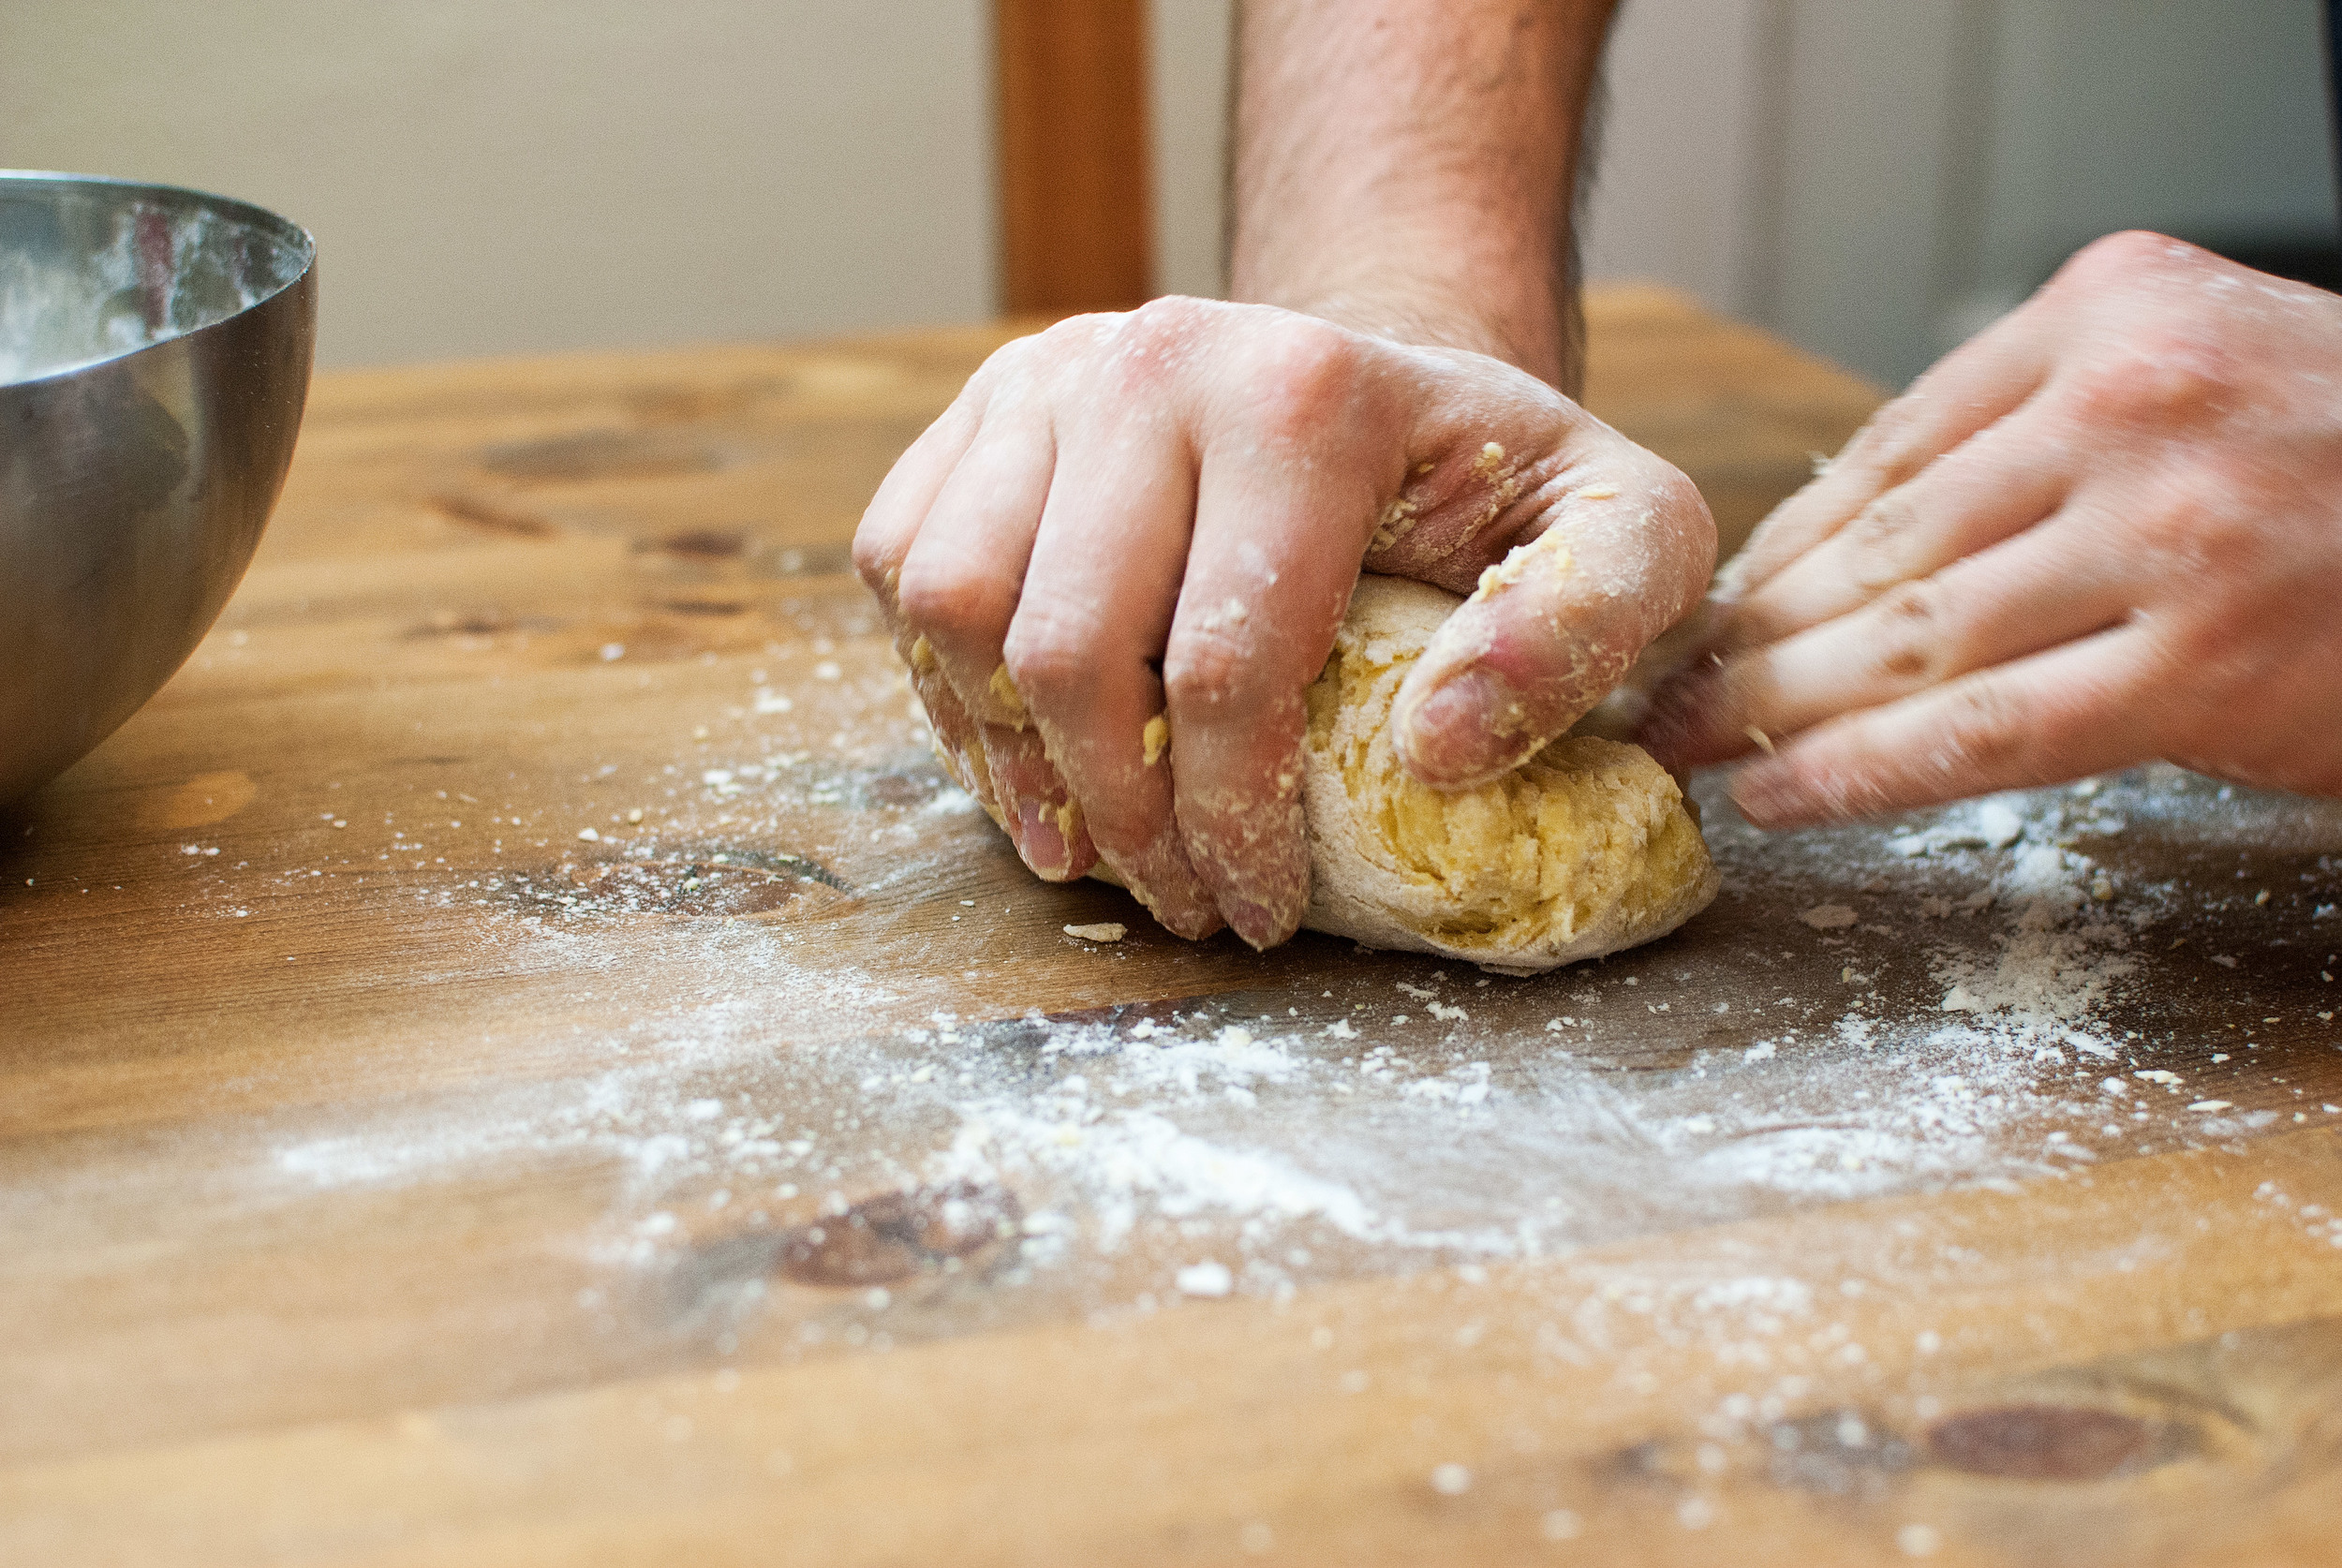
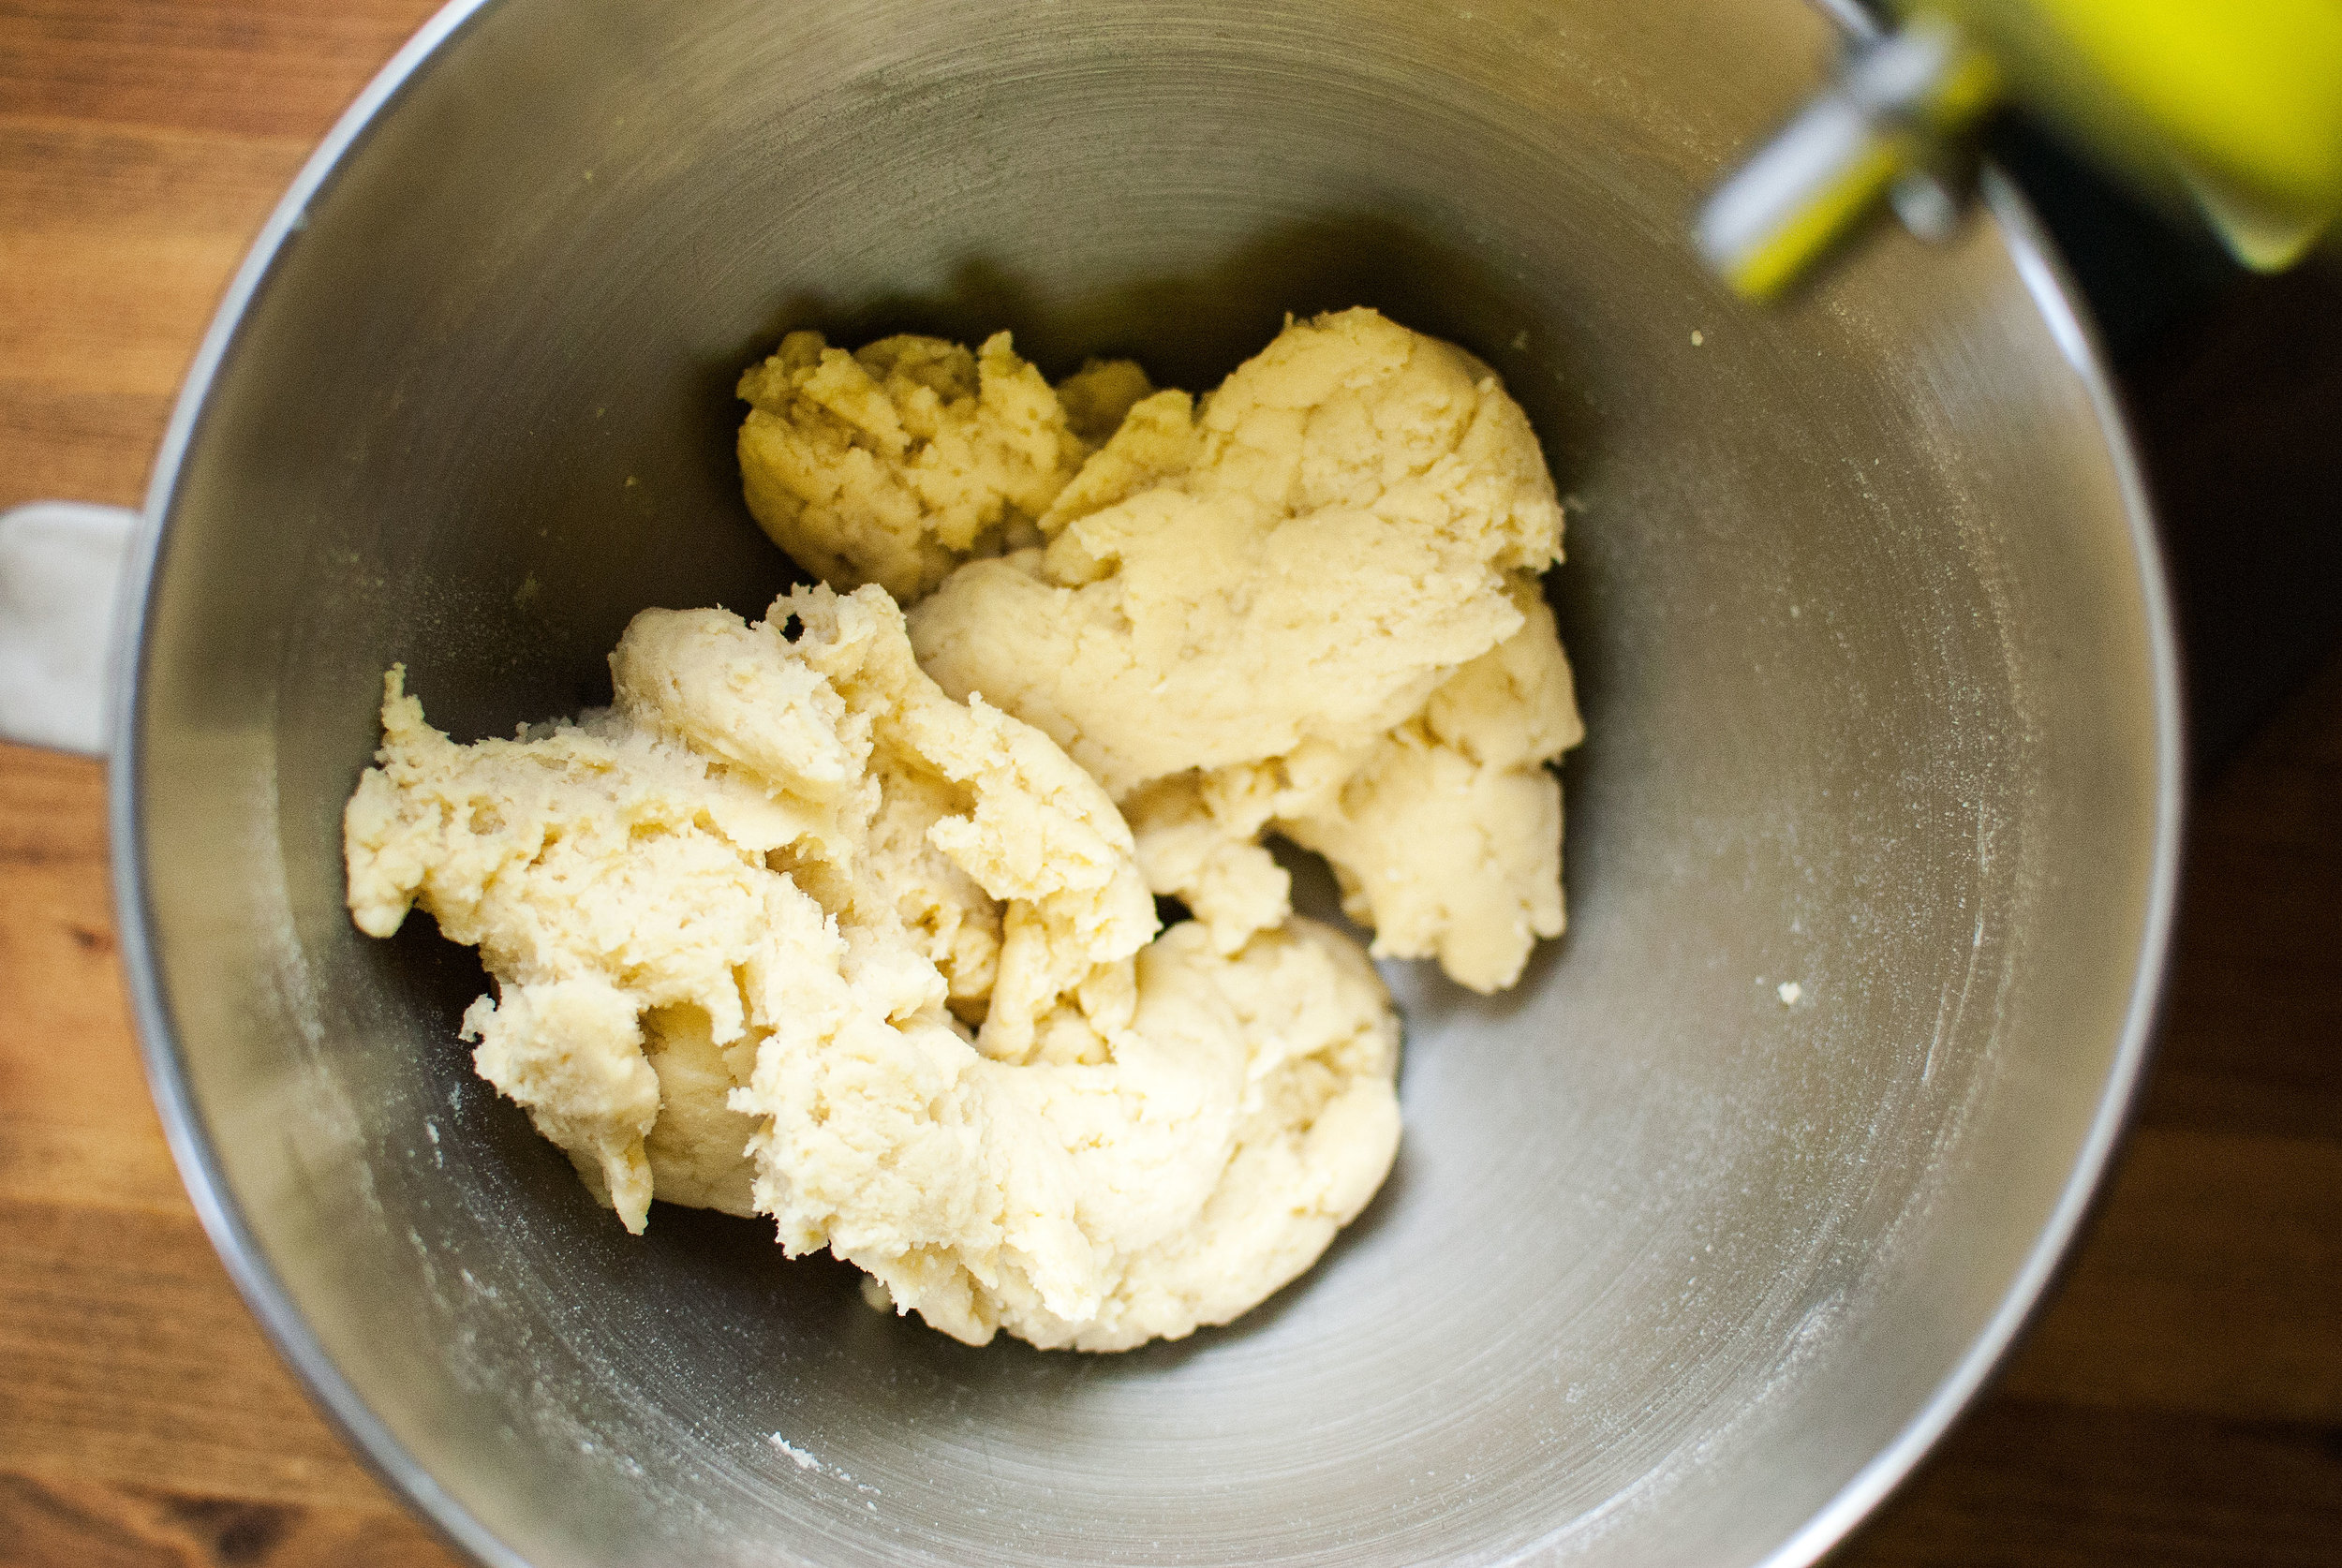
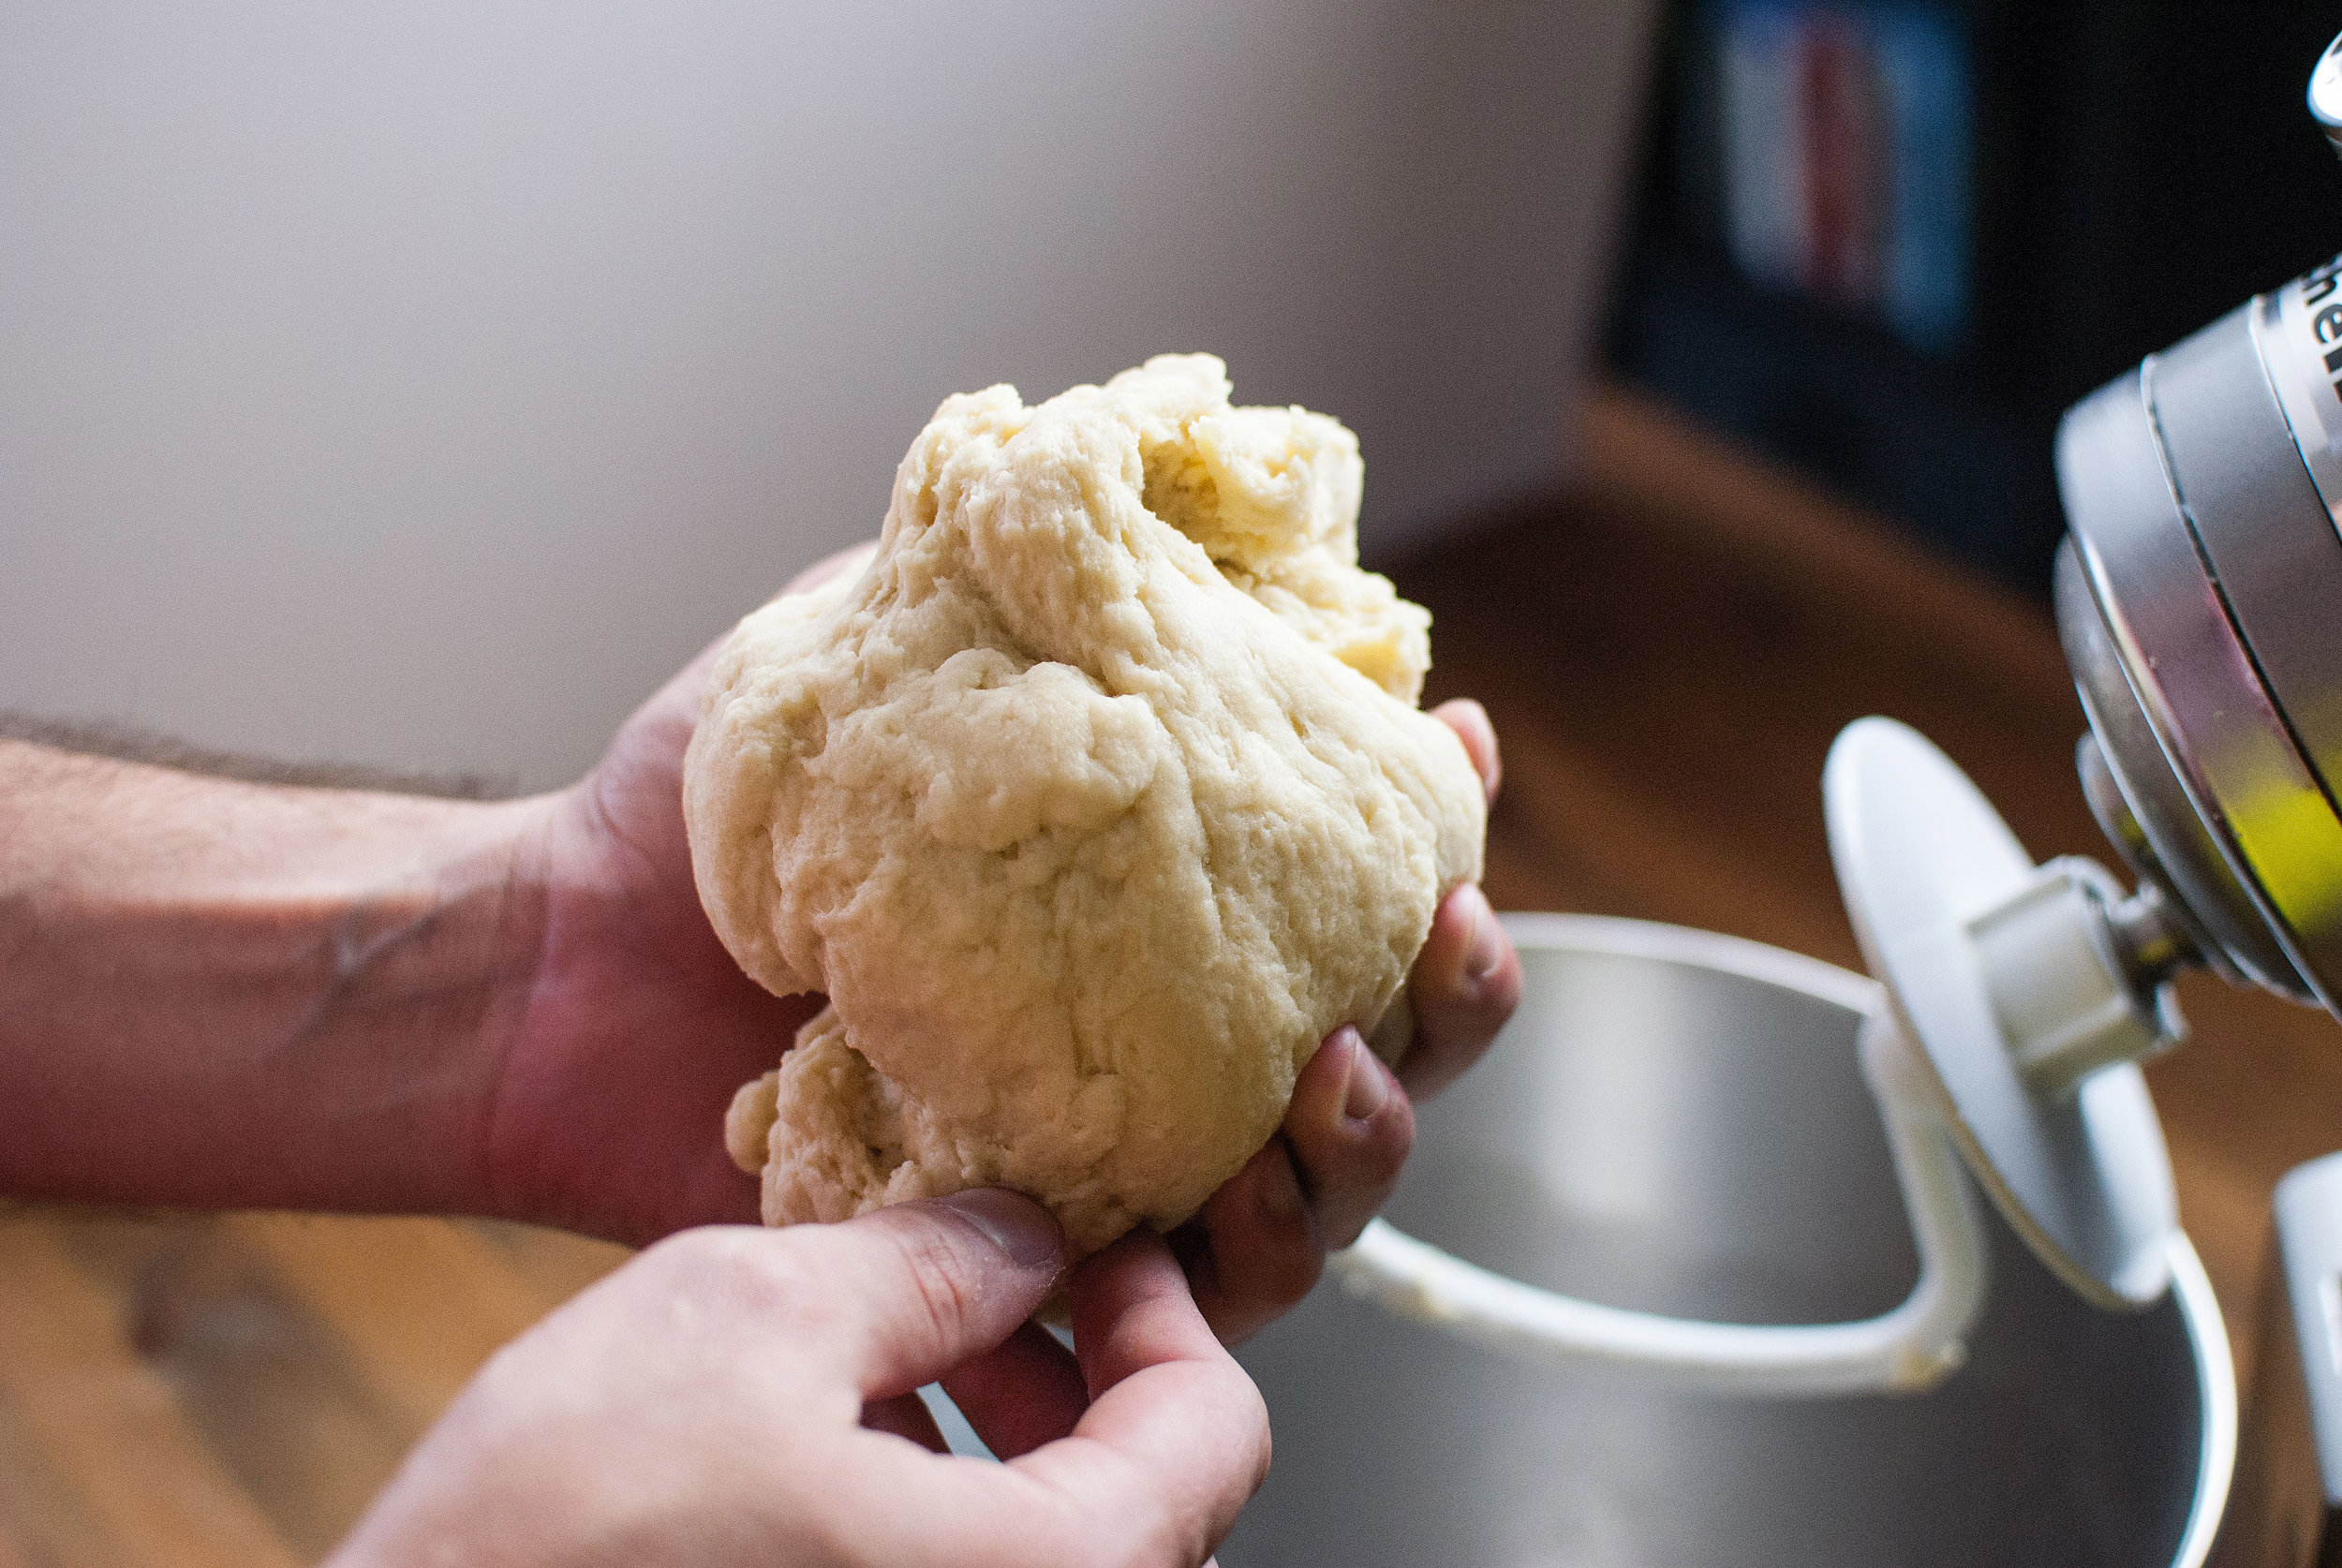
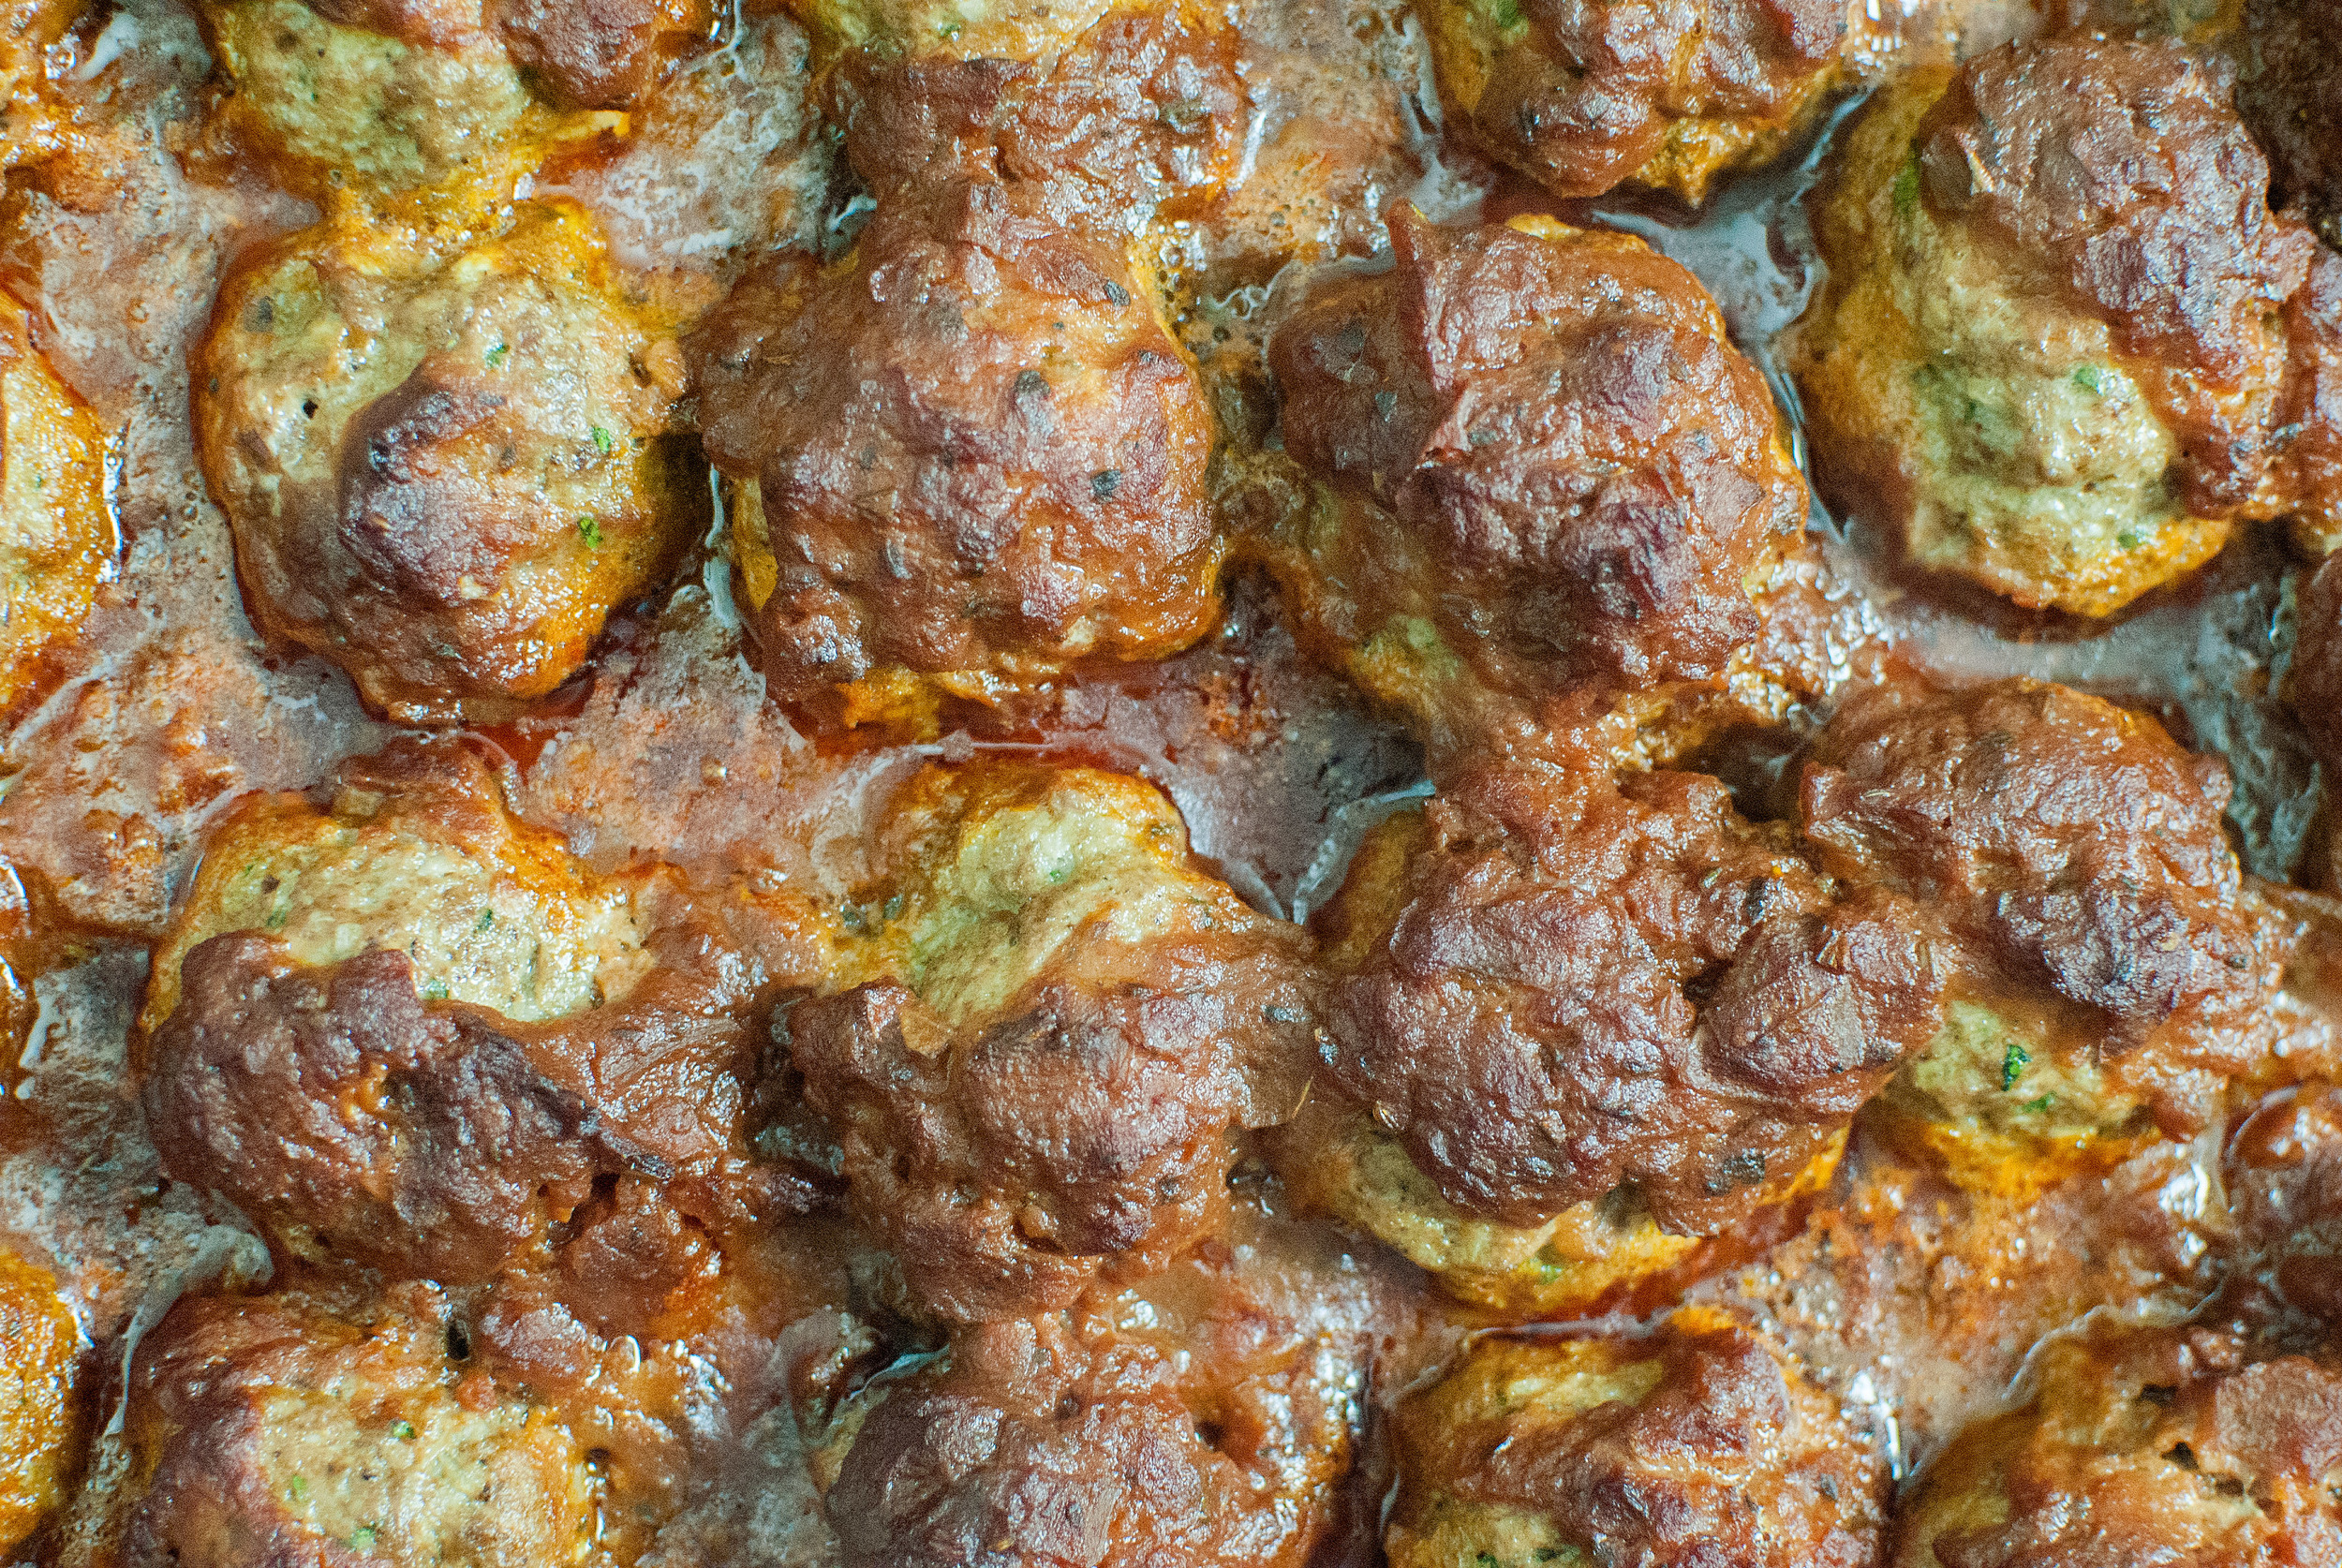
    Knead the dough until all ingredients are just coming together. It might look a bit crumbly at this stage, but trust me, it’s ready. You can choose to knead the dough even further if you want a more toothsome noodle; this is especially a good idea if you are going to stir fry them since they need to hold up a little bit better to withstand the high heat and being tossed around. However, if you’re making a pasta dish where all you need to do is toss them in a sauce, I’d recommend kneading them less so your noodles retain a soft, gentle, and sexy texture. At the end of the day it’s all up to your own personal preference.

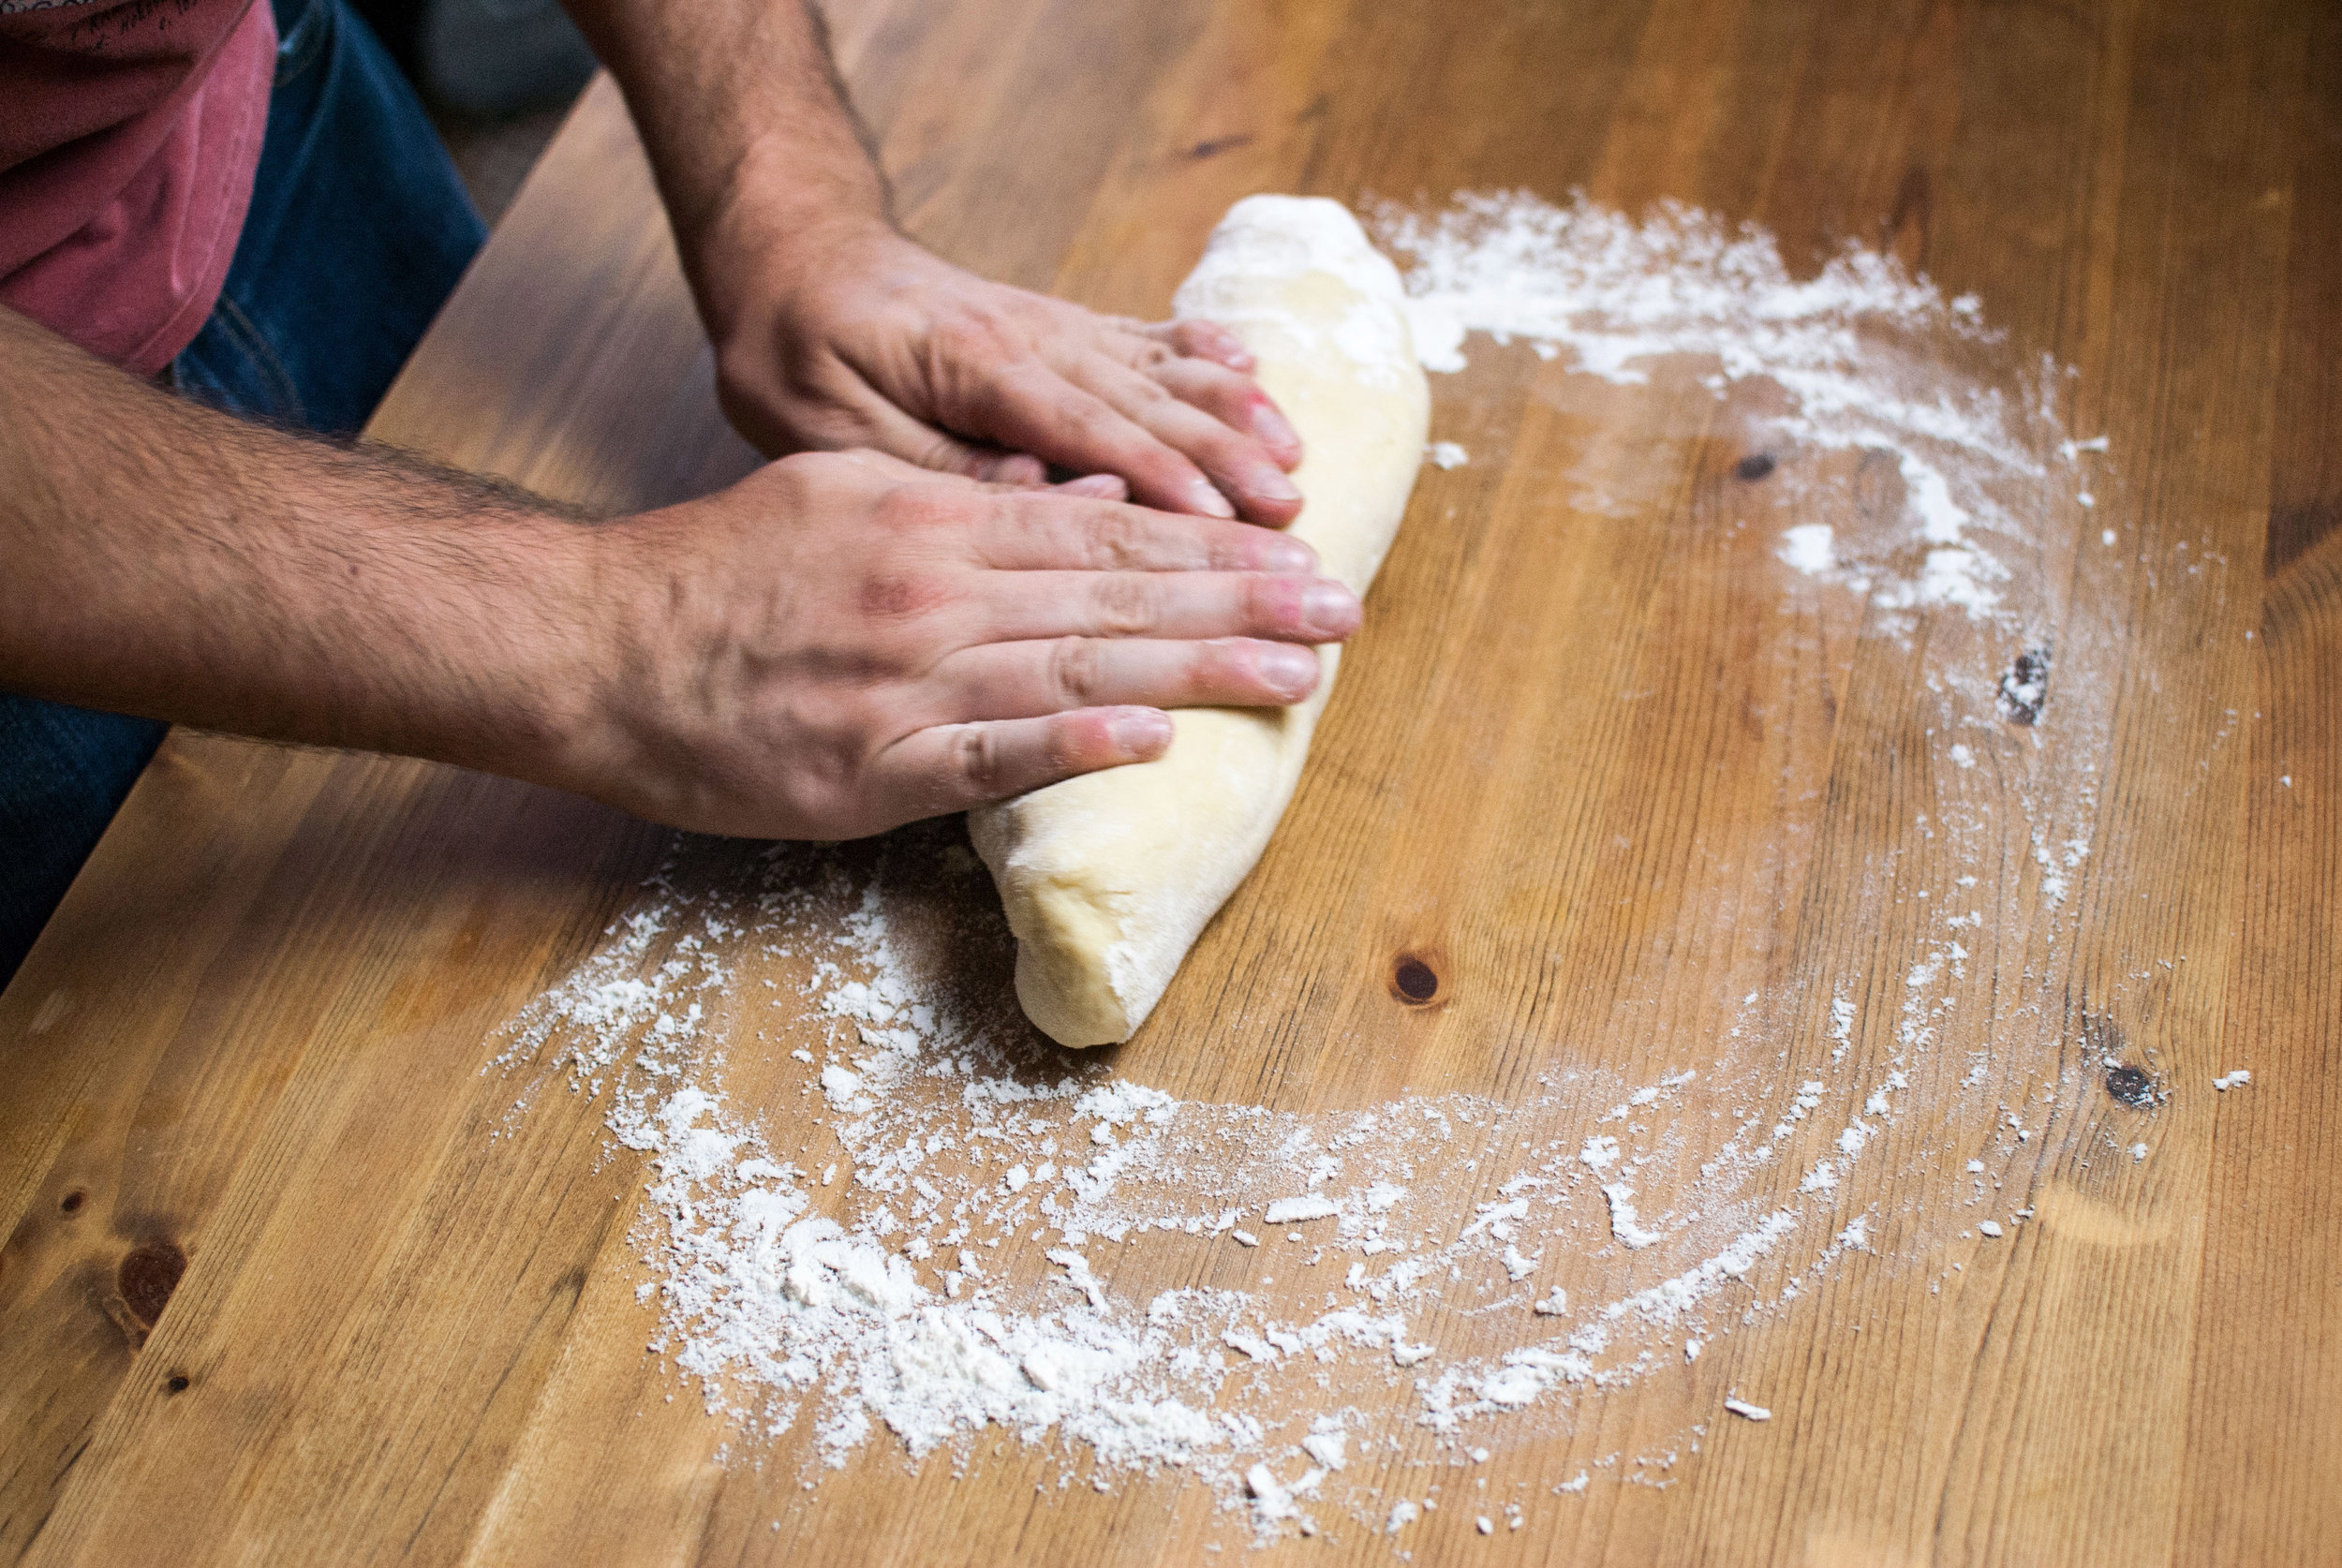
    Wrap the dough after you’ve kneaded it to your satisfaction in plastic wrap, leaving no scrap behind, and let it rest for at least half an hour. This step is critical: if you skip it, rolling out your dough is going to be a hellish experience, and by the time you’ve managed to make a single sheet of dough after wrestling with chunks constantly breaking off during the process, your noodles will be tough and gummy. After wrapping the dough in plastic wrap, you could also chuck the dough in the fridge for future use at this point; just keep in mind that you should use it within two days of making it since the dough begins to oxidize.
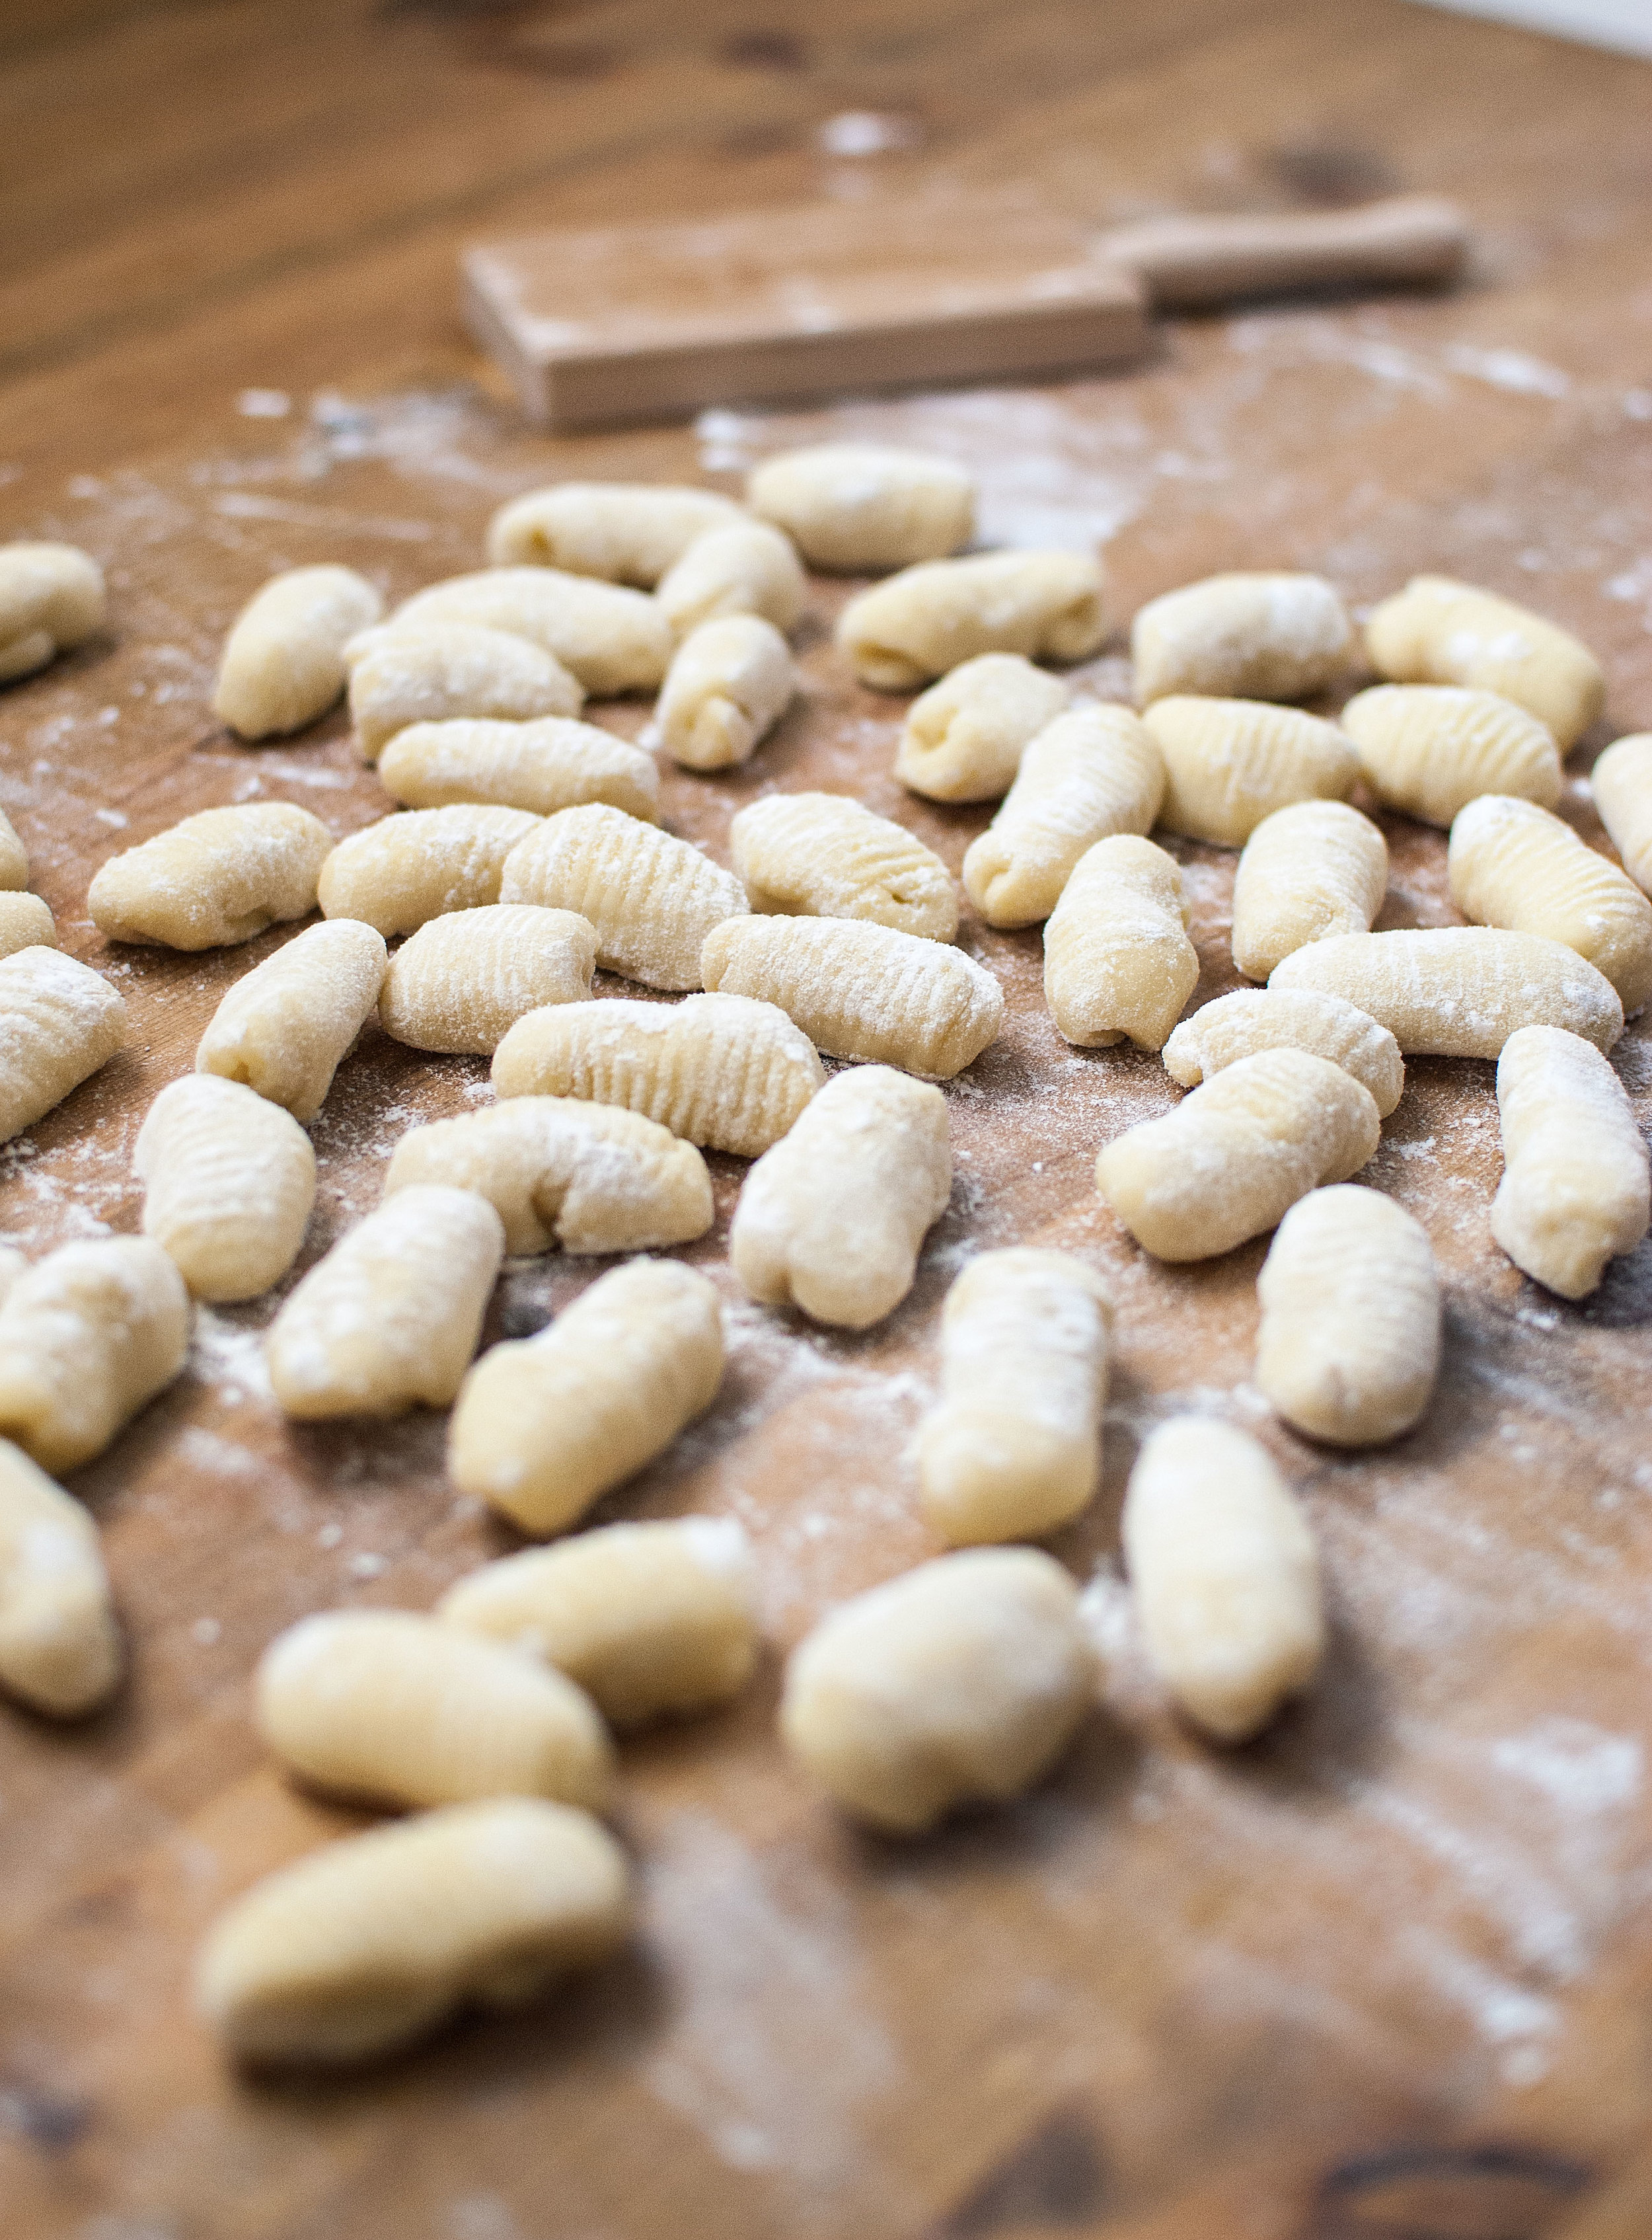
    Shaping your noods:

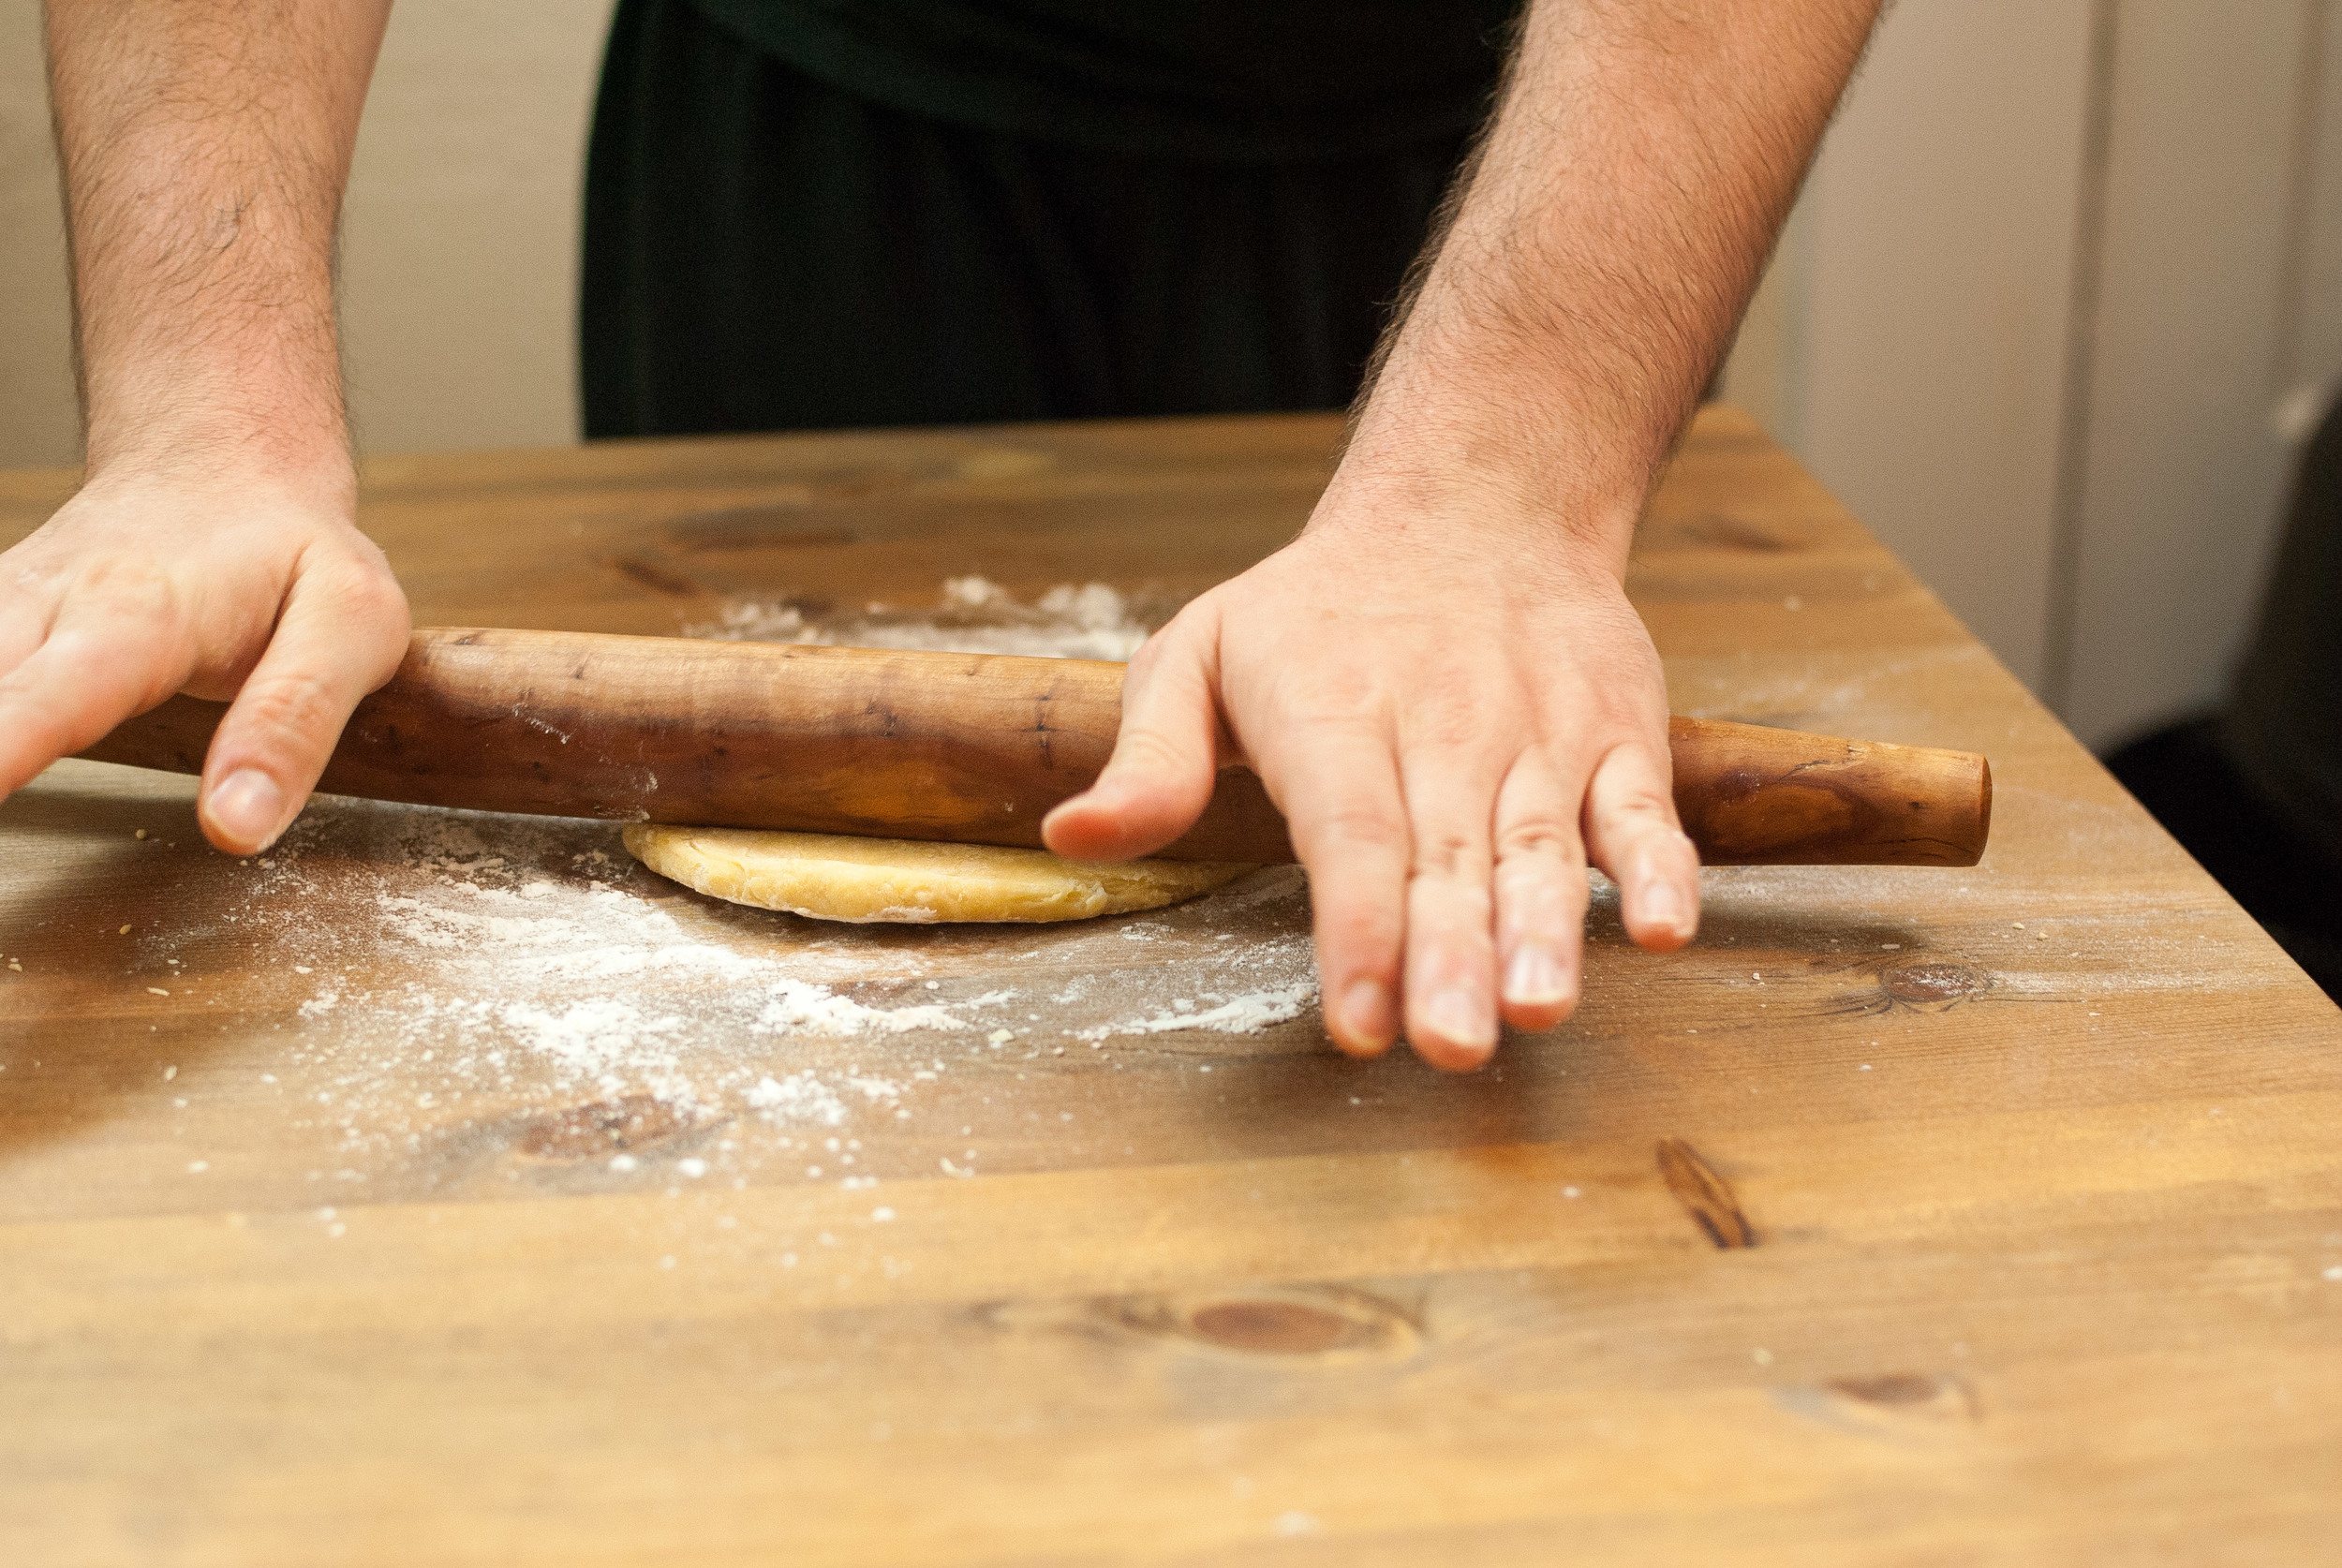
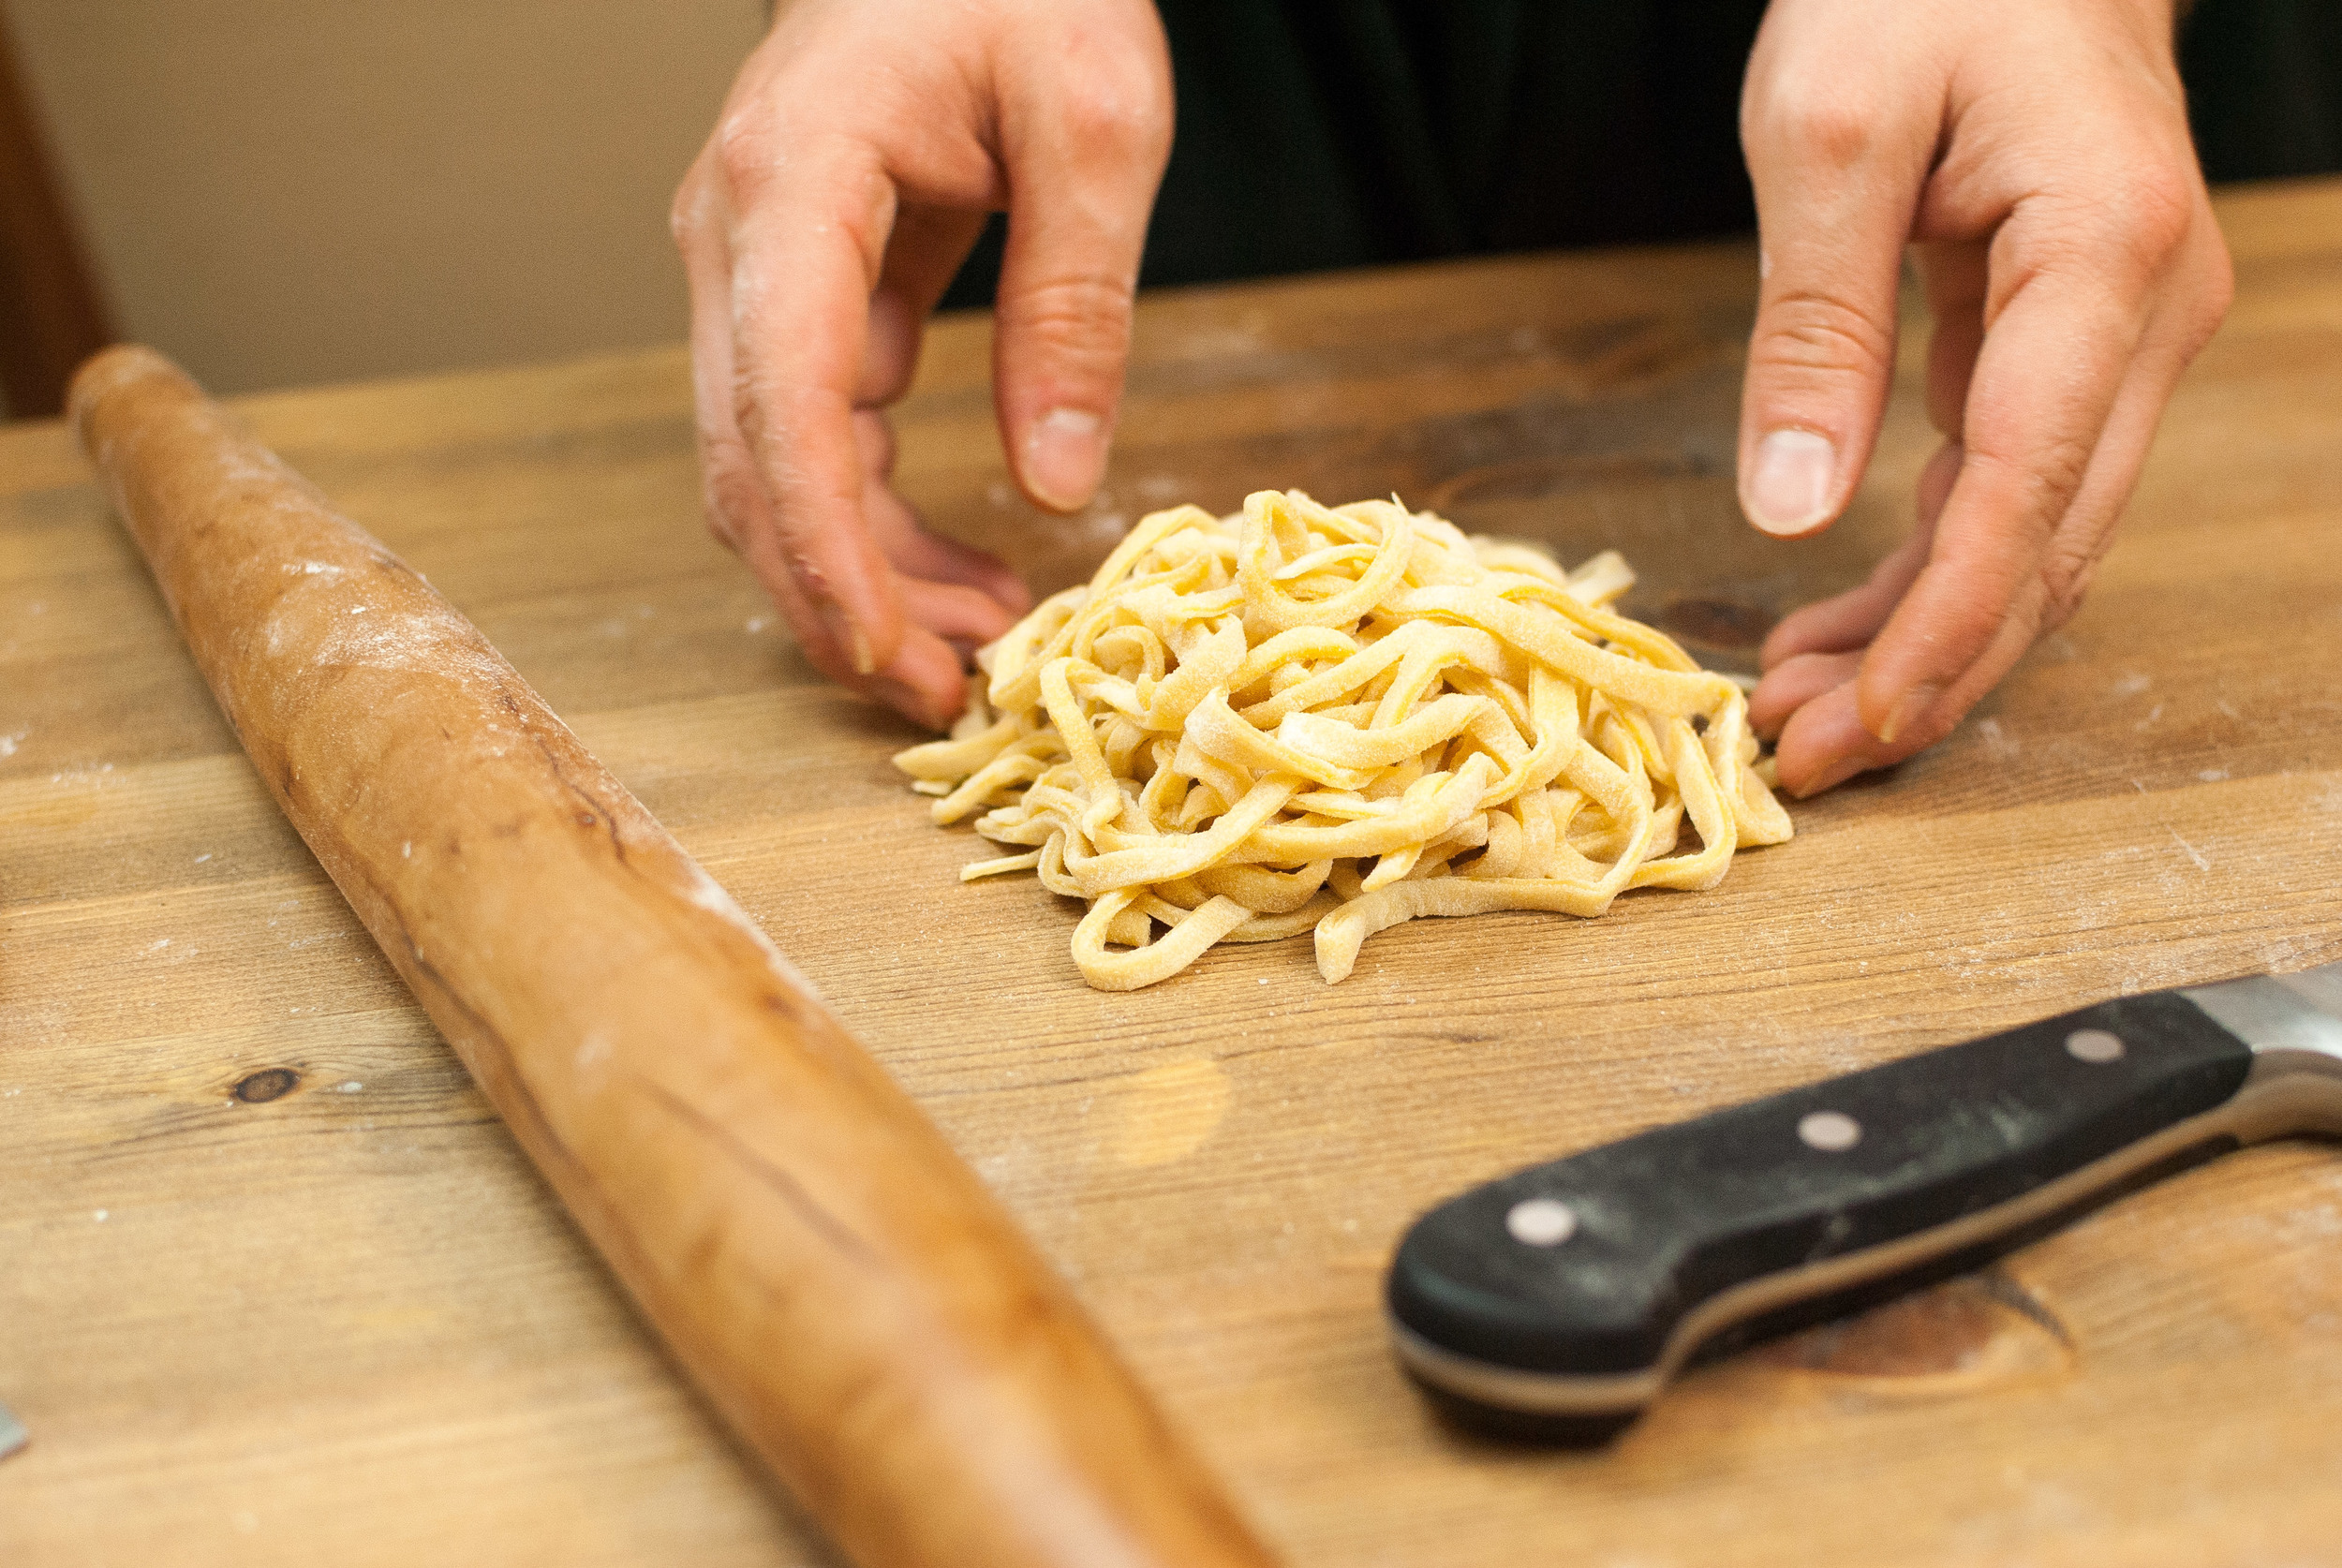
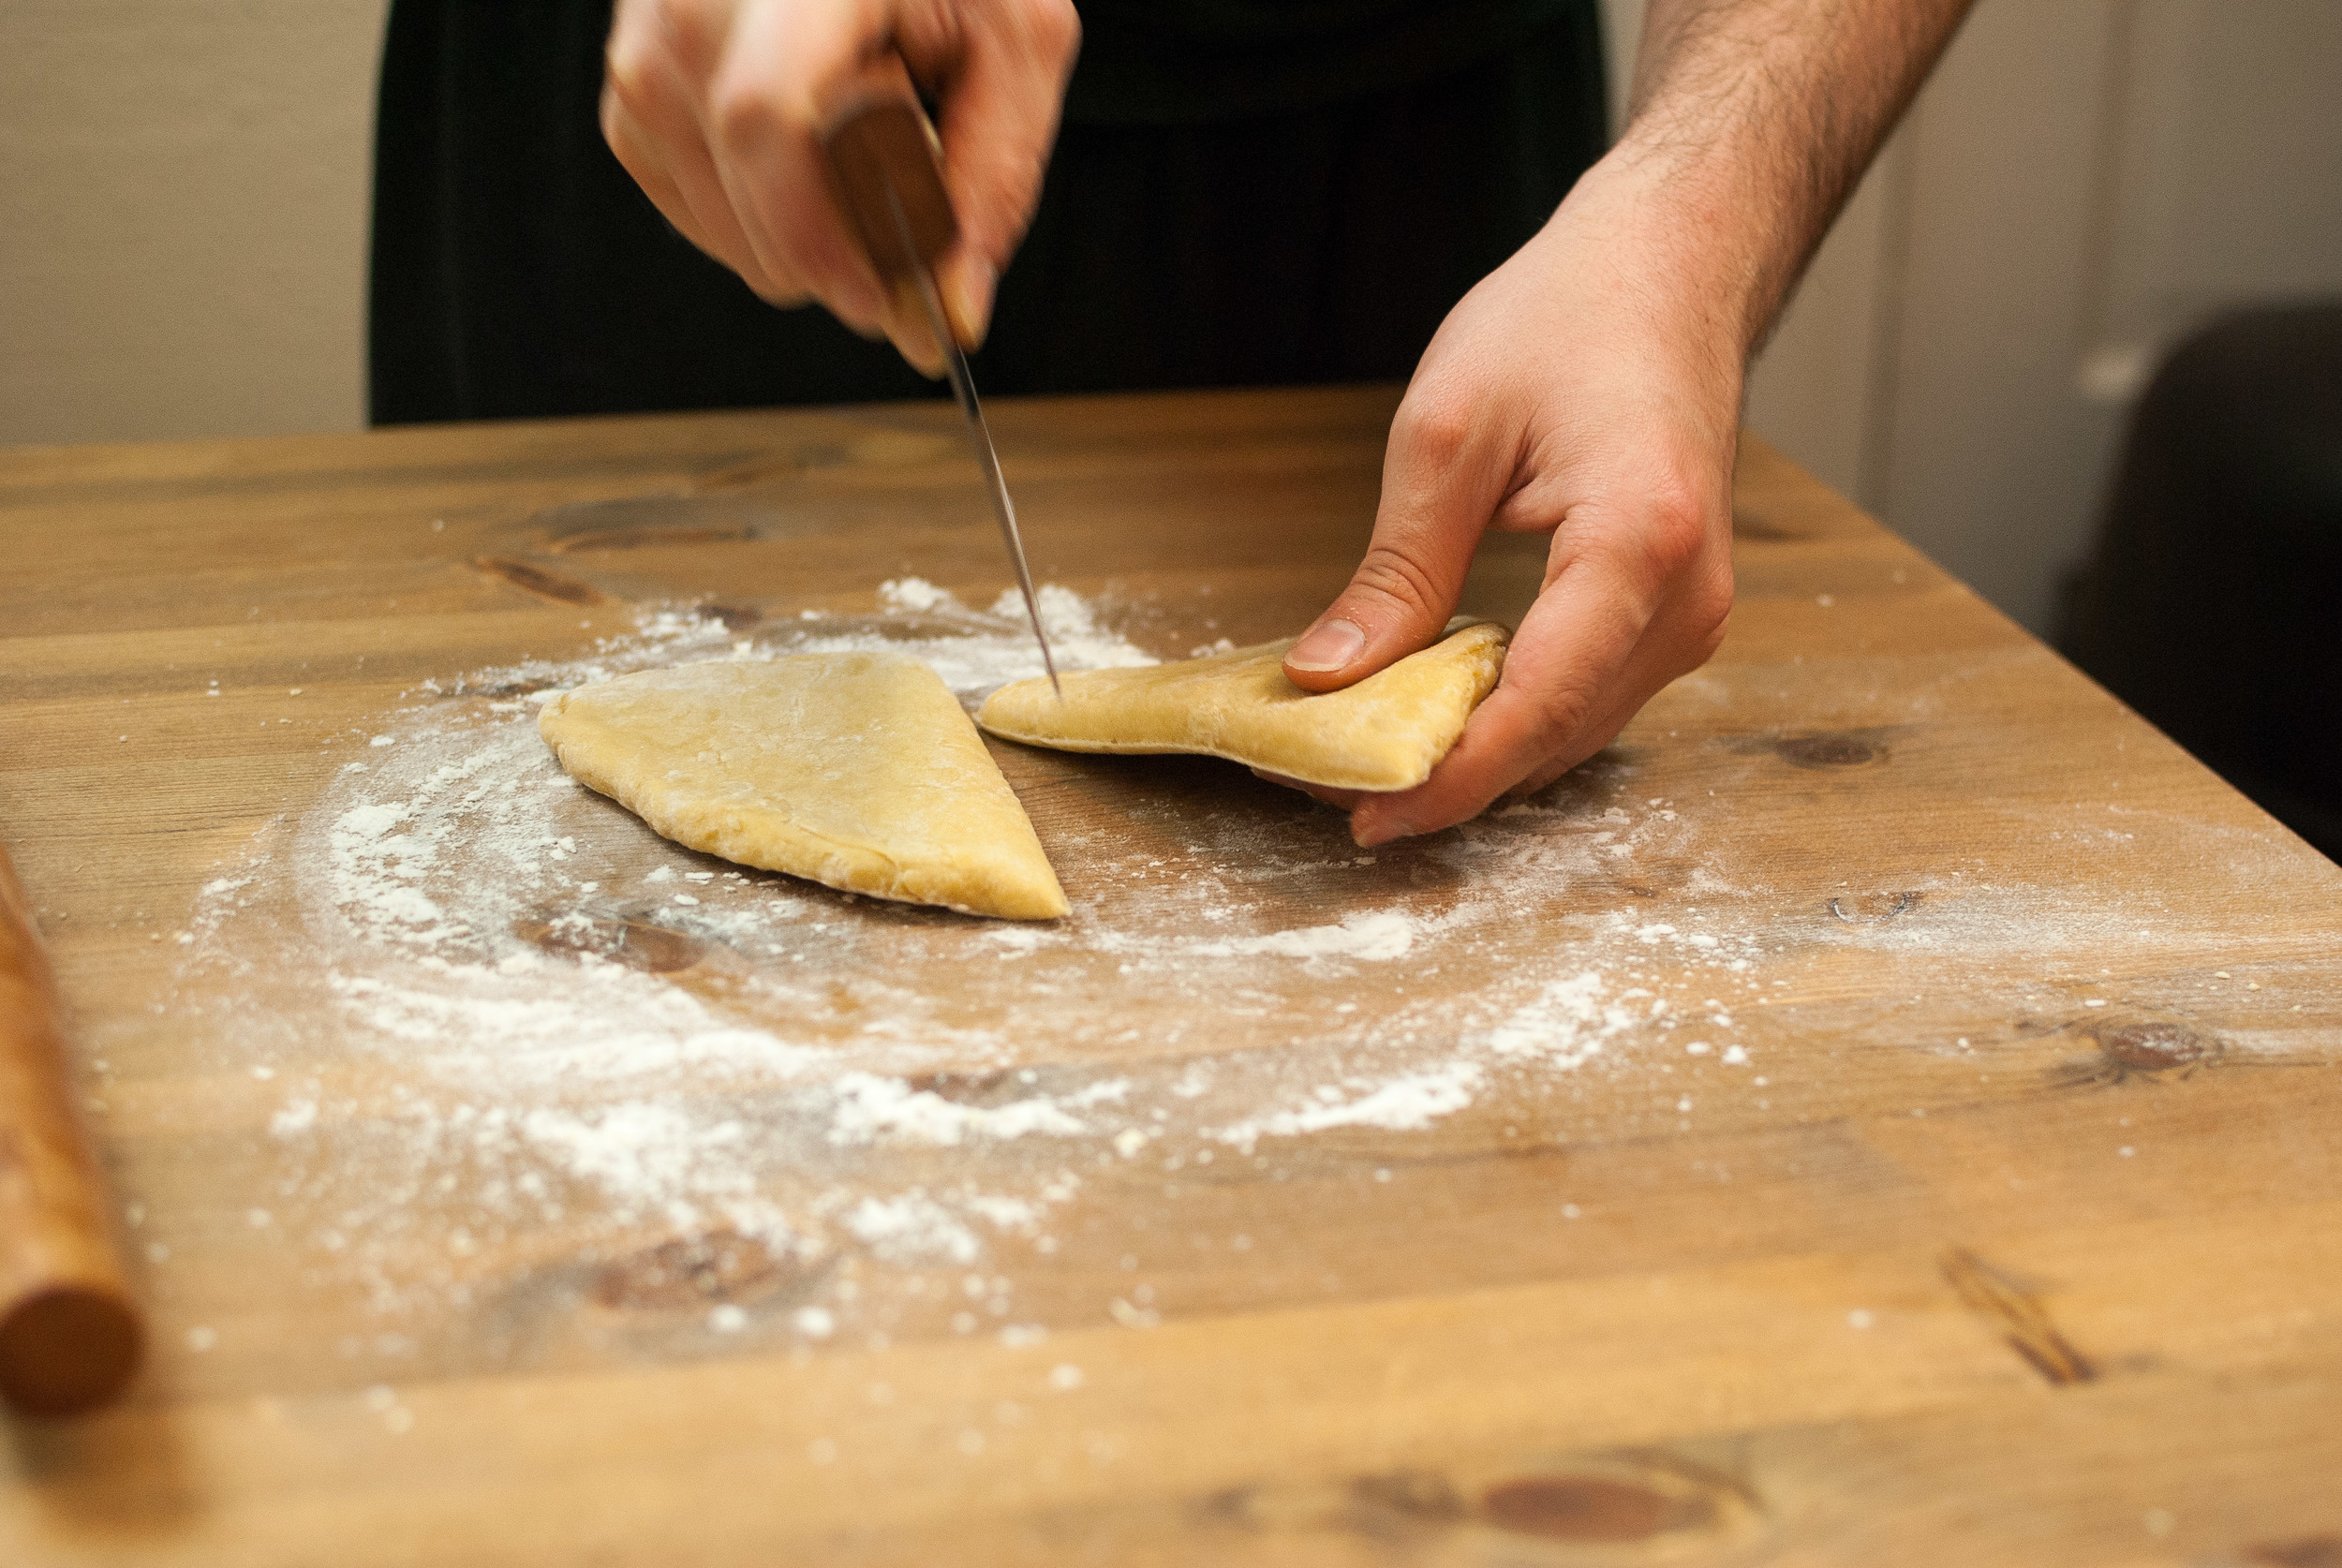
    Prepare a working surface by covering it with a thin layer of flour. Unwrap your dough, and cut it into four pieces, then proceed to turn one of the pieces into a sheet to cut into noodles.

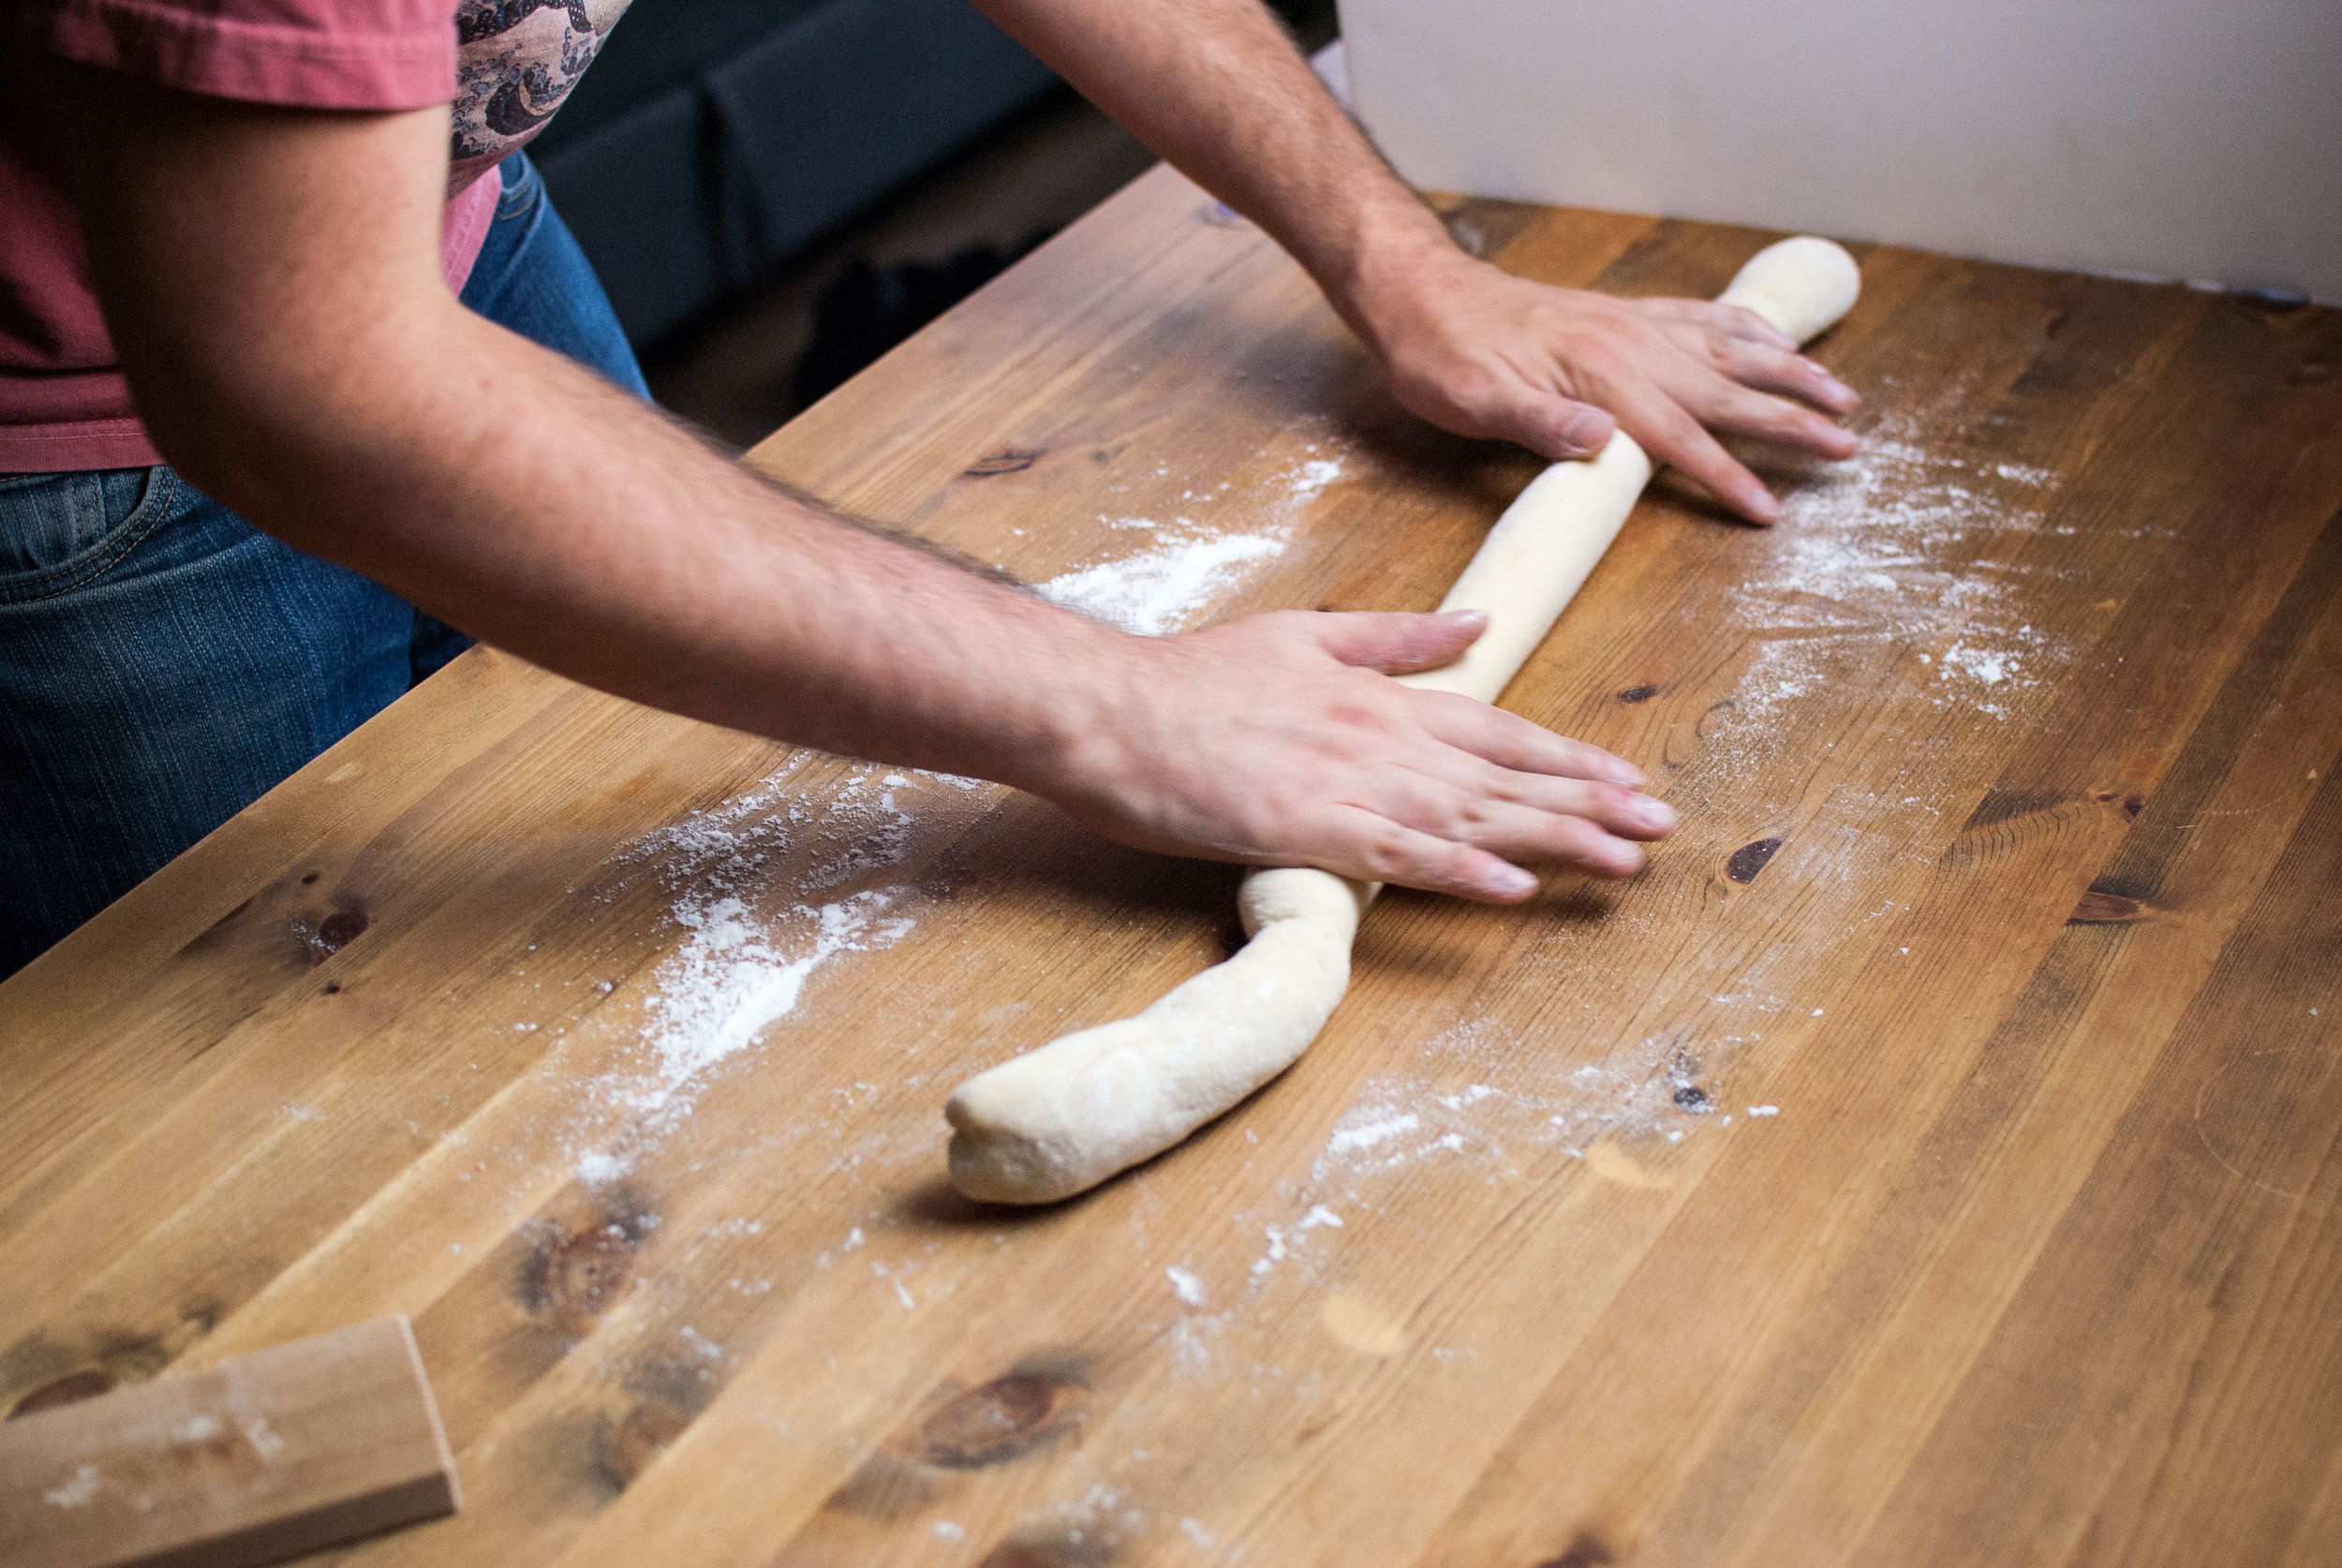
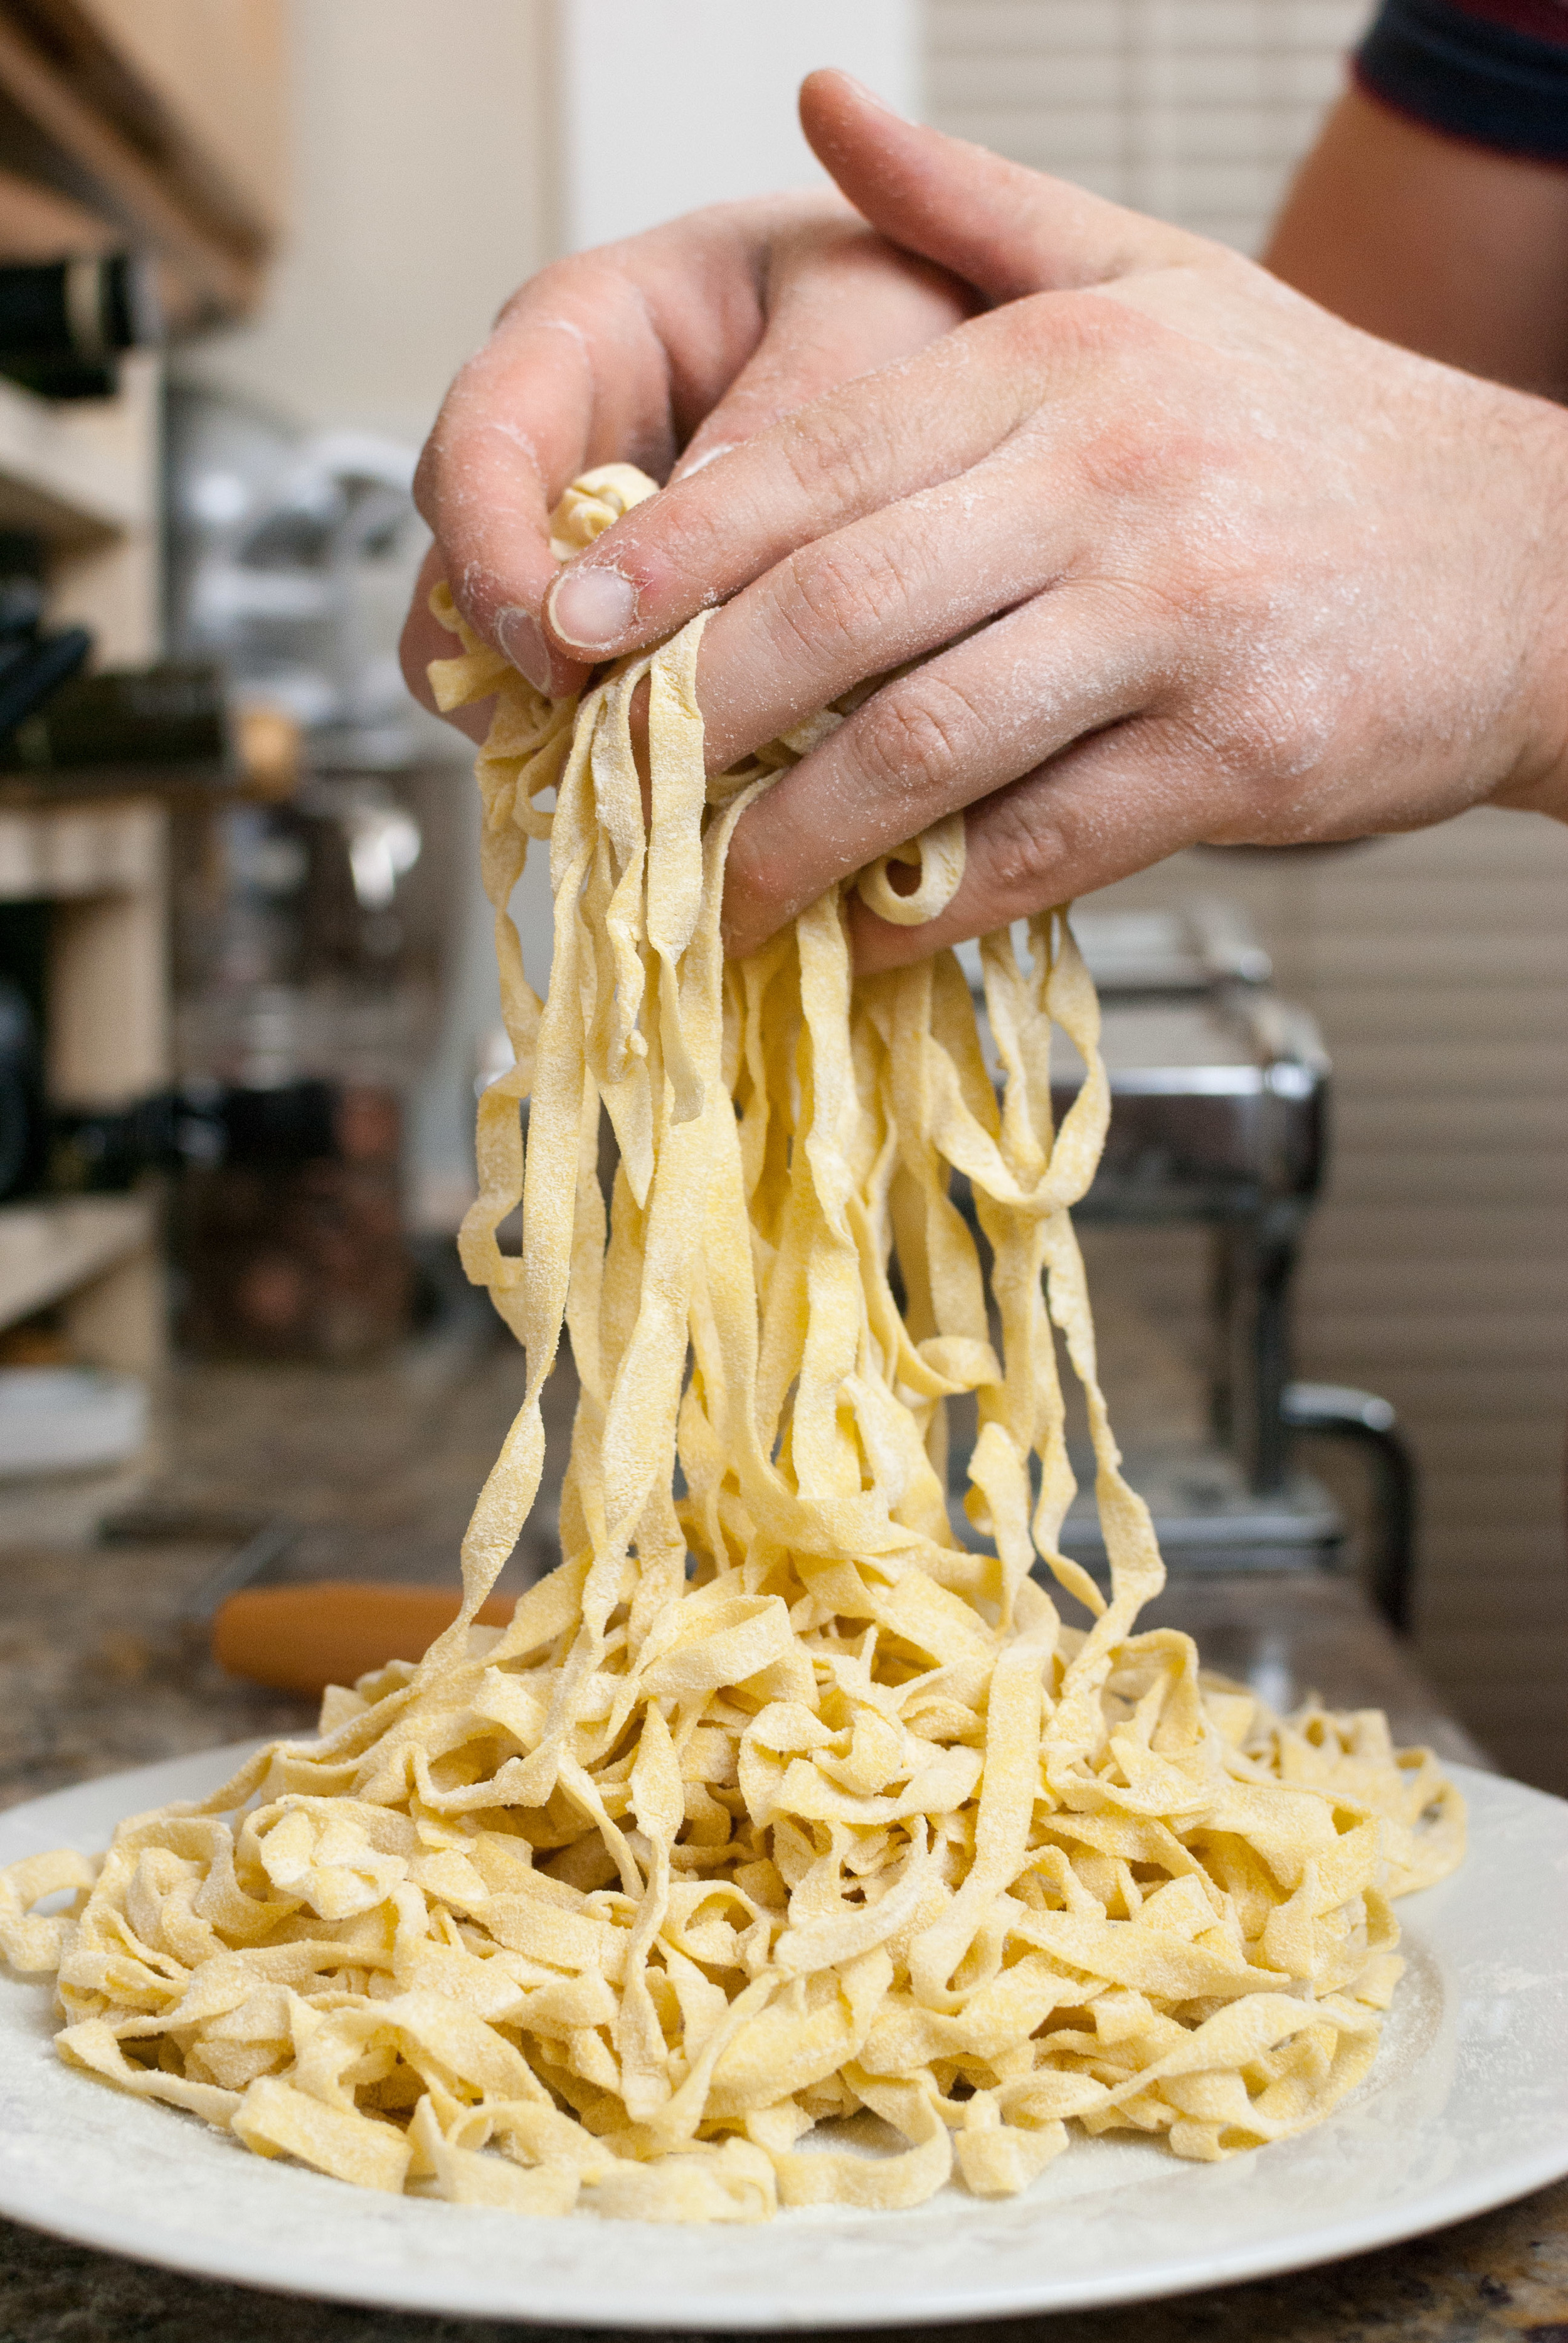
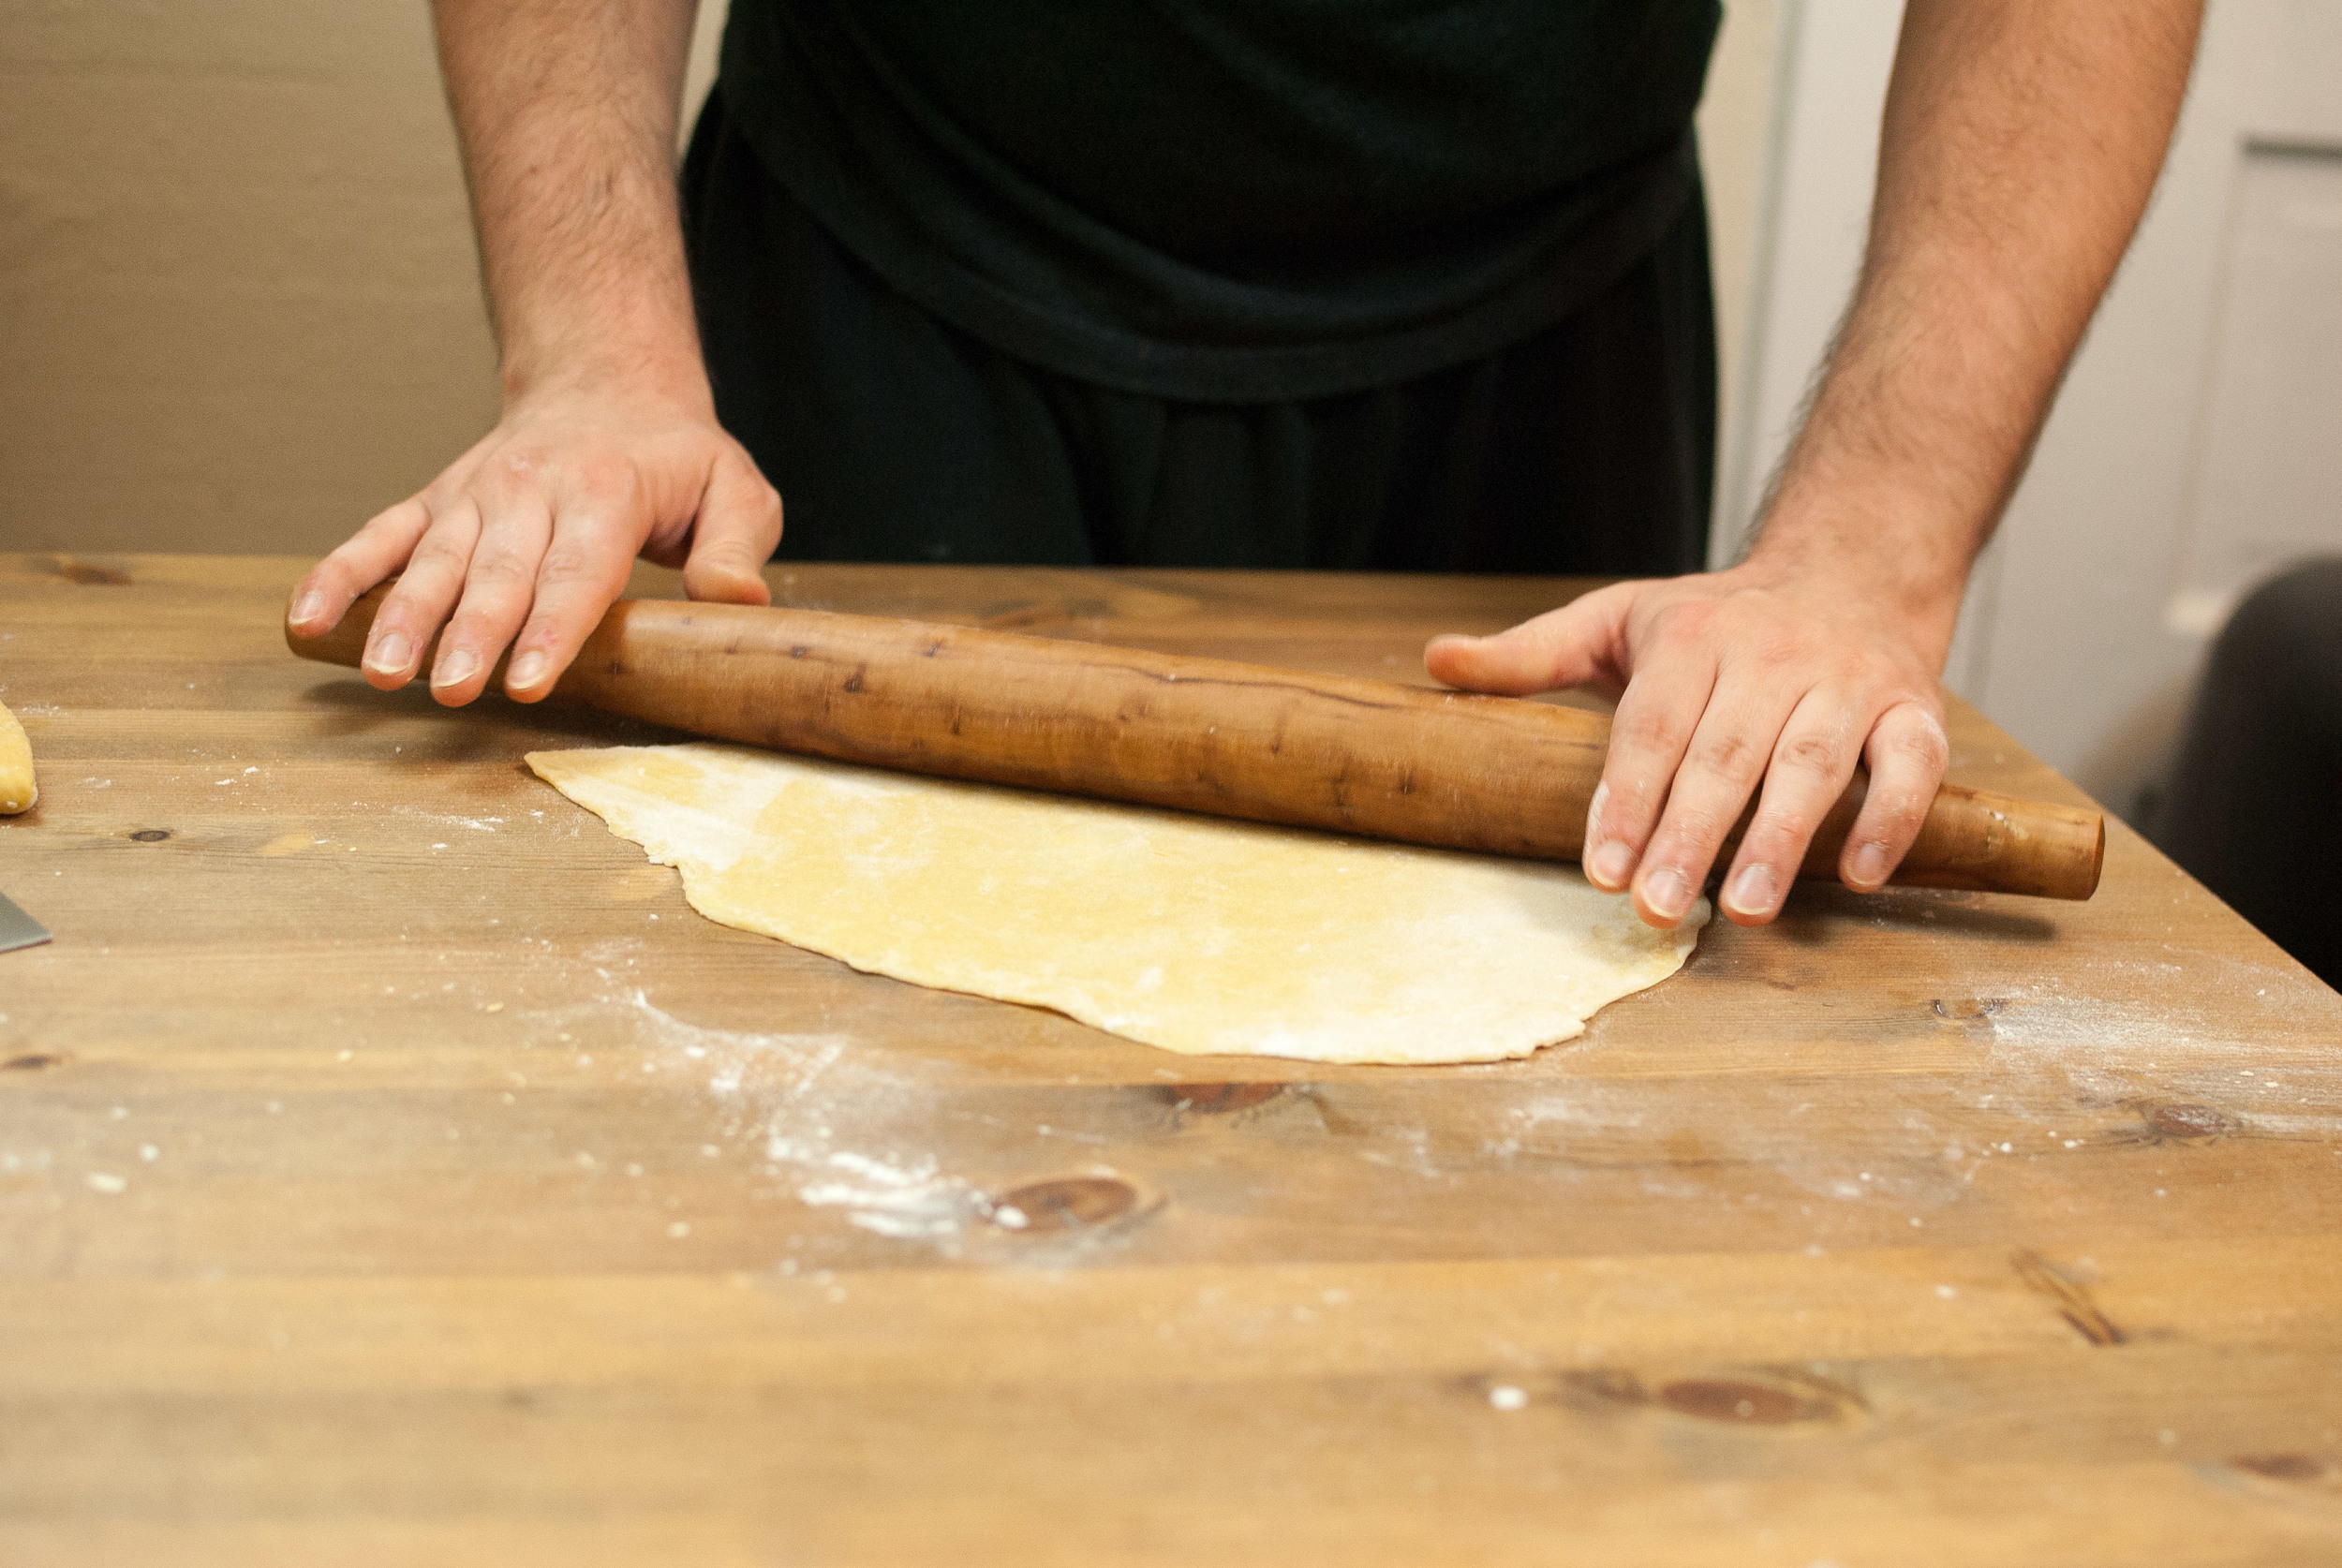
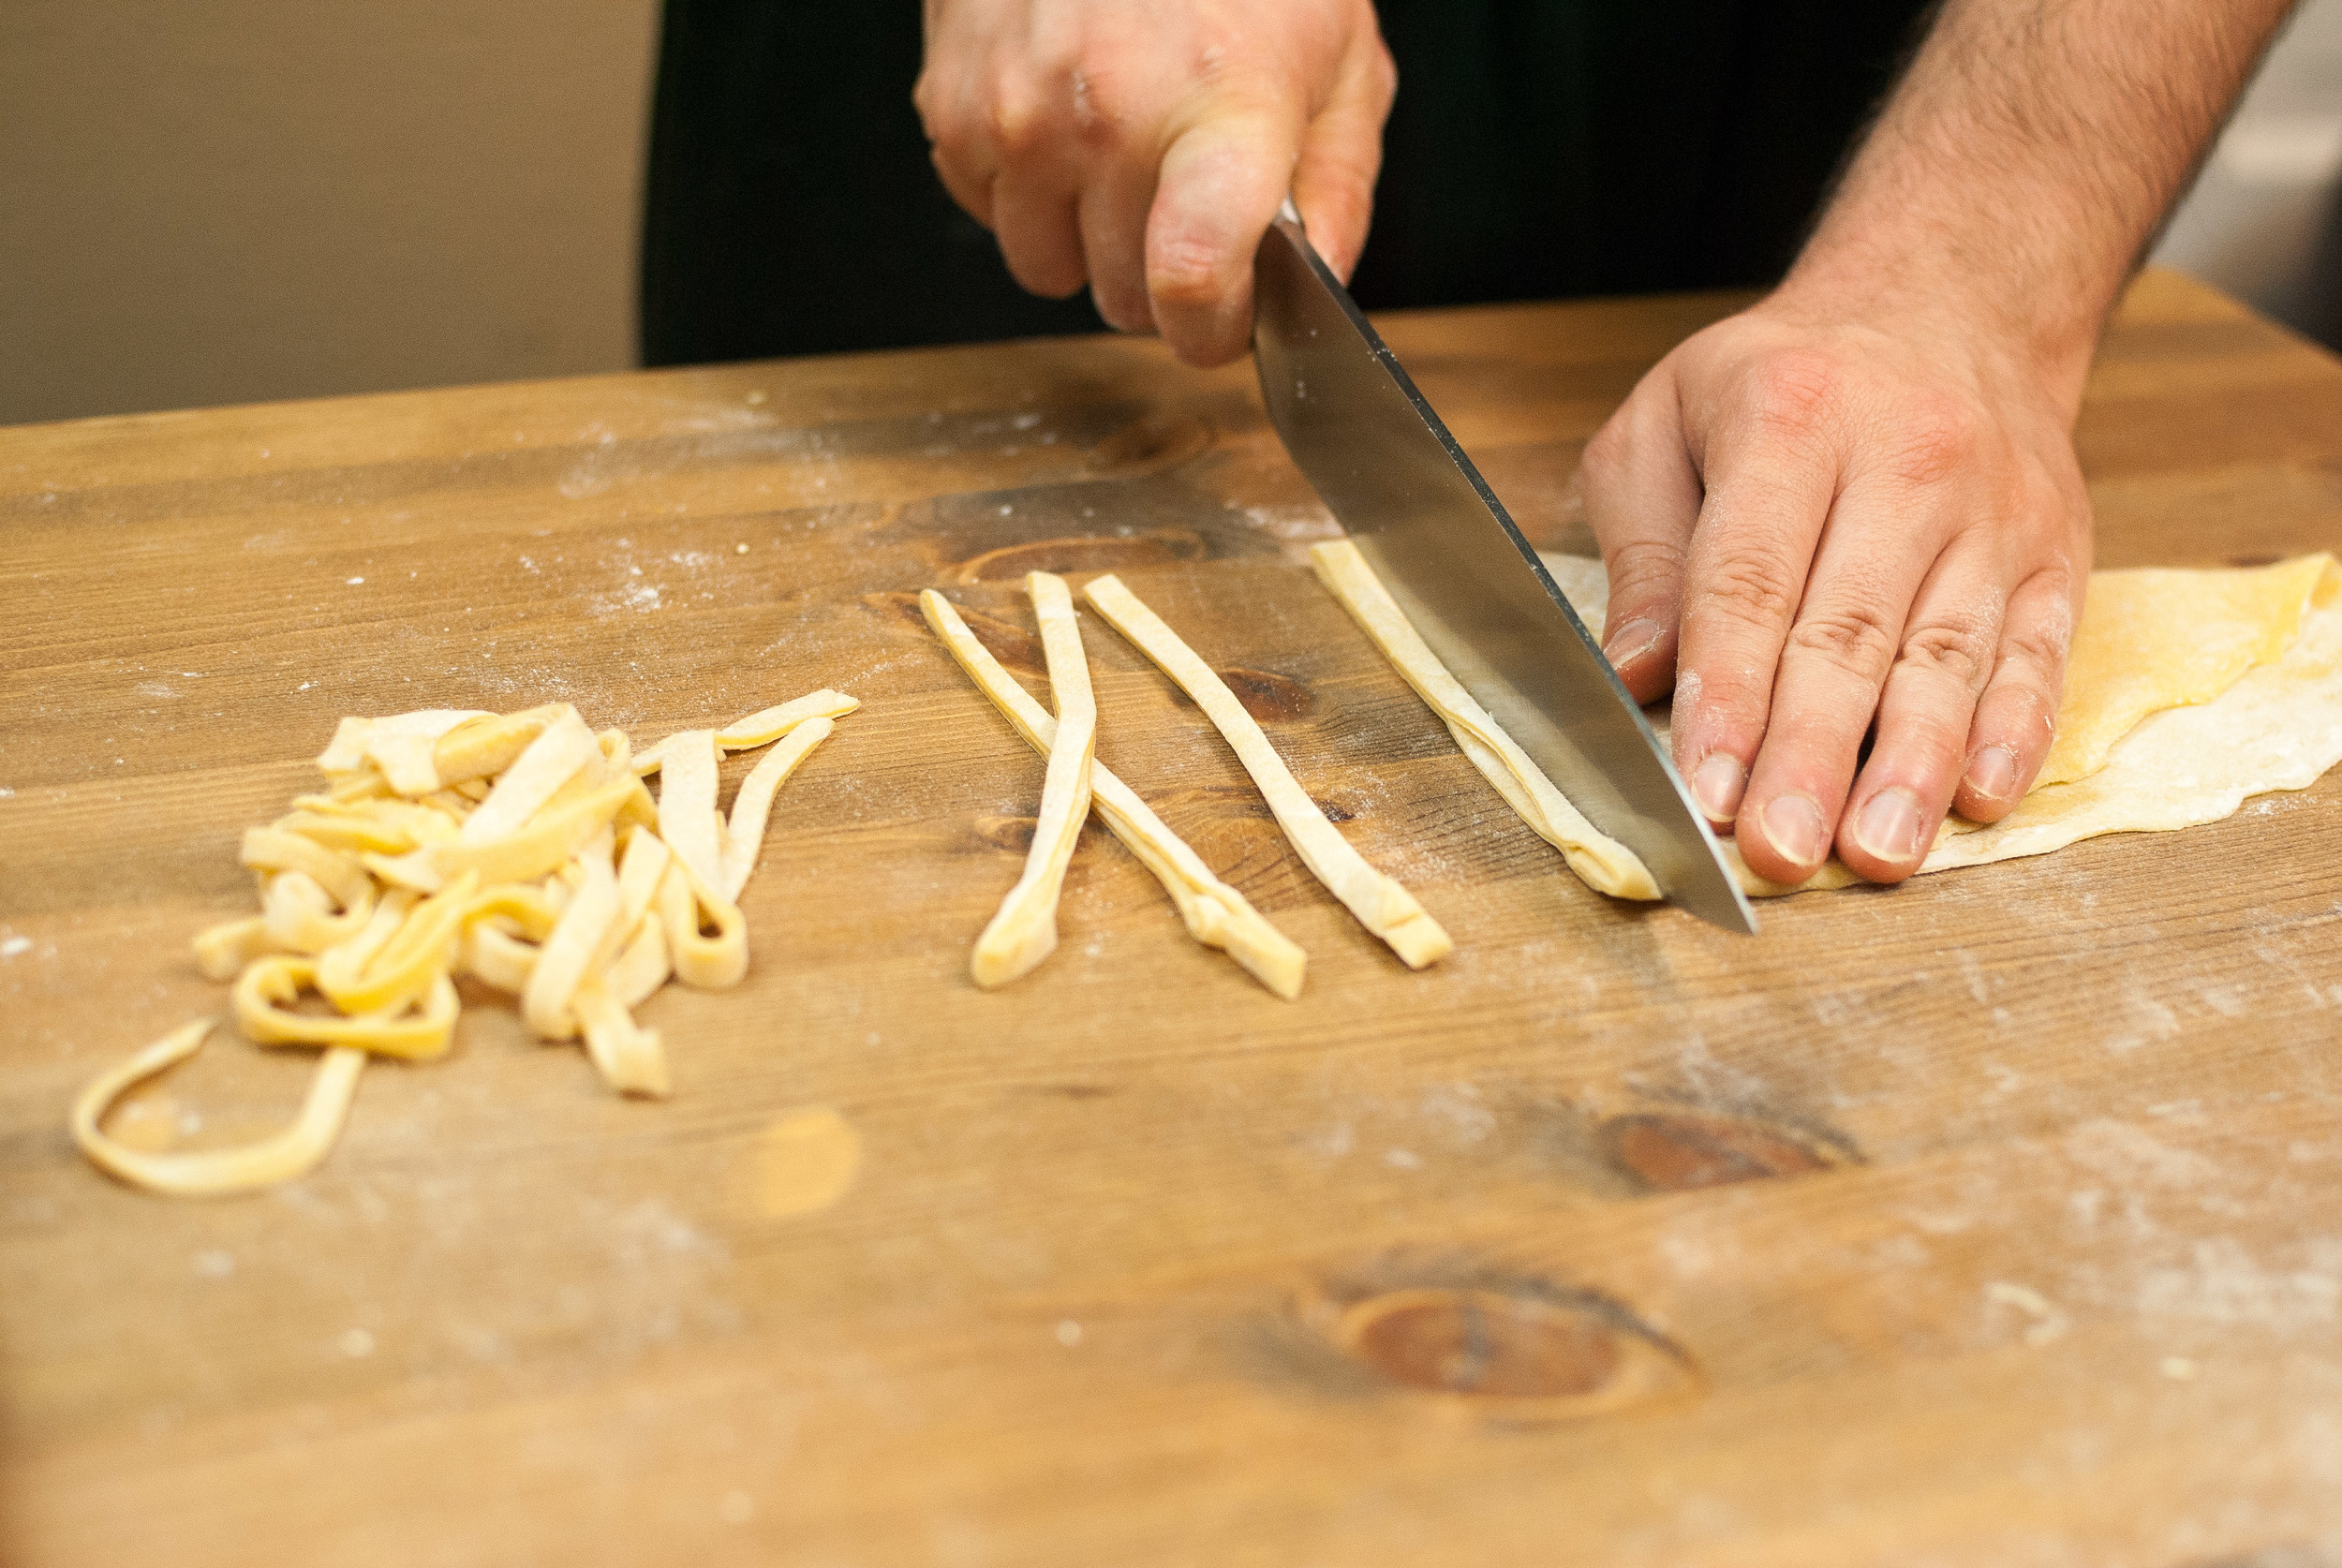
    If you don’t have a crank, use a rolling pin and roll out your dough to your desired thickness, keeping the dough well floured to prevent sticking; aim to keep it long and rectangular to create a single sheet that’s about 6 inches wide. I’ve found that around two feet is a good length for all purpose noodles, but if you’re going to be making something like linguine or pappardelle, we recommend going as thin as you can. When it’s thin enough, cover one side of it with even more flour and gently fold the sheet in half. Cover the new surface with a little more flour, then fold it again. Repeat this step one to two more times until the dough is rolled small enough to where you can cut it comfortably with a chef’s knife. Choose your style of noodle, and cut the dough accordingly. After you’re done cutting, pick up the noodles and separate them, then cover them in even more flour and toss them to make sure that they don’t stick together. Now they’re ready to cook!

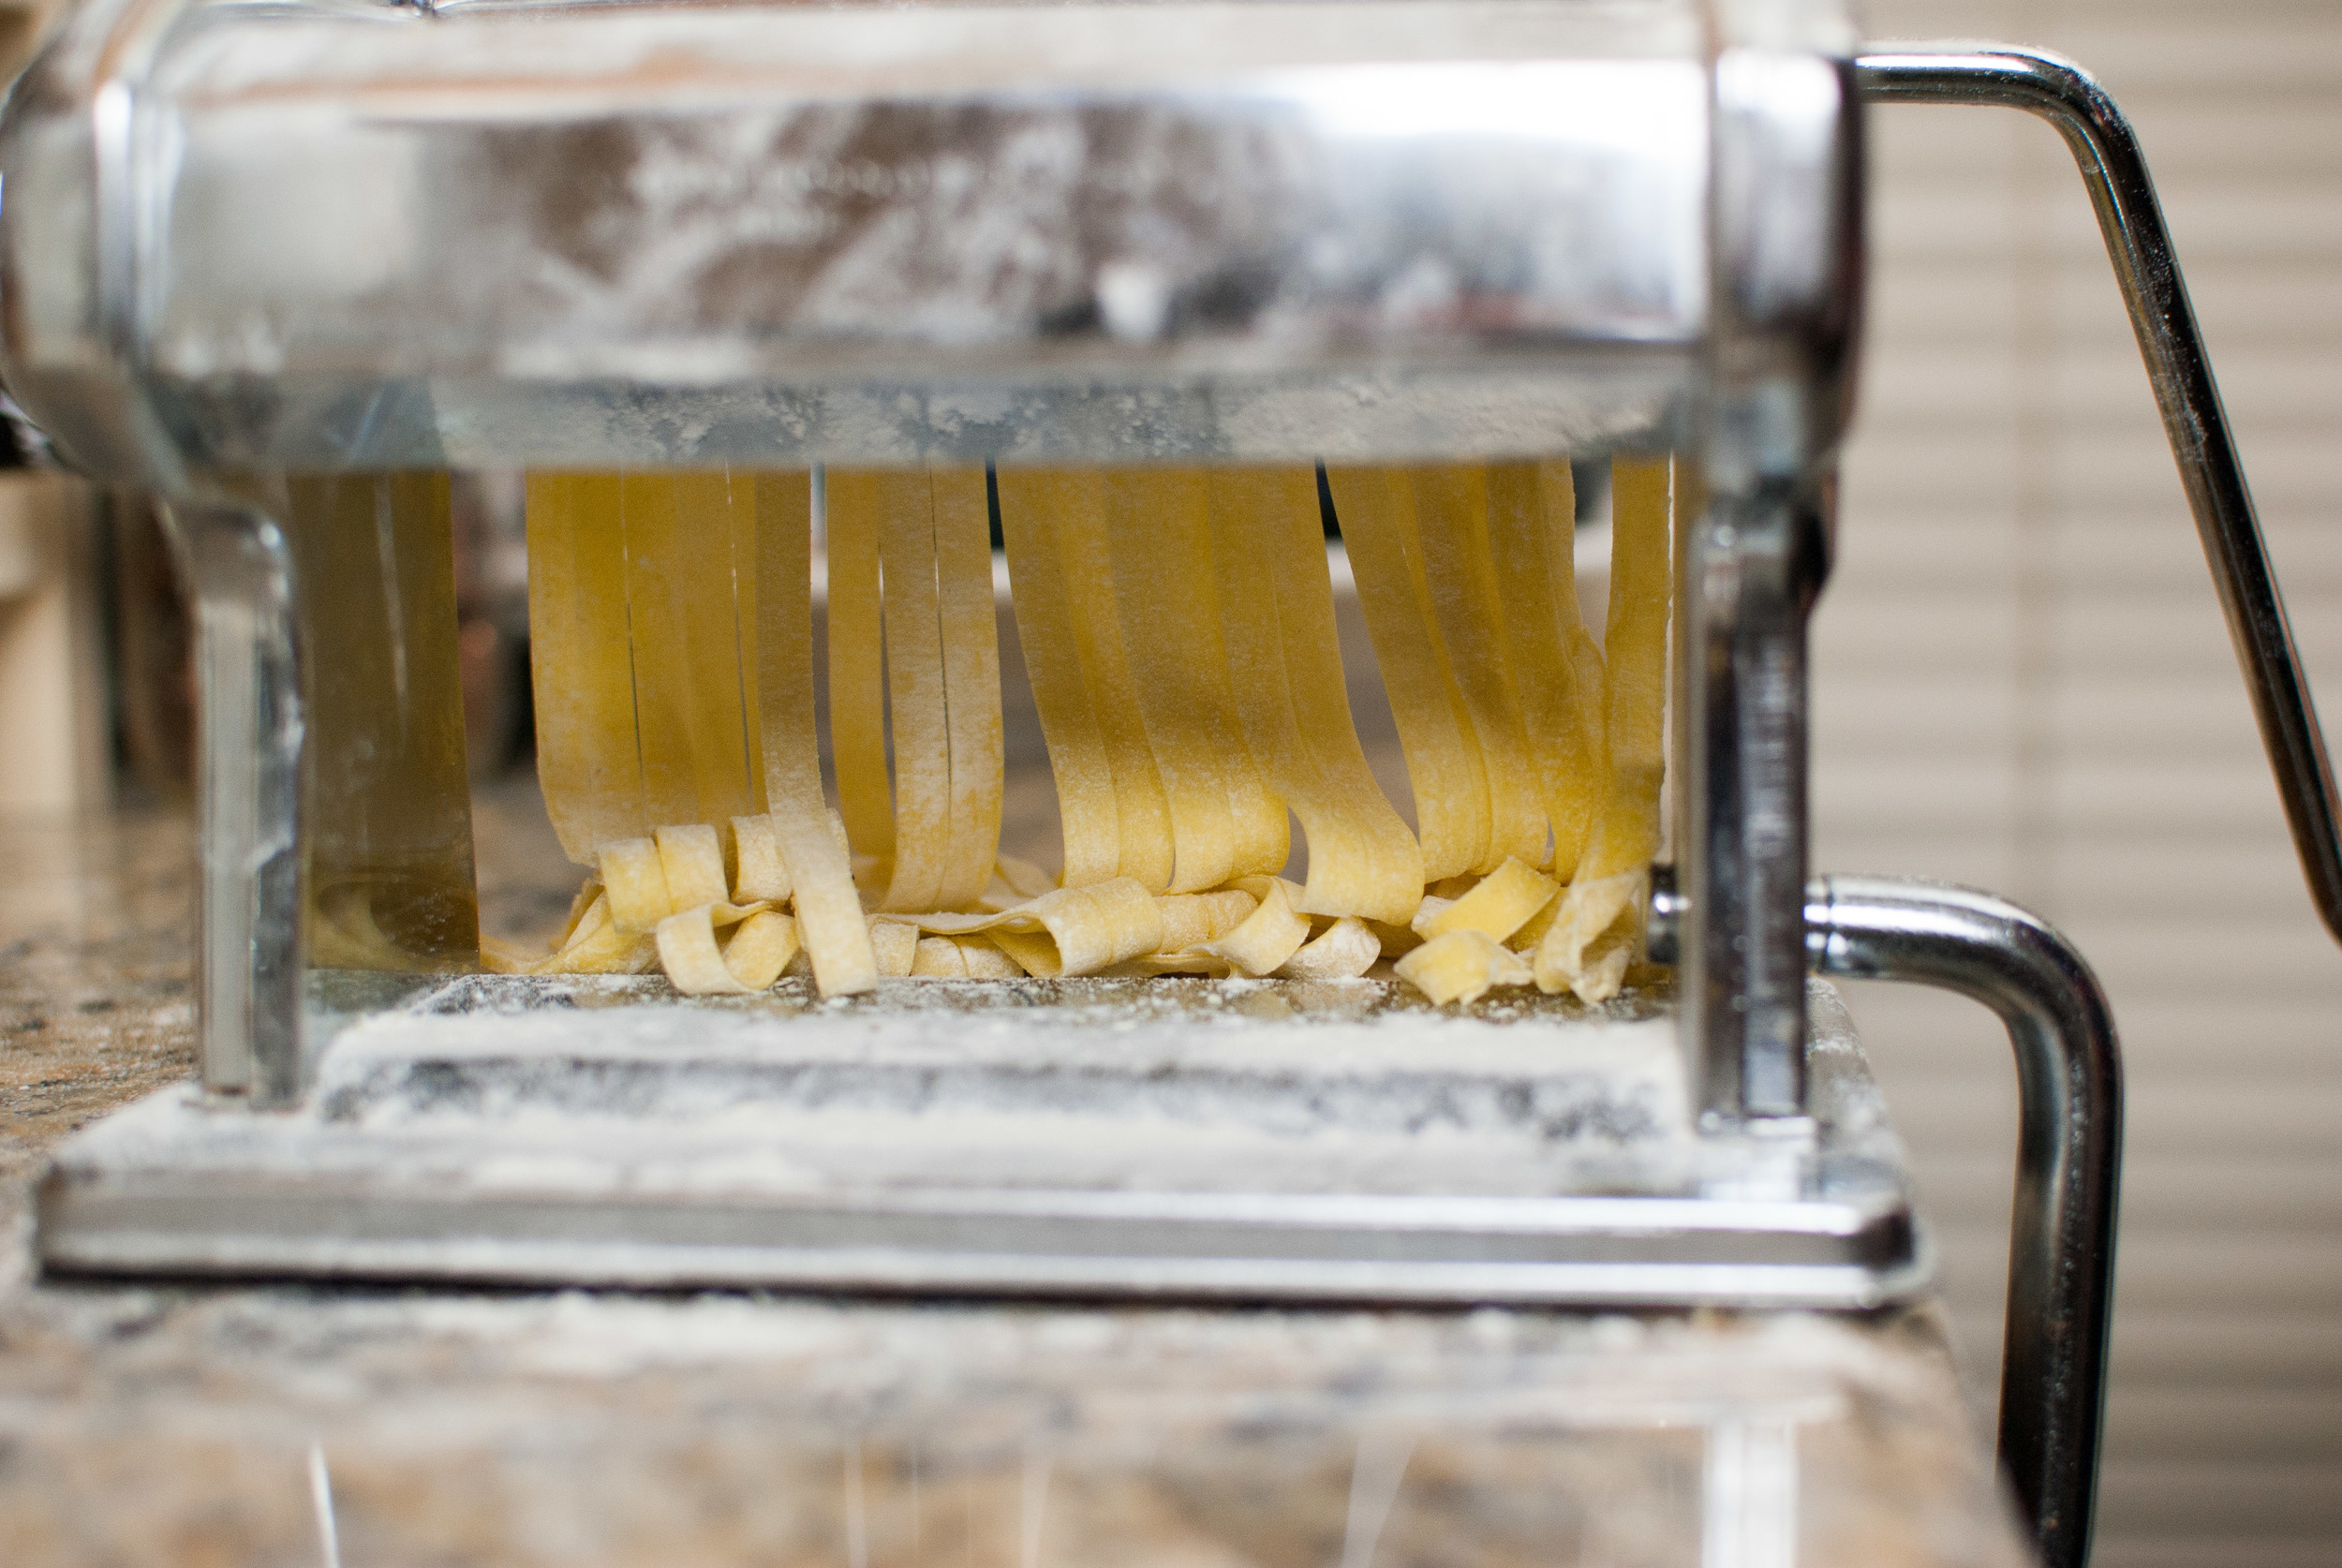
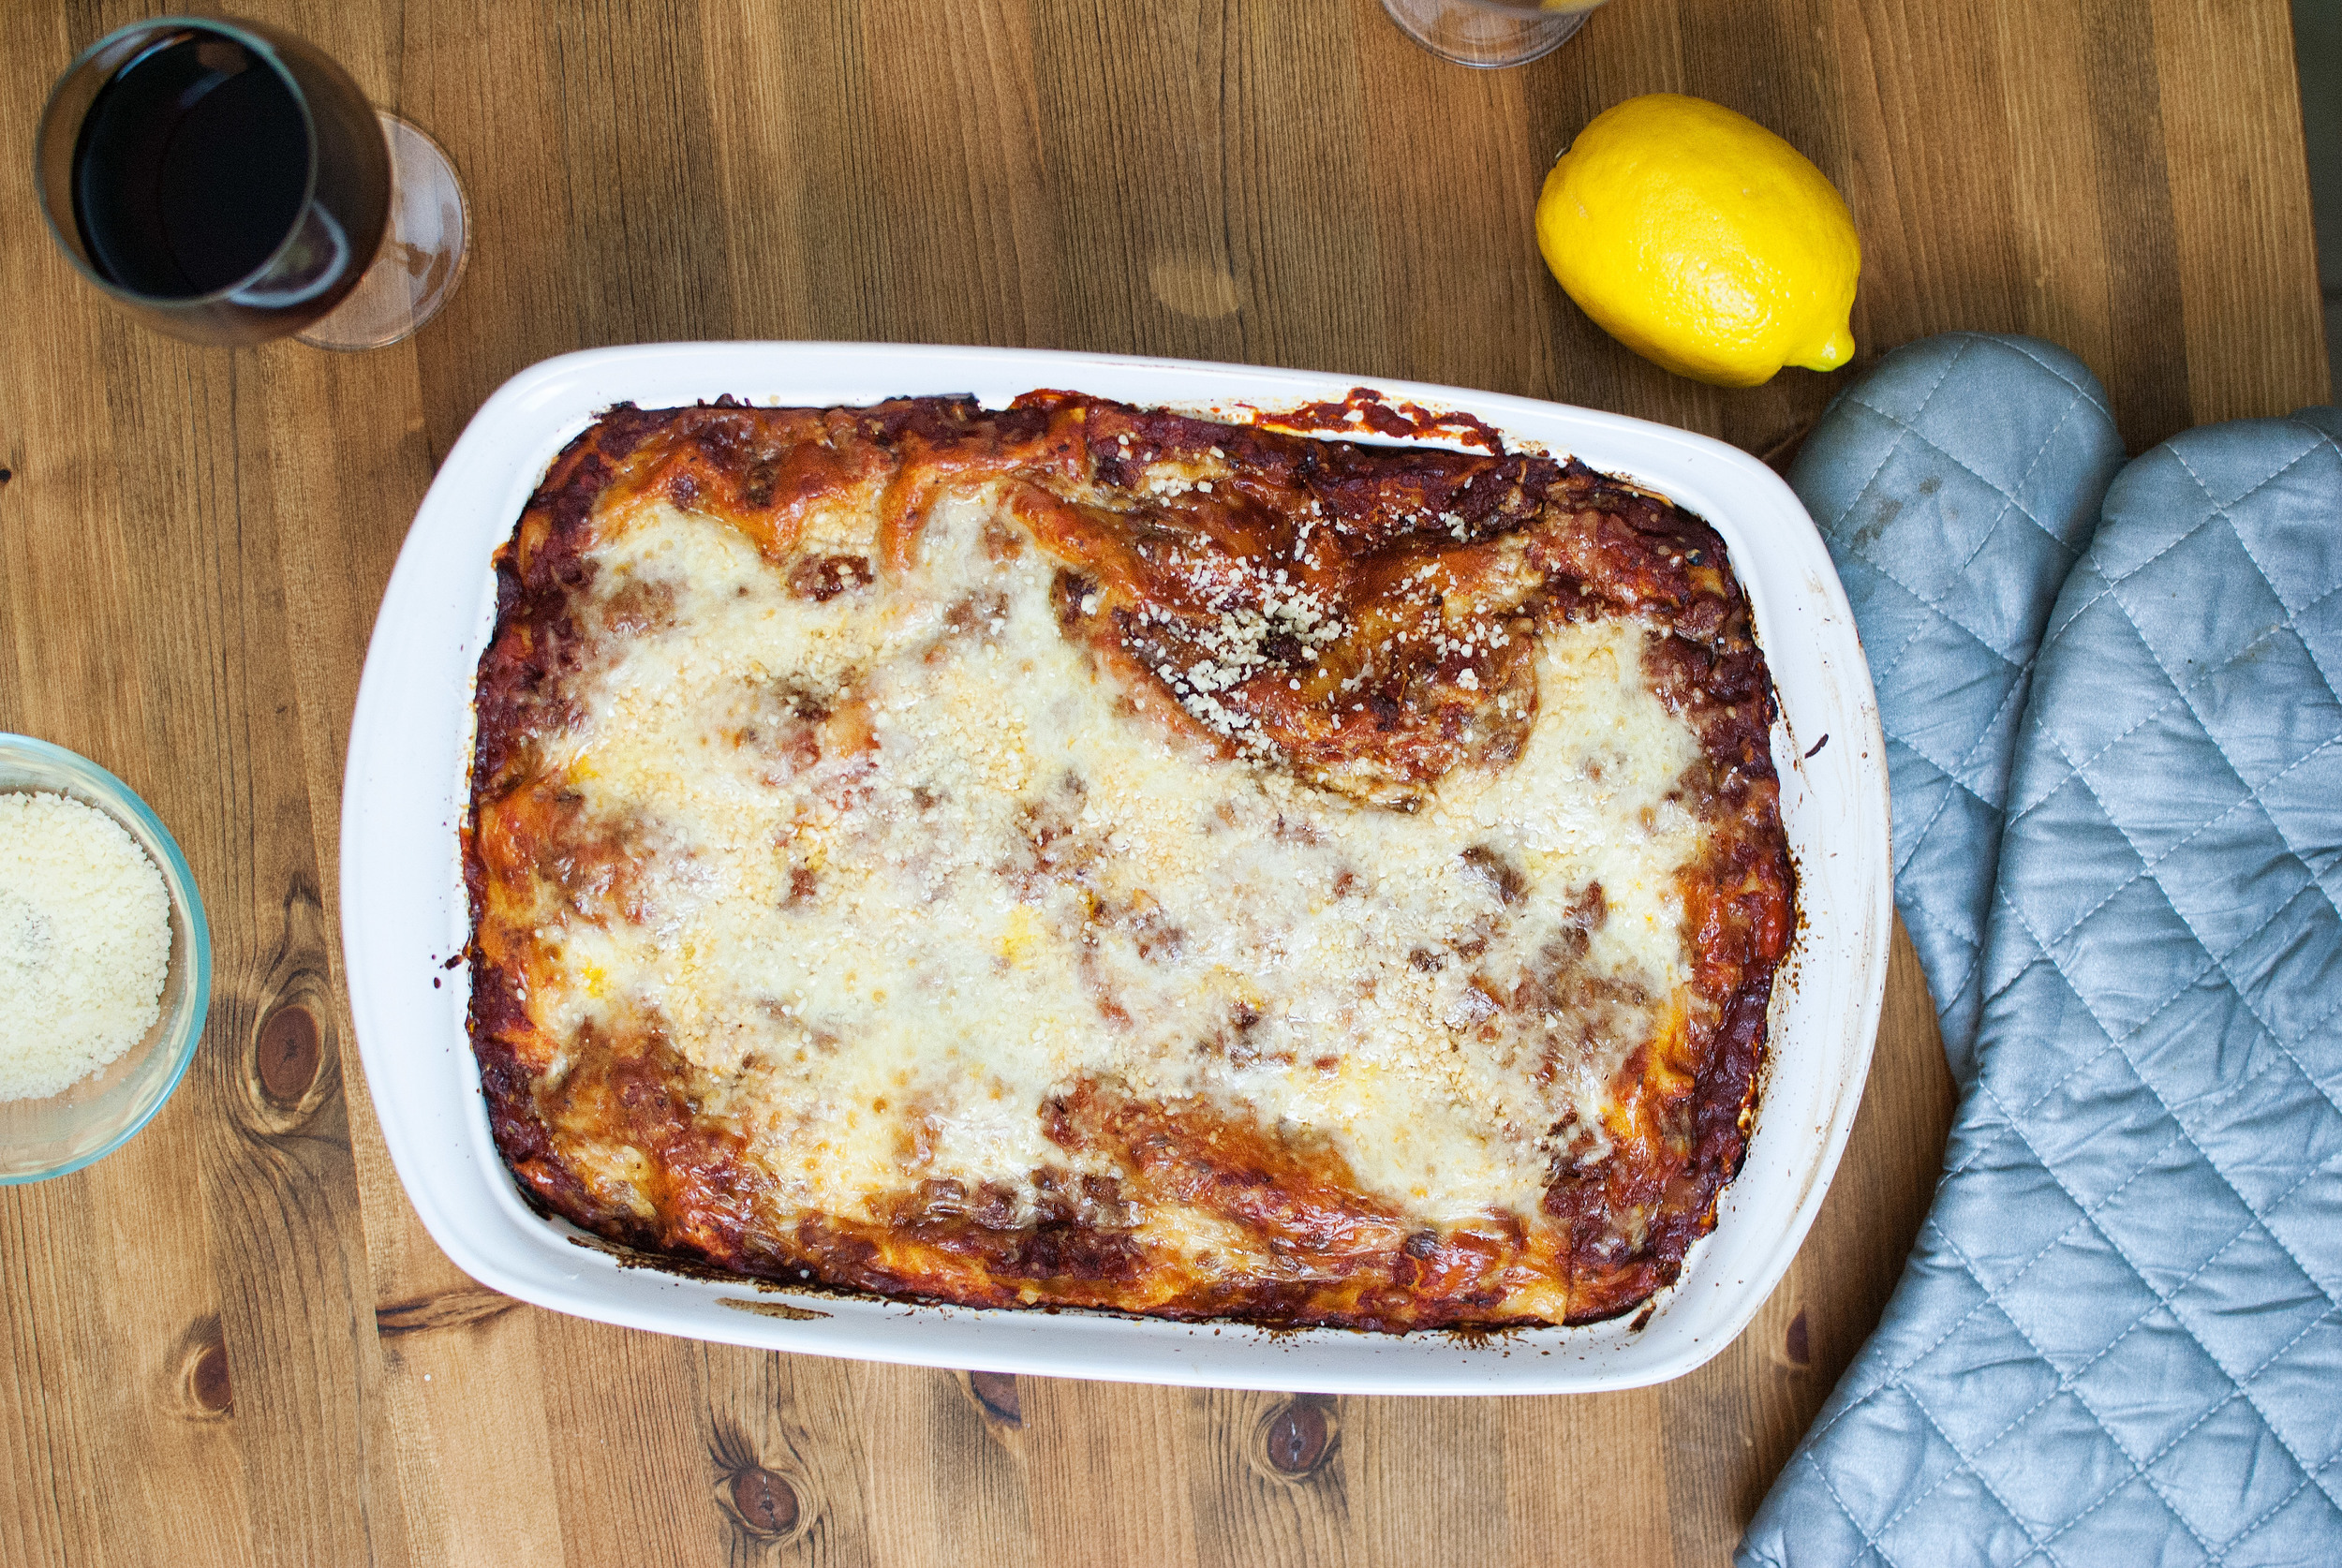
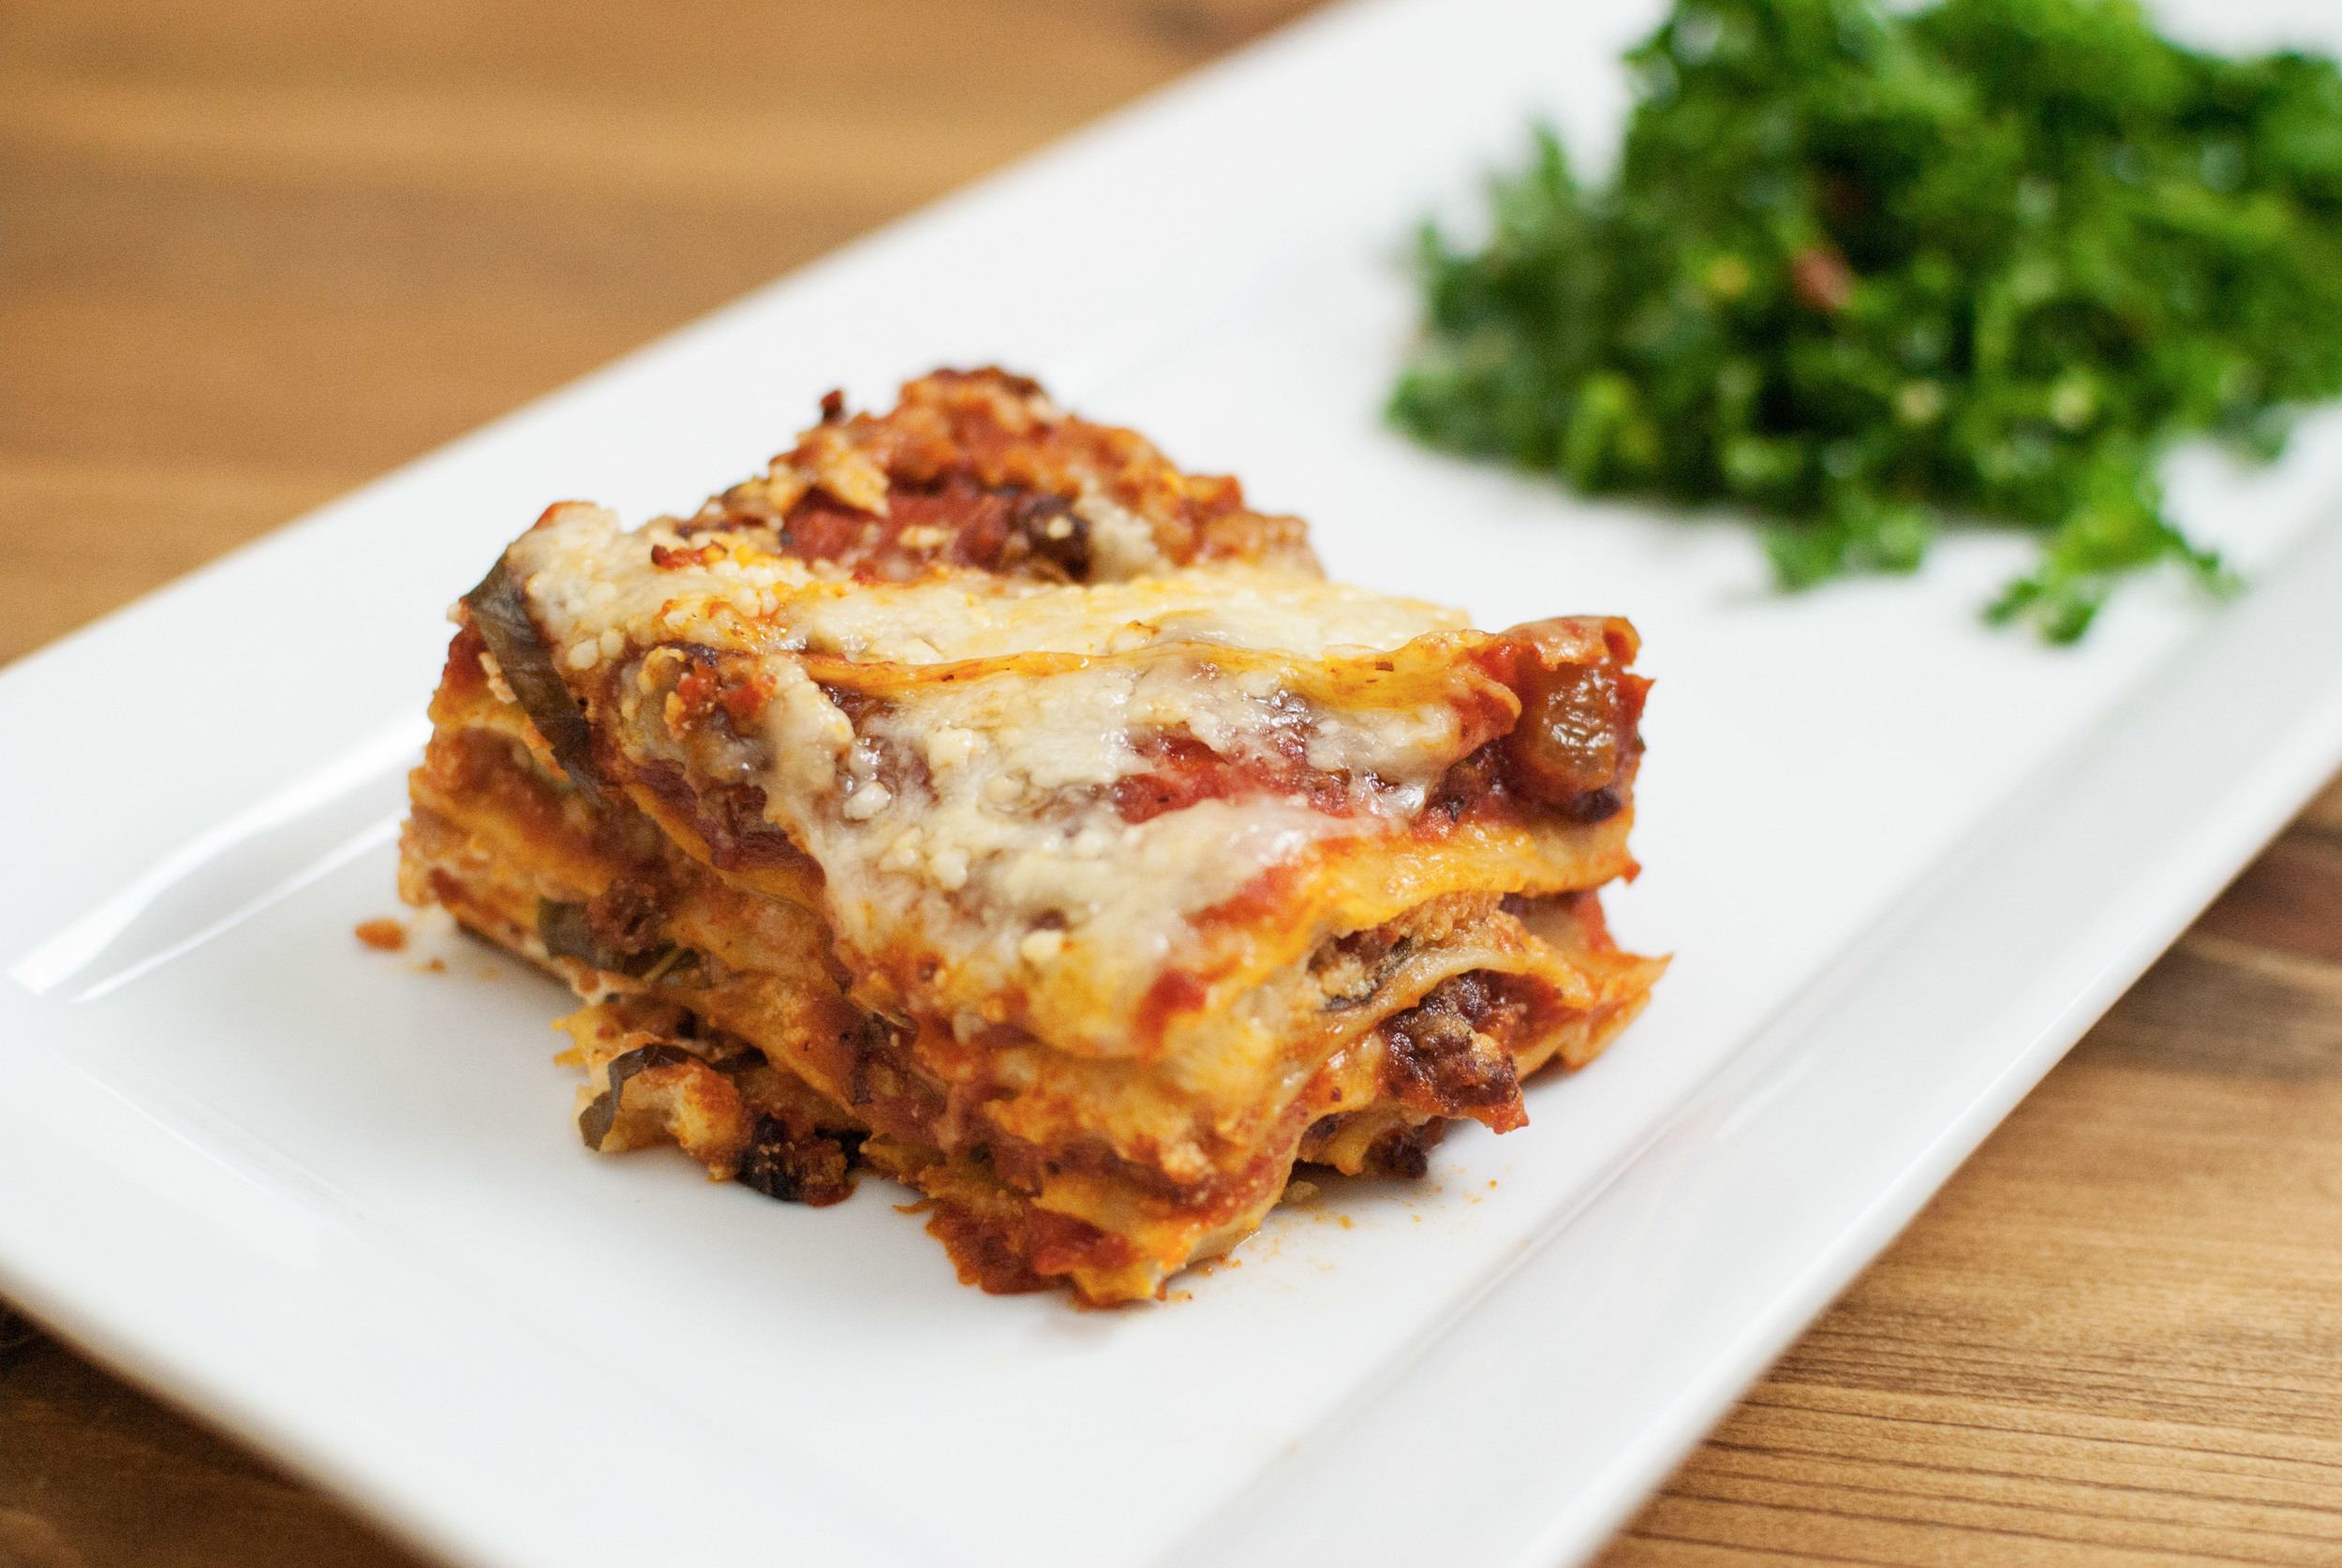
    If you do have a crank, run your dough through the first setting after flattening it a little bit with a rolling pin and covering both sides with a little flour. Proceed with the settings one by one until you get your noodles as thin as you want them, but experiment with what you like. For stir frys or hearty ramen noodles, I tend to stop at a 3, then run it through the spaghetti cutter. For linguine and pappardelle (or really fine noodles for a soup), my preferred setting is 6. If you’re going to be using this dough to make lasagna (it is a game changer, kids), I usually stop at a 5. Run your dough sheets through the cutter of your choice (I’d recommend cutting the longer dough sheets in half), or you can follow the folding and cutting instructions listed above if you prefer to cut them by hand. Be sure to toss your noodles in flour to make sure they don’t stick together.

    Cooking your noodles is a cinch. Bring a pot of water to a rolling boil and plop in your noodles. When they rise to the surface, they’re done. It takes a minute. A literal minute. Then fish ‘em out and use them however you see fit! Be sure to use them quickly since fresh pasta will stick to itself much quicker after it’s cooked than dried pasta will.

    Yields 4 servings.

  • Everyday Gnocchi


    Gnocchi is one of those recipes that mystifies me when I find out that someone thinks that it’s difficult to make, because not only is it really easy (and cheap) to produce, it’s also easy to produce a lot of it; and that’s exactly what we do. It’s common for me to whip out about four batches at a time of this recipe (a standard mixer should be able to hold two at once) then freeze the lot on a sheet tray and store these little guys in a large plastic bag. It’s such a satisfying meal for us, and the knowledge that we can put in minimal effort for it makes it all the more alluring after a long day of work where you just want something delicious and quick. Just pick your sauce, pop these kids out of the freezer and boil ’em in water till they float, and you’re set.

    Side note: yes, the gnocchi in this recipe are pressed onto a gnocchi board. Do you need to do that? No, no you don’t. Do grooves hold more sauce? Yeah, they do. Will your dinner be any less delicious if your gnocchs are just little grooveless potato lumps that you cut off from your giant slab of dough? Nope, it’ll be awesome.

    Did we press these onto a groove board just for this post so our gnocchi will look awesome even though we almost never do it in real life?

    You bet your ass we did.

    Everyday Gnocchi:

    • 1 cup of cooked skinless russet potato flesh, thoroughly mashed with as few clumps as possible.

      • Side note: When I do big batches of gnocchi, I will often add my cooked potato to a food processor and blend it until it’s very smooth, along with the olive oil. This changes the texture of the potato dramatically, making it much smoother (almost like a potato cake batter, and makes a much stickier dough after you add the flour to it. I’d recommend doing this, but if you’re tired and just wanna mash the potatoes by hand, your gnocchi won’t be any less delicious.

    • 2 tablespoons olive oil

    • 1 large egg

    • a big three-finger pinch of good salt

    • 2 cups flour

    Mix the mashed potato, egg, olive oil, and salt until thoroughly combined. Add the flour all at once and mix (your hands are the best tool for this if you don’t have a mixer) until all the flour is integrated. Continue to knead the dough until it becomes firmer and pulls away from the sides of the bowl.  The dough should be smooth, not unlike bread dough but much less springy. If you’re using a mixer, you’ll need to use the paddle at first to blend the flour into the wet ingredients, then switch to the dough hook once the it all begins to come together. Knead it for a minute or two until it becomes a tight dough. Let the dough rest at room temperature for about 30 minutes in a bowl with a cloth over it before proceeding to shaping.

    Transfer the rested dough to a lightly floured table or counter and begin to roll it into a long snake-like shape; it should be a little less than an inch in circumference when you’re finished. The dough will be quite tough and glutinous, so I’ve found that letting gravity stretch it a bit by pulling it and letting it hang in the air (as well as giving a few good thwacks on the table) works quite well to elongate it. Once you’ve got it rolled, take a knife or dough cutter and cut the dough into little nubs. The ideal size of a single gnocch for us is about the size of your thumb pad, so when you’re done, your table might look like it’s covered in a bunch of little floury thumbs (not to be grotesque, but hey, it’s an image you won’t forget).

    Your gnocchi are ready. They’re good to boil in the moment, or just place them on a sheet tray lined with baking parchment and freeze them for later. They keep for…well, we don’t actually know how long they really keep for; we’ve never let them sit around for too long. Oh, well…

    Optional: After cutting the dough, you’re welcome to press your little gnocs onto a gnocchi board to get their groove on. Simply take a gnocch and press it with your thumb onto a floured board, almost like a thumb print cookie, then remove it and fold it into itself so it returns it’s round shape once again with the grooves facing outward (duh). I’ll admit, it’s a bit of a tedious process, but they do look lovely when they’re finished and they really do hold more sauce. I’d recommend this method if you’re tossing them in a tomato sauce.


    gnocchi_dough_19.jpg

    Yields about 65-70 gnocchi, roughly 4 servings.

  • Spaghetti and Meatballs


    spaghetti_and_meatballs_04.jpg

    We’ve been on a pasta kick, and what good is a that if you don’t have spaghetti and meatballs in there somewhere? If you play your cards right and have the marinara prepared ahead of time, you can make this rich and relatively quick spaghetti and meatballs easily…perhaps a bit too easily.
    Instead of using homemade noodles for this, we opted for packaged angel hair spaghetti, which we think gives the dish more diverse textures. Any pasta will do. At the end of the day, though, it’s all about the sauce and the balls.


    spaghetti_and_meatballs_01

    spaghetti_and_meatballs_01

    One trick we use is to soak the breadcrumbs in red wine. Since we use Pinot noir in our marinara, it’s a perfect match. This recipe will make a lot of meatballs, so hope is that you’ll have enough for leftovers.

    Spaghetti and Meatballs

    • ¼ cup homemade breadcrumbs
    • ¼ cup Pinot noir red wine
    • ½ lb. ground pork
    • ½ lb. ground beef (not lean)
    • ½ oz. (about ¼ cup) Italian parsley, packed
    • ½ onion, diced
    • 3 cloves garlic
    • 1 egg
    • ½ tsp. fresh ground black pepper
    • 1 tsp. salt
    • 1 quart marinara (we recommend Nate’s Pinot Noir Marinara)
    • 6 oz. dried angel hair pasta
    • parmesan, Italian parsley, red pepper flakes to finish

    Preheat oven to 350°F.

    Soak the breadcrumbs in the wine in a small bowl until the breadcrumbs have absorbed all of the wine, about five minutes. Place meats, onion, parsley, garlic, egg, salt, pepper, and soaked breadcrumbs in the bowl of a large food processor. Pulse until combined. Don’t process too much or you’ll whip the egg, which isn’t what you want here.

    Prepare a 13 x 9 baking dish with about half the marinara spread evenly. Set aside.

    Divide meat into 1.5-inch balls and place into the baking dish, leaving some room around the meatballs so they don’t stick together. Cover the meatballs with the rest of the marinara.

    Bake, uncovered, for 45 minutes, or until a meat thermometer reads 160°F.

    Put a large pot to boil.

    Remove from oven and let cool for 10 minutes. Stir the marinara to incorporate the rendered fat and roasted bits that were on top of the meatballs. While the meat cools, cook pasta al dente. Strain and toss noodles with just enough marinara to coat the noodles. Serve with more marinara and three meatballs. Garnish with parmesan cheese, chopped parsley, and red pepper flakes to taste.

    Yields about 18 meatballs.


    spaghetti_and_meatballs_03

    spaghetti_and_meatballs_03

  • Lemon Basil Lasagna


    Lasagna-03.jpg

    Sometimes, we like to go all out on a meal. Lasagna is one of those meals. We know we’ve been posting some quick recipes that you can make on a typical weeknight, but this one—this one is for the weekend.
    Lasagna is a production, especially if you’re making (almost) everything from scratch. For this we used Nate’s pinot noir marinara, but instead of using oil to caramelize the onions, we opted for rendered fat from ground pork. What really makes this shine, though, is Jon’s lemon-infused ricotta mixture. It accents the tart umami of the marinara perfectly, giving the lasagna a duality: rich and floral.

    Lemon Basil Lasagna

    • 1 batch everyday pasta, rolled to 5 or 6 thickness or 1 12-oz. package of no-boil lasagna noodles.
    • 2½ c. shredded mozzarella
    • ¼ c. parmesan reggiano or pecorino romano, grated

    Sauce

    Ricotta mixture

    • 1 15-oz. container whole fat ricotta cheese
    • ½ c. grated parmesan reggiano or pecorino romano, grated
    • 1 lemon, juice and zest
    • ½ oz. basil leaves, chiffonade
    • 1 egg
    • salt & fresh ground pepper to taste

    For the sauce, follow the directions here, browning the pork sausage in the same pot for the marinara over medium high heat. Remove the meat from the pan using a strainer, leaving the rendered fat and add diced onions to the hot pan. Add a small amount of oil if needed. Add the rest of the ingredients and reduce sauce for up to 1½ hours, stirring constantly.

    While the sauce is reducing, make the pasta dough.

    Preheat oven to 350°F (180°C).

    Mix the ricotta, parmesan, basil leaves, lemon juice and zest, and egg in a medium bowl.

    Roll out pasta into lasagna noodles and coat with a light dusting of flour to keep from sticking. Take a 13″ by 9″ baking dish and coat the bottom with just enough marinara, about 1 cup. Place a layer of noodles in the pan.

    Dollop in about a third of the ricotta mixture and spread evenly over the noodles. Add about ¾ cup marinara and spread evenly. Sprinkle ¾ cup mozzarella on top and place another layer of noodles on top of the layer. Congrats! This is your first layer!

    Repeat this twice.

    For the top, spread enough marinara to cover the noodles thinly. Sprinkle remaining mozzarella and parmesan over the top. Cover with foil. Bake covered for 40 minutes. Remove foil carefully (use an oven mitt!) and bake for another 15–20 minutes, until cheese is browned and the lasagna is boiling.


    Lasagna-01

    Lasagna-01

    Remove from oven and let rest for 10–15 minutes before serving.

    Serves 8.


    Lasagna-02

    Lasagna-02

  • Nate’s Pinot Noir Marinara


    Marinara_01.jpg

    Marinara is a mother sauce that you can use in all sorts of Italian dishes, from spaghetti to pizza to lasagna to meatball subs, even just for dipping breadsticks.
    Jon and I make marinara differently. His turns out smoky and rich. Mine is more bright and floral with a slight acidic edge. (I think it’s because of the bay leaf and I put waaay less wine in the sauce.) You can’t make marinara wrong, but sometimes the freshness is nice. You can customize the sauce for the dish as you see fit.

    Nate’s Pinot Noir Marinara

    • 2 28-ounce cans crushed tomatoes
    • 1 medium sweet onion, diced
    • 6 cloves garlic, minced
    • 2 tbs. dried Mediterranean oregano
    • 1 tbs. fennel seed
    • 1 10-inch sprig rosemary, leaves removed, minced (reserve the stick)
    • ¼ tsp. red pepper flakes
    • 1 bay leaf
    • 2 cup pinot noir red wine
    • 2 tbs. olive oil
    • salt & pepper to taste


    Marinara_02

    Marinara_02

    In a large heavy-bottomed stock pot, heat oil over medium heat. Sweat the onions (cook them until translucent), stirring constantly. Add tomatoes and stir. Add everything else, and bring to a simmer. Reduce to low heat and cook uncovered for 1 hour, stirring frequently. The sauce will reduce about halfway.

    You can refrigerate the sauce for up to 3 days or freeze for up to 3 months.

    Yields scant 3 pints.

  • Chicken Marsala with Fettuccine


    DSC0059.jpg

    Relatively quick and easy. Complex, rich, savory, and sweet. It’s hard to keep track of how many times we have made this recipe. It’s our standard cream sauce pasta dish, giving the boot to the run-of-the-mill fettuccine alfredo. You won’t find anything out of the ordinary with this recipe. It’s just really really good. Oh, and we added rosemary to the sauce, because who are we kidding. It’s us.
    We fucking love rosemary.

    Chicken Marsala with Fettuccine

    • 1 batch sexy pasta (½ batch everyday pasta) or 6 oz. dried fettuccine
    • ½ lb. chicken breasts (1–2 breasts)
    • 1 small shallot, minced
    • 1 8-inch sprig rosemary, leaves only, minced
    • ½ pound cremini mushrooms (roughly 6 large), sliced ¼-inch thick
    • 1 clove garlic, minced
    • ½ cup marsala wine
    • ¾ cup whipping cream
    • salt and pepper to taste
    • parmesan cheese, for garnish
    • Italian parsley, for garnish
    • red pepper flakes, for garnish
    • rosemary flowers, seasonal, for garnish


    Chicken-Marsala-2

    Chicken-Marsala-2

    Roll out pasta using a pasta machine to thickness setting of 5. Cut in half as the dough gets too long to handle. Run through the fettuccine attachment and toss the noodles with flour to keep it from congealing. If you don’t have a pasta machine, follow the noodle making instructions from this recipe. Set aside, but toss frequently until ready to boil to ensure the noodles don’t stick together.


    Chicken-Marsala-3

    Chicken-Marsala-3

    Carefully slice chicken breasts in half, and season the surface with salt and pepper. Coat a 12” skillet with oil and bring to medium-high heat. Pan sear chicken until it has a deep golden crust and is cooked through (160°F/71°C). Set aside.

    Bring a pot of water to boiling.

    In the same skillet as you used to cook the chicken, add a little more oil. Cook the mushrooms until softened and golden brown. (This part requires some patience. Allow mushrooms to cook without stirring until you are ready to flip them.) When mushrooms are cooked, add shallots and cook briefly until translucent. Add marsala wine to deglaze and lower the heat to medium low. Add rosemary and reduce wine until it has mostly evaporated.

    While wine is reducing, cook noodles 1½–2 minutes, or until the begin to float and the water starts foaming. Drain and set aside. Do not do this ahead of time or you will end up with an unappetizing glob of cooked noodles that not even Lumpy Space Princess would enjoy.

    Add cream and garlic and cook, stirring, for 1–2 minutes, until the sauce starts to thicken. Add cooked noodles and toss with the sauce. The gluten from the noodles will thicken the sauce. Serve immediately with chicken and garnish with parmesan, parsley, red pepper flakes, and rosemary flowers (if in season).


    Chicken-Marsala-4

    Chicken-Marsala-4

    Serves 2.

  • Pasta alla Carbonara

    >
    You don’t need expensive equipment to make pasta. All you need is a rolling pin and a sharp knife, and you’re good to go.

    Pasta alla carbonara is one of the easiest in the pasta canon, complete with echoes of the all-American breakfast: bacon and eggs. It is a great dish that finds a great compromise between rich flavors and inexpensive ingredients. It’s pasta tossed with whipped eggs, cheese, crisp bacon, and its rendered fat. When you combine the hot noodles and eggs, it cooks the eggs just enough to create a creamy sauce that bonds the bacon fat and melted cheese. Essentially what you’re making is a cheesy, bacon-flavored custard.

    Want richness without meat? Replace the bacon with a cup of sliced raw mushrooms and add a smidgeon of olive oil and it’ll produce the same texture with a woodsy depth.

    Pasta alla Carbonara:

    • 1 batch of sexy pasta dough, ½ batch everyday pasta dough, or 6 oz. dry pasta

    • ½ cup bacon (or pancetta if you prefer), minced

    • 2 large eggs

    • ⅓ cup parmesan cheese, shredded

    • 2 tbs. Italian parsley, chopped

    • ½ tsp. salt

    • Fresh ground pepper

    Roll out pasta dough on a floured surface until thin enough for your liking. Cover dough with a light dusting of flour, fold dough in half, and cut into strips. Don’t worry about making them the same size!

    In a big skillet, fry the bacon until crisp and the fat is rendered; then remove from heat. Keep everything in the skillet. Set aside.

    In a small bowl, beat the eggs lightly until the yolk is mixed with the whites. Then add the cheese, parsley, salt, and pepper. Mix thoroughly. Set aside.

    Boil noodles for 1½–2 minutes (this depends on how thick you make them), until the noodles start to float. The next step must be done as fast as you can, so make sure you have your eggs ready. Strain pasta quickly in a colander and put in the skillet with the bacon and rendered fat. Immediately pour the eggs into the skillet with the noodles and stir them gently, constantly until the heat from the noodles begins to cook the eggs. Serve immediately garnished with parmesan cheese, parsley, and red pepper flakes.

    Serves 2.