Tag: gluten free

  • Fresh Strawberry Ice Cream


    Oregon’s berry bounty is impressive, especially in the summer. Wave after wave of variety comes into its own and it can seem overwhelming when the time comes to choose which one to work with, but after much deliberation, Nate and I think that we’ve finally decided on what our favorite is.

    Is it the plentiful, tart, and quintessential Pacific Northwestern blackberry?

    No.

    Is it the delicate, elegant, and high-brow dessert-loving raspberry?

    No.

    Is it the versatile, delicious, and nutritious blueberry?

    No. No it is not.


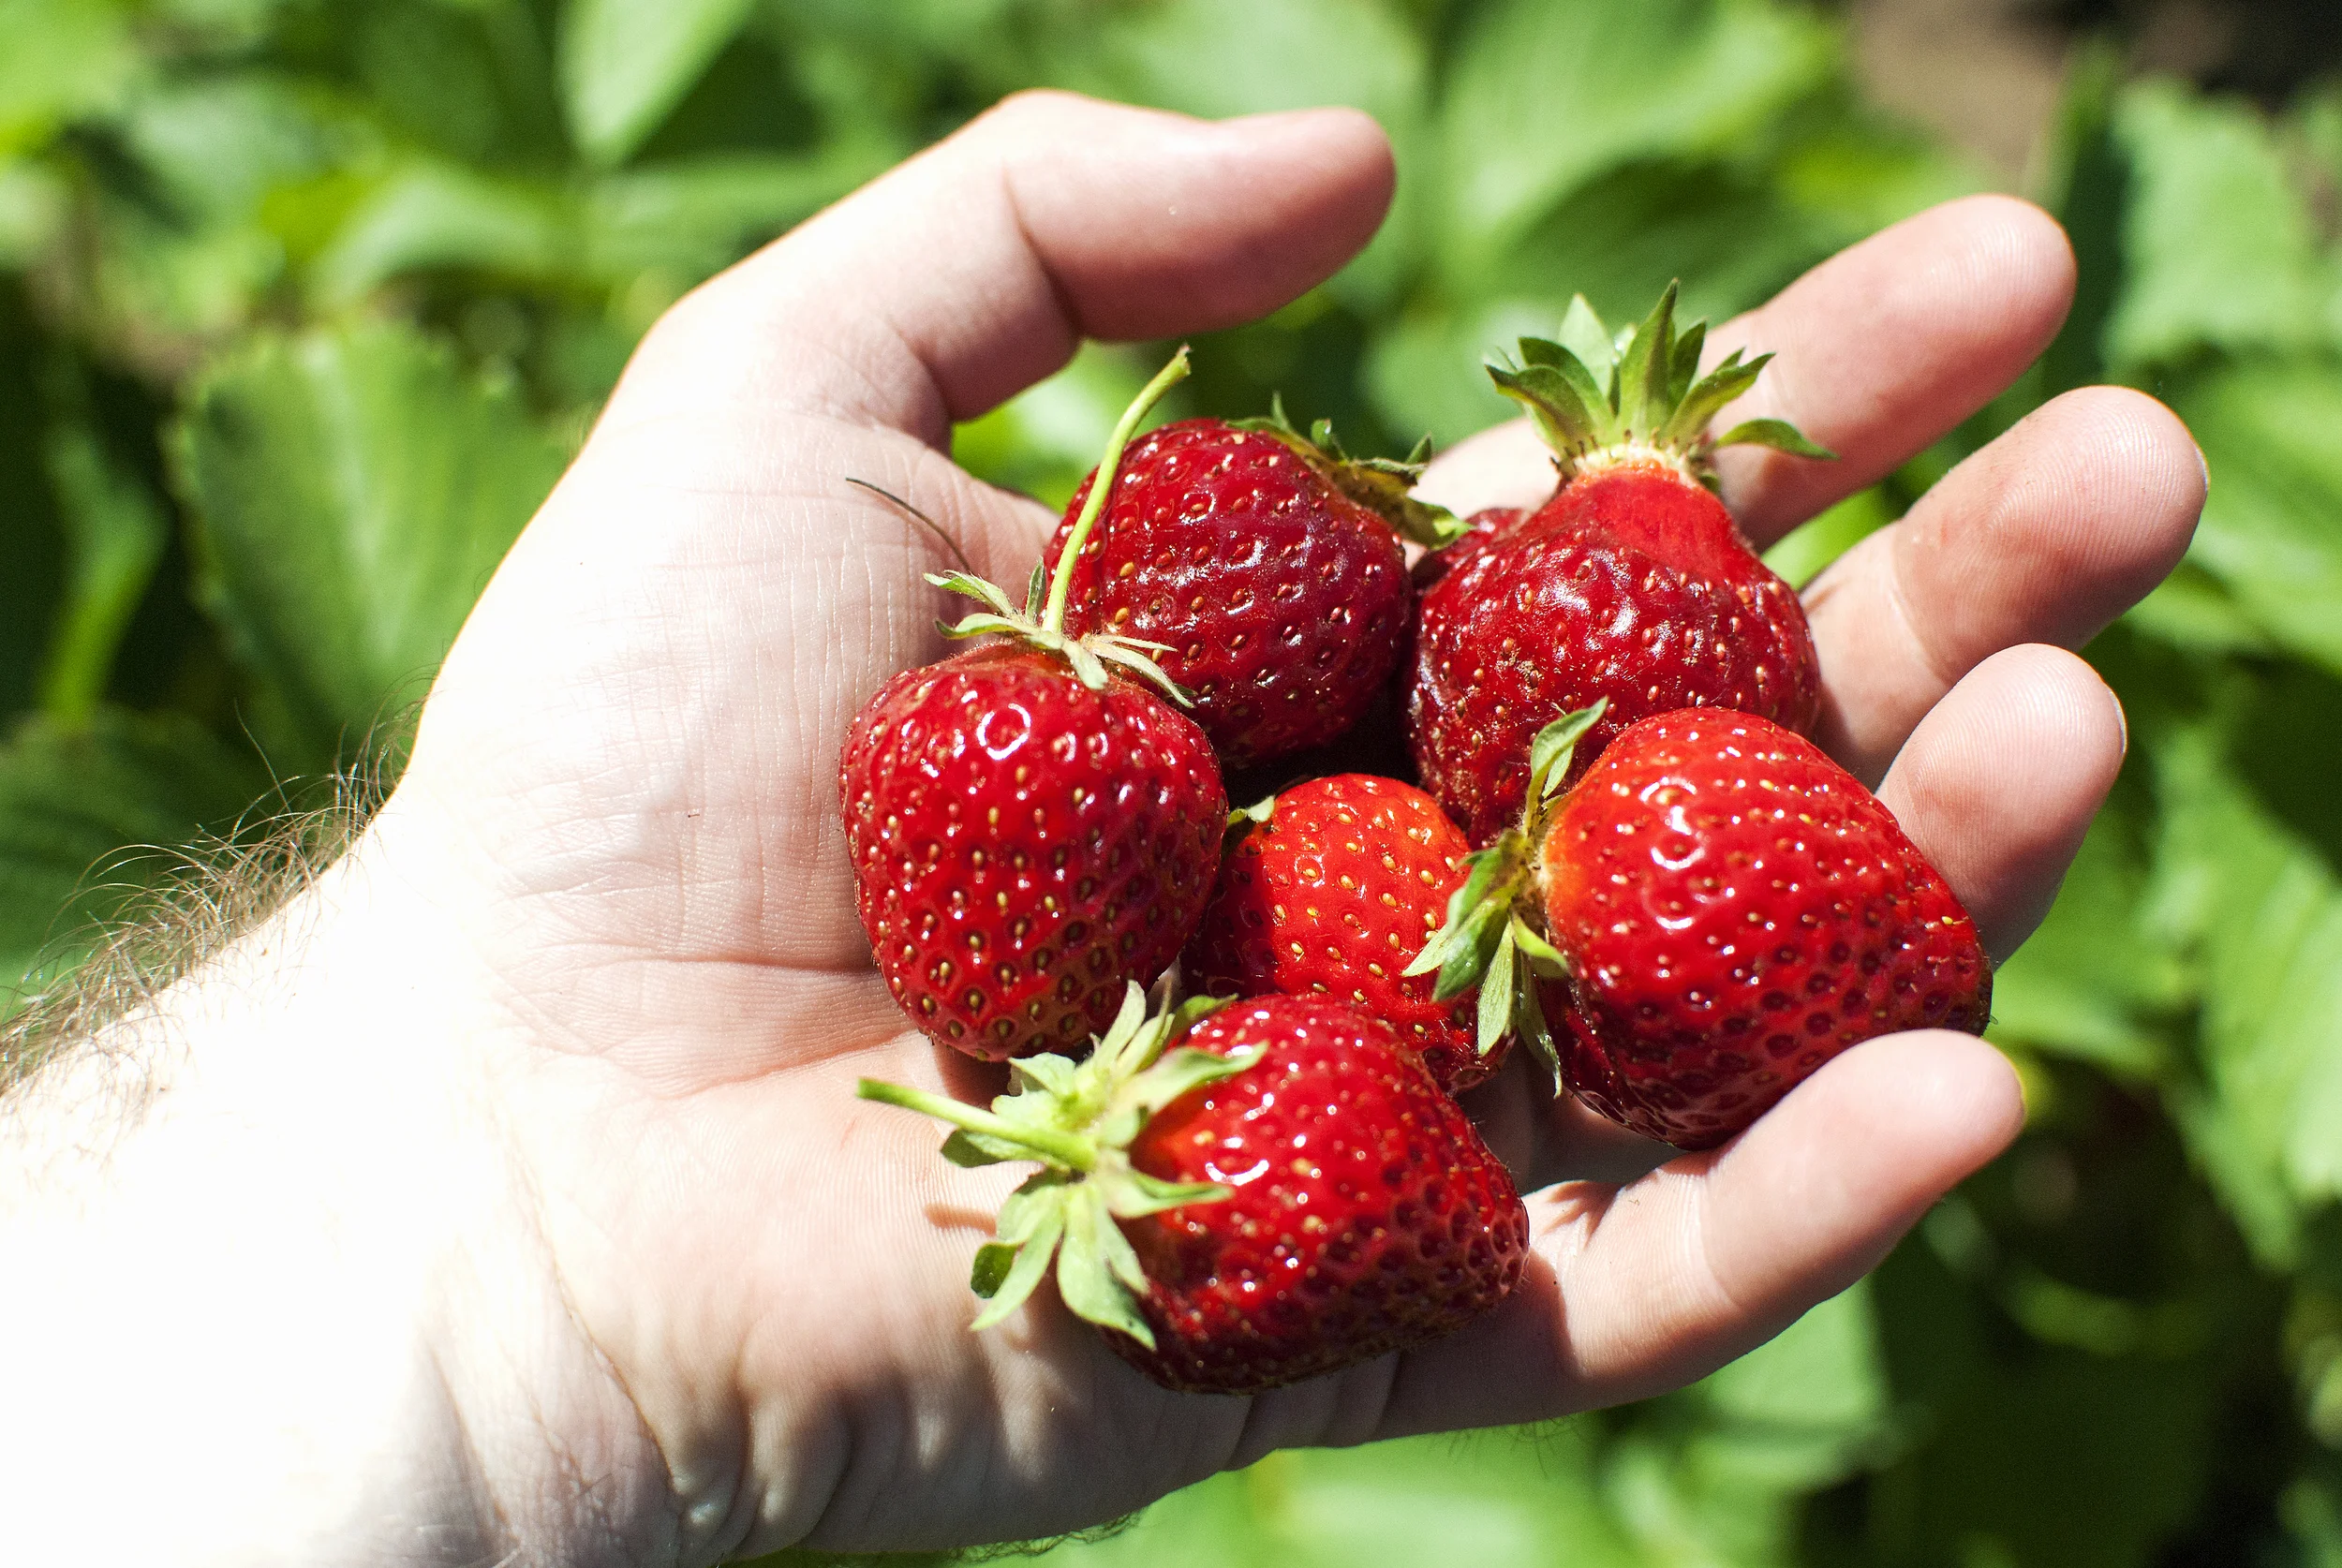
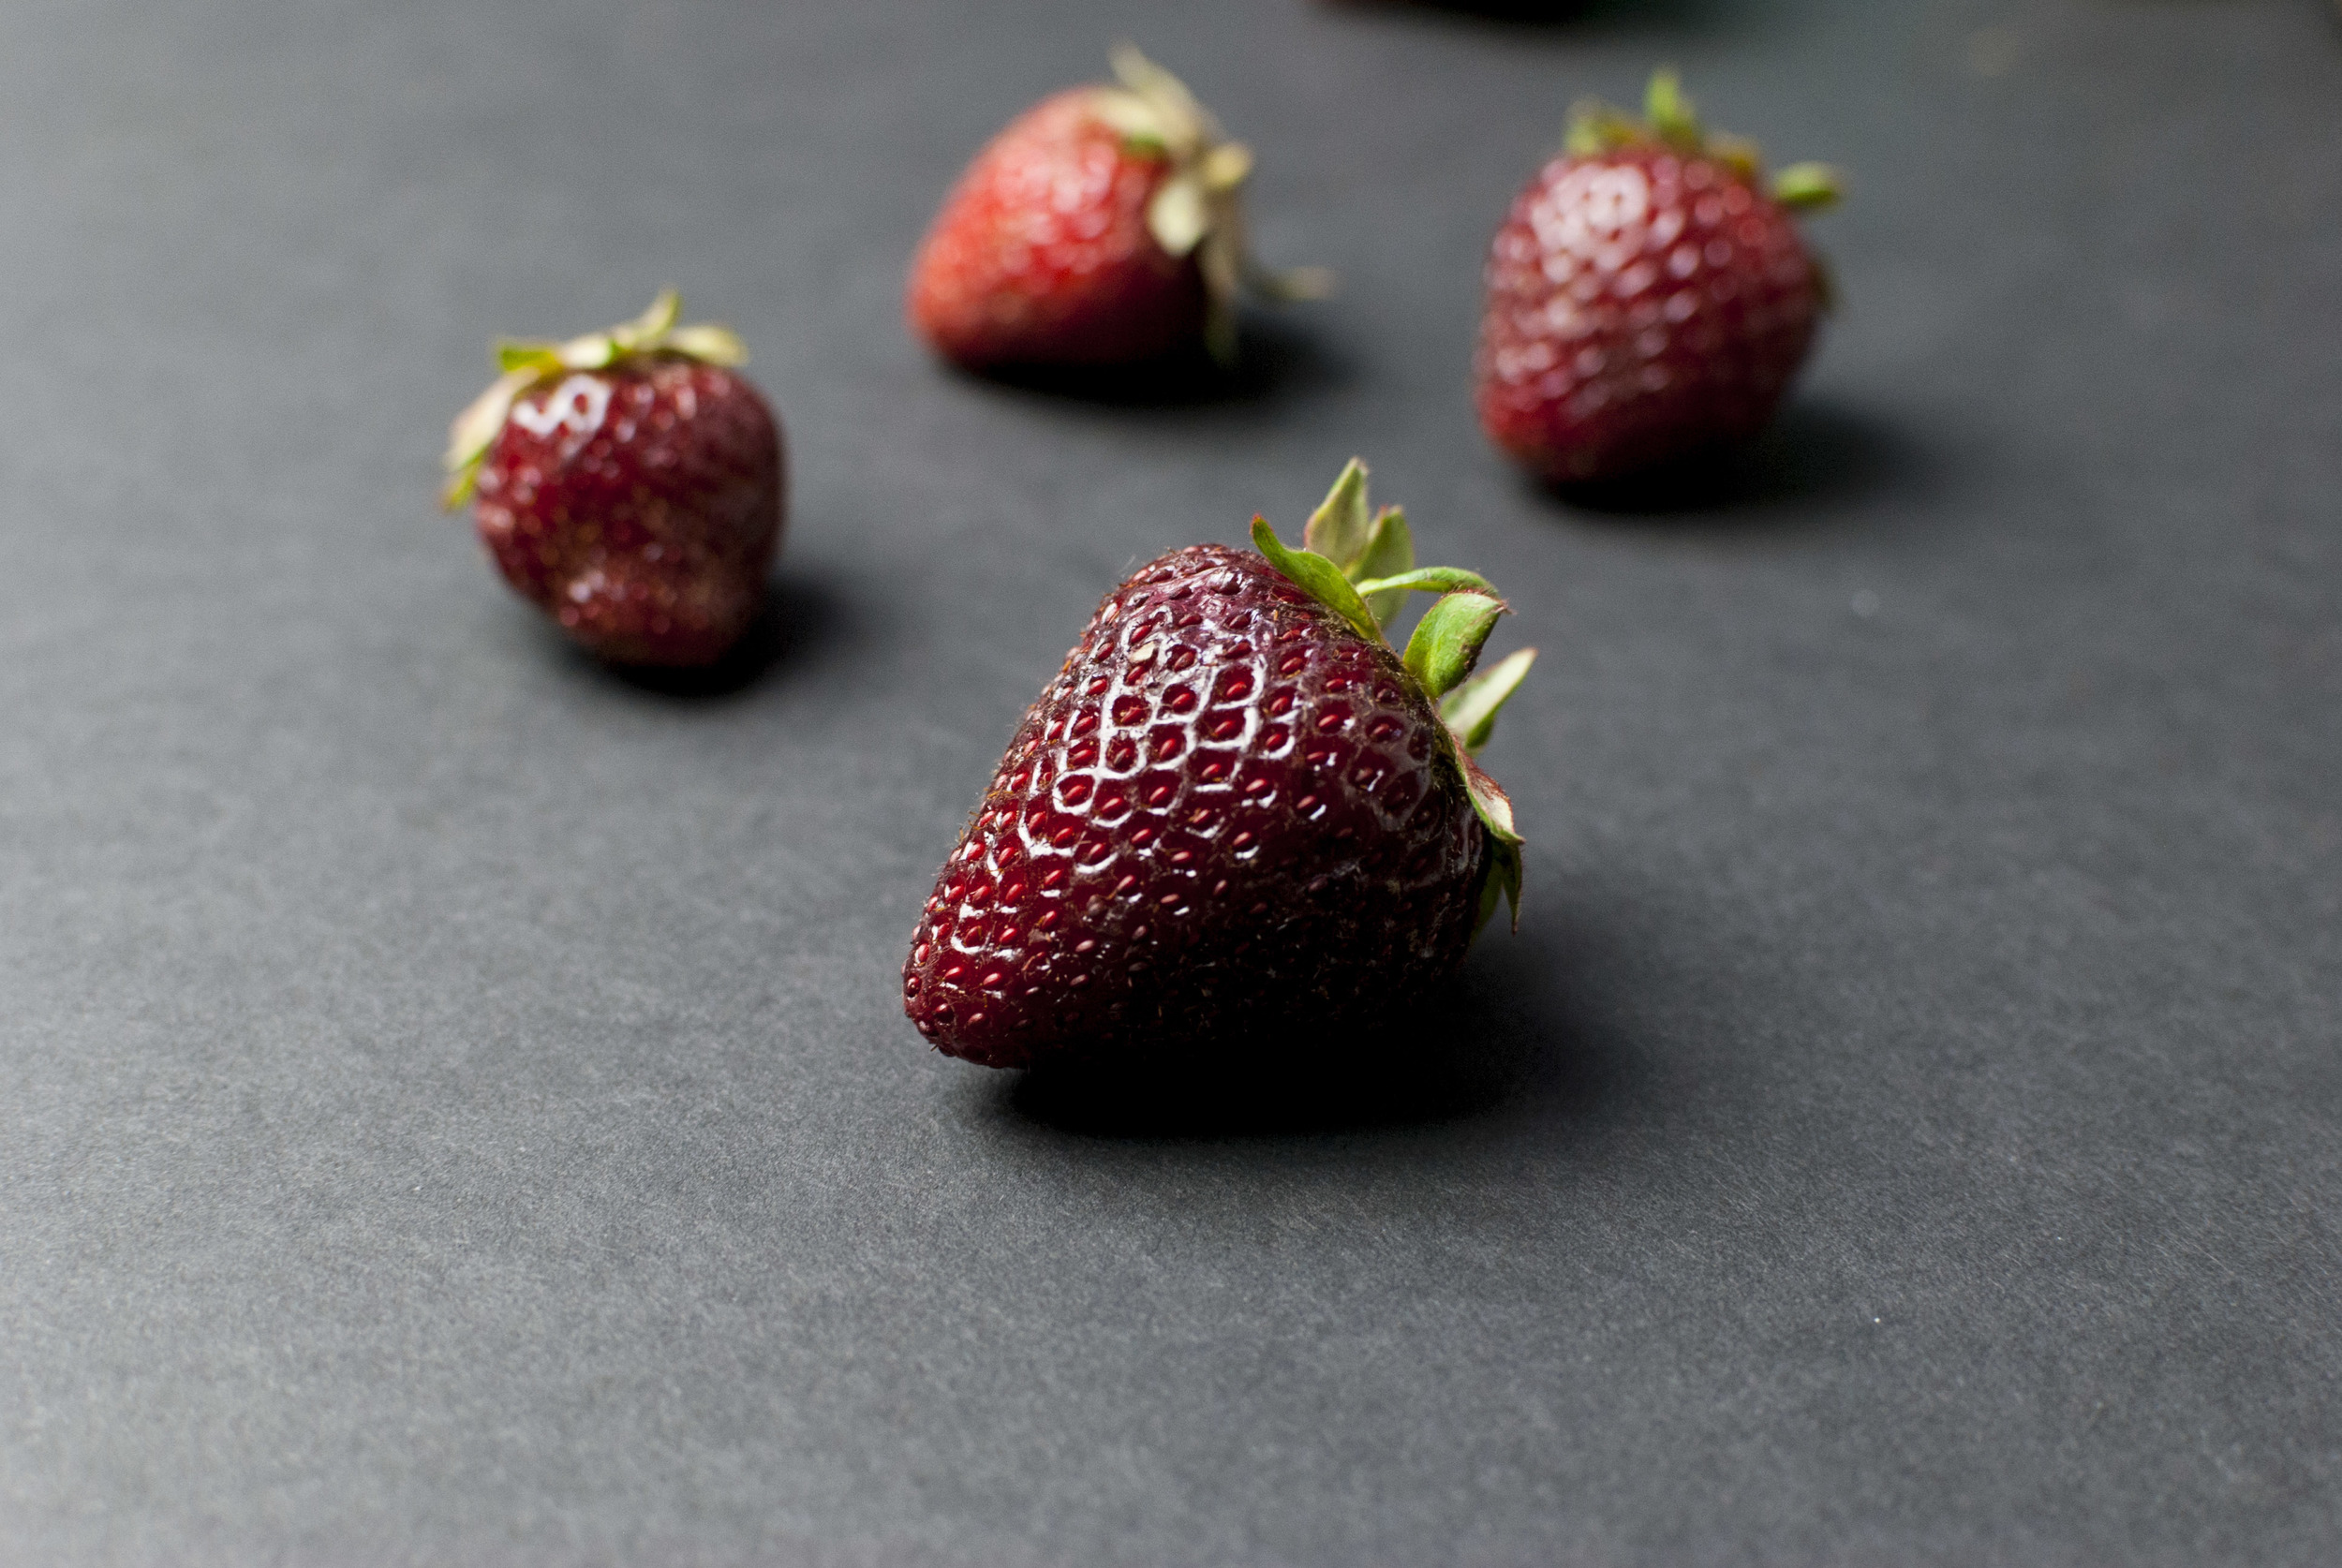
    For us, the most sublime berry is the one that welcomes us into the warmer months in Oregon. Hitting their peak in early summer, their season comes and goes quickly. It’s important to get them while you can because, as summer develops, they just aren’t the same anymore, then they disappear altogether, waiting for late spring once again. We are, of course, talking about what might be the most popular berry in America: the strawberry.

    One might think to oversimplify this common ingredient; after all a strawberry is a strawberry is a strawberry, right?

    Noooooope.

    There are so so many species of these little beauties, and they all taste a little different from one another. However, there are two that rise above the rest for us: Hoods and Seascapes. I’d be impressed if anyone went wrong with either one of them if you get them at the right time, and the time is now, but as this recipe suggests, like so so many things in this world, we believe that they should be drowned in cream and churned.

    P.S. This fresh fruit ice cream proportion works magic with these strawberries, but don’t let that stop you from getting creative. If you apply the same amount of any fresh fruit into this recipe, it will work. Let this be a way for you to experience all the best fruit this summer. I mean, that’s what we will be doing…

    Fresh Strawberry Ice Cream:

    • About 1½ cups (335 grams) fresh, ripe strawberries, tops removed (Hoods or Seascapes if you can get them)
    • A pint (472 grams) heavy whipping cream
    • 1¼ cups (263 grams) whole milk
    • ¾ cup plus 1 tsp (161 grams) sugar
    • Scant ¼ cup (67 grams) light corn syrup
    • A dash xanthan gum

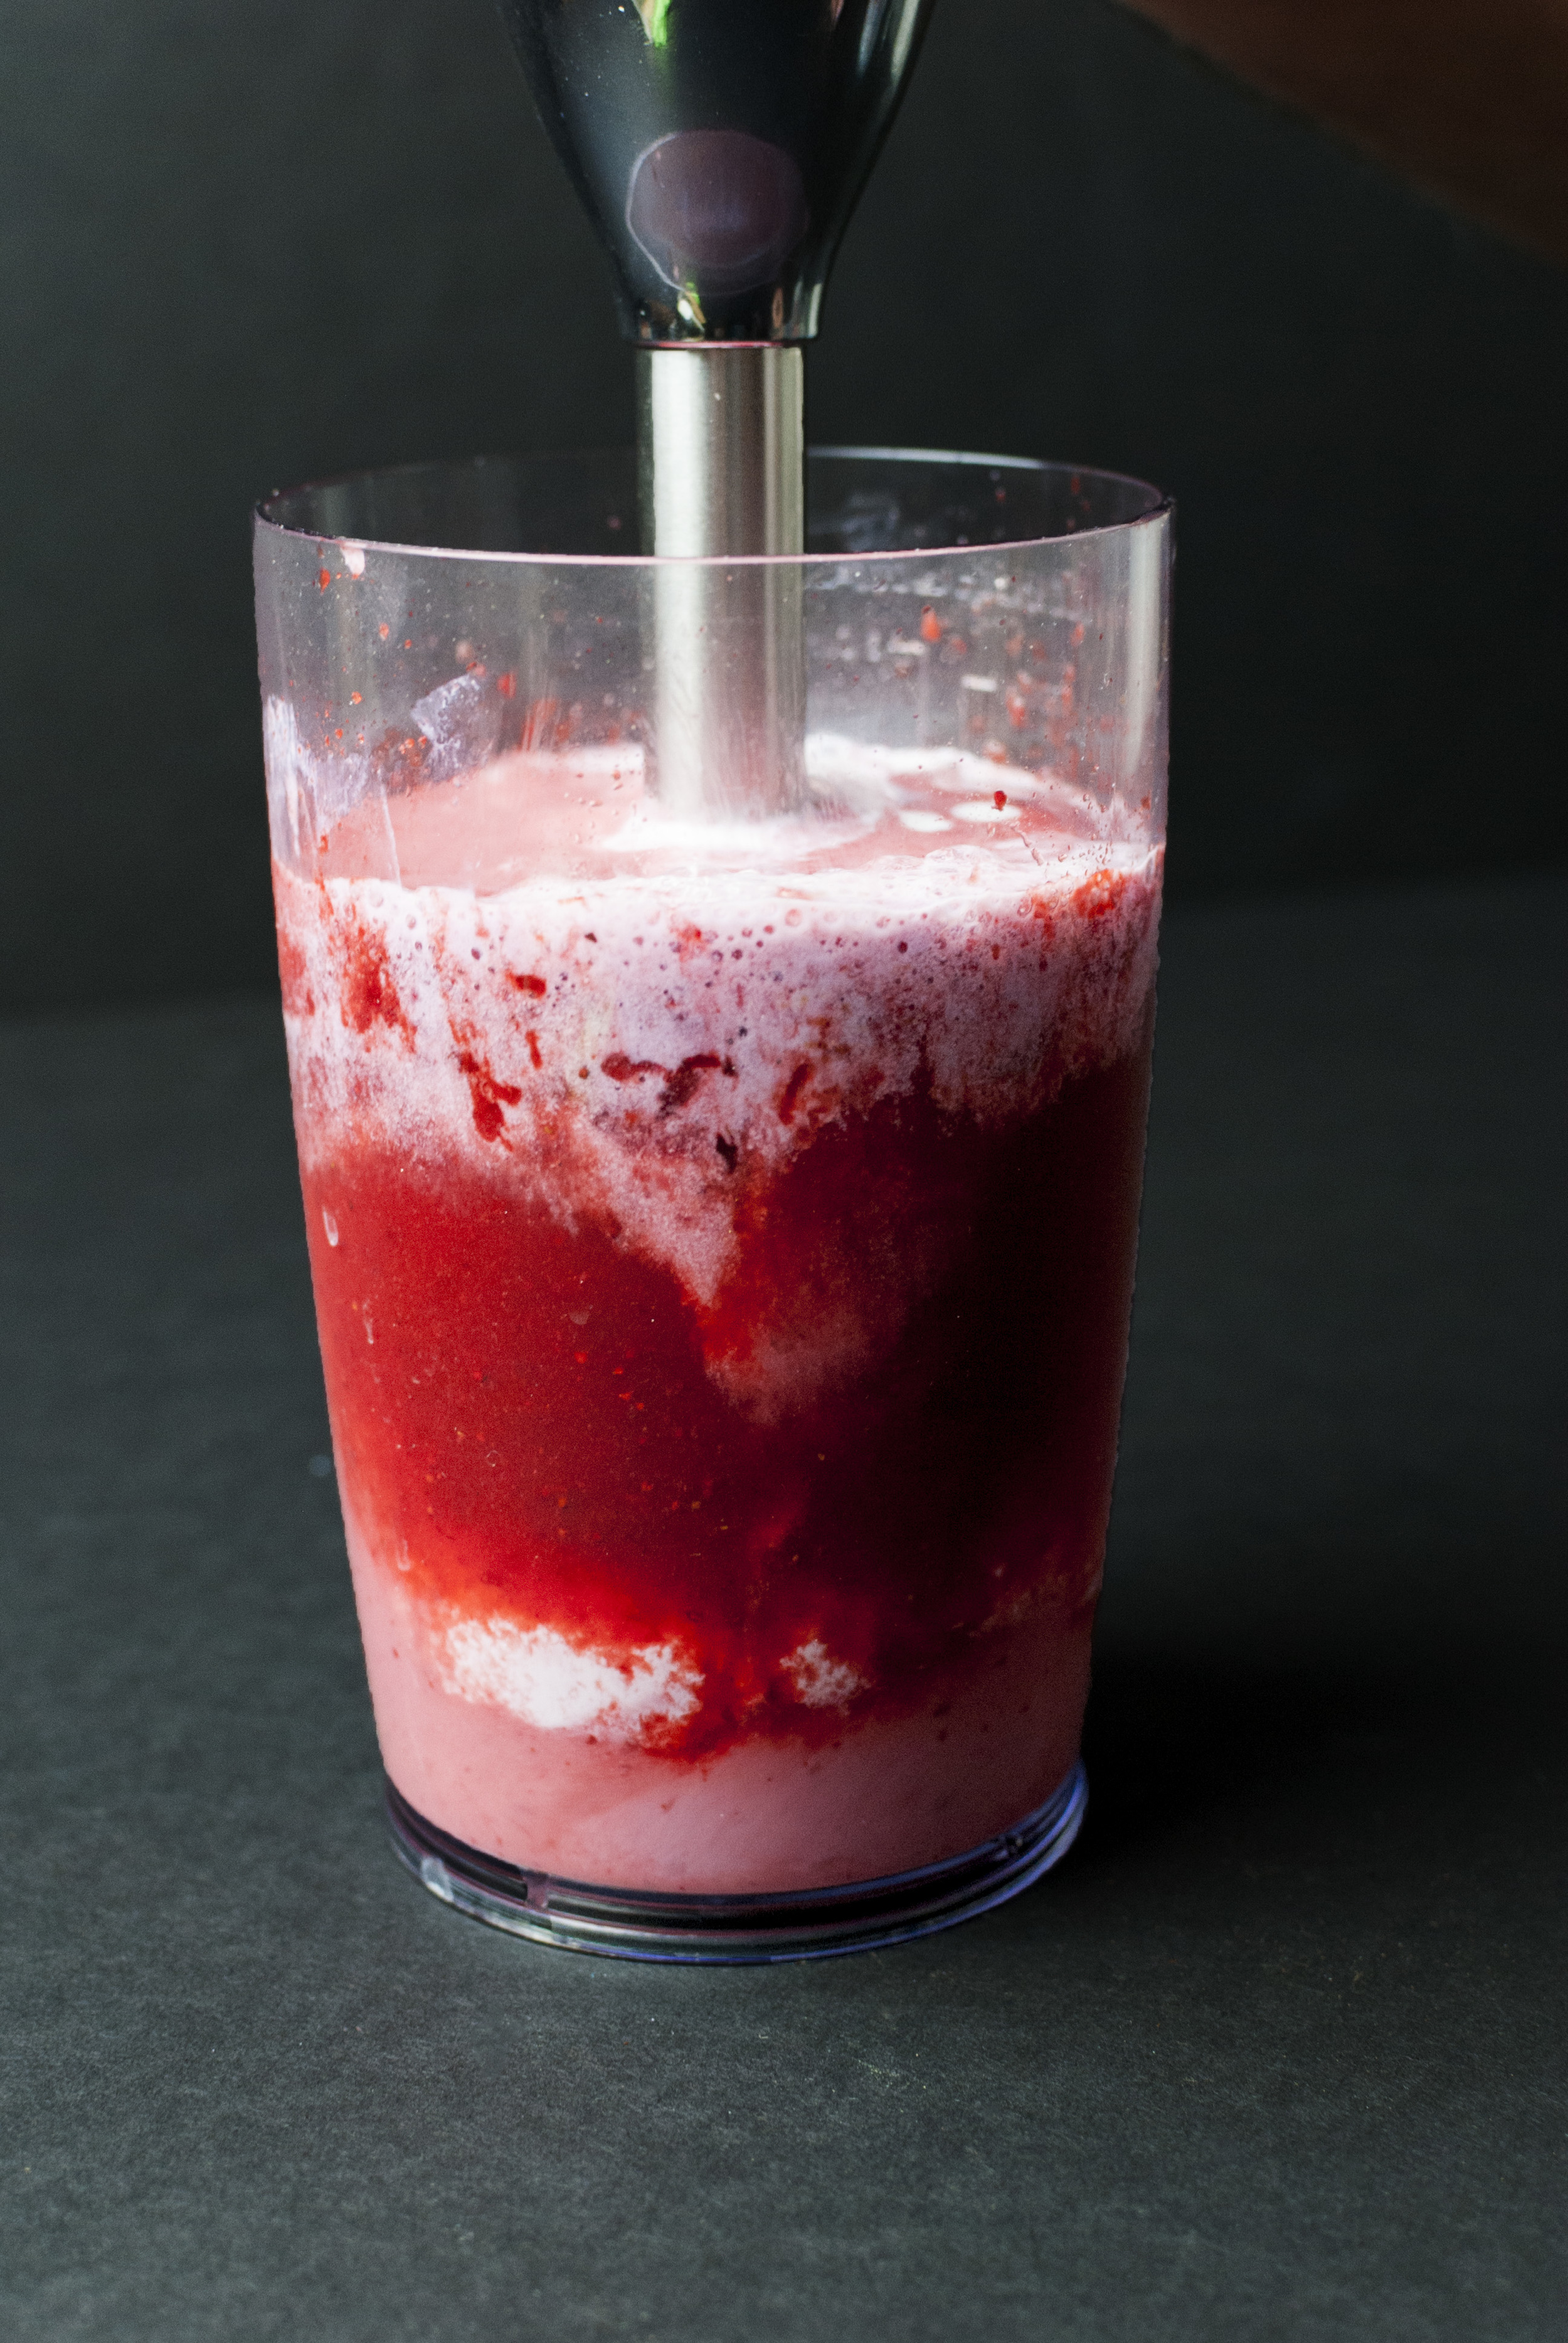
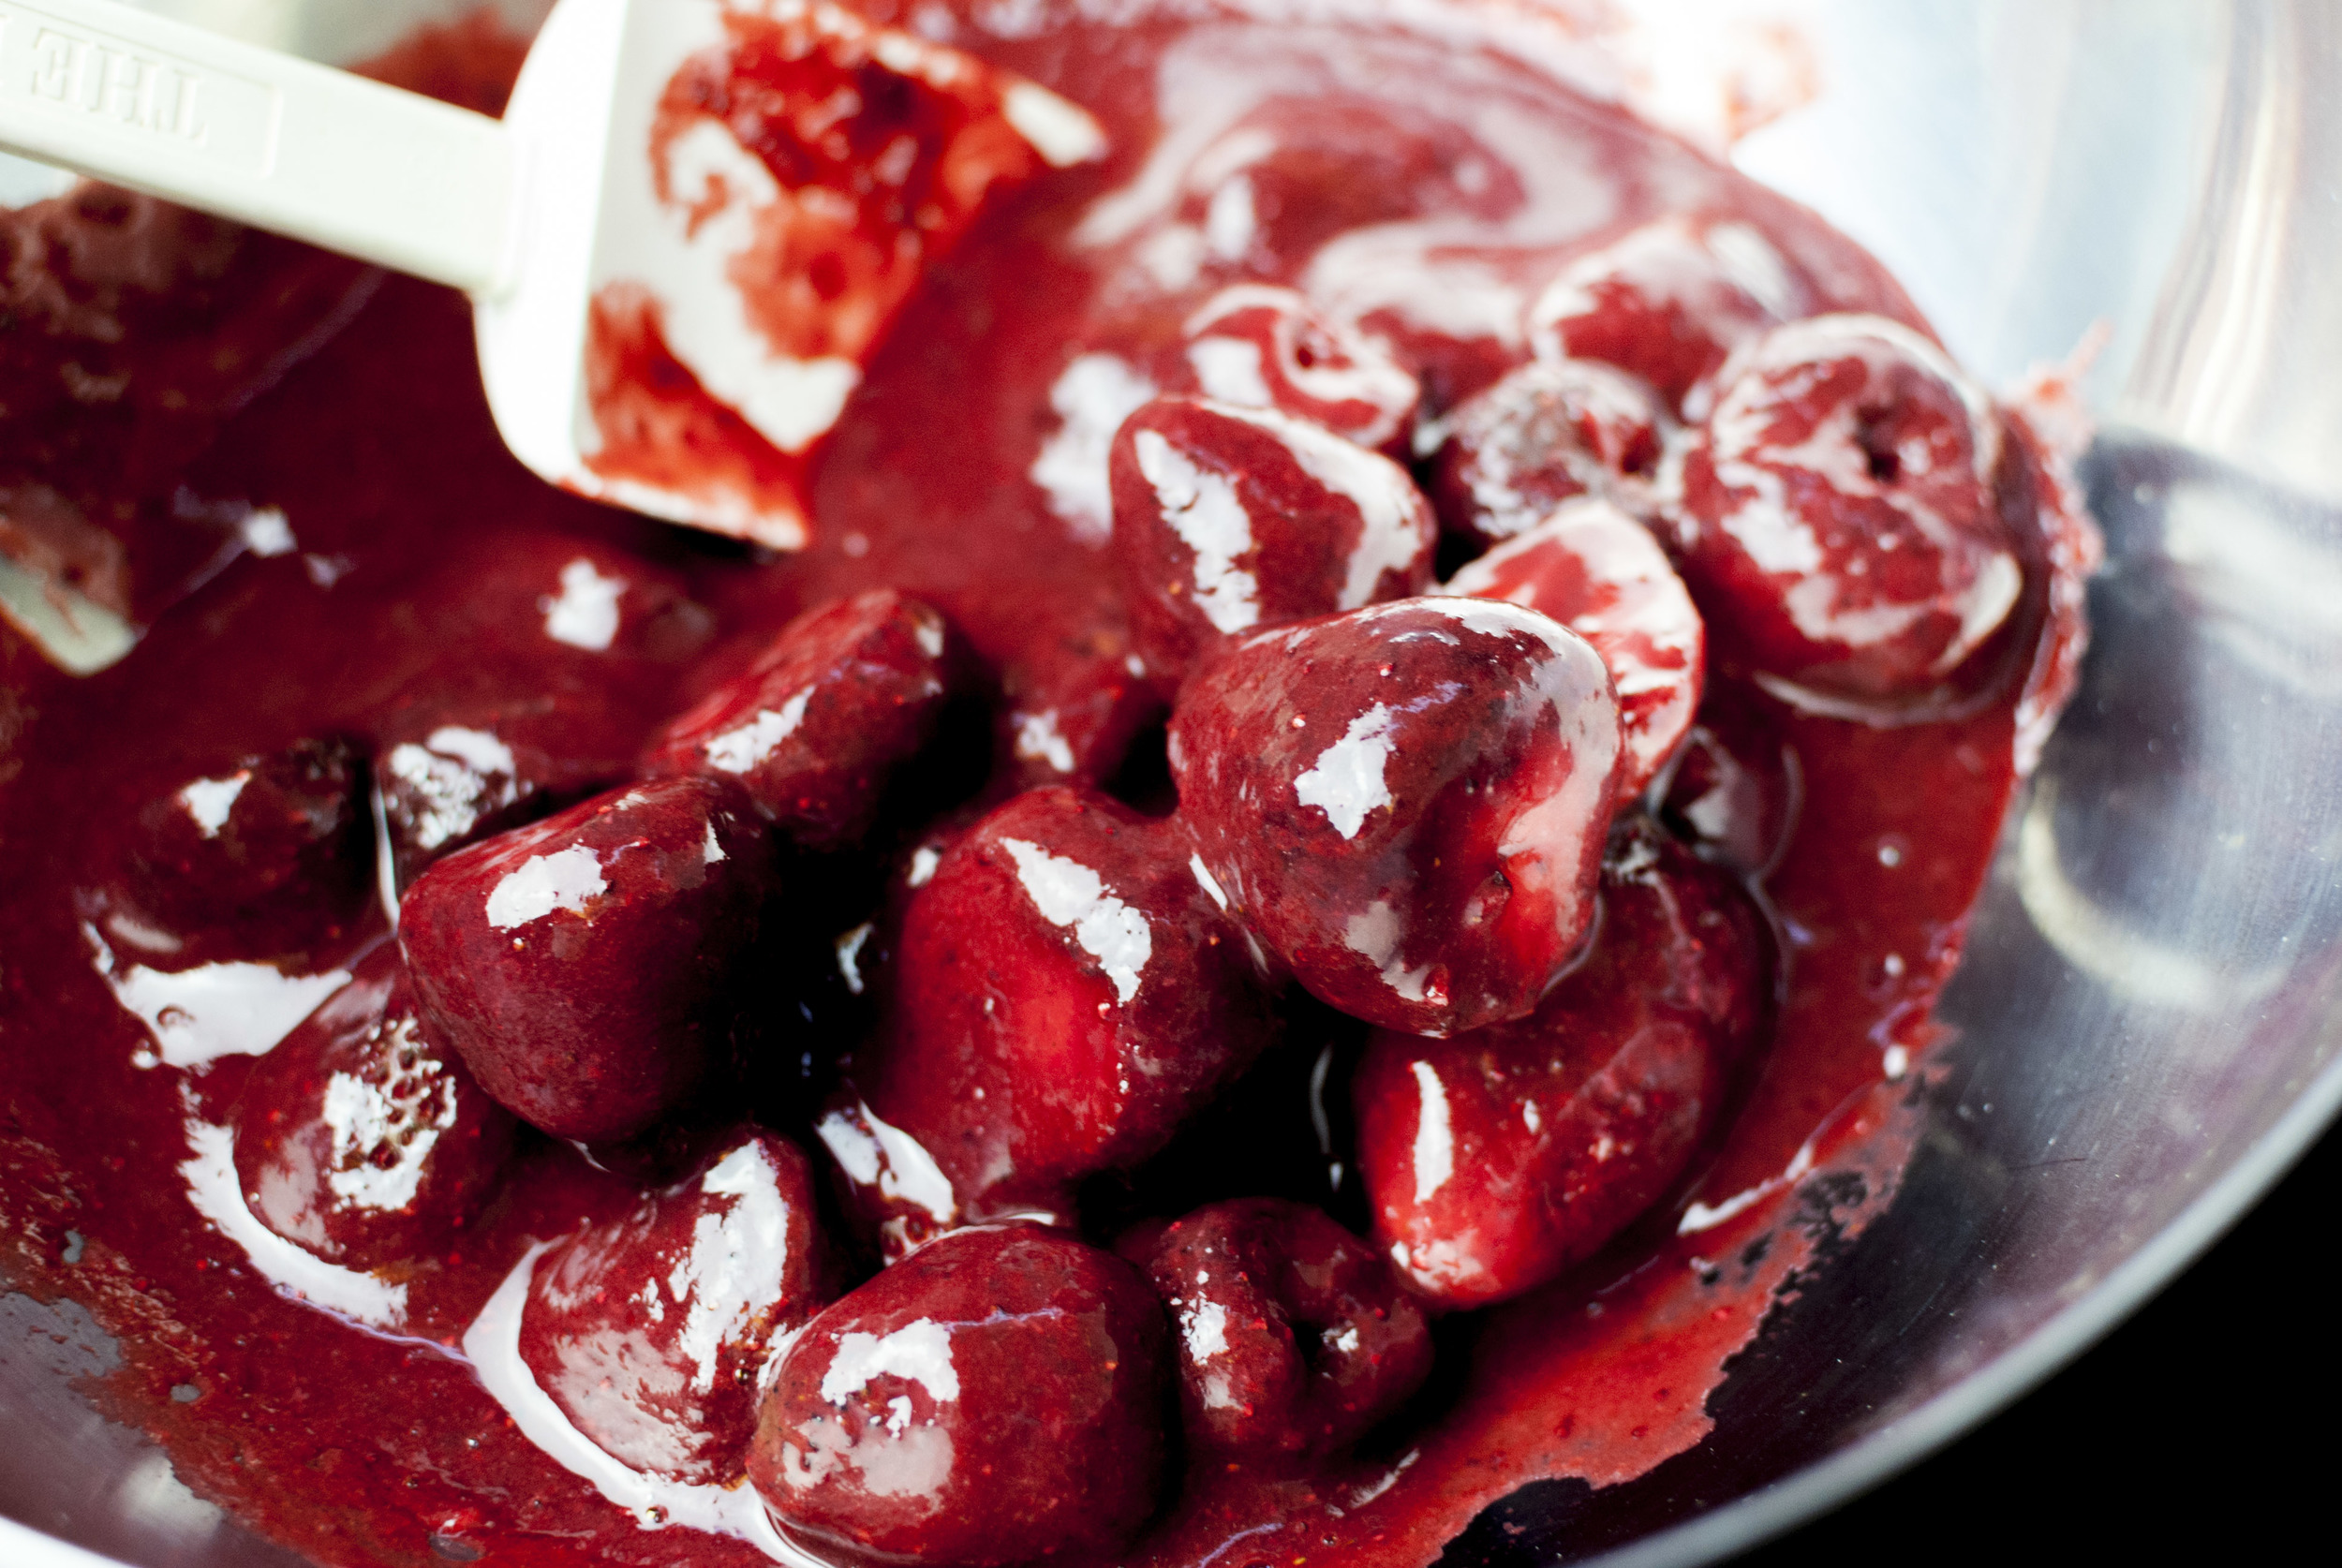
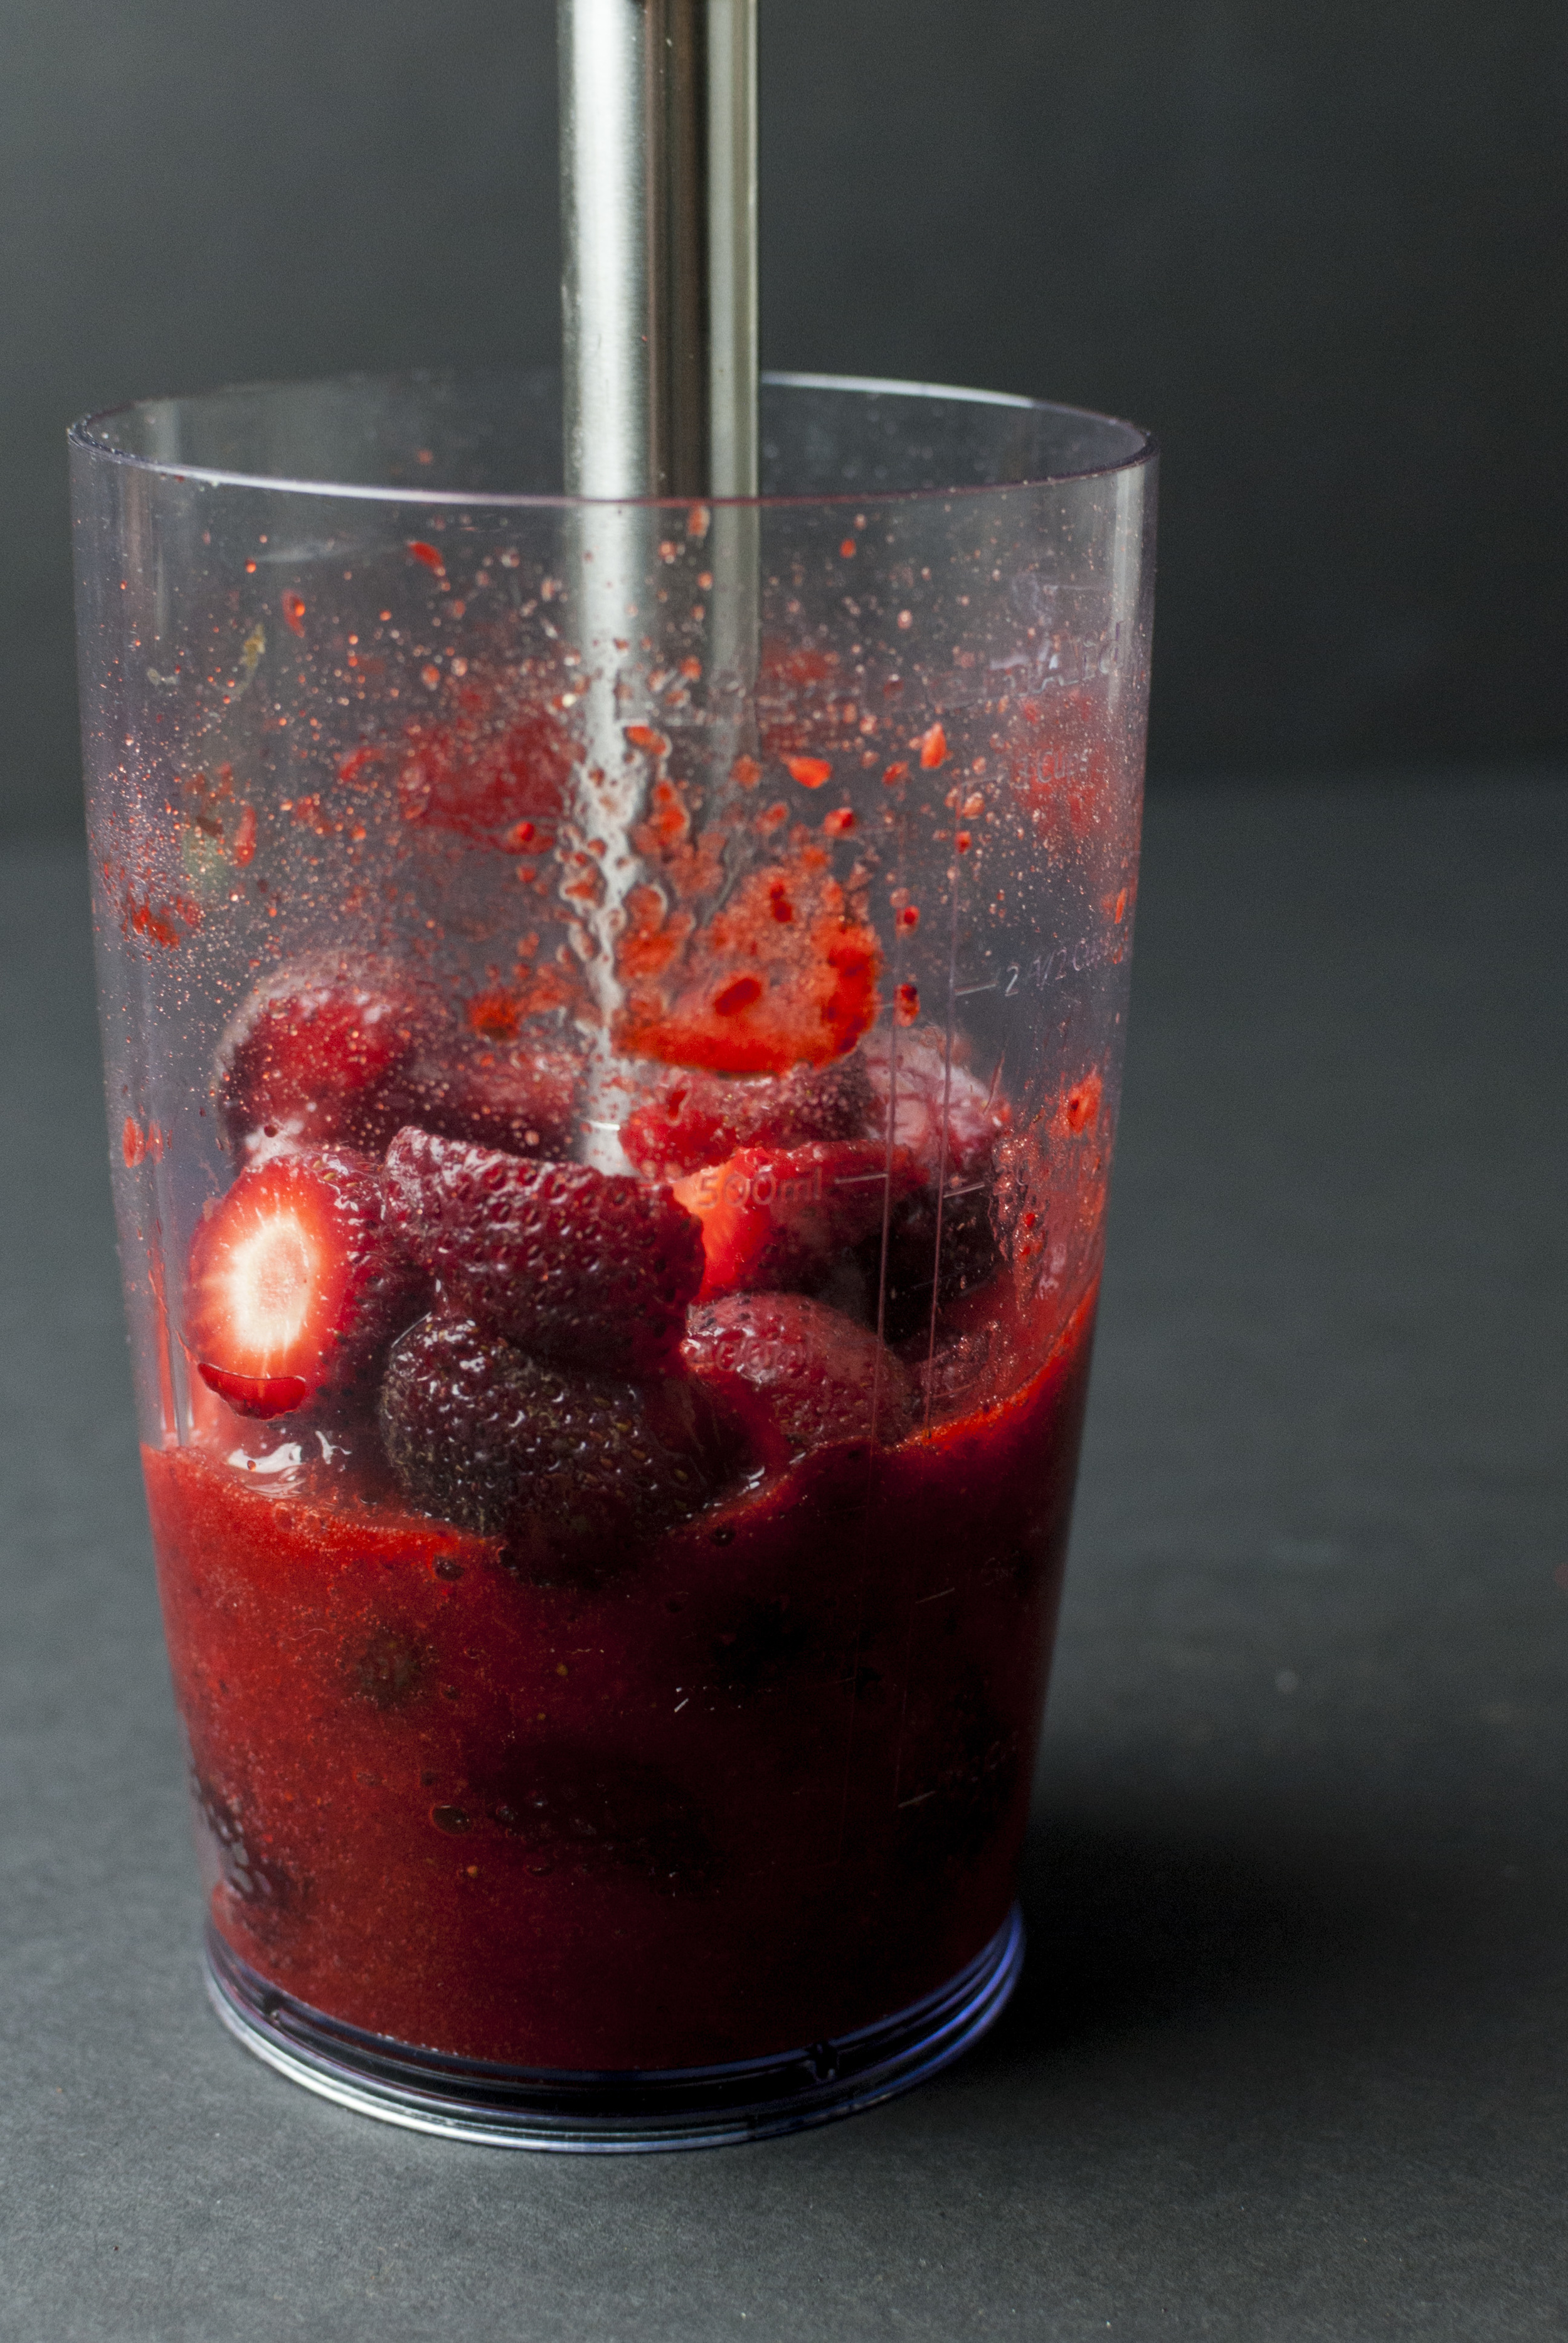
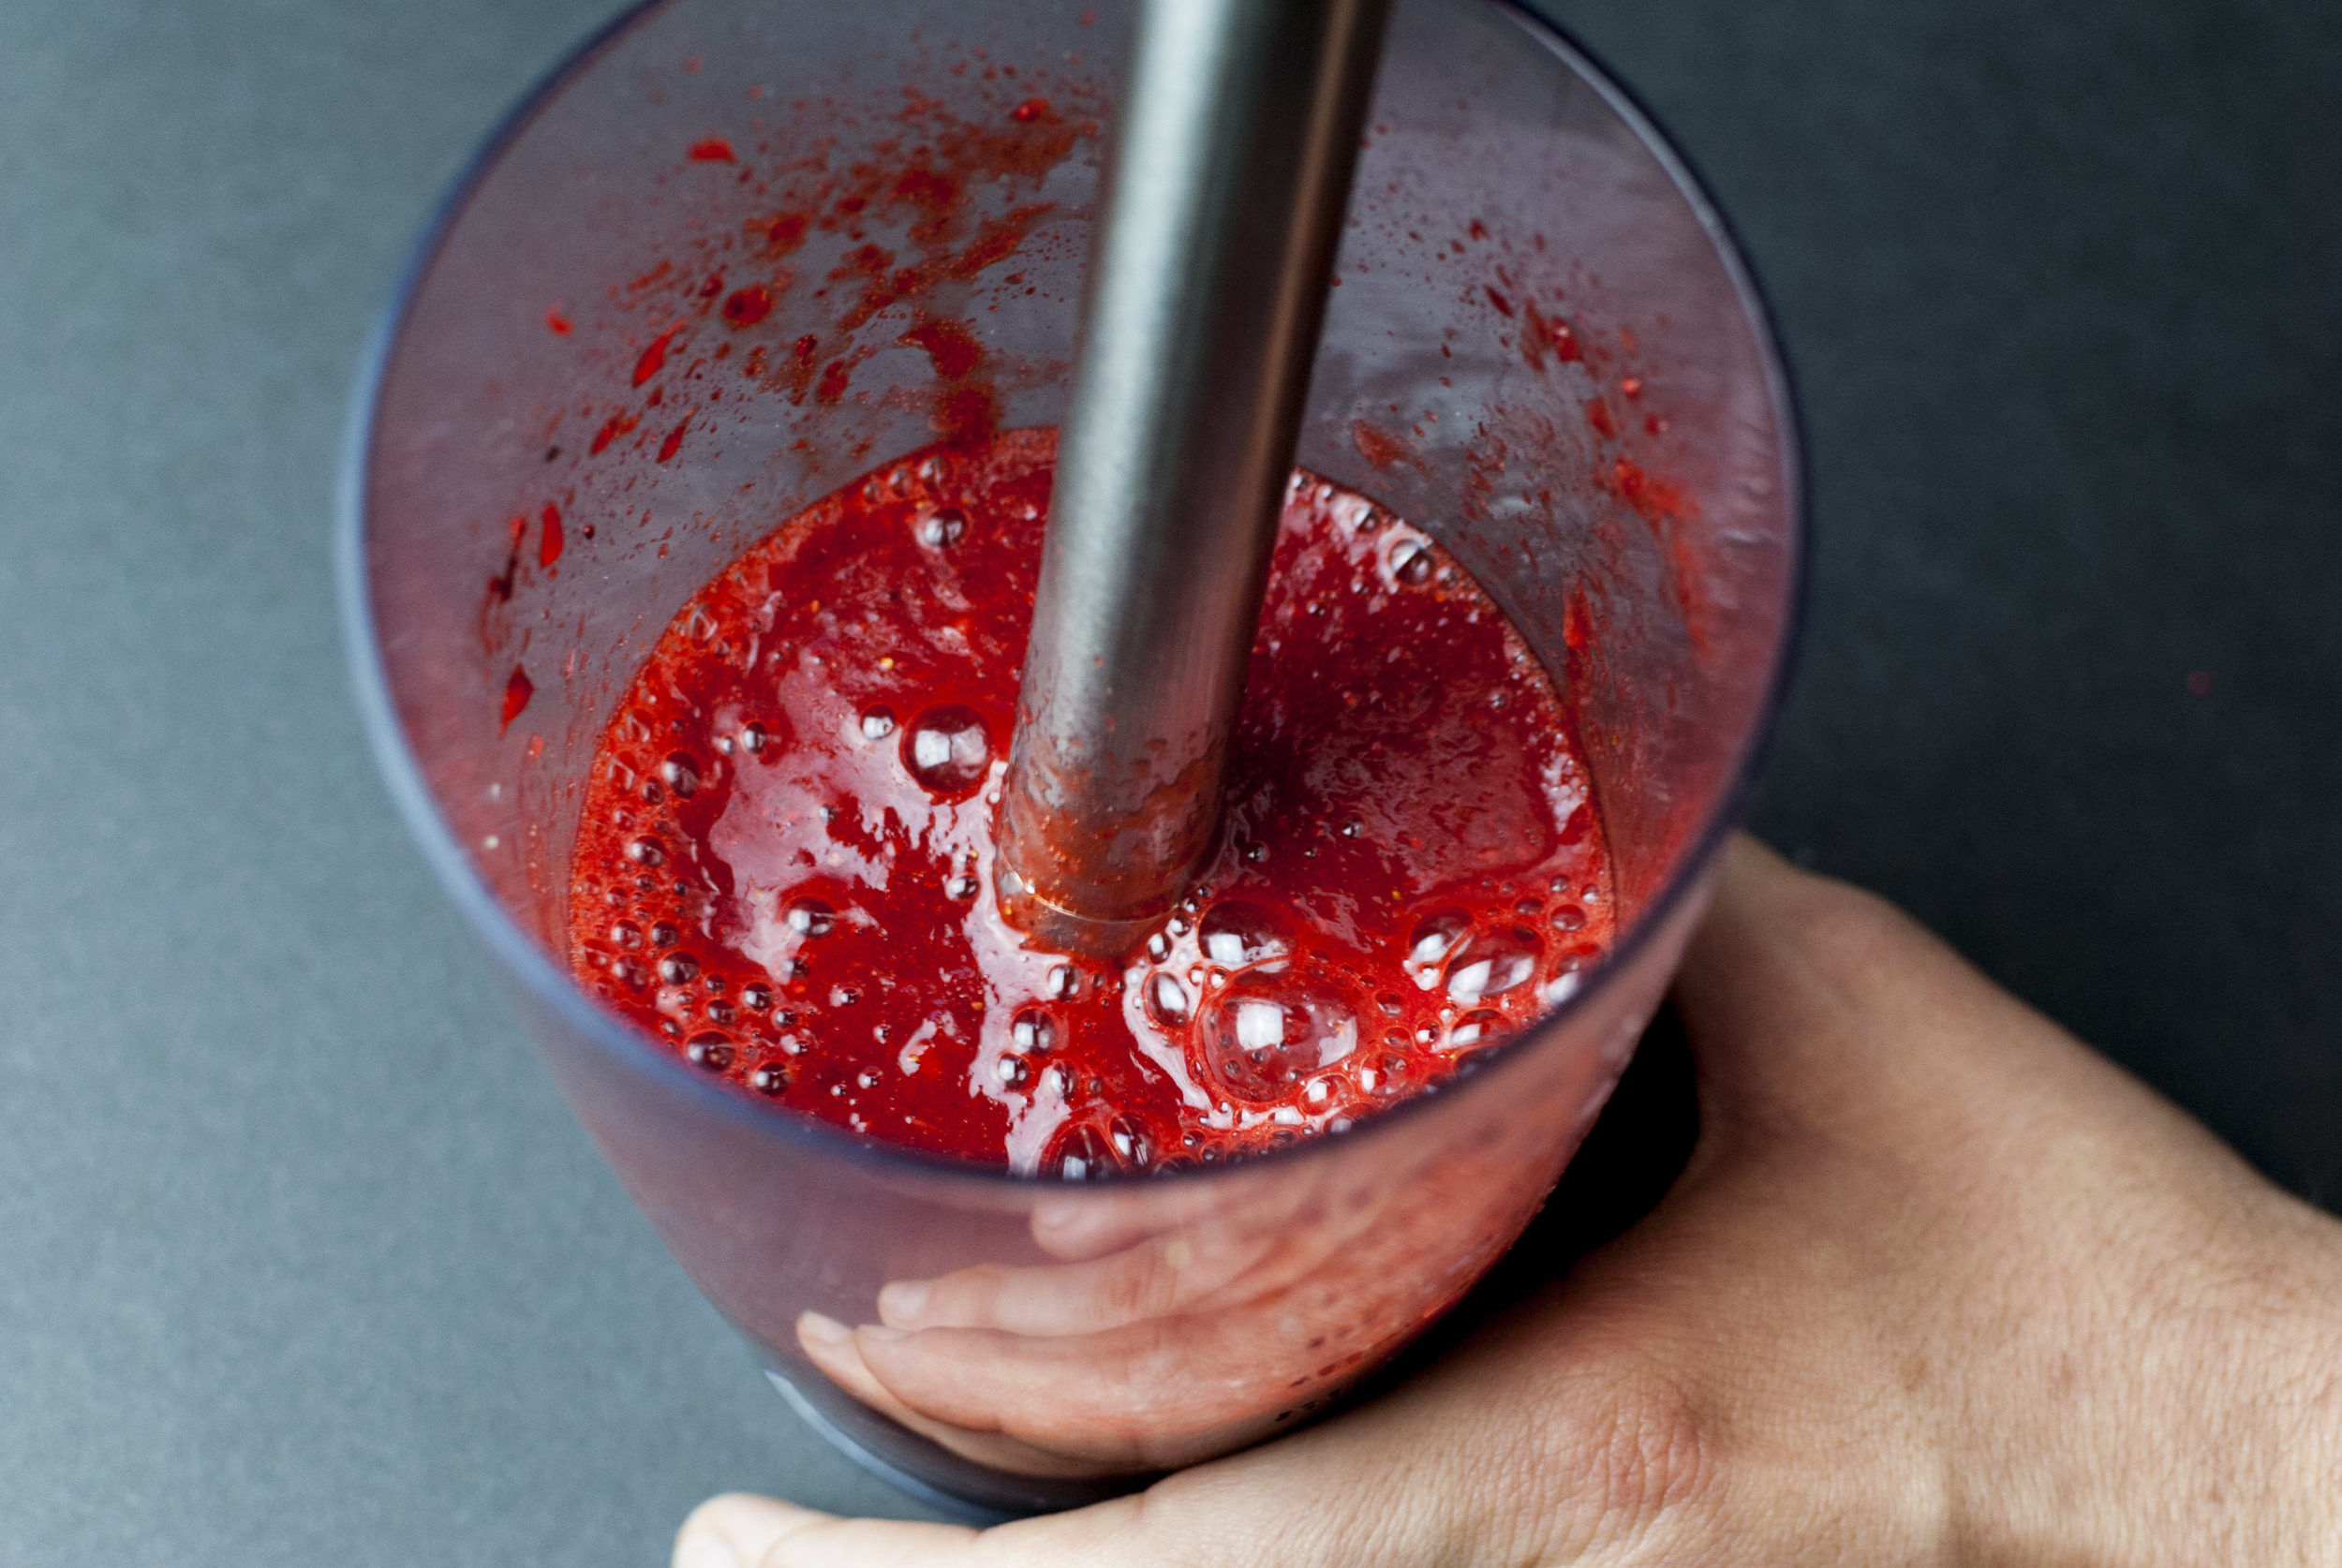
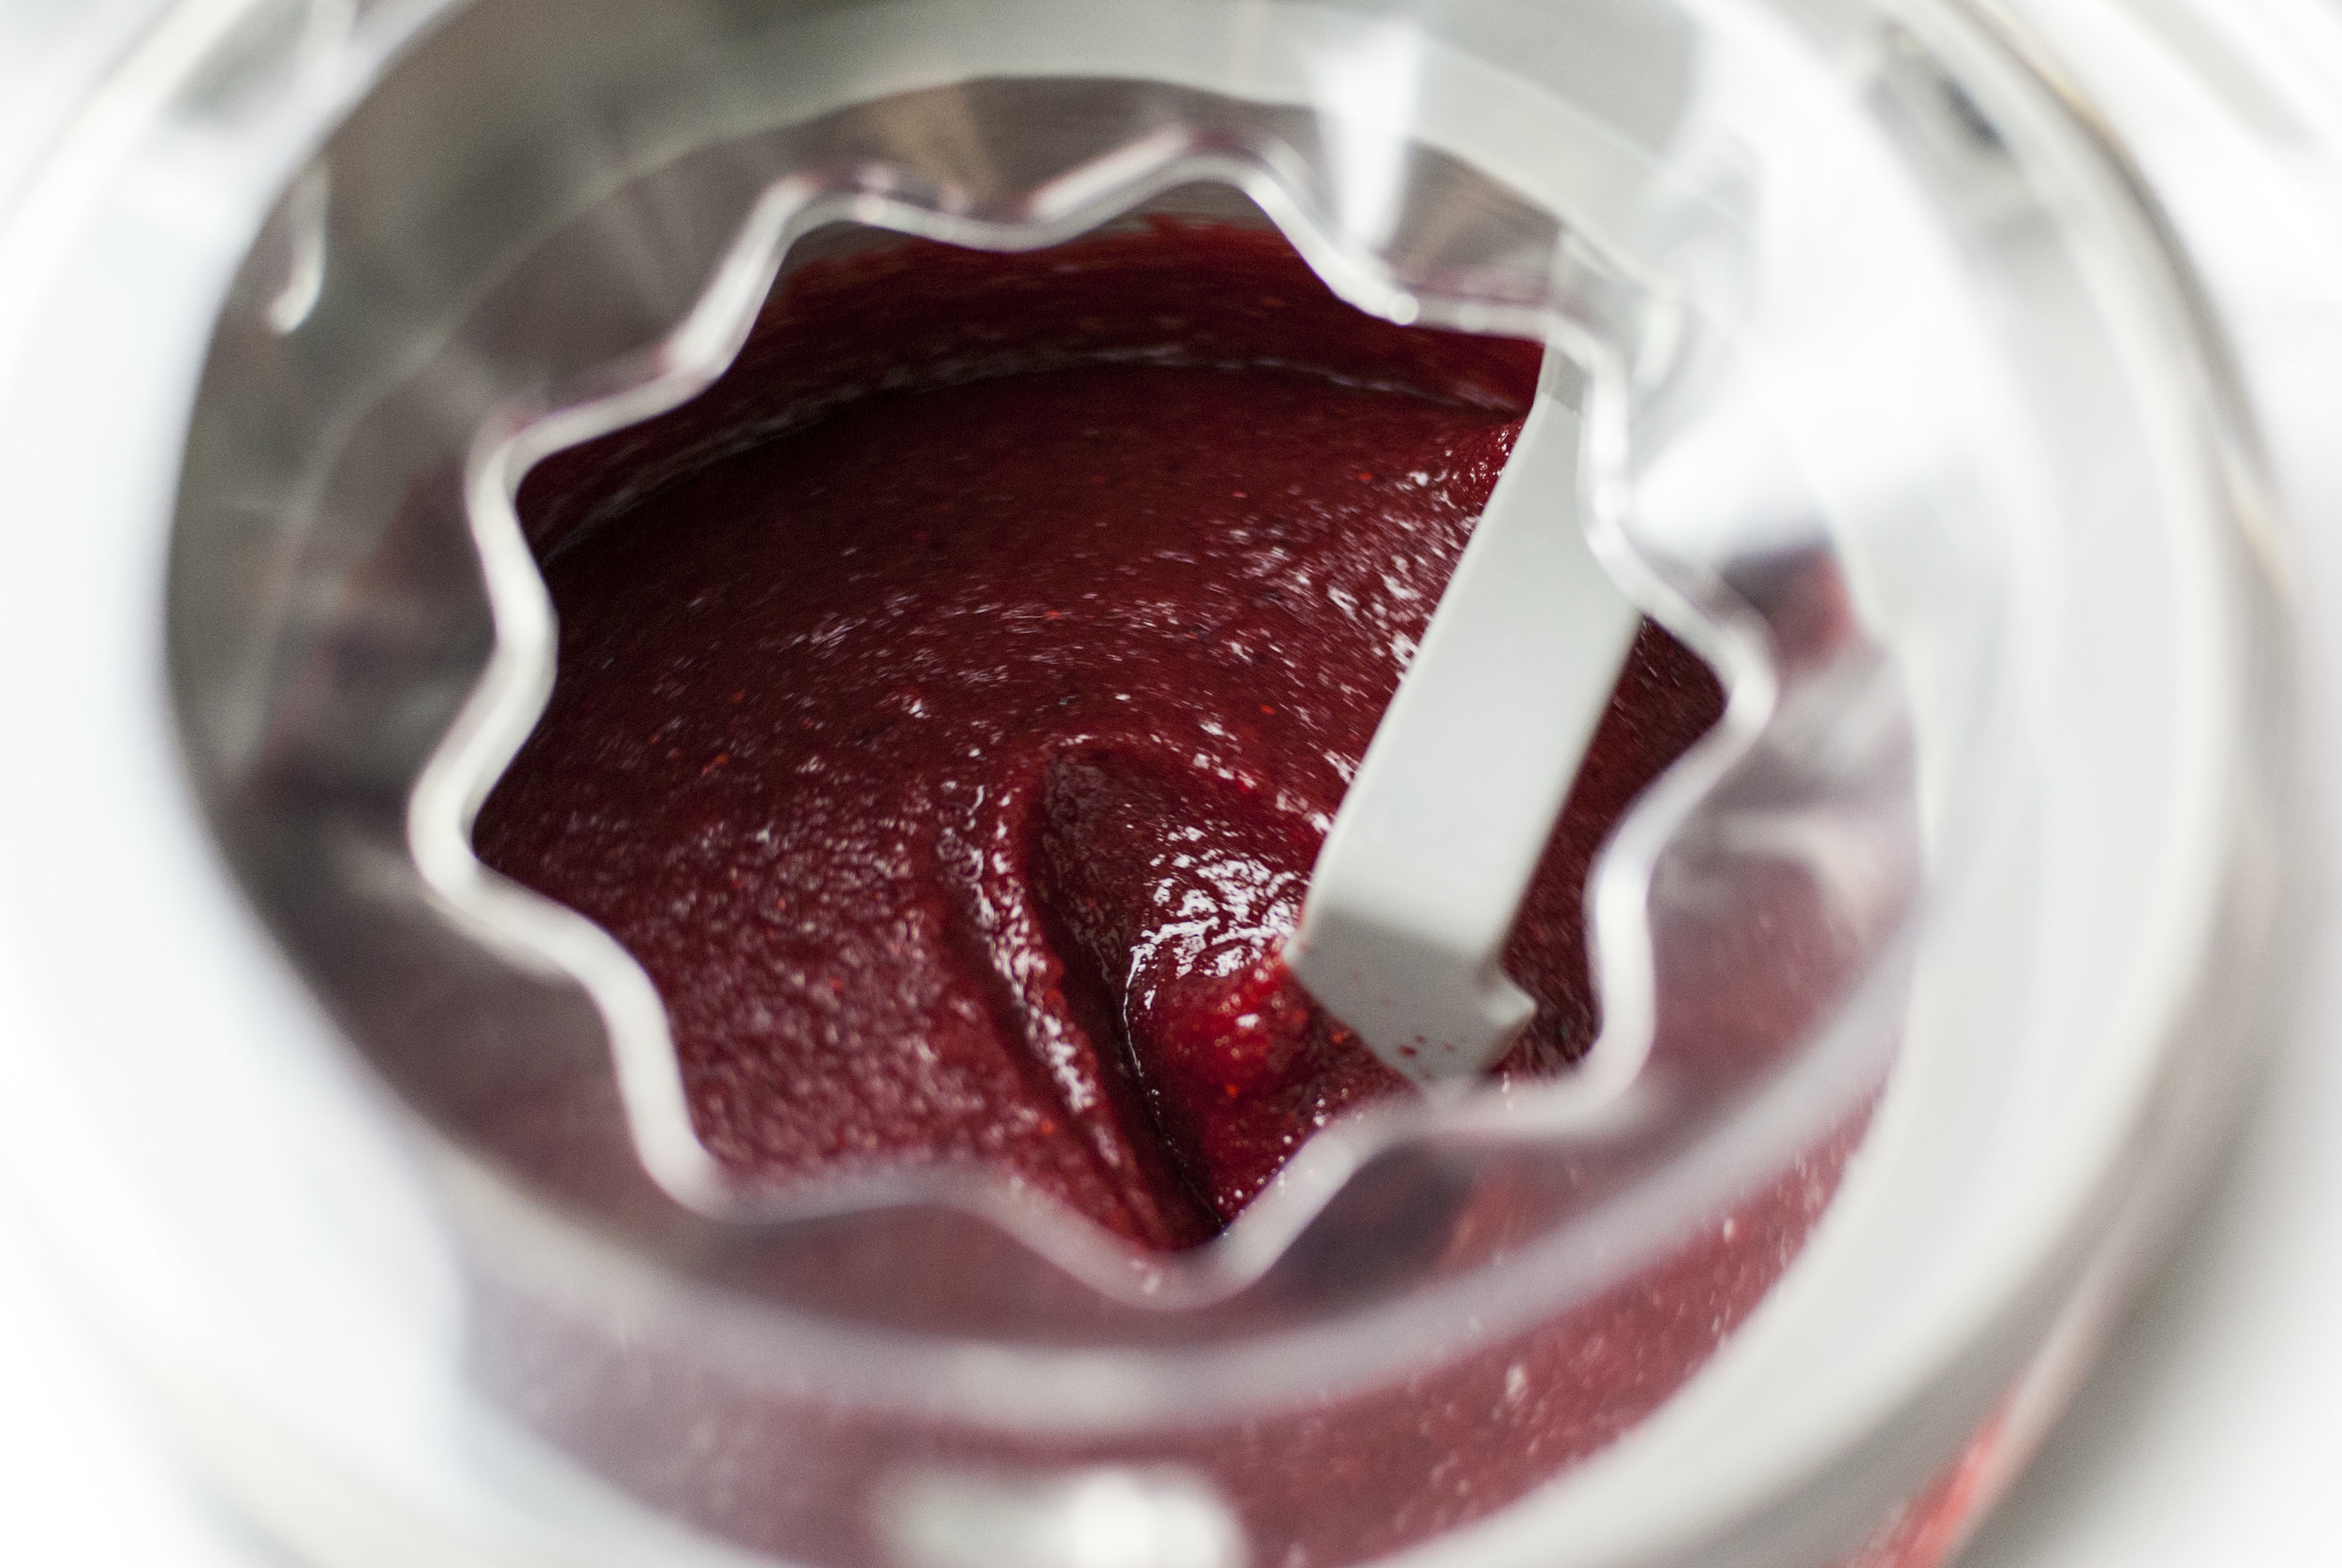
    Blend strawberries in a food processor or using an immersion blender, then transfer into a large bowl big enough to hold all ingredients. Whisk in the cream, milk, sugar, corn syrup, and xanthan gum.

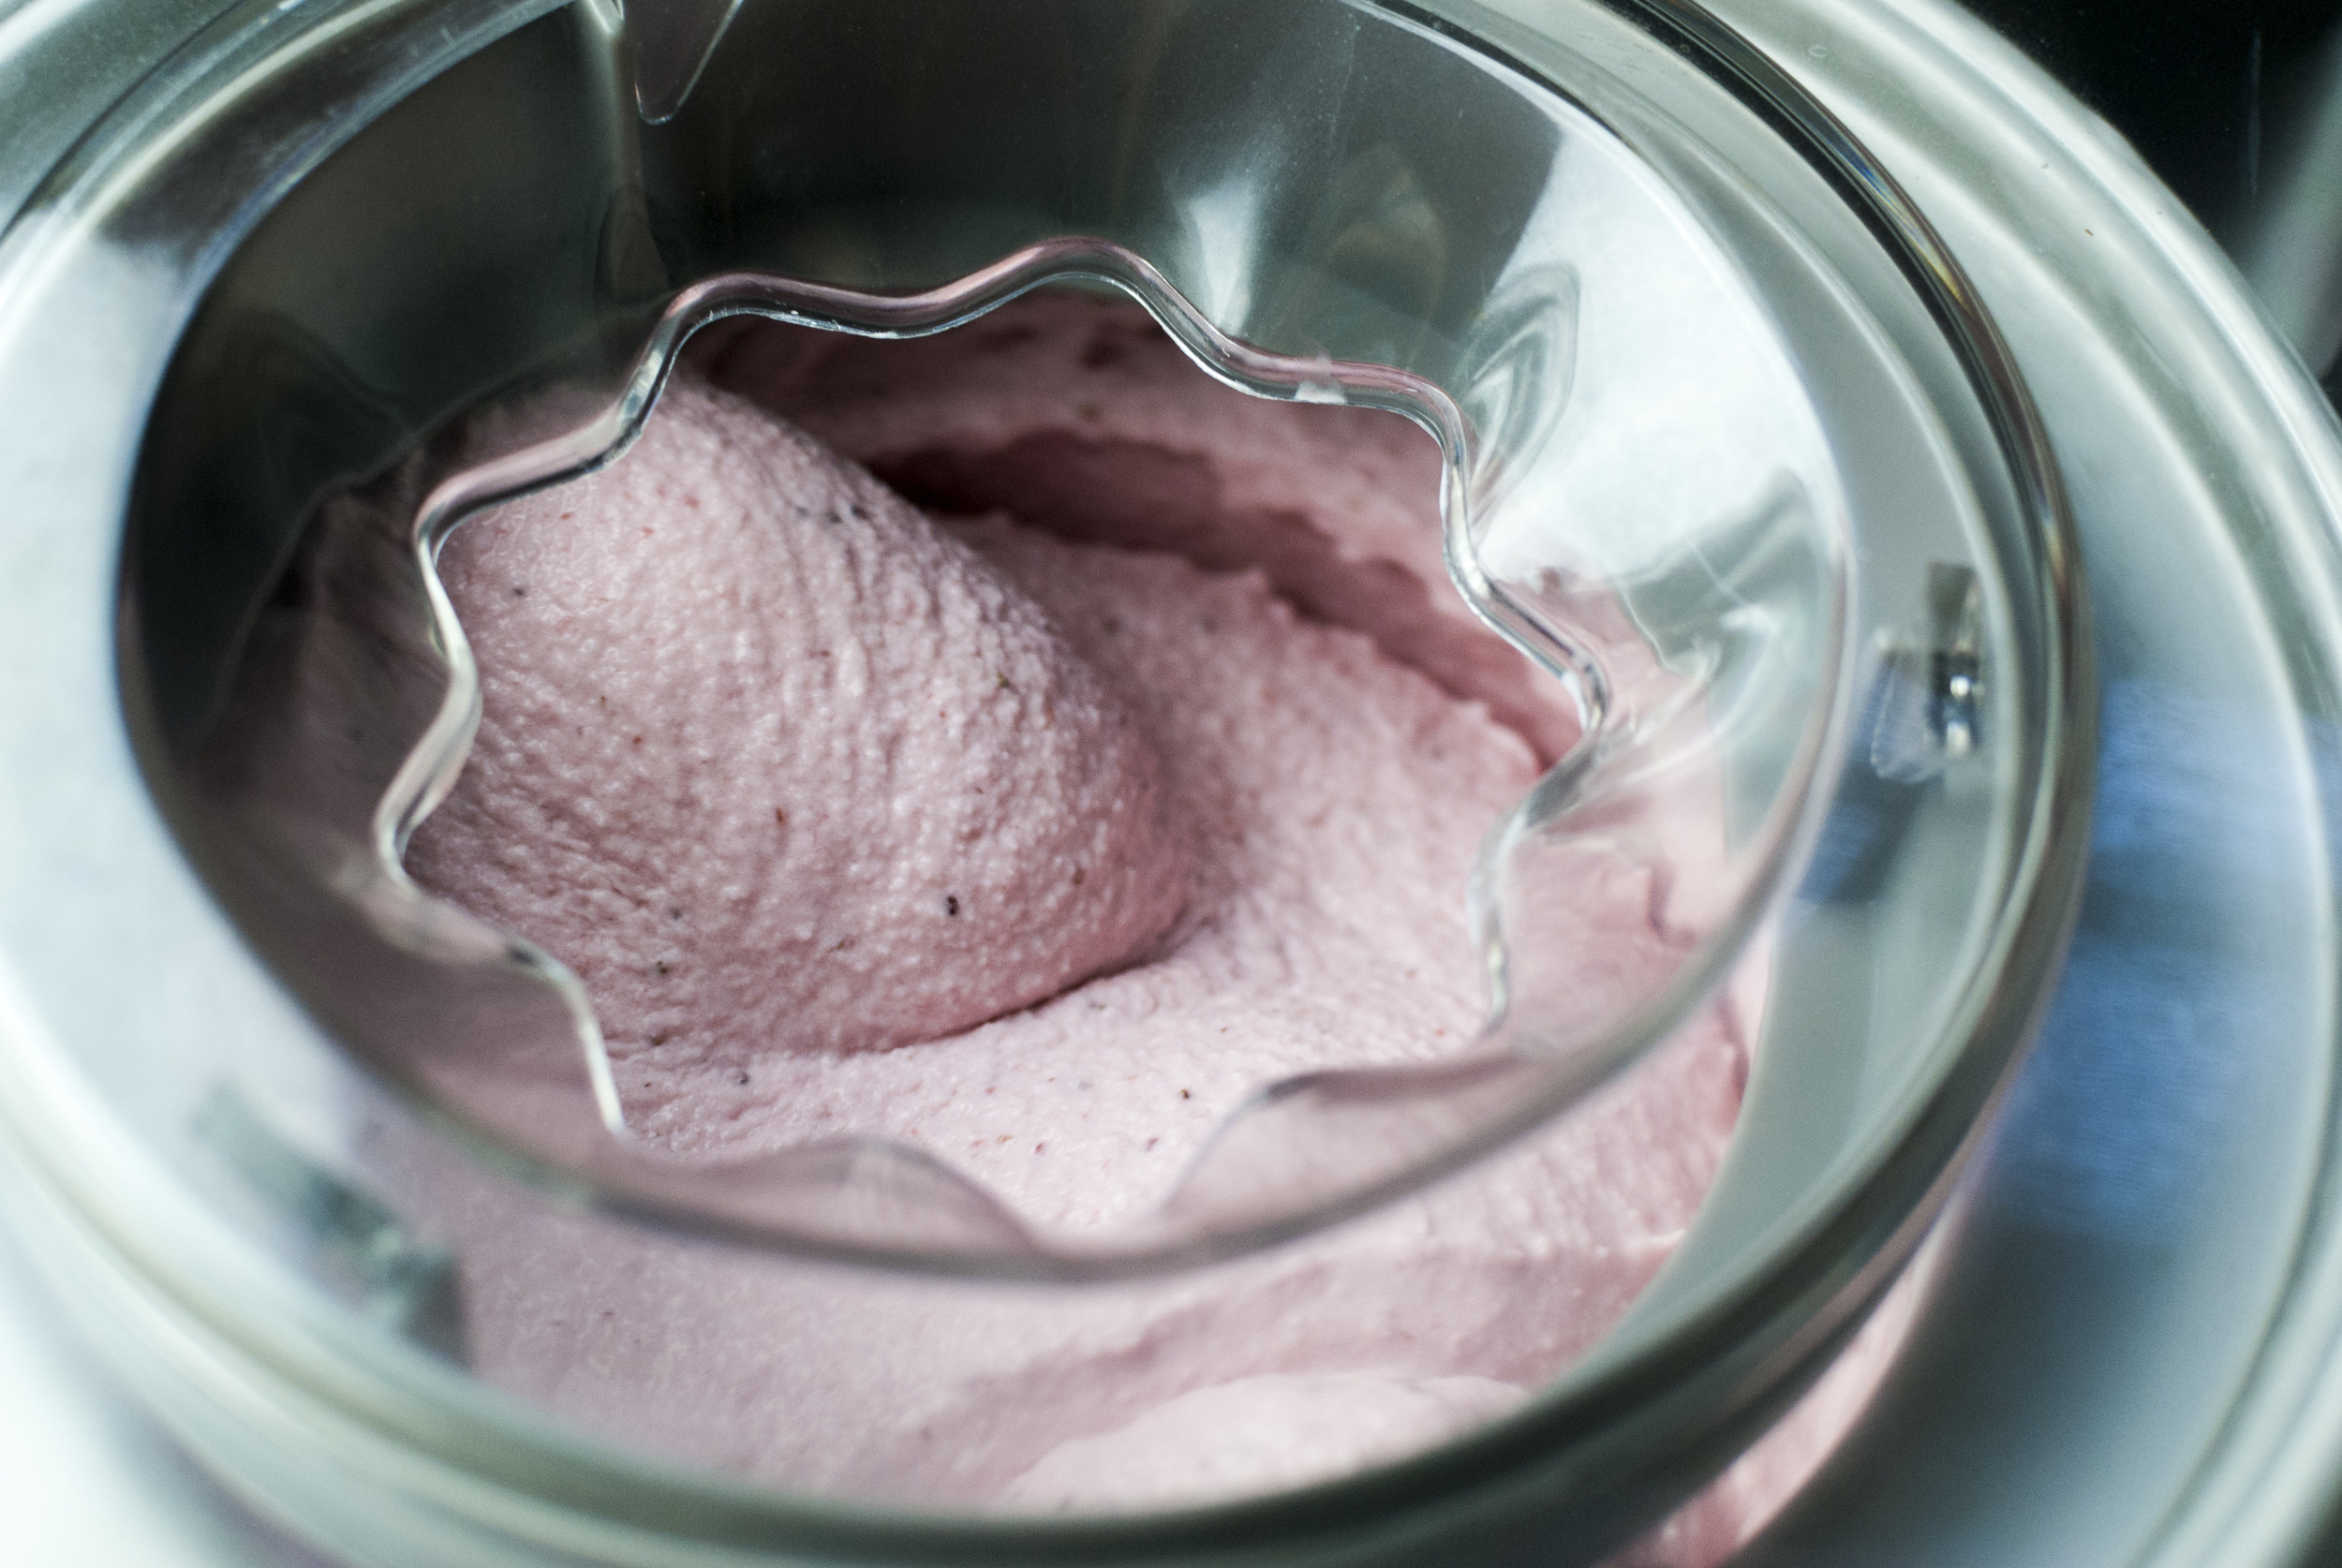
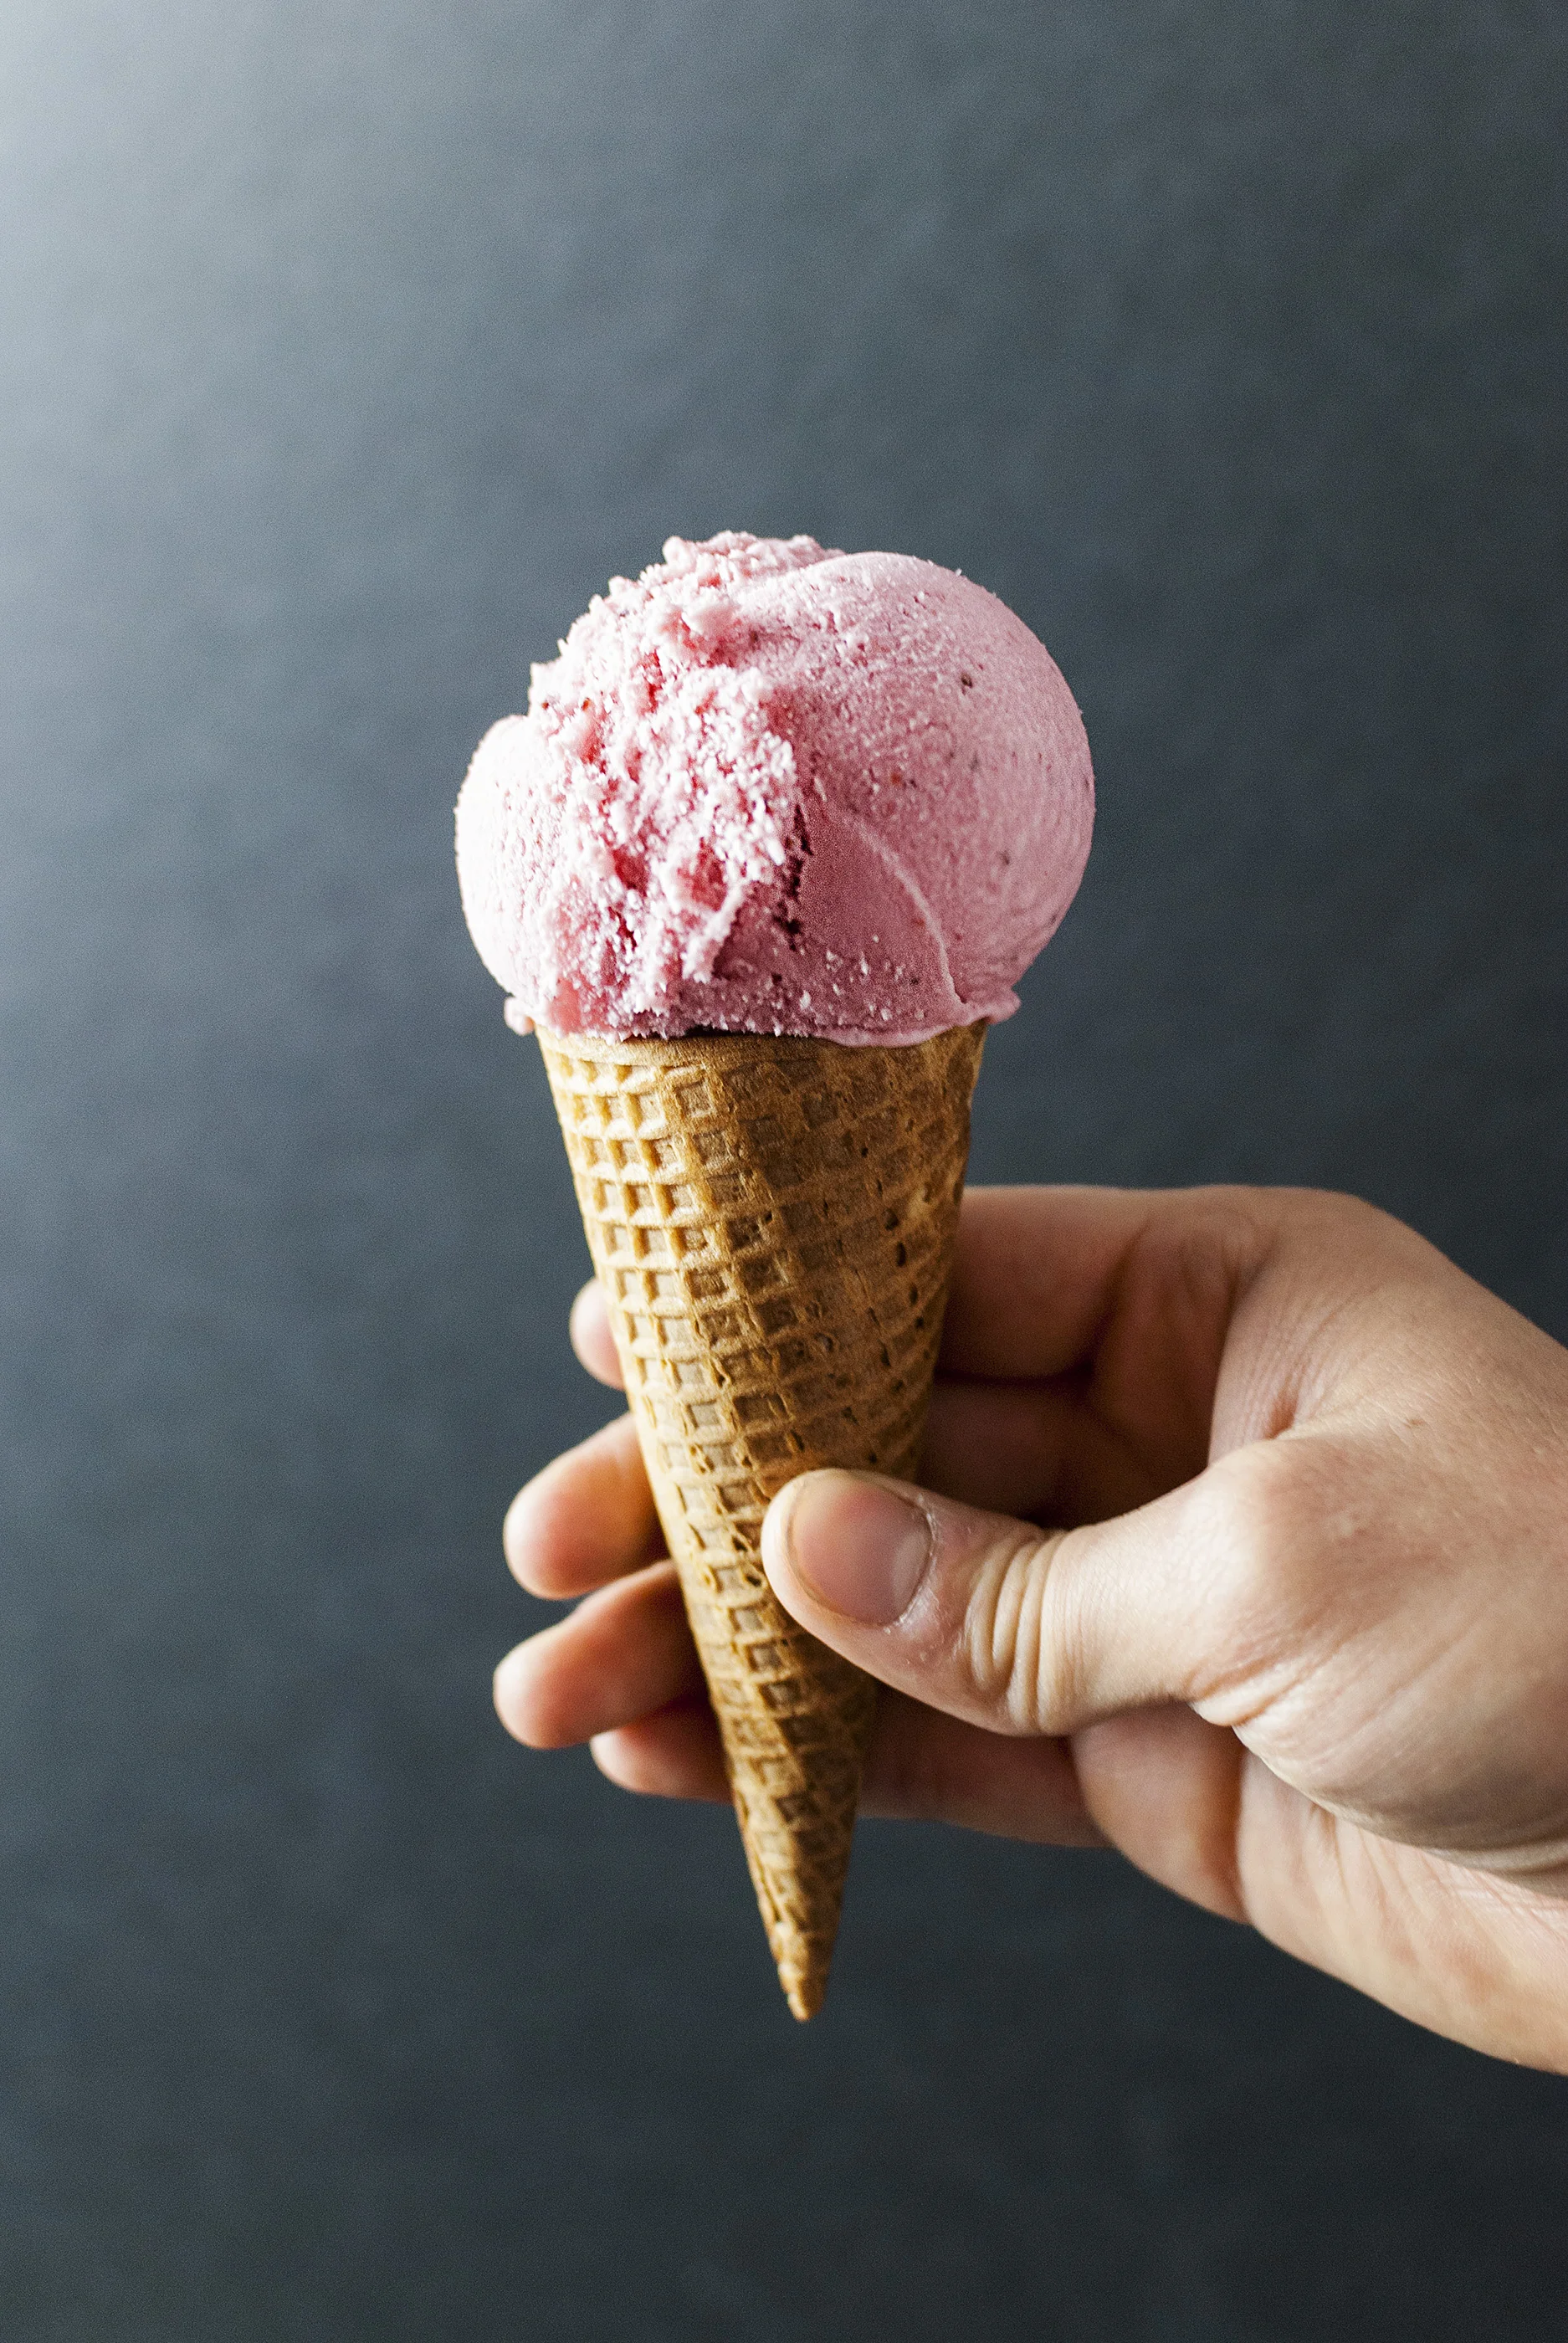
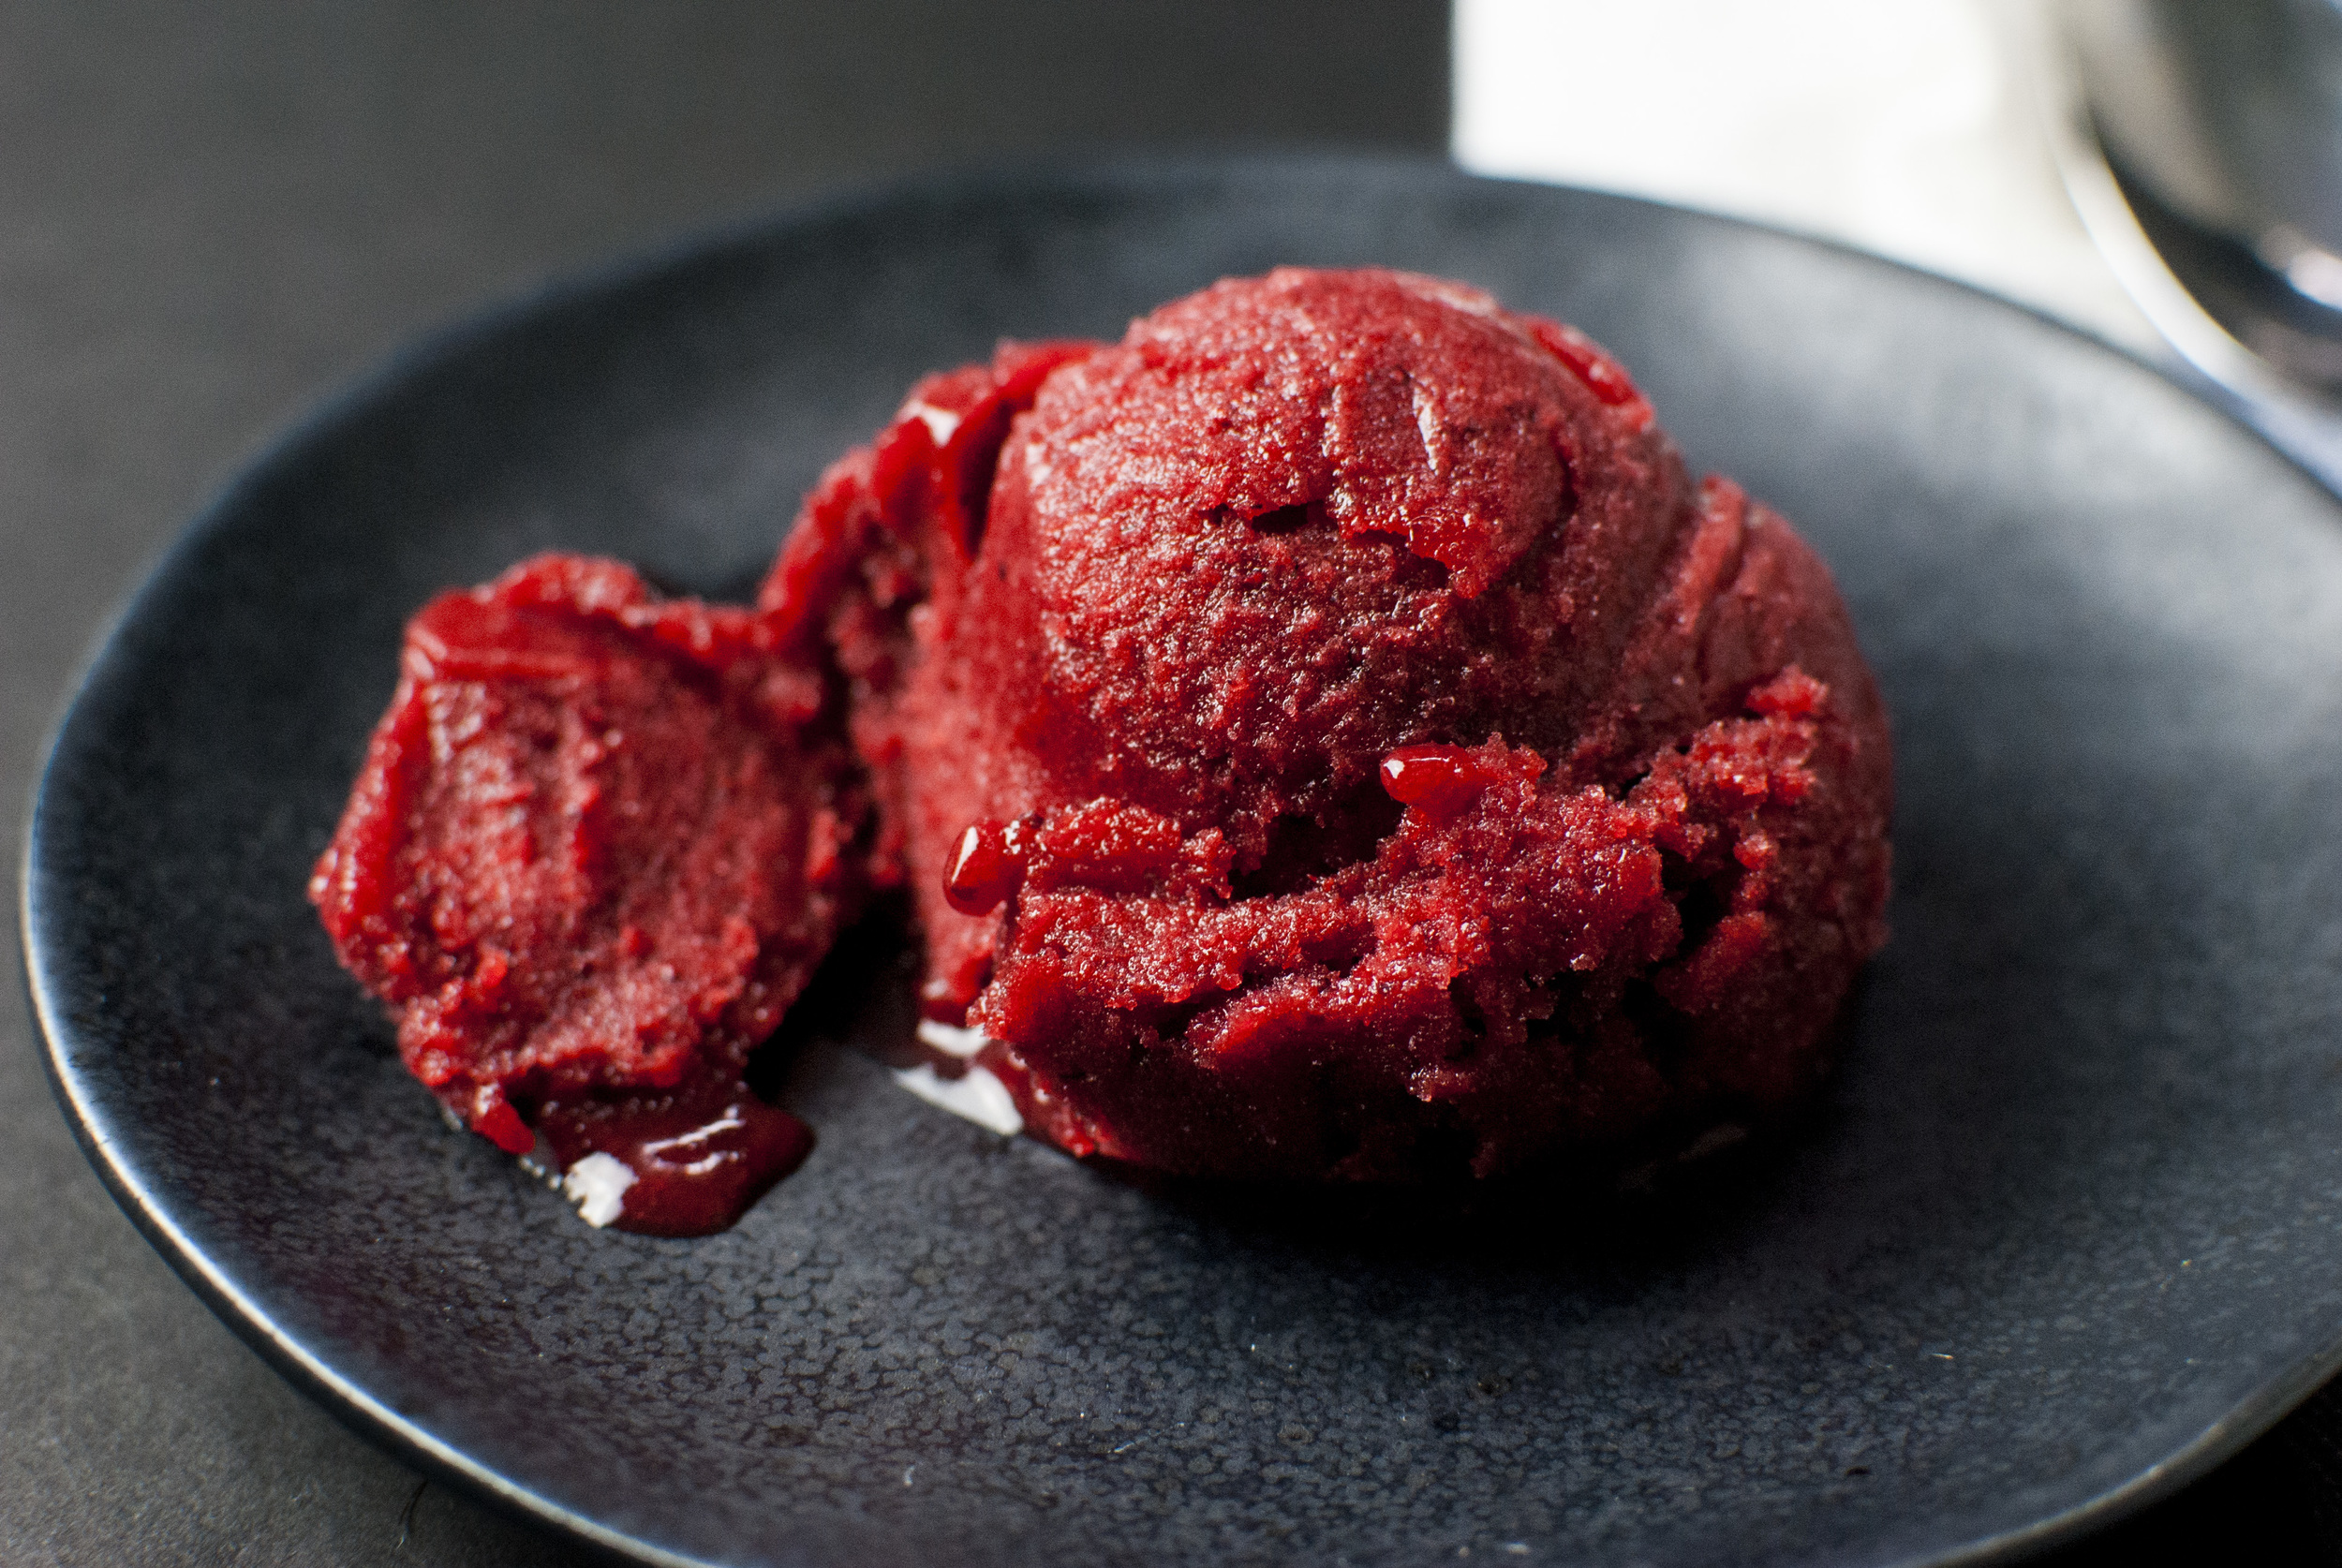
    Ready your ice cream maker (if you have a freezer bowl type make sure the bowl is completely frozen! This usually takes at least 24 hours.), and begin churning immediately. Churn for 25–30 minutes, or until the mixture resembles thick soft serve ice cream. Transfer ice cream to an airtight container, but before putting on the lid, cover it with a layer of plastic wrap, allowing it to stick to the entire surface of the ice cream. Seal the container and place in the back of the freezer for at least 4 hours prior to serving. For best consistency, freeze overnight.

    Temper about five minutes before devouring.


  • Strawbanero Sorbet


    Sorbet gets a bad rap.

    “Why would you want to eat that when you could have ice cream?”

    “That‘s gross, no thanks. I’ll take the good stuff.”

    “Aww, I’m sorry that’s all they have for you…”

    Rude.

    I’m going to make something clear here. If you think that sorbet is gross, it’s because all the sorbet you’ve had is garbage. It’s simple as that.

    I can understand the aversion; lots of commercial sorbet can be incredibly icy, resembling more of of a sad popscicle that got crammed into a pint container, but know this: it doesn’t need to be this way. Real sorbet is light and bright, harnessing the pure and unadulterated essence of the fruit it was made with. In a way, it’s like a little time capsule, keeping the fruit at the peak of its ripeness so you can revisit it every time you open your freezer. Good sorbet outshines any alternative no-fat, low-carb, low-sugar, high-protein, “guilt-free” bullshit on the market today. We tried some just to see for ourselves what the fuss was all about (for science!) and let’s say that we won’t be returning to that arena any time soon. Or ever.

    While Nate and I love almost everything about ice cream (eating it, making it, designing it) we understand that it’s a sometimes food. So, in an effort to find a dessert lower in fat that would be a little easier on our bodies and also rid ourselves of the ungodly amount of strawberries we purchased at the farmer’s market this week (they were just so pretty) we came up with this little recipe. Using amazing strawberries make it bright and floral while the habanero lends its own sweetness to the mix along with something a little extra.

    Strawbanero Sorbet:

    • 2 pounds ripe strawberries, tops removed

    • 1 small(!) habanero

    • ¾ cup sugar

    • ¾ cup water

    • ¼ cup light corn syrup or tapioca syrup

    • 2–3 tablespoons lemon juice (to taste)

    Put the sugar and water in a sauce pan over high heat and allow the mixture to boil, dissolving all the sugar in the solution. Once it resembles a syrup, remove from the heat and let it cool to room temperature.


    Spear the habanero on a fork and flame the skin over a gas burner (or with a blow torch) until the entire body of the chile is black. Remove the habanero from the fork and place in a plastic bag for 10 minutes or so, allowing the chile to sweat and its outer skin be very tender. Rub the char off the habanero, then remove the stem and the seeds, discarding them.

    Put all of the strawberries and the processed habanero into a food processor and blend until completely smooth. Strain it, if you like. Transfer the very fine strawberry habanero pulp to a large bowl and whisk in all the simple syrup and corn syrup. Chill in an airtight container until cold, at least an hour (we recommend overnight as it will allow the subtle flavor of the habanero to develop further).

    Prepare your ice cream/sorbet churner (if you using a freezer bowl make sure that it is completely frozen—this typically takes up to 24 hours). Remove the sorbet mix from the fridge and add the lemon juice, then pour into the churning machine. Churn for 15–20 minutes, or until it becomes thick and almost smoothie-like. Transfer into an airtight container like a large tupperware; cover in plastic wrap, allowing it to stick to the entire surface of the sorbet, lid it, then chill in the freezer for at least 4 hours.

    Serve in cups, cones, or maybe even in a spritzer for a zippy float.


    strawberry_habanero_sorbet_03.jpg

  • Chilaquiles


    Everyone seems to have a default breakfast. You know the one. You’re mulling over what to eat in the morning, then you sigh and say “I’ll just make this. Again.” Very frequently, it’s a rag tag assembly of whatever you have on hand in your fridge on a regular basis. It’s a reflection of your cooking habits where your stock characters/ingredients all work together.
    This particular meal (if you really think about it) was probably the result of drinking way too much the night before and not wanting to go to any large lengths to create a fancy meal the following morning. I can imagine the inventor’s thought process going something like this:

    “Lets see. I’ll take some super stale tortillas that I was too drunk to put away last night (they’re still good, right?) and…fuck it, I’ll just fry ’em up with some eggs and salsa. Christ, my head hurts.”

    Pretty sure that’s how it went down.

    In a way, chilaquiles are the Mexican answer to fried rice: an excess of a starchy meal component that is used in an ingenious way to get rid of leftovers. Chilaquiles are a spicy, fresh, and satisfying breakfast situation that bring a huge variety of textures and flavors to one meal. If you haven’t made these before, you better get on it. You just might have a new favorite default breakfast.

    This recipe is designed to give you freedom to do what this dish does best: get rid of leftovers. All you really need are the things listed in the chilaquiles section, but adding a garnish or three and a couple add-ins can transform a good bowl of chilaquiles into a great one. We certainly have our preferences, and we can make this breakfast in our sleep, which is a helpful skill if you’re waiting (in vain) for your coffee to brew.

    Chilaquiles

    • 10 corn tortillas, left out overnight to become stale, cut into eighths
    • Oil for frying
    • 2 eggs, beaten
    • ½ + ¼ cup salsa, divided
      Note: Use any salsa you like: red or green. The idea is to use up whatever you have lying around. If we were to give you a recommendation, however, we would tell you to use our recipe for morita salsa. It turns out very 👌👌.

    Garnish

    • More salsa
    • Cilantro, chopped
    • Queso fresco, crumbled
    • Crema
    • Lime slices
    • Fresh avocado, sliced

    Optional add-ins

    • 4 oz. chorizo, veggie sausage, protein of choice
    • ¼ of a medium onion, chopped
    • ½ of a small zucchini, sliced
    • ½ cup roasted corn

    In a deep skillet, heat a generous amount of oil on medium high and fry the chips in several batches until they are crispy and golden. Allow them to cool slightly drain excess oil on a plate with a paper towel. Set aside. Remove almost all leftover oil from the skillet if a lot remains.


    Chilaquiles-01.jpg

    Heat the same skillet on medium heat and cook your desired add-ins at this time. When they are done, add in the eggs and cook quickly, like scrambled eggs. When the eggs are almost done, add the ½ cup of salsa and stir until all of it is evenly incorporated. Add the chips and stir well. Add the remaining ¼ cup of salsa and stir well.


    Chilaquiles-02.jpg

    Serve immediately with a few garnishes, and tuck in.


    Chilaquiles-03.jpg

    Serves 2.

  • Larb Burgers


    larb_burgers_02.jpg

    All I can really glean from this recipe is that we come up with really good ideas when we’re drunk.
    So, one hot day recently, we were making larb and drinking a questionable amount of a tasty IPA (like you do), and then one of us—of course I can’t remember who—came up with the idea that instead of sticking to the plan and making salad, that we were actually craving burgers. Sure, it might have been the alcohol talking, but tell me, when you’re sloshed, what are you more inclined to eat: salad or a burger? Yeah. That’s what I thought you’d say. Glad we are all being honest here.

    Of course it was written in the stars that we had some leftover coconut milk in the fridge that we could transform into an amazing peanut sauce, and thus, the larb burger was born. After the incident, we made it three times in two weeks. We just couldn’t get it off our minds, and we also constructed some additions to spruce it up. What we’ve ended up with, we felt we really needed to share on the blog.

    For those of you who don’t know what larb is, it is ground chicken salad blended with Thai aromatics and chili, dressed in lime and fish sauce, then traditionally served on big leaves of lettuce. What we’ve done is form the ground chicken with aromatics into patties, then seared (or grilled) them up. We serve them on huge lettuce leaves, then smother those bitches in homemade peanut sauce. The burger is then topped with a fresh slaw dressed in lime, a juicy slice of mango, and crispy fried shallots. Wrap up burger. Put in face.

    You’re welcome.


    larb_burgers_03

    larb_burgers_03

    Larb Burgers

    • 1 lb. boneless, skinless chicken thighs
    • 1 shallot, thickly sliced
    • 3 cloves garlic, peeled
    • 6–8 kaffir lime leaves
    • 1 stalk lemongrass, roughly chopped
    • 1 tbs. fish sauce
    • 2-inch piece of ginger or galangal, peeled, roughly chopped
    • ripe mango, peeled sliced
    • 2 small shallots, thinly sliced
    • green leaf lettuce

    Peanut Sauce

    • ½ 15-oz can coconut milk.
    • ½ cup creamy peanut butter
    • 2 tsp. fish sauce
    • ½ tsp. chili paste (or Sriracha)
    • 2 tsp. palm sugar simple syrup
    • ⅓ cup water

    Slaw

    • 1 cup cabbage, shredded
    • ¼ cup cilantro, chopped
    • ¼ cup mint, chopped
    • Juice of 1 lime
    • ½ tsp. fish sauce

    In a food processor, pulse shallot, garlic, kaffir lime leaves, lemongrass, fish sauce, and ginger or galangal until minced, scraping sides as needed. Add chicken and process until chicken is ground up and the aromatics are evenly distributed. Set aside to rest.

    In a small skillet, heat coconut milk, peanut butter, fish sauce, chili paste, and palm sugar simple syrup over low heat. Stir constantly until warmed through and it starts to thicken and eventually congeal. Remove from heat. Gently stir in water until a smooth paste. Set aside.

    Heat a large skillet to medium high heat and coat with oil. Form 6 patties from the chicken mixture and cook until done (160°F), about 5–7 minutes a side. Remove burgers from heat and set aside to rest. In the same pan, add a little more oil and toss in the sliced shallots. Fry until golden and crispy. Set aside on a plate to cool and crisp up.

    In a small bowl, combine cabbage, cilantro, mint, lime juice, and fish sauce. Set aside.

    Serve burgers immediately topped with peanut sauce, mango, slaw, and shallots.


    larb_burgers_01

    larb_burgers_01

    Yields 6 burgers.

  • Nate’s Pinot Noir Marinara


    Marinara_01.jpg

    Marinara is a mother sauce that you can use in all sorts of Italian dishes, from spaghetti to pizza to lasagna to meatball subs, even just for dipping breadsticks.
    Jon and I make marinara differently. His turns out smoky and rich. Mine is more bright and floral with a slight acidic edge. (I think it’s because of the bay leaf and I put waaay less wine in the sauce.) You can’t make marinara wrong, but sometimes the freshness is nice. You can customize the sauce for the dish as you see fit.

    Nate’s Pinot Noir Marinara

    • 2 28-ounce cans crushed tomatoes
    • 1 medium sweet onion, diced
    • 6 cloves garlic, minced
    • 2 tbs. dried Mediterranean oregano
    • 1 tbs. fennel seed
    • 1 10-inch sprig rosemary, leaves removed, minced (reserve the stick)
    • ¼ tsp. red pepper flakes
    • 1 bay leaf
    • 2 cup pinot noir red wine
    • 2 tbs. olive oil
    • salt & pepper to taste


    Marinara_02

    Marinara_02

    In a large heavy-bottomed stock pot, heat oil over medium heat. Sweat the onions (cook them until translucent), stirring constantly. Add tomatoes and stir. Add everything else, and bring to a simmer. Reduce to low heat and cook uncovered for 1 hour, stirring frequently. The sauce will reduce about halfway.

    You can refrigerate the sauce for up to 3 days or freeze for up to 3 months.

    Yields scant 3 pints.