Category: Snacks

  • Smoky Baba Ghanouj


    The baba ghanouj recipe is a little nod to the only Middle Eastern restaurant from my Oregonian hometown of Coos Bay/North Bend, simply named Cafe Mediterranean. My family is reasonably certain that when they first opened that we generated a venerable chunk of their revenue. Back in the early 2000’s, living in such a small town, we hadn’t really ever been exposed to food like that before, and it was such a welcome influence that it sent us on a mezze kick in our own kitchen that lasted for years. They had a strong menu, but for us, the star of the show was their baba ghanouj. One day, we asked for the recipe, and they graciously revealed the secret ingredient that made it so addictive: a little kiss of liquid smoke. It ties everything together so nicely, opening up a larger dialogue between the eggplant and the garlic.

    Since then, we’ve tweaked it to make it our own, for instance, roasting the eggplant longer for a deeper flavor and adding a lot more garlic. We also boost the smoky flavor by garnishing the dish with a little dusting of smoked paprika.


    Smoky Baba Ghanouj:

    • 1 large eggplant, halved
    • ¼ cup tahini
    • 4–5 cloves garlic, crushed
    • 1 teaspoon ground cumin
    • Juice of 1 lemon
    • A drop of liquid smoke
    • Salt to taste
    • Olive oil for garnish
    • Smoked paprika for garnish


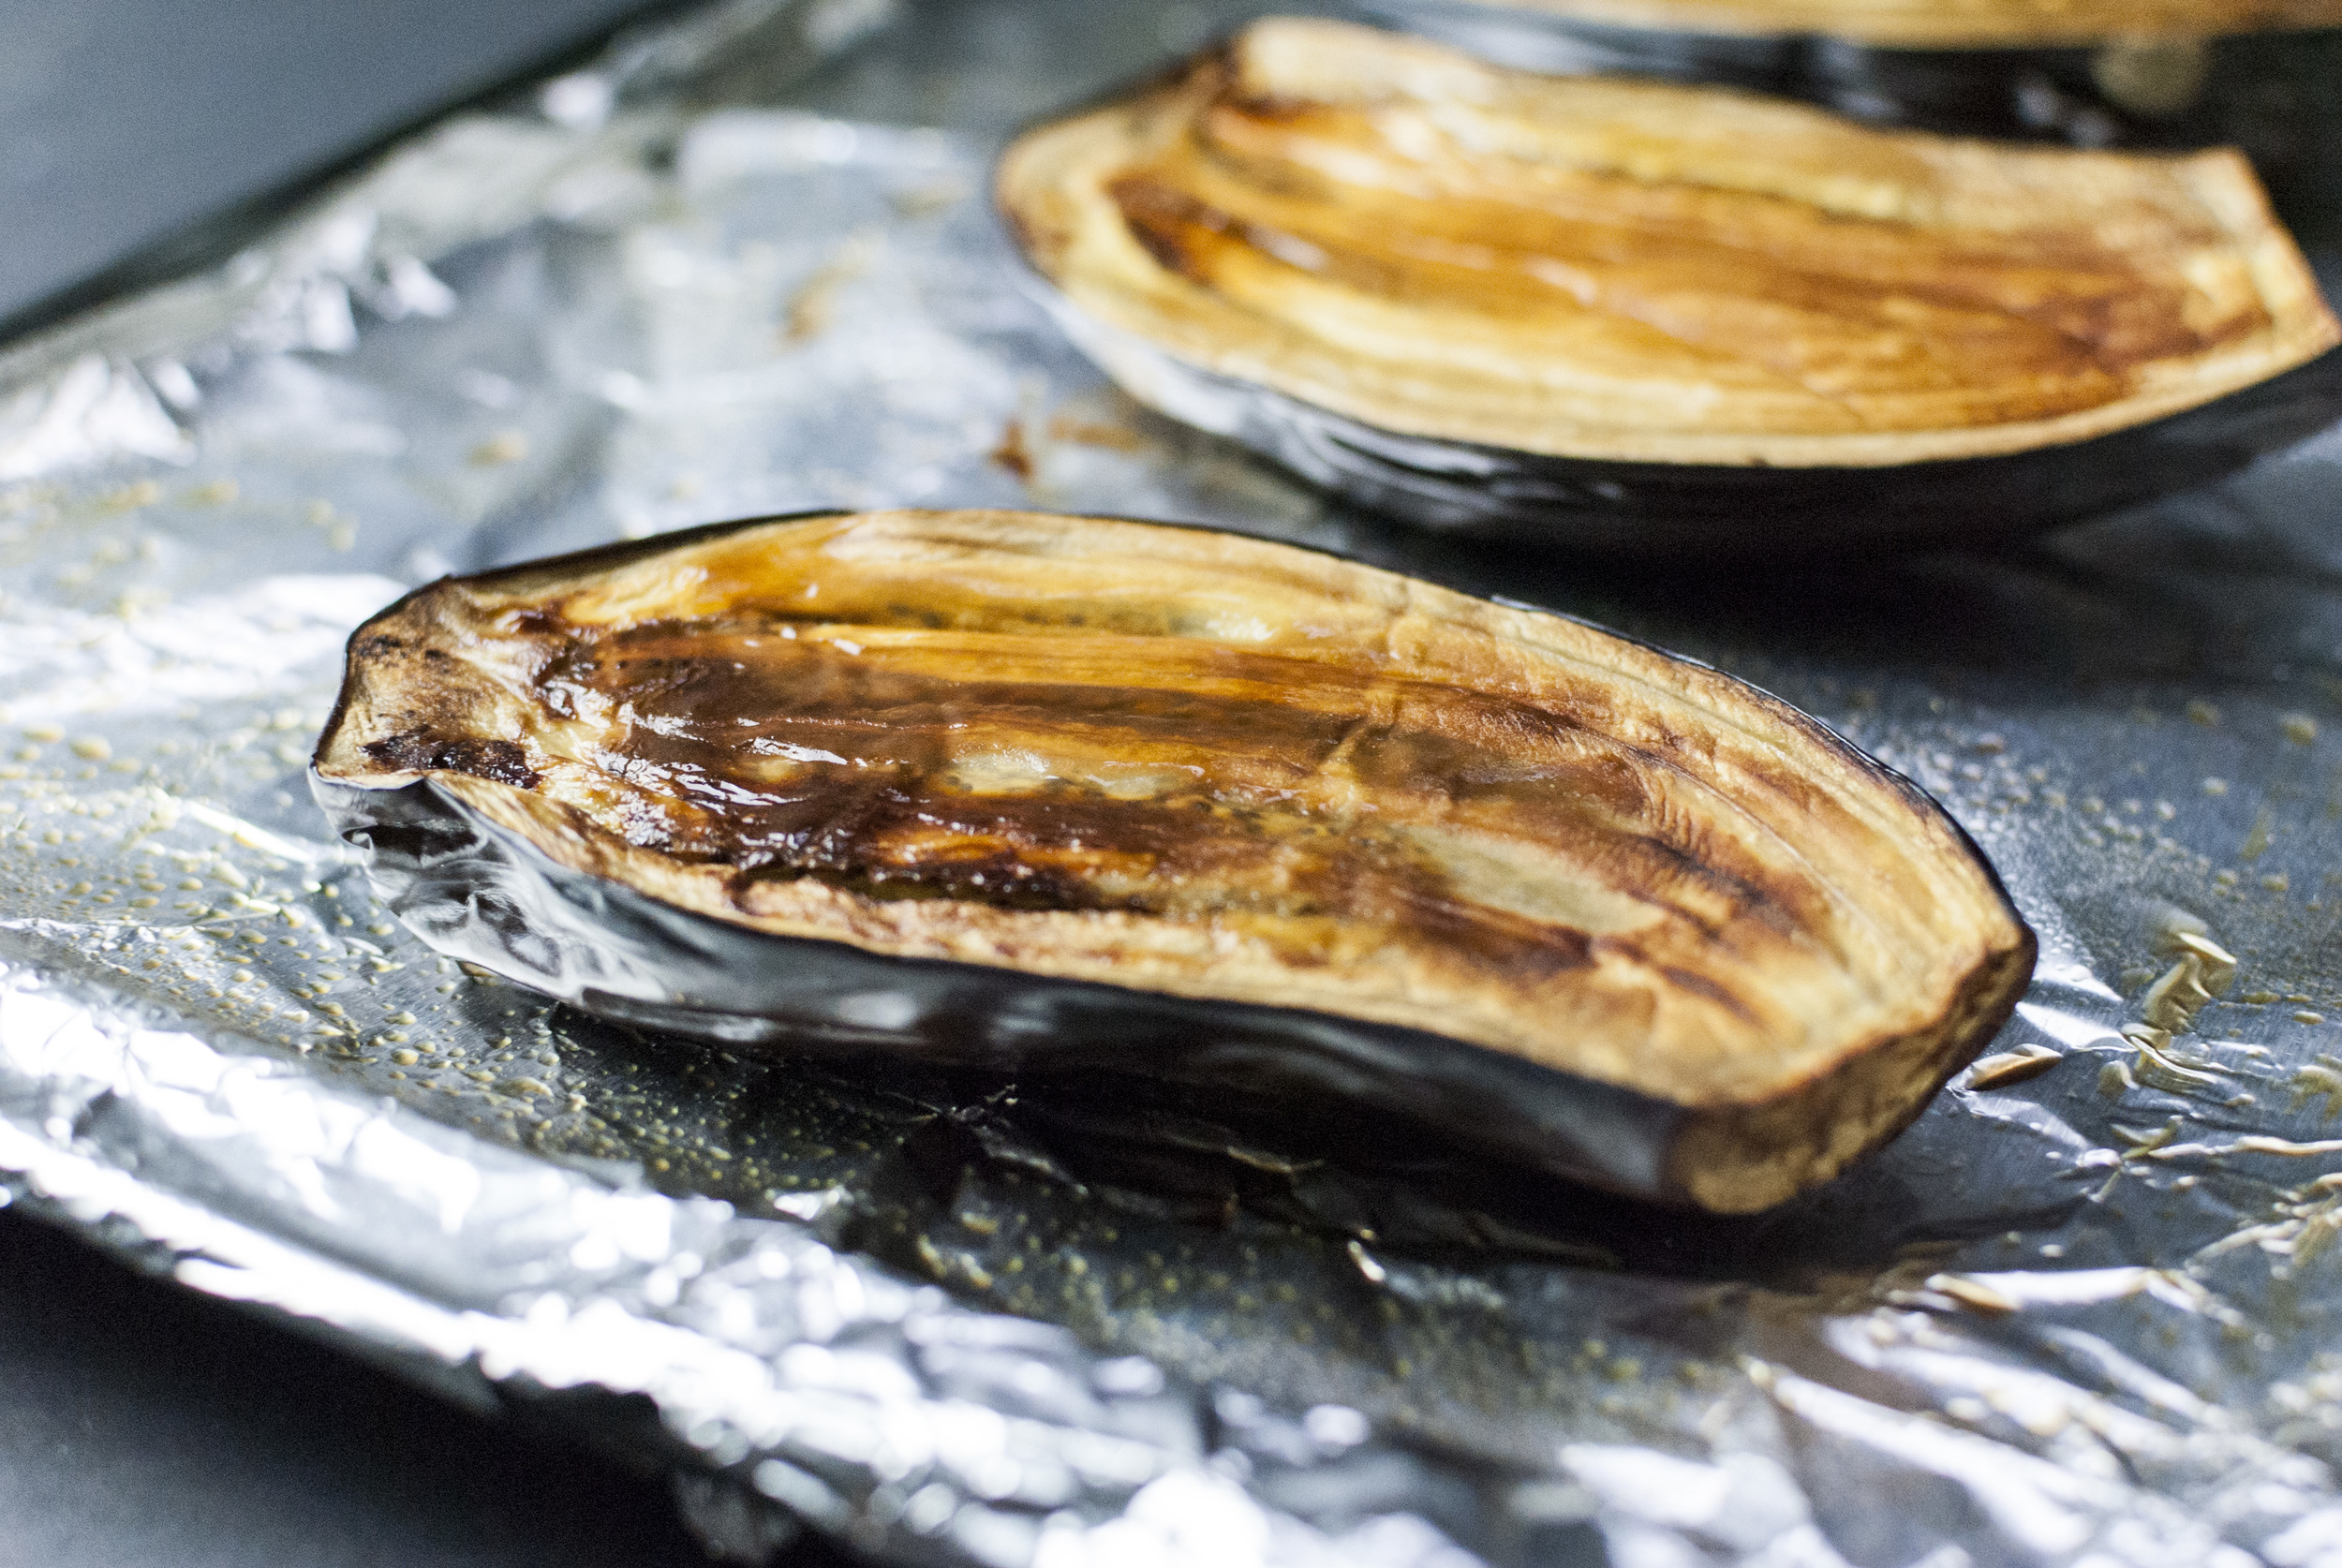
    Preheat oven to 350°F. Cover a baking sheet in aluminum foil then lightly oil the surface. Roast the eggplant on the baking sheet skin side up for about 2 hours or until the flesh of the eggplant is very tender.

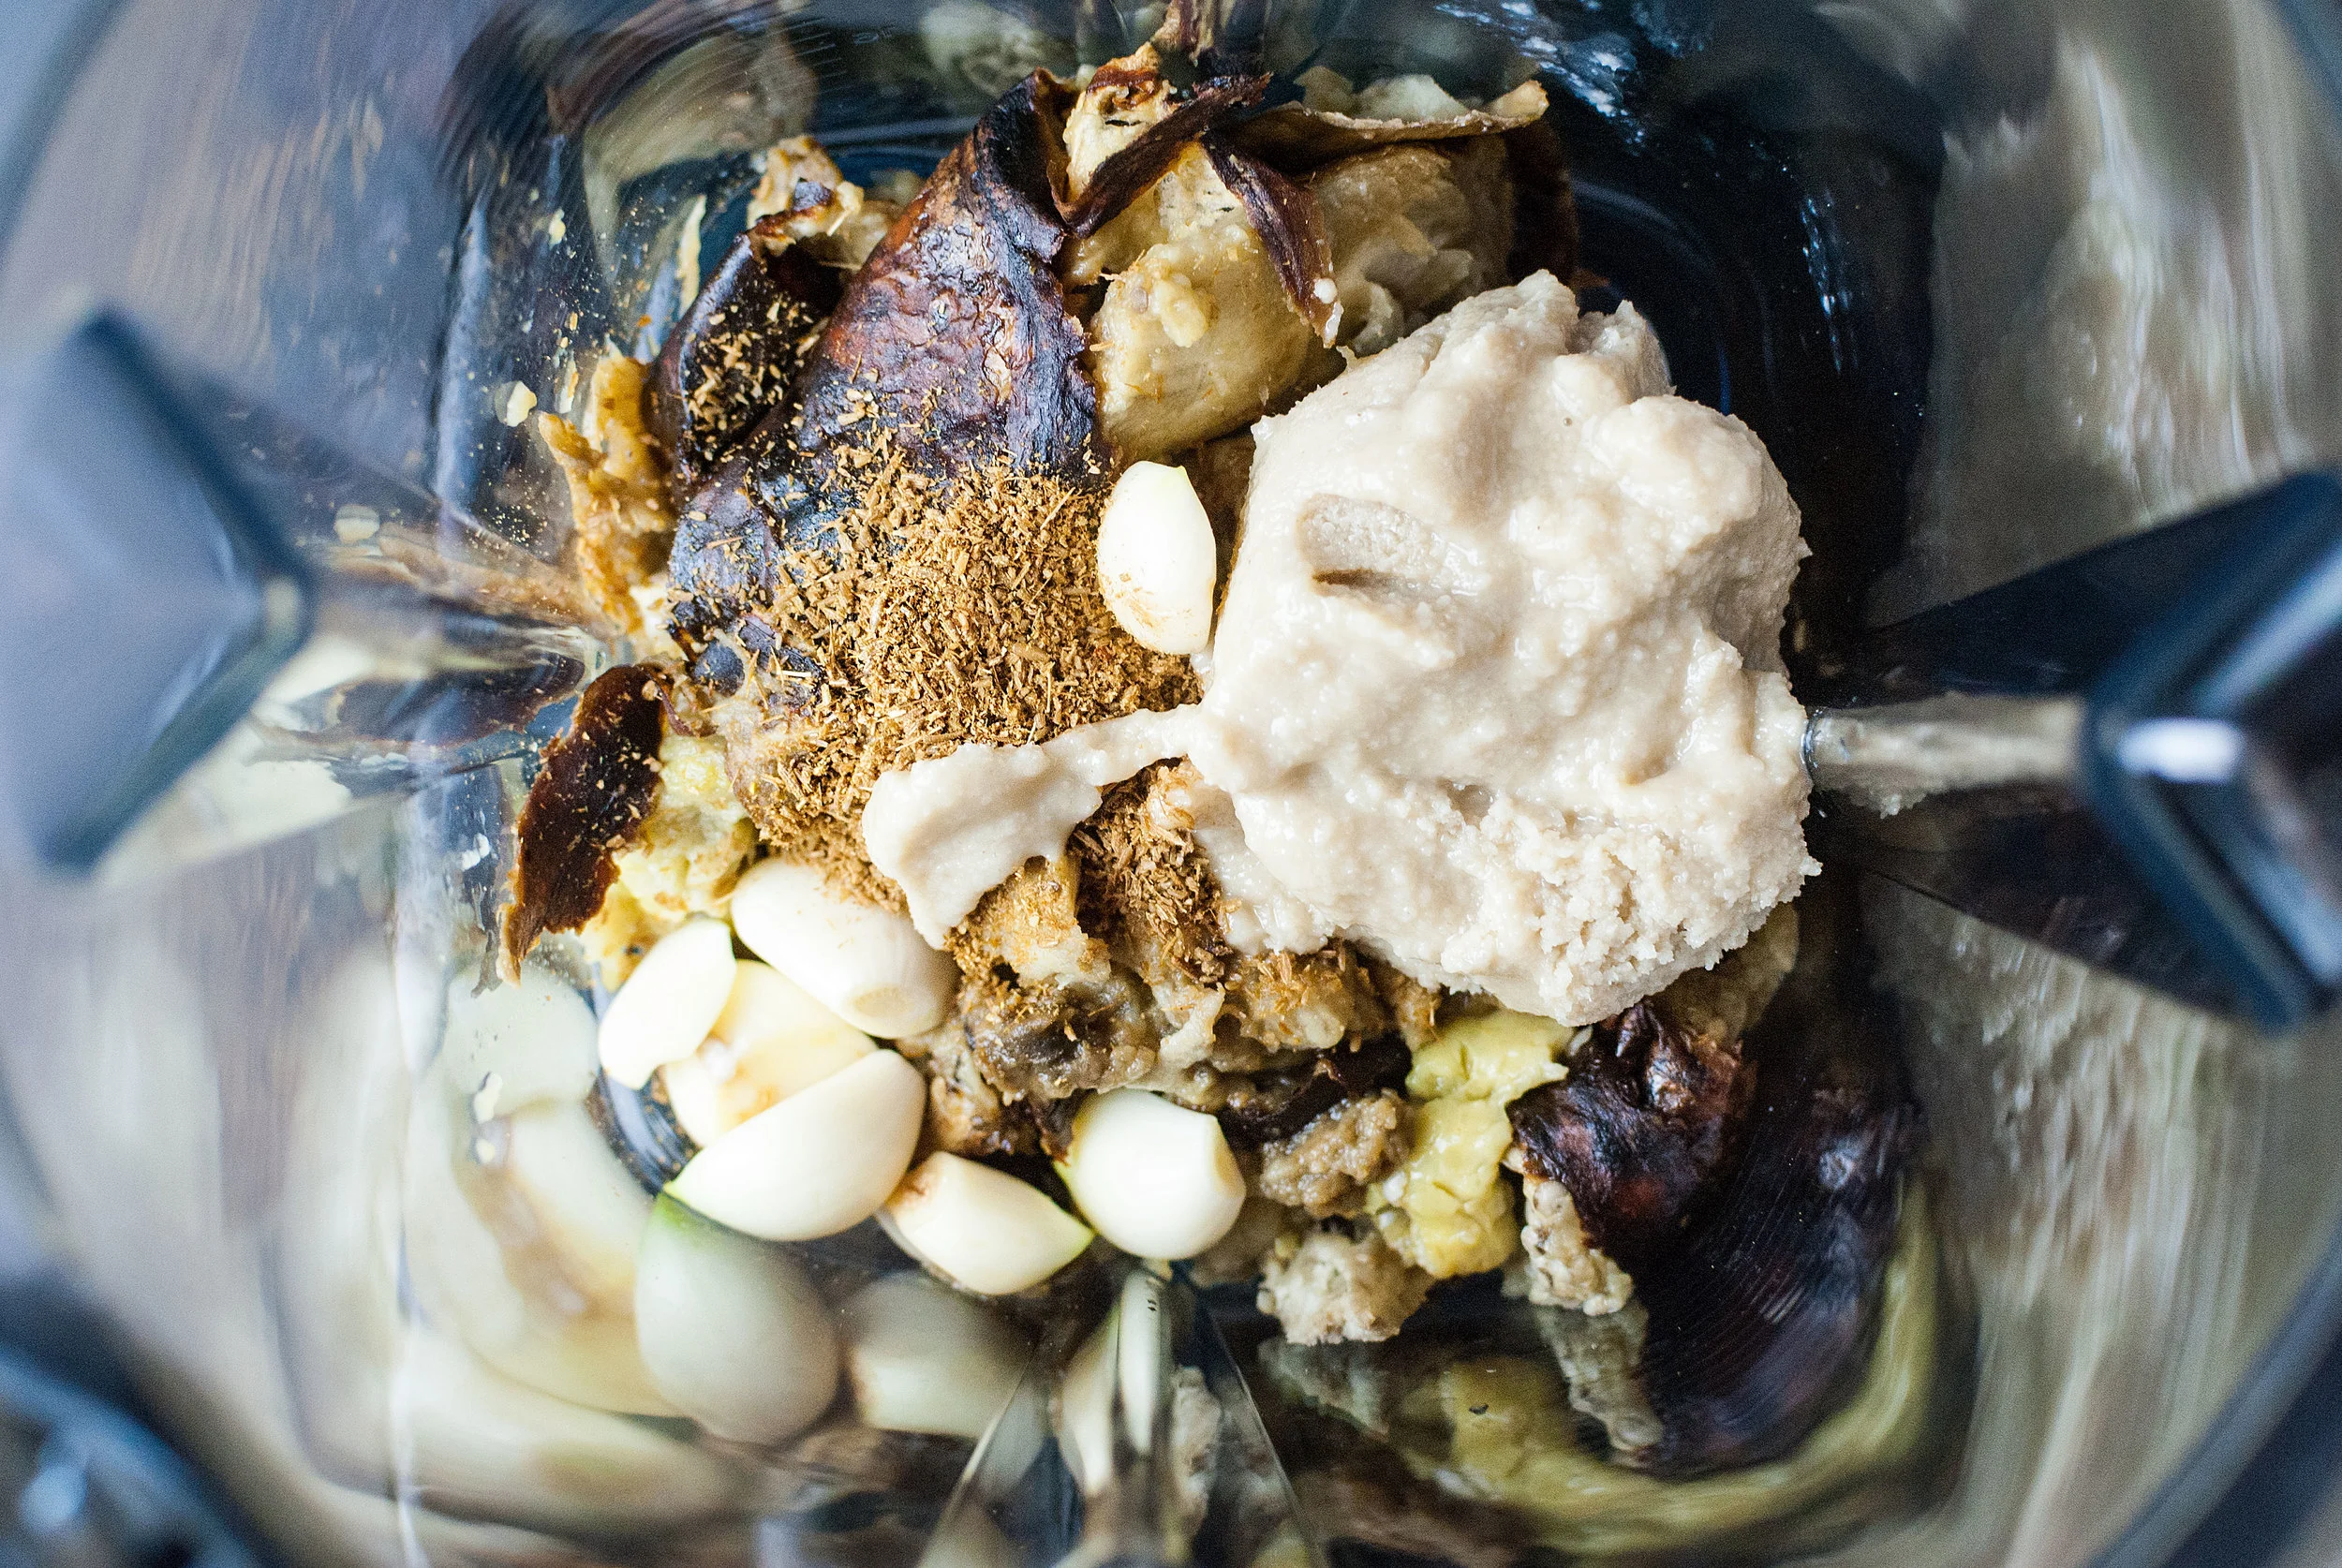
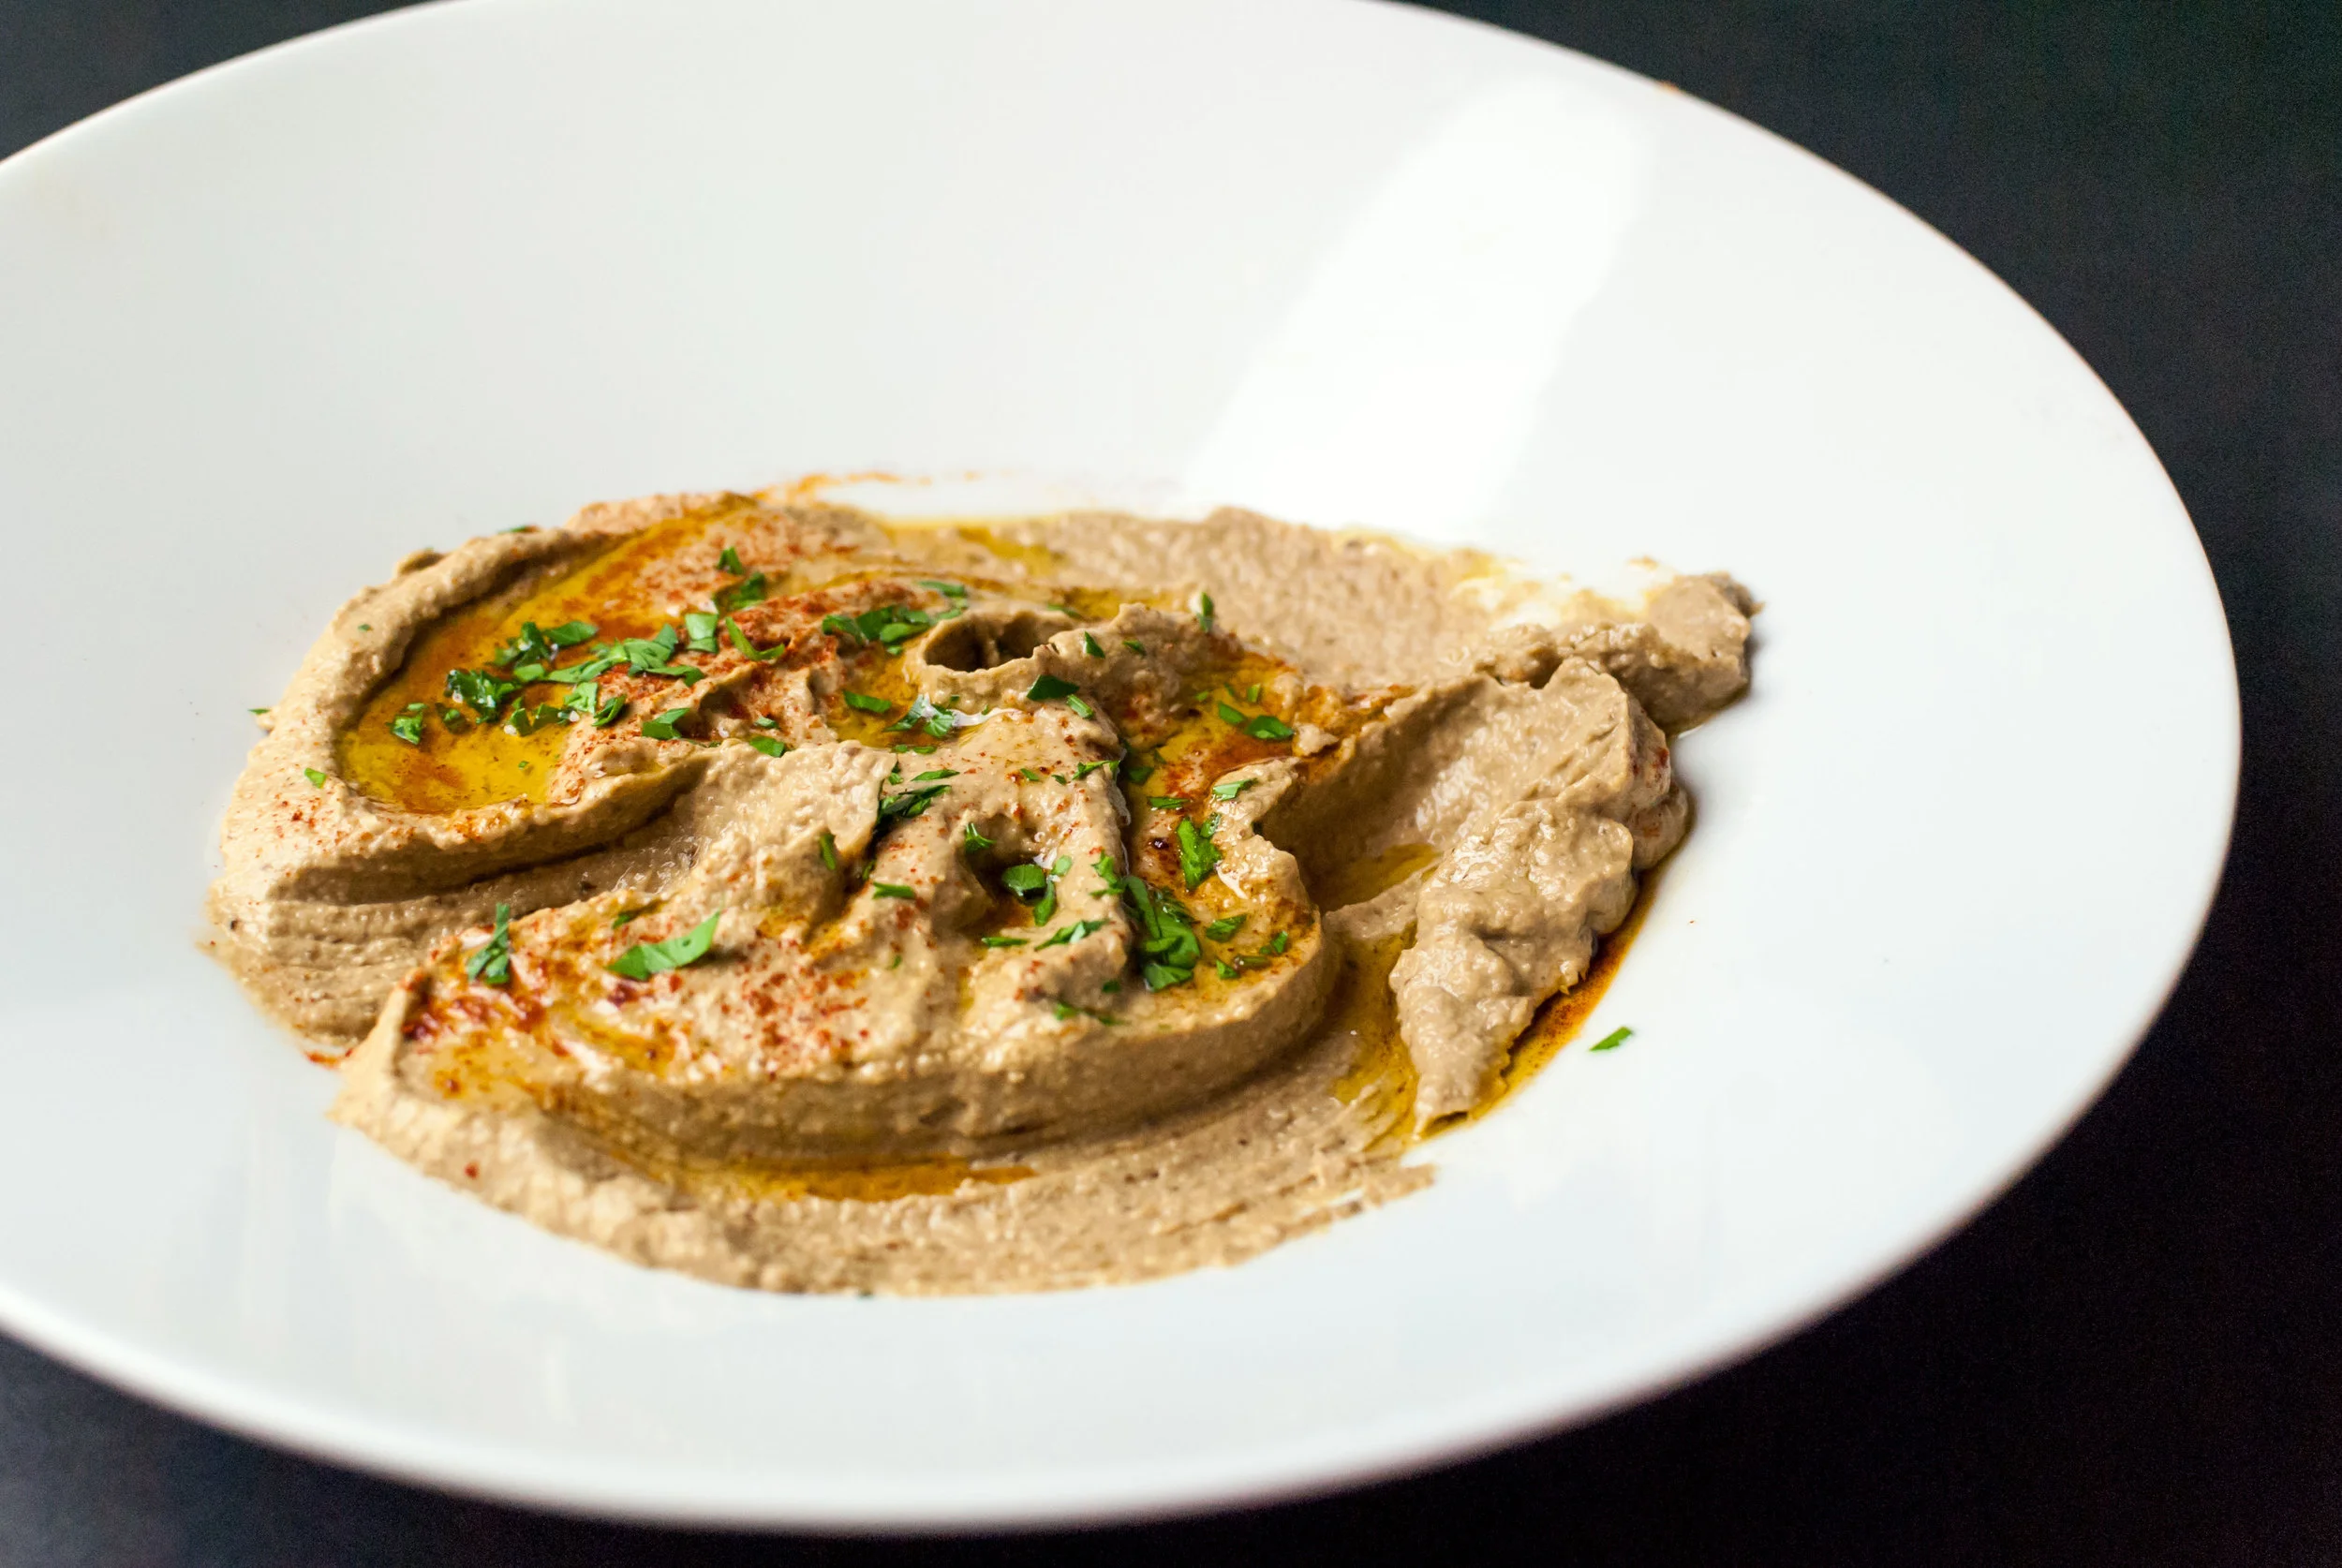
    When the eggplant is cool enough to handle with your hands, scoop the flesh out of the skins and place into a food processor with the tahini, garlic, cumin, lemon juice, and liquid smoke. Pulse at first, breaking everything up into more manageable sizes for the blades, then blend steadily until completely smooth. Taste test and add salt to your liking. When finished, place the baba ghanouj into a serving dish and drizzle with a little bit of olive oil and a light dusting of smoked paprika.


  • Smashed Raspberry Grilled Cheese


    Our challenge of savory seasonal eating continues!

    Raspberry season is upon us, and we quickly discovered through our research process that there’s not a whole lot of savory raspberry recipes out there, which we found simultaneously disappointing and alluring. We found plenty of jams, jellies, cookies, pavlovas (Christ, so many pavlovas) and cakes, but no one seemed interested in figuring out how raspberries could make their way out of the realm of dessert.

    But if there’s a way to make something savory, we will find it. As usual, the key was cheese.

    Grilled cheese sandwiches are essentially a step below pizza ingredient-wise, so they’re near the top of the favorite food list for us. Few things can compare to crisp and thickly sliced rustic bread (Nate makes the best) with melted cheese. However, there is one thing that these sandwiches usually lack to create what is more commonly accepted as a “complete taste” on its own, and that’s acid. That’s why you see grilled cheese and tomato soup paired together all over the place.

    So we thought…why not switch up the acid?


    Berries and cheese go way back, so we weren’t too scared about them intermingling. Our acidic subject? Fresh raspberries. Our cheese? We eventually decided to go with a blend of chèvre for flavor and Jarlsberg for texture. So we smashed some raspberries we got from Sauvie Island Farms after a lovely day of berry picking onto some of Nate’s homemade 50% whole wheat sourdough bread and got cooking.

    The results? Crunchy, fluffy, creamy, gooey, and tart. It was everything we hoped it would be and more. If you have any fruit laying around, especially incredibly fresh fruit, we wholeheartedly recommend you put your thinking cap on and find a cheese that’ll pair well with it, then immediately stuff it in a grilled cheese sandwich. You will not be disappointed. Sometimes it really is the simplest things that taste the best.

    Smashed Raspberry Grilled Cheese Sandwich:

    Makes 1.

    • 2 thick slices of good rustic bread (whole wheat sourdough was magical with this, but if you wanna try something else, it’ll still turn out awesome)
    • About 1 tablespoon of butter, room temperature
    • 8–10 ripe raspberries (enough to cover the surface of one piece of bread)
    • 2 ounces of Jarlsberg cheese, grated
    • 1 ounce chèvre, room temperature
    • A dash of freshly ground black pepper

    In a small bowl, mix the grated Jarlsberg and chèvre together along with the fresh black pepper. Set aside.

    Butter both pieces of bread on one side using ½ a tablespoon of butter each. On the unbuttered side of one of your pieces of bread, lay out your raspberries and smash them with a fork, moving the juices around until the entire surface of the bread is covered. Spoon the cheese mixture on top of the smashed raspberries and spread it until the cheese covers the surface of the bread. Put the other piece of bread on top, buttered side up.

    Preheat a non-stick pan on medium heat and put the sandwich in the pan. Allow each side to cook for roughly four minutes, adjusting heat as needed to cook the sandwich through, or until each side of the bread is golden brown and the cheese is melted. To help the melting process along, you can put a lid on the pan, keeping the heat trapped in, though you should limit this because you will lose that deep crispness with too much steam.

    Allow sandwich to cool, then go to town.


  • Leek Powder Pierogis


    Leek-Powder-Pierogi-5.jpg

    We are very often products of our upbringing. This recipe is a really fun blend of my mother’s culinary curiosity and my father’s Polish ancestry.
    Leek powder was borne out of my mother getting sick of throwing out leek greens, so she found a way to use them and even make them keep for a long time. Gastronomically she was gifted with preserving things, and she was willing to give anything a chance. Anything.

    My father loves feeling connected to his Polish roots, and one of the main ways that he returns to them is through food. It’s the little things like sauerkraut, a well-made kielbasa, or the richness of sour cream that take him back.

    Naturally, I inherited both of these compulsions, so here we are. Pierogis are just about the most Polish thing I can think of, and I love the crap out of them. Crispy and cheesy potato dumplings. What’s not to like? To bring this to another level, I decided to try adding a little bit of my mother’s evil genius influence. The leek powder gives the dough a fun color and a wonderful herb-like flavor that’s perfect for its potato counterpart.

    Leek powder pierogi dough

    • 2½ cups (300 g) all-purpose flour, plus more as needed
    • ½ cup lukewarm water
    • 1 egg, room temperature
    • 2 tbsp. sour cream
    • 1 tsp. salt
    • 1 tbsp. leek powder

    Potato filling

    • 2 cups mashed red potatoes (about 1 lb raw potatoes)
    • 2 tbsp chives, chopped
    • 1 tsp. salt
    • 2 oz. cheddar, shredded
    • 1 tbsp. butter
    • ½ tsp. fresh ground pepper

    Knead all the ingredients for the pierogi dough together until combined. The dough should be only slightly sticky, so add more flour as needed. Refrigerate for 30 minutes to let the leek flavor infuse and the flour bind to the moisture.

    While the dough rests, boil quartered potatoes until soft. Strain and mash, adding cheese, butter, salt, and pepper. Mix until fully incorporated. Allow the mixture to cool slightly before adding the chives; they shouldn’t cook.

    Roll out the dough to about ⅛” (thinner is okay) and use a cookie or biscuit cutter to cut out the dough. Use two pieces of dough per pierogi, spooning about ½ tbsp. (think half a ping pong ball) of potatoes on one. Wet your fingers and dab it around the edges, sealing it.

    Heat a skillet with 1/2 tbsp. butter over medium heat. Cook until golden brown on both sides. Serve with sour cream, applesauce, fresh dill, or caramelized onions.

    Makes 24 pierogis.

  • Spiced Banana Bread


    banana-bread-031.jpg

    I spent a long time looking for the perfect banana bread recipe, which, when you think about it, shouldn’t be all that hard. The problem I kept running into was finding all sorts of things in the recipes from buttermilk to sour cream. I prefer to get the moisture in my banana bread from the bananas, since it gives it more banana flavor rather than a milk-based additive.
    What I ended up with was a soft, caky banana bread that’s always a hit at parties or when I take it to work. The thing that varies for me is what spice I use in it. Usually I’ll put in nutmeg or allspice, but sometimes cloves. Honestly it’s usually whatever I see first on the shelf. The key part of great banana bread is bananas so ripe, you think they’re rotten. For this last batch, I let the bananas get so black, they started to ferment. If this makes you uncomfortable, just remember that any alcohol in the bananas will cook off. Because you let them go for so long, make sure to start out with big fruit or use an extra so it’s moist enough.

    I think the best part about this recipe is that it takes a little over an hour from start to finish. It will keep, wrapped in foil, for up to a week.

    • ¼ cup butter, softened
    • ¾ cup granulated sugar
    • 1 large egg
    • 3 extremely ripe bananas, mashed
    • 1 tsp. vanilla extract
    • 2 cups (240 g./8.5 oz.) all-purpose flour
    • 1 tsp. baking soda
    • ½ tsp. salt
    • ½ tsp. ground nutmeg/allspice/cloves

    Preheat oven to 350°F. Lightly oil an 8×4 inch loaf pan. (I use 8×5 pans, but bake for a shorter time.)

    In a medium bowl, cream butter and sugar together until the sugar starts to dissolve. Stir in the egg. Add the bananas and vanilla extract and stir until fully mixed.

    Sift together flour, baking soda, salt, and spices. Add to the banana mixture and stir gently until just combined. You should still have some bits of undissolved flour.


    banana-bread-01

    banana-bread-01

    Pour into prepared loaf pan and tamp the base of the pan with your hand, or on a flat surface, to get rid of any bubbles. Bake for 50–60 minutes. Check about 40 minutes in. If it’s getting dark too soon, it means your oven is too hot. Bread is done when a toothpick comes out clean.

    Remove from oven and let rest in pan for 10 minutes before removing from the pan. Cool on an wire rack. I’d tell you to cool it completely, but good luck with that.


    banana-bread-02

    banana-bread-02