Category: Desserts

  • Smoked Peanut Butter & Jelly Ice Cream


    Have you ever had an idea that you thought could be good, then when you finally manifested it, it turned out to be shockingly better than you ever thought? Have you ever been so taken off guard by the deliciousness of something you prepared that all you can do is keep tasting it, wondering how you hadn’t found or heard of it before, as if it should’ve been something you knew you loved all along? When was the last time you cleaned your ice cream equipment with your face instead of your dishwasher (but please, never your freezer bowl!)?

    As you ponder these questions, we suggest that you prepare your ice cream maker and go out and get yourself some liquid smoke, because this recipe is too easy and too delicious to sit on your screen and be stared at. This bold, savory, satisfying ice cream demands to be made, to be devoured.

    The inspiration for this came from a simple fact: smoke bonds to fat. While that usually is expressed through savory fats, there’s almost always that little wiggle room for a crossover, and that wiggle room is where we live; it’s our neighborhood. Peanuts are roasted anyway, so the rationalization of enhancing the smoke flavor didn’t seem too far-fetched. But then showcasing that in ice cream? Well, we’re just crazy enough to try a stunt like that, and boy, did it pay off.

    Play in your kitchen. Trust your instincts. You won’t win every time, but when you do—oh, when you do—you get something like this.


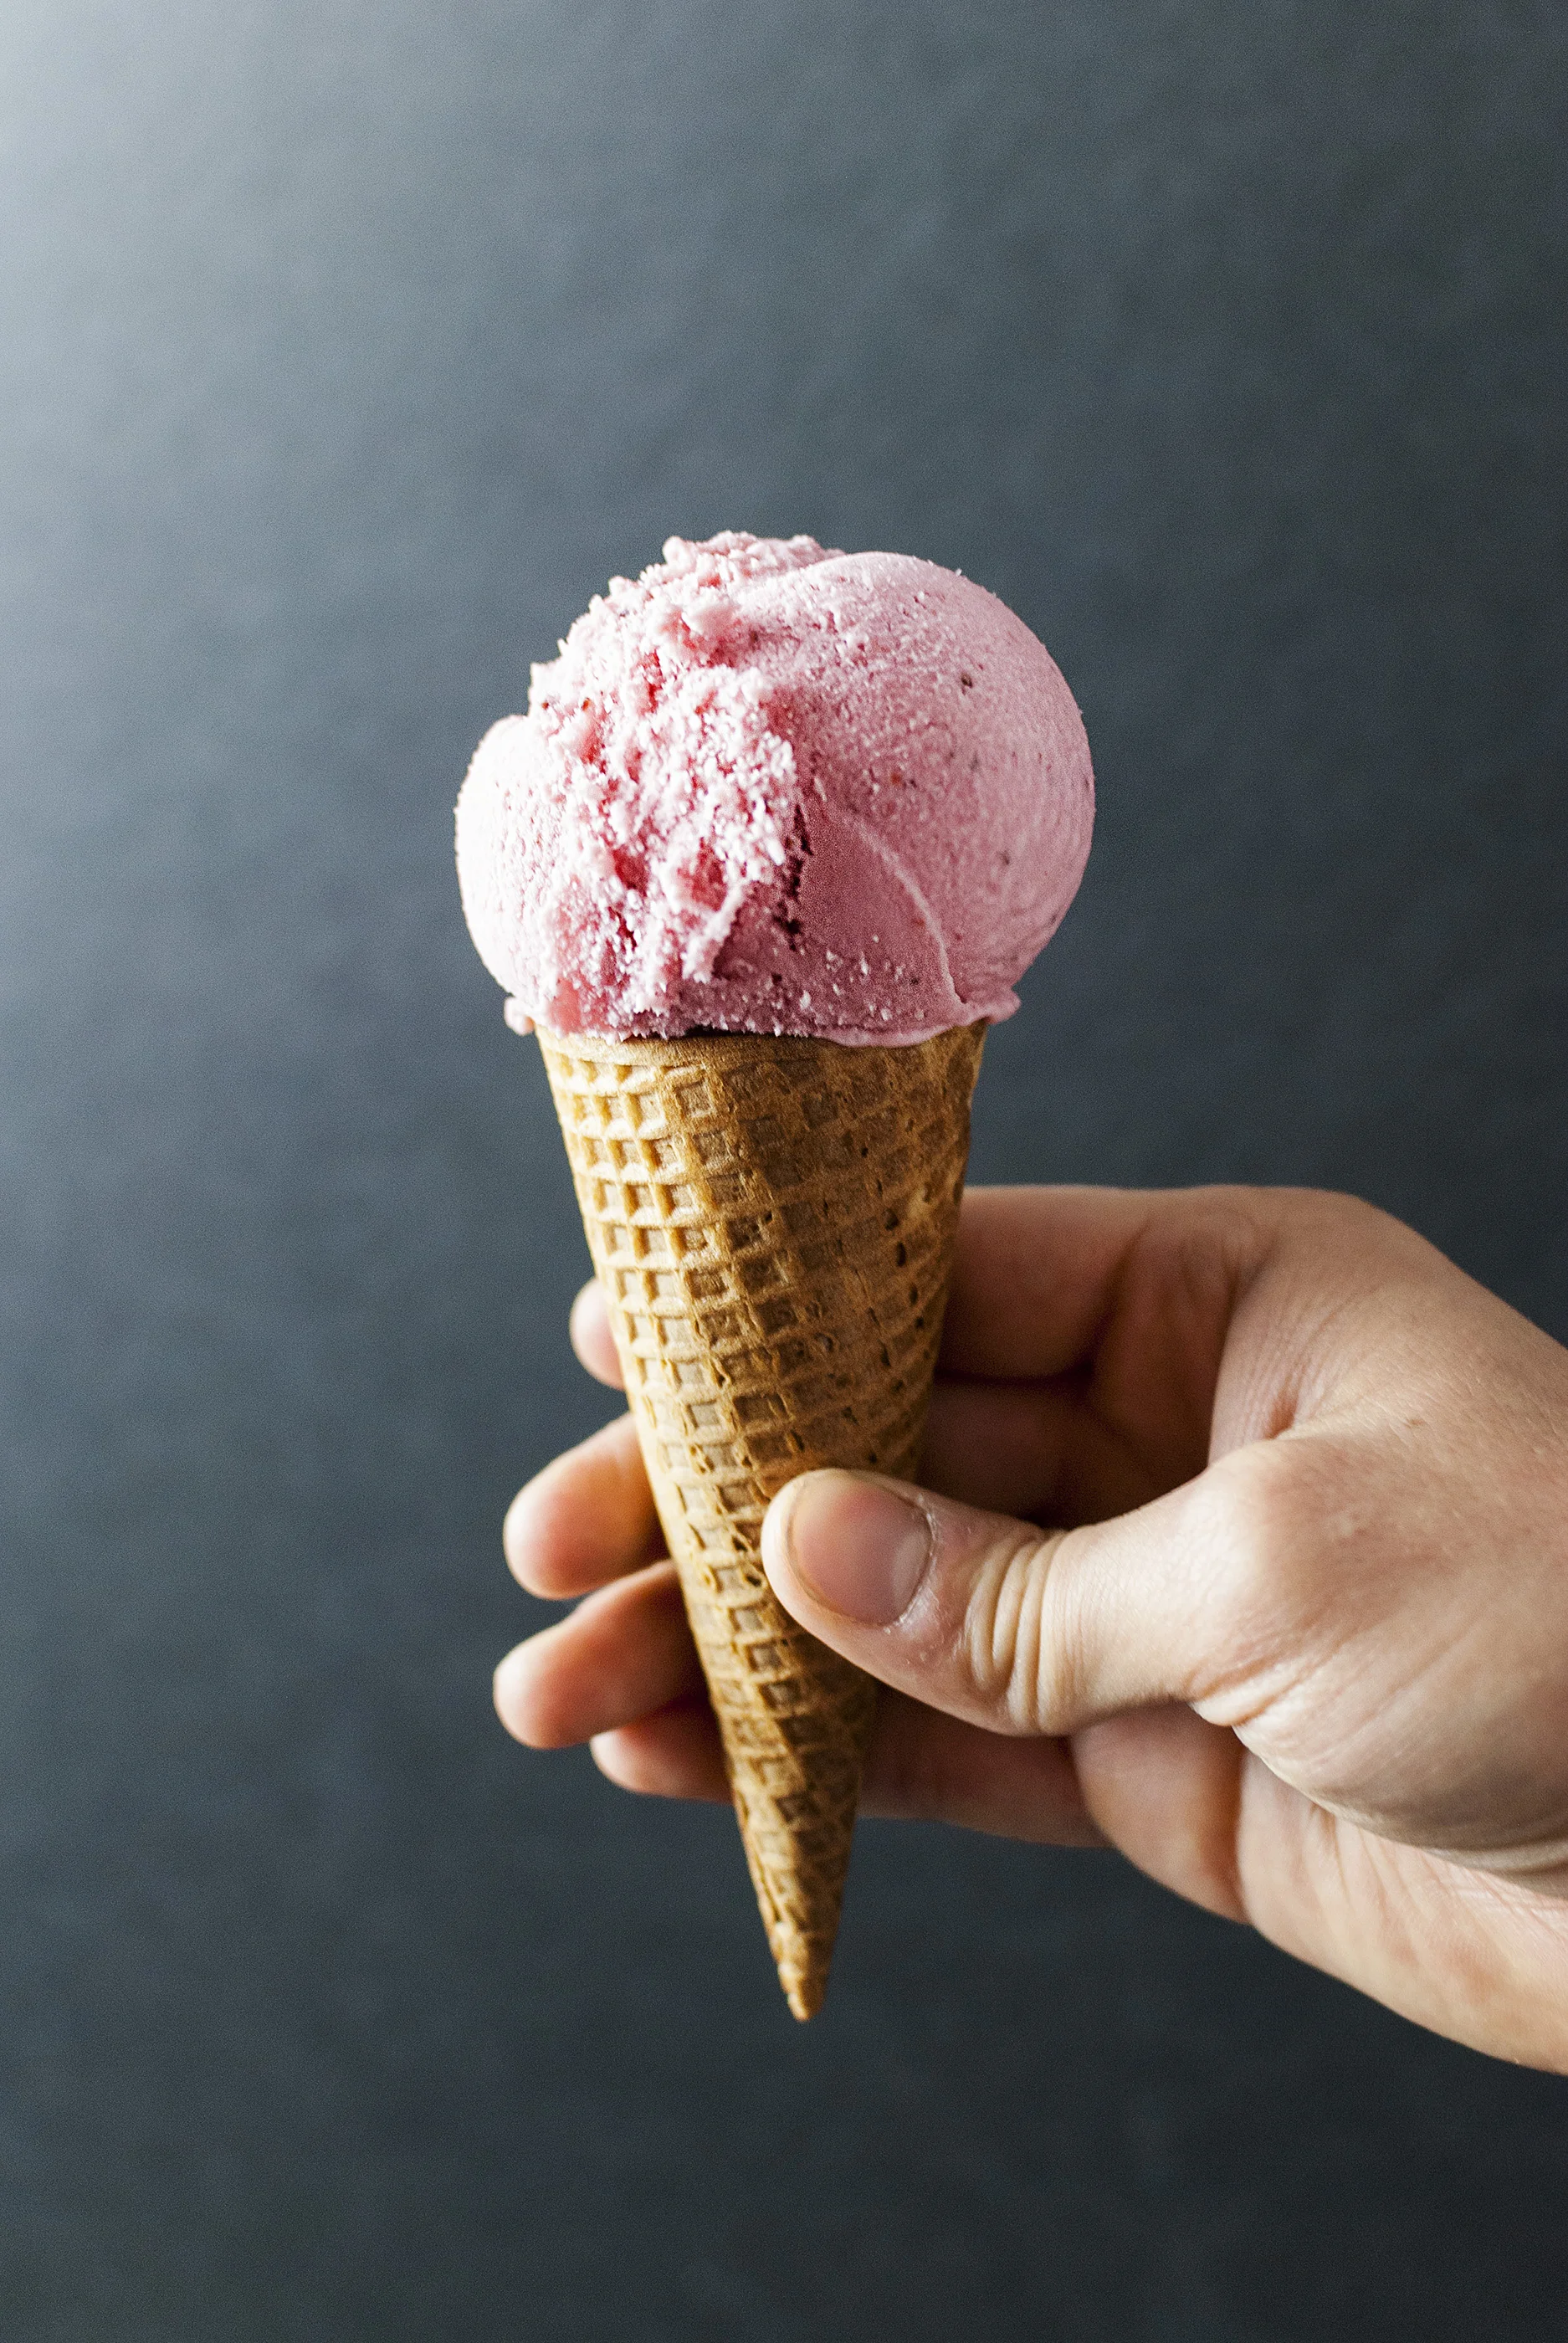
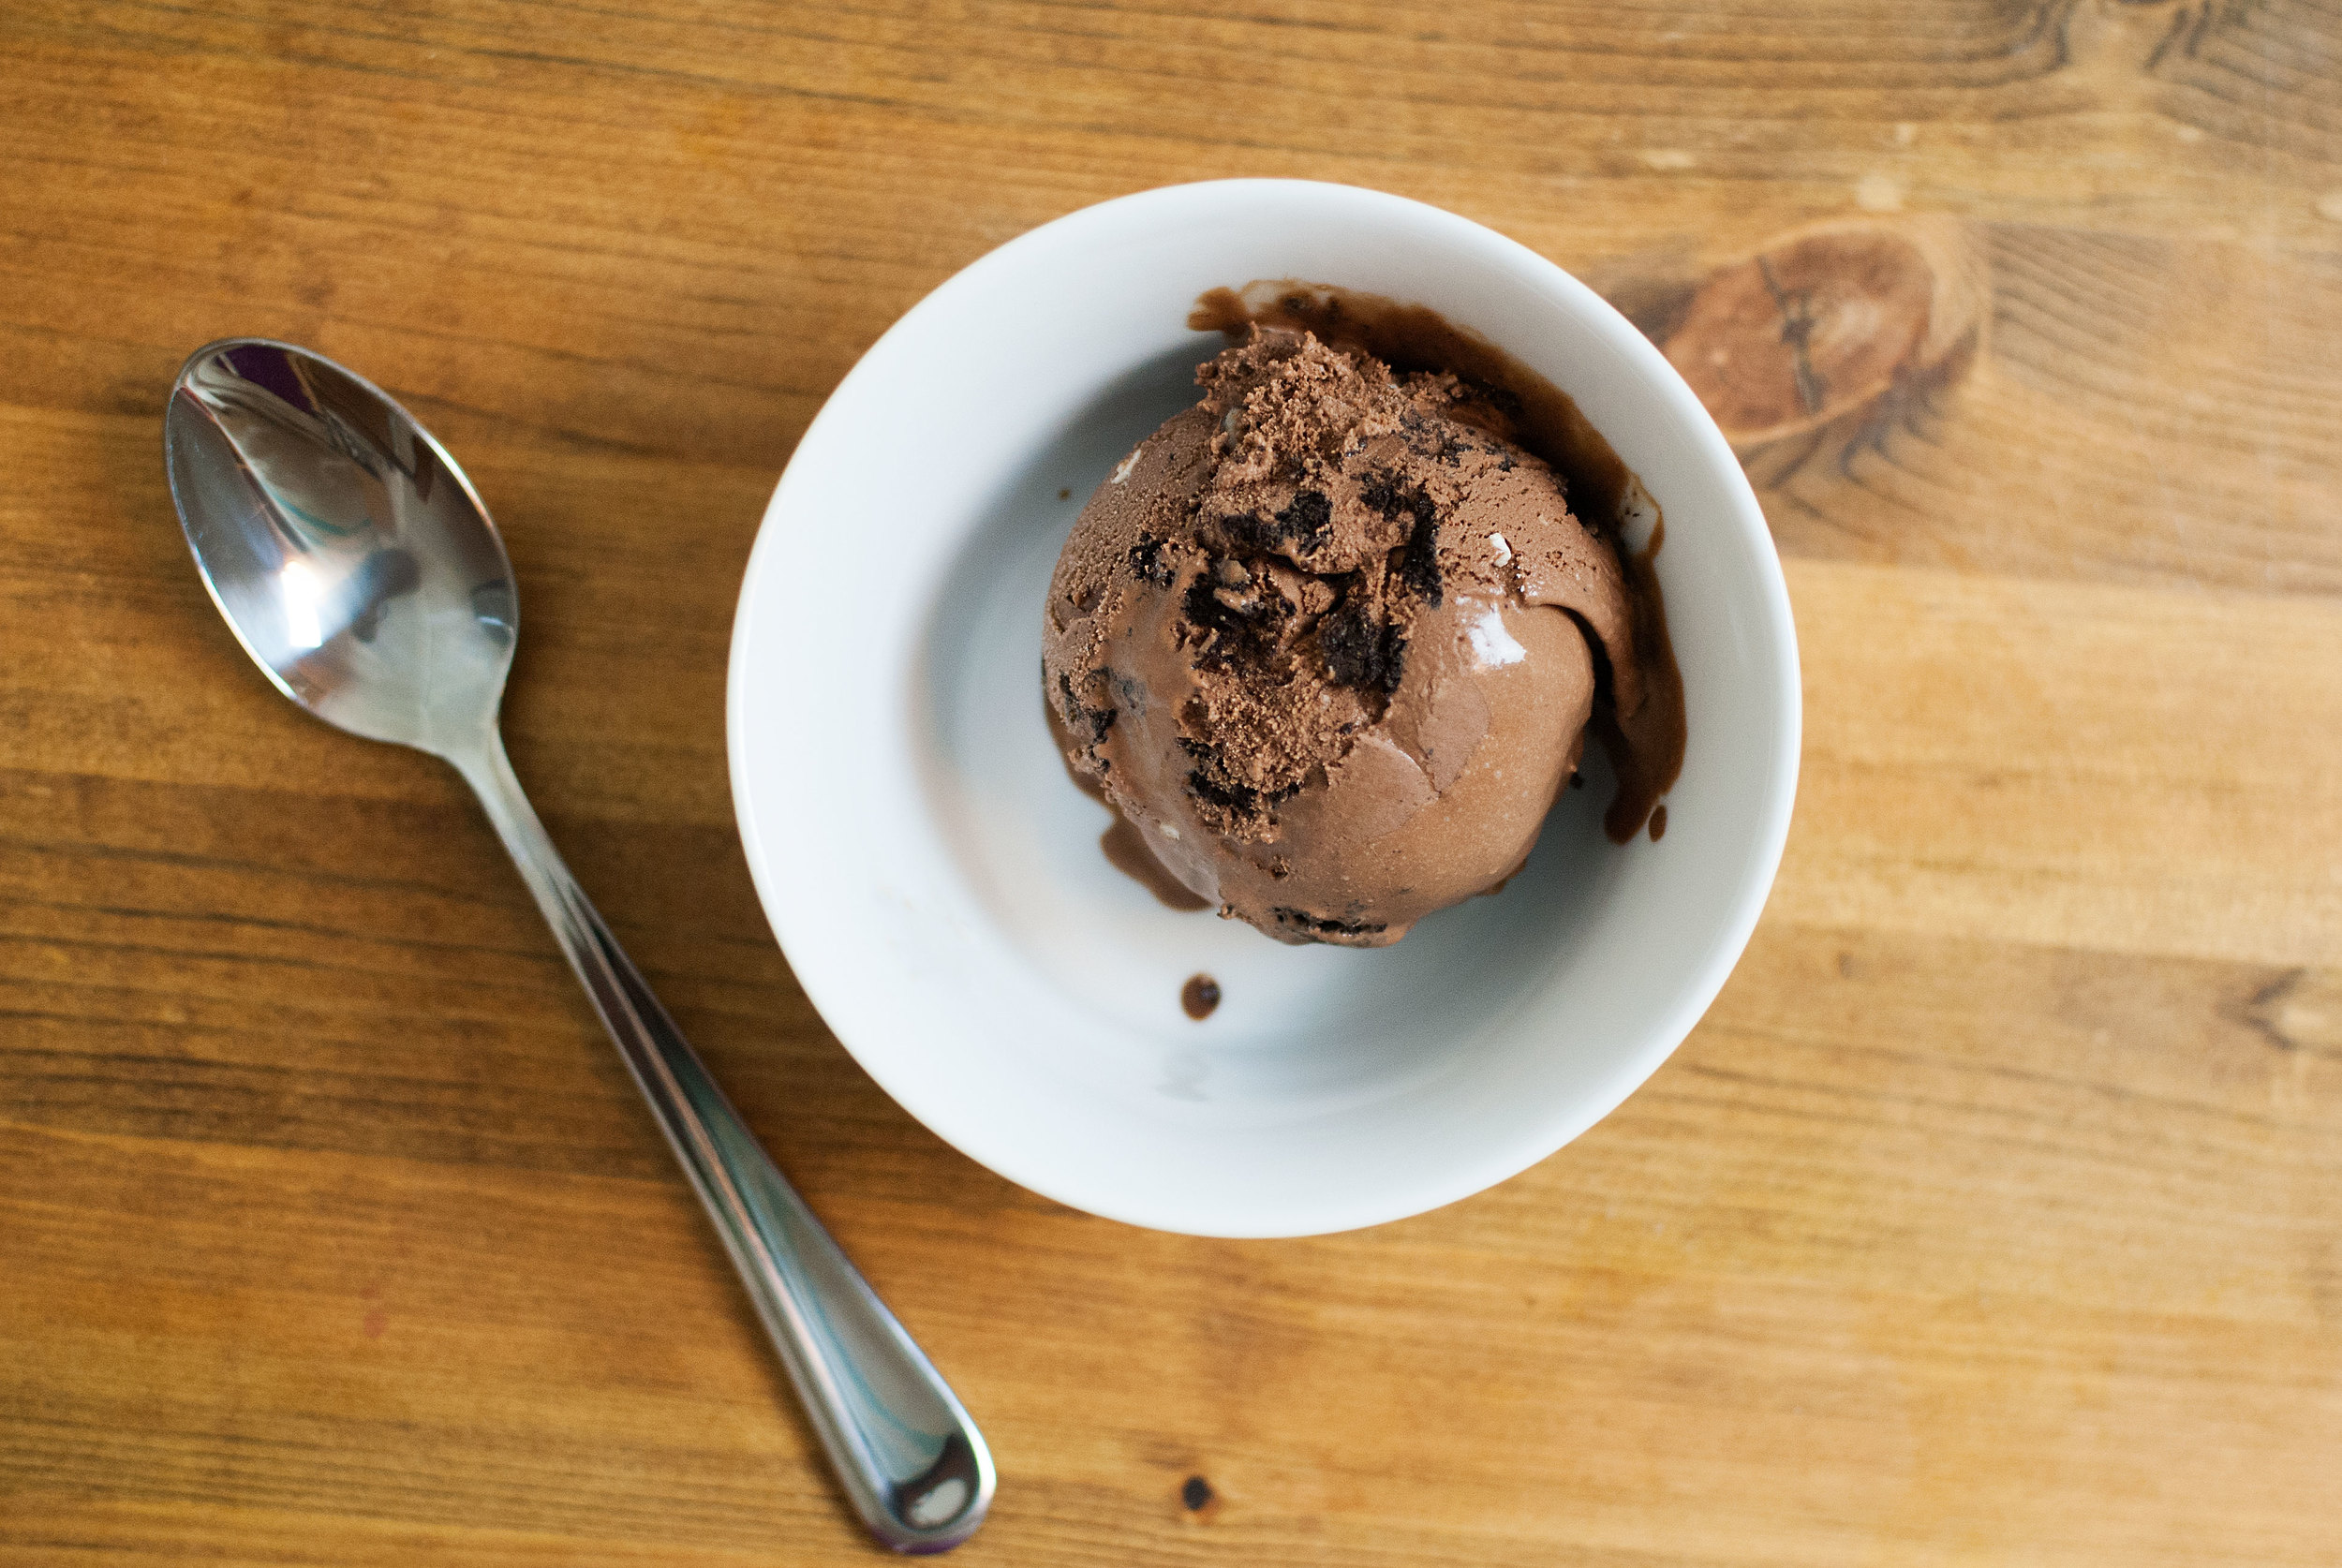
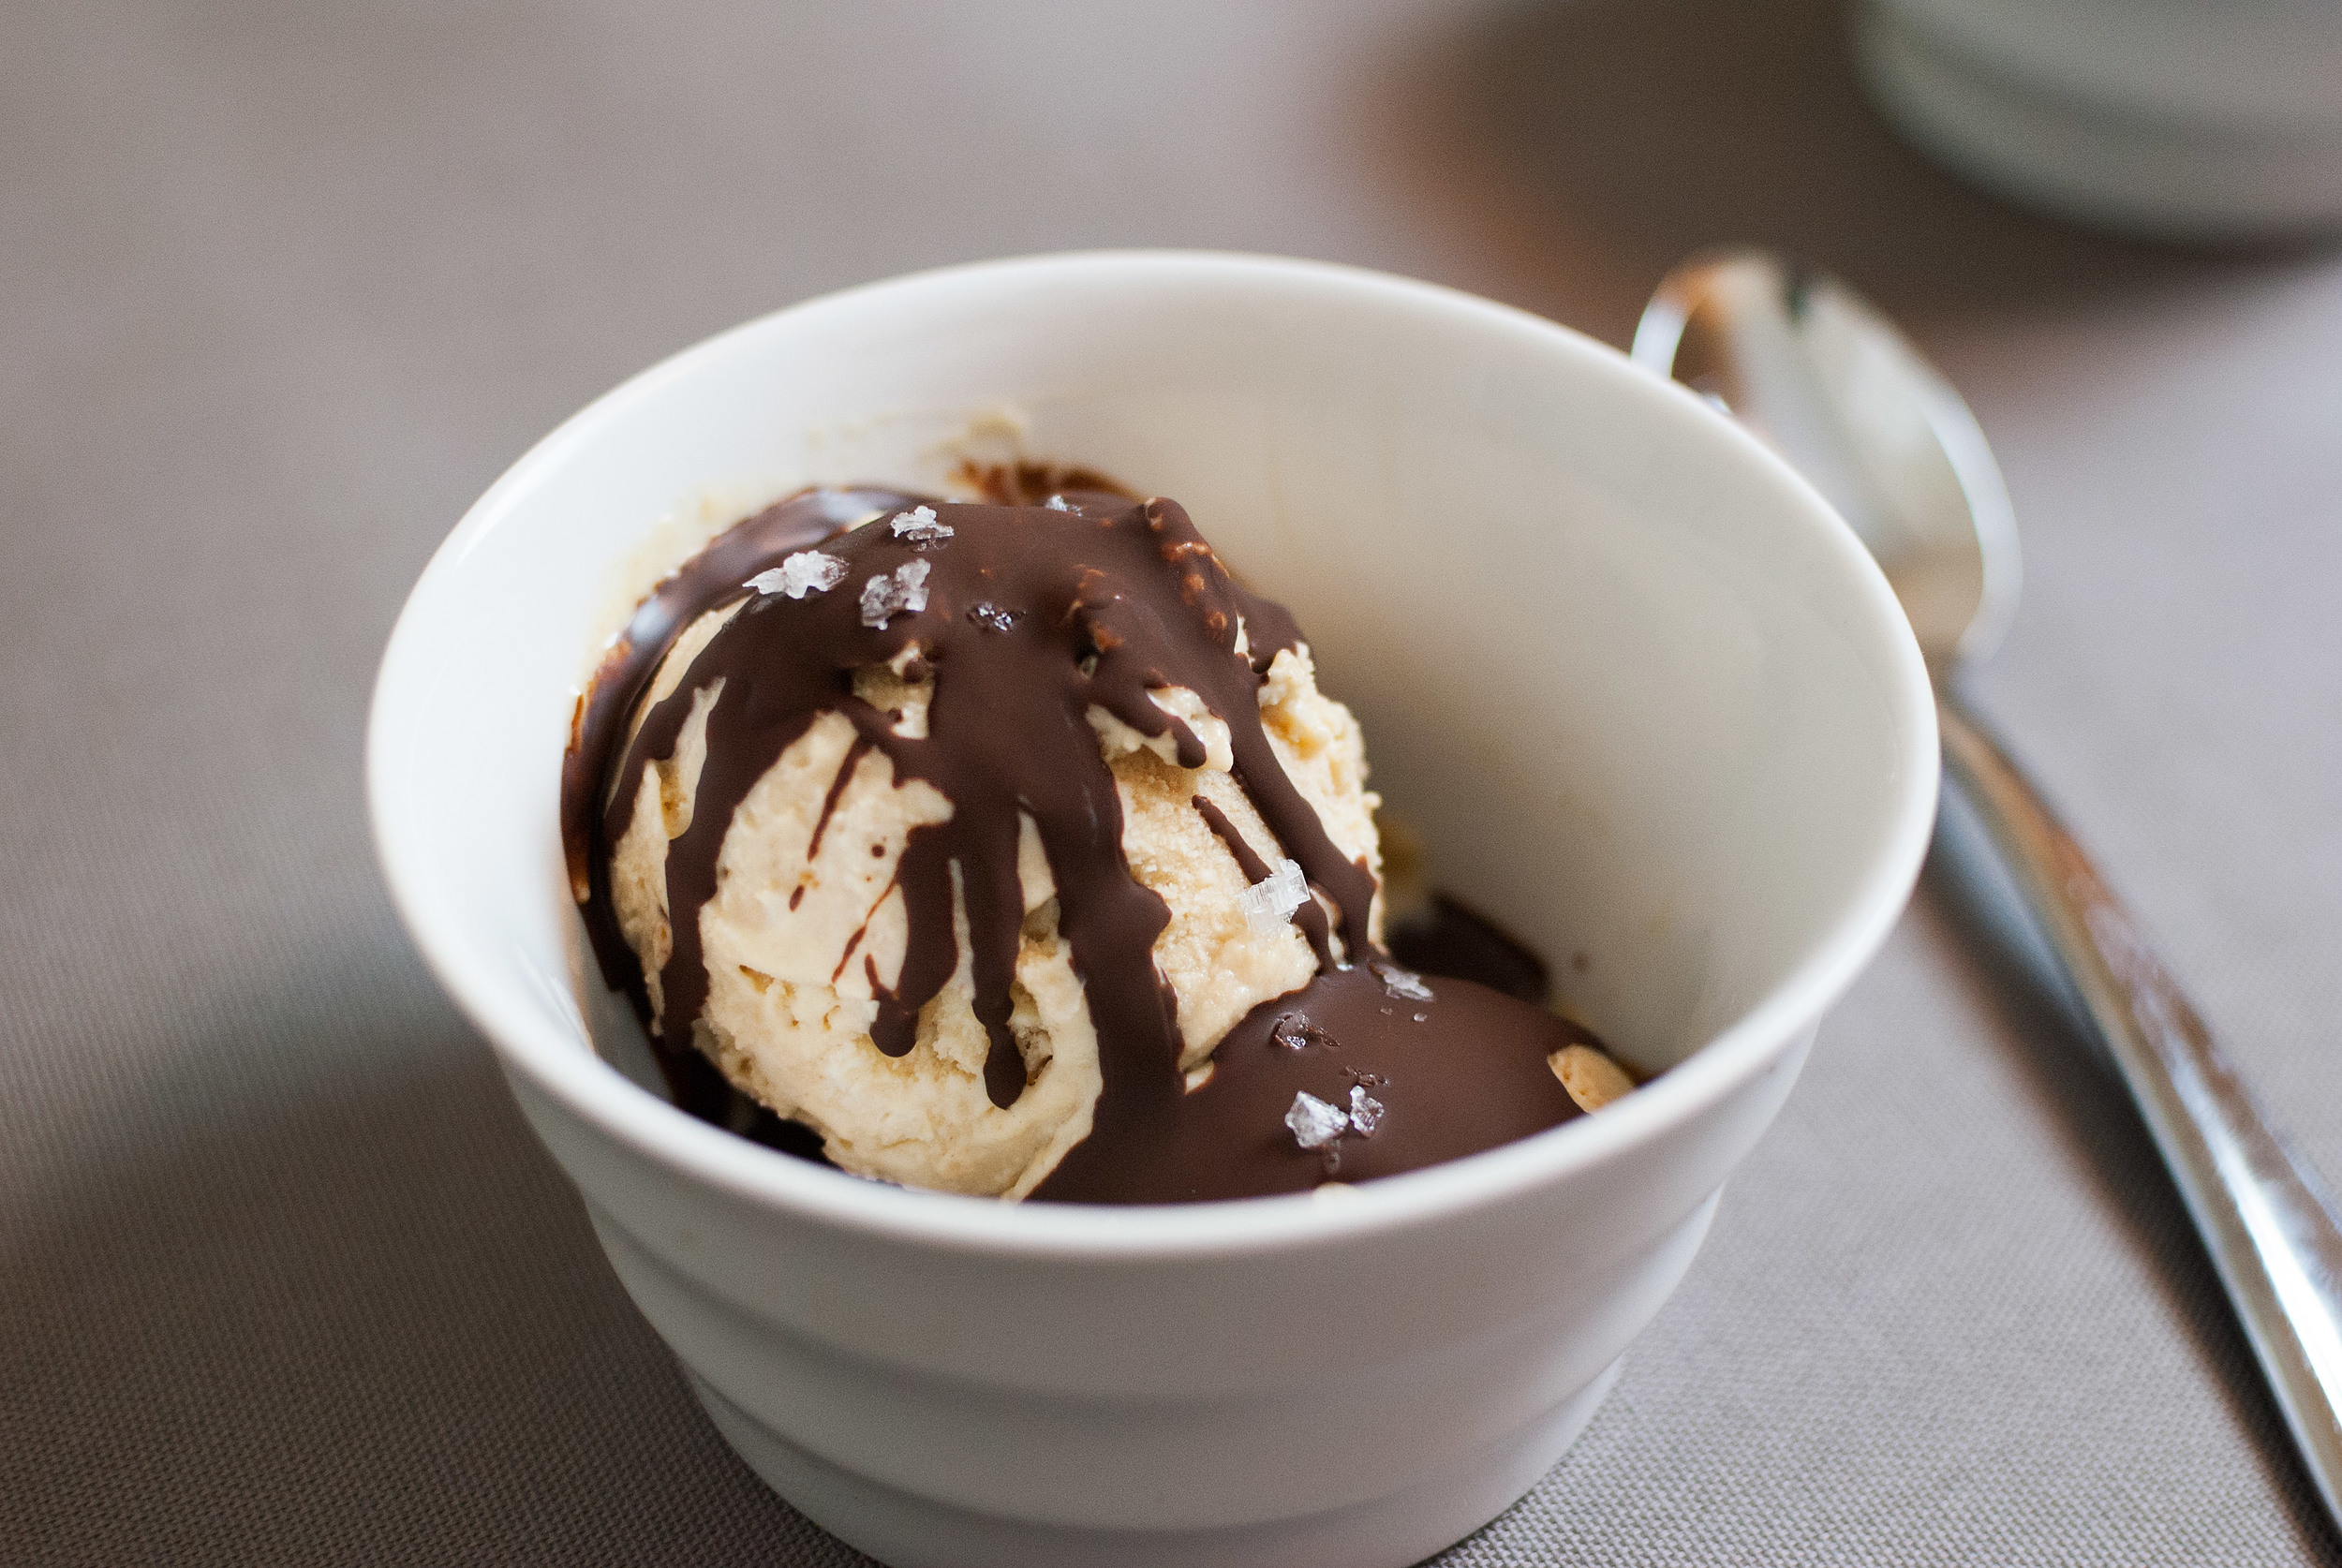
    Smoked Peanut Butter & Jelly Ice Cream:

    • 1 cup salted natural creamy peanut butter (look for one that tastes less sweet, like Trader Joe’s)
    • 2 cups heavy cream
    • 1 cup milk
    • ½ cup sugar
    • ½ tsp salt
    • ⅛ teaspoon of liquid smoke
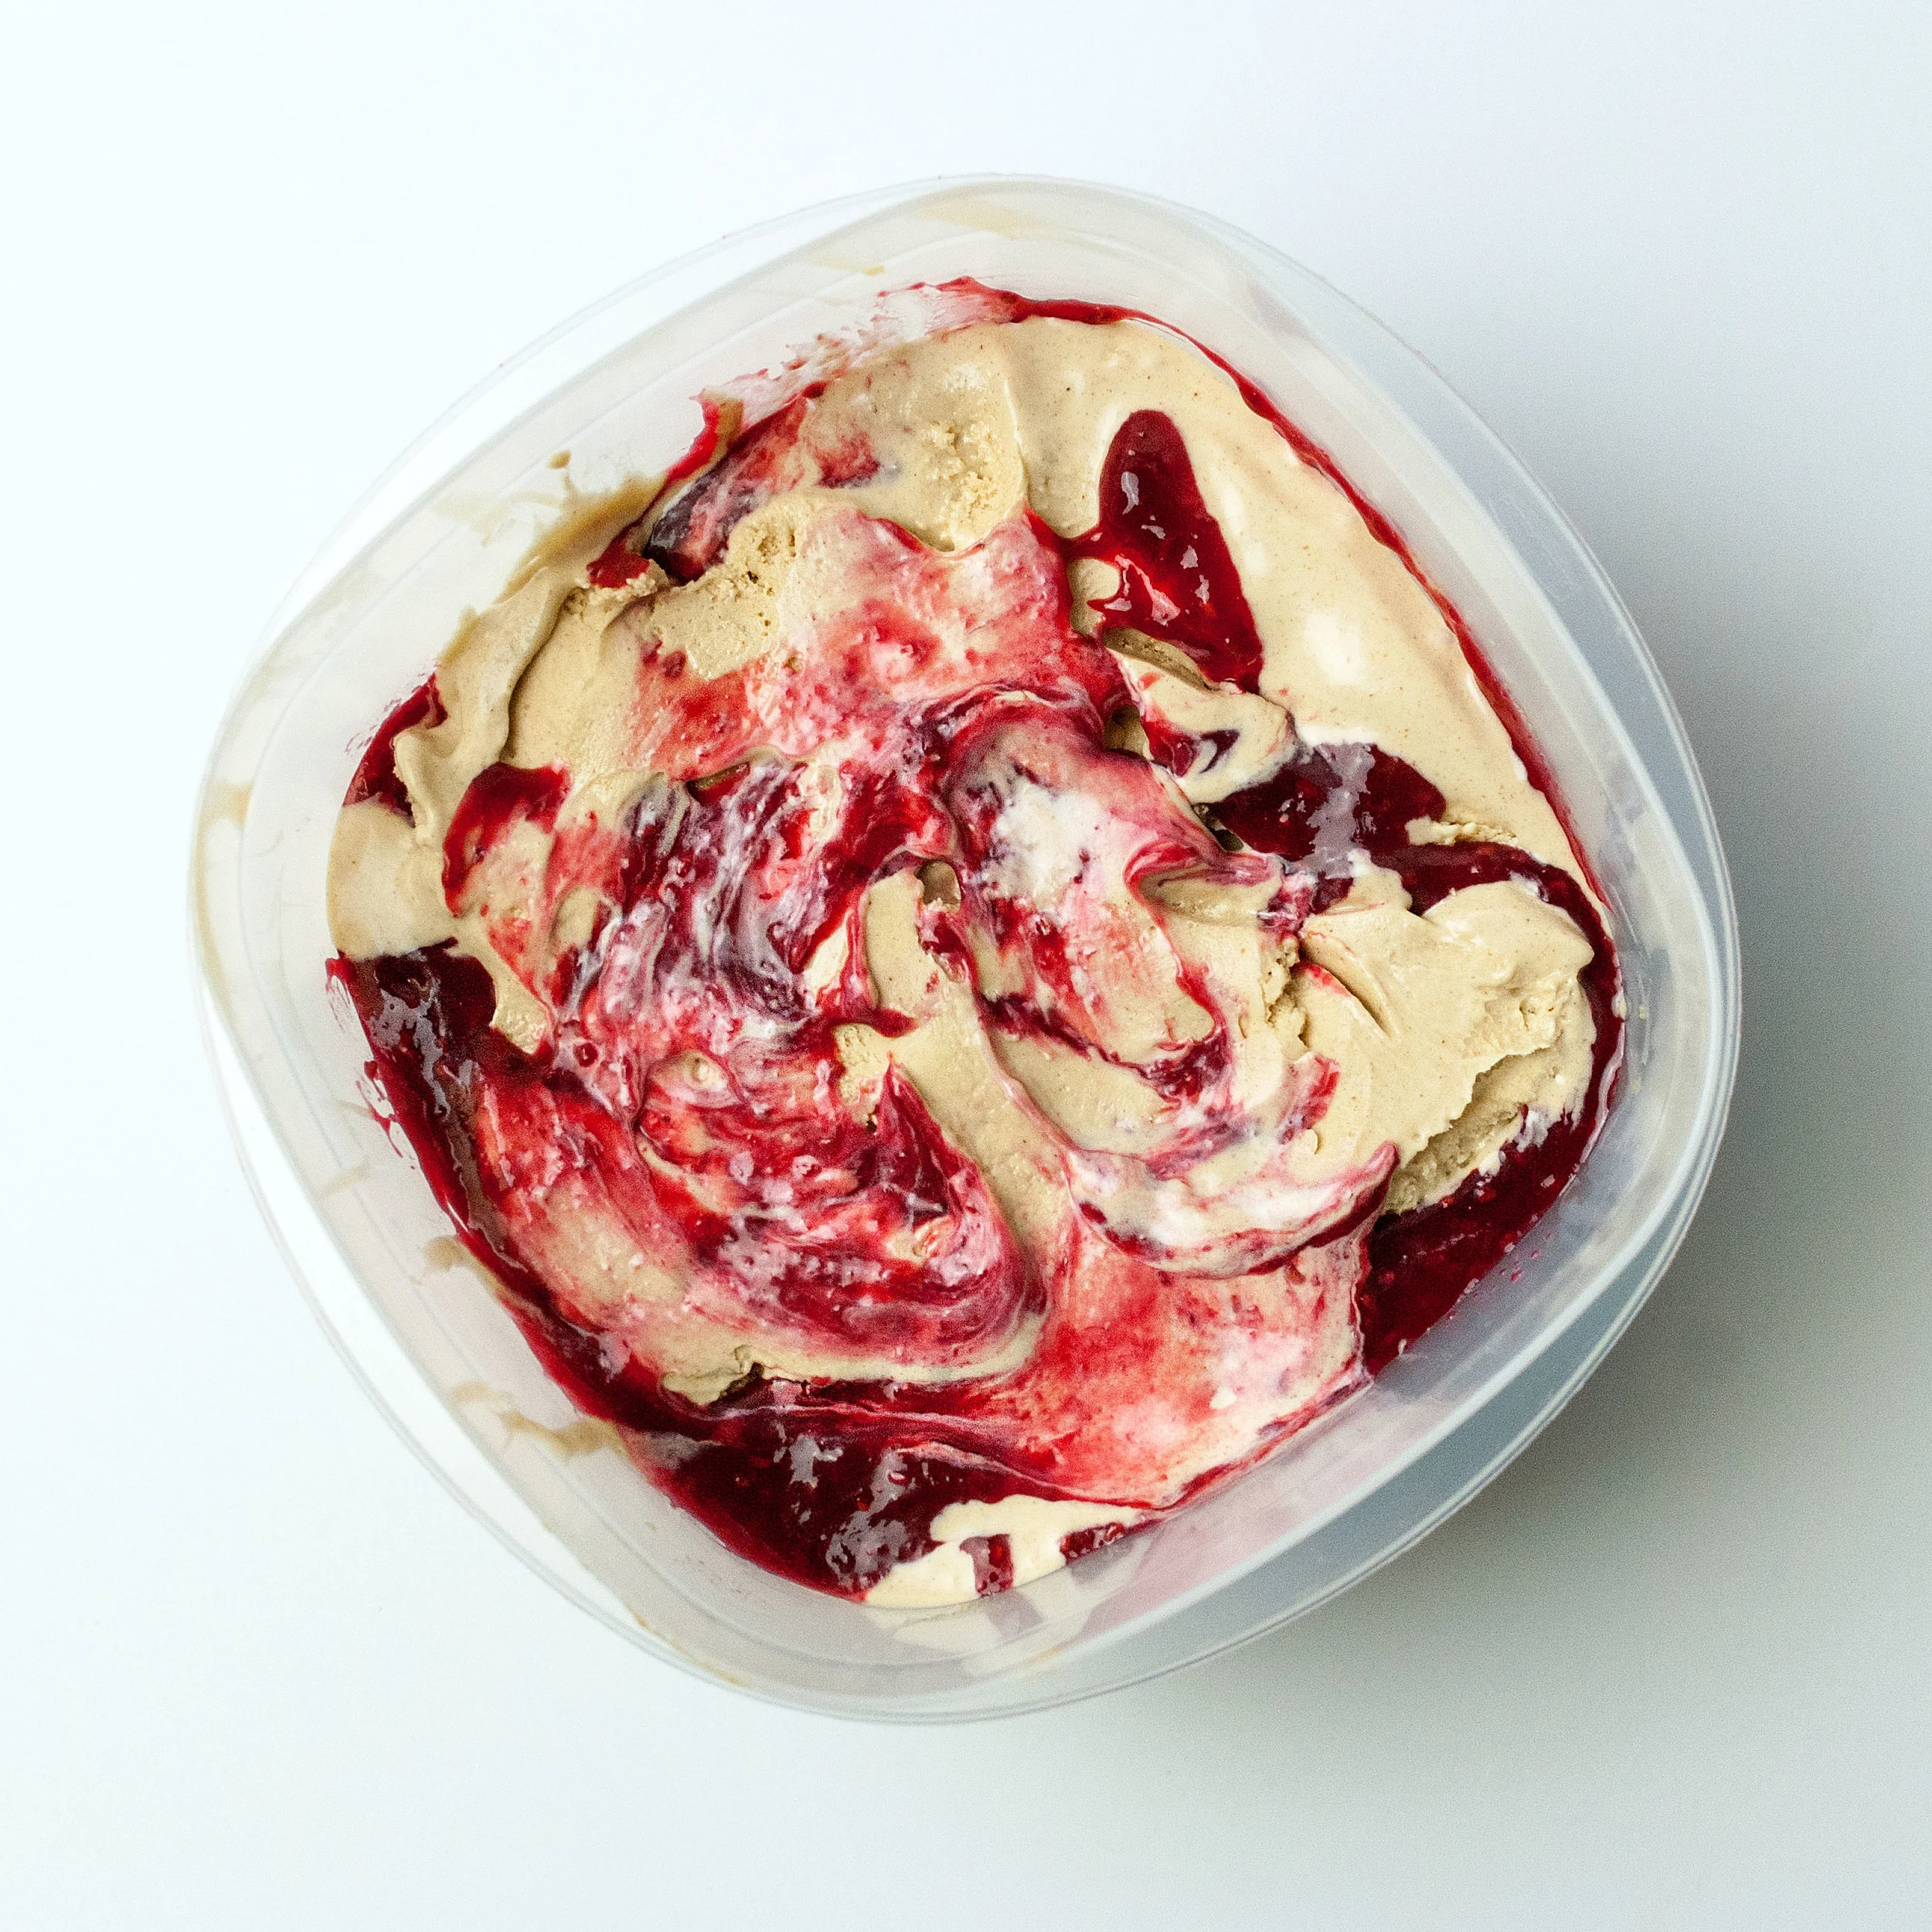
    • ½ cup jam
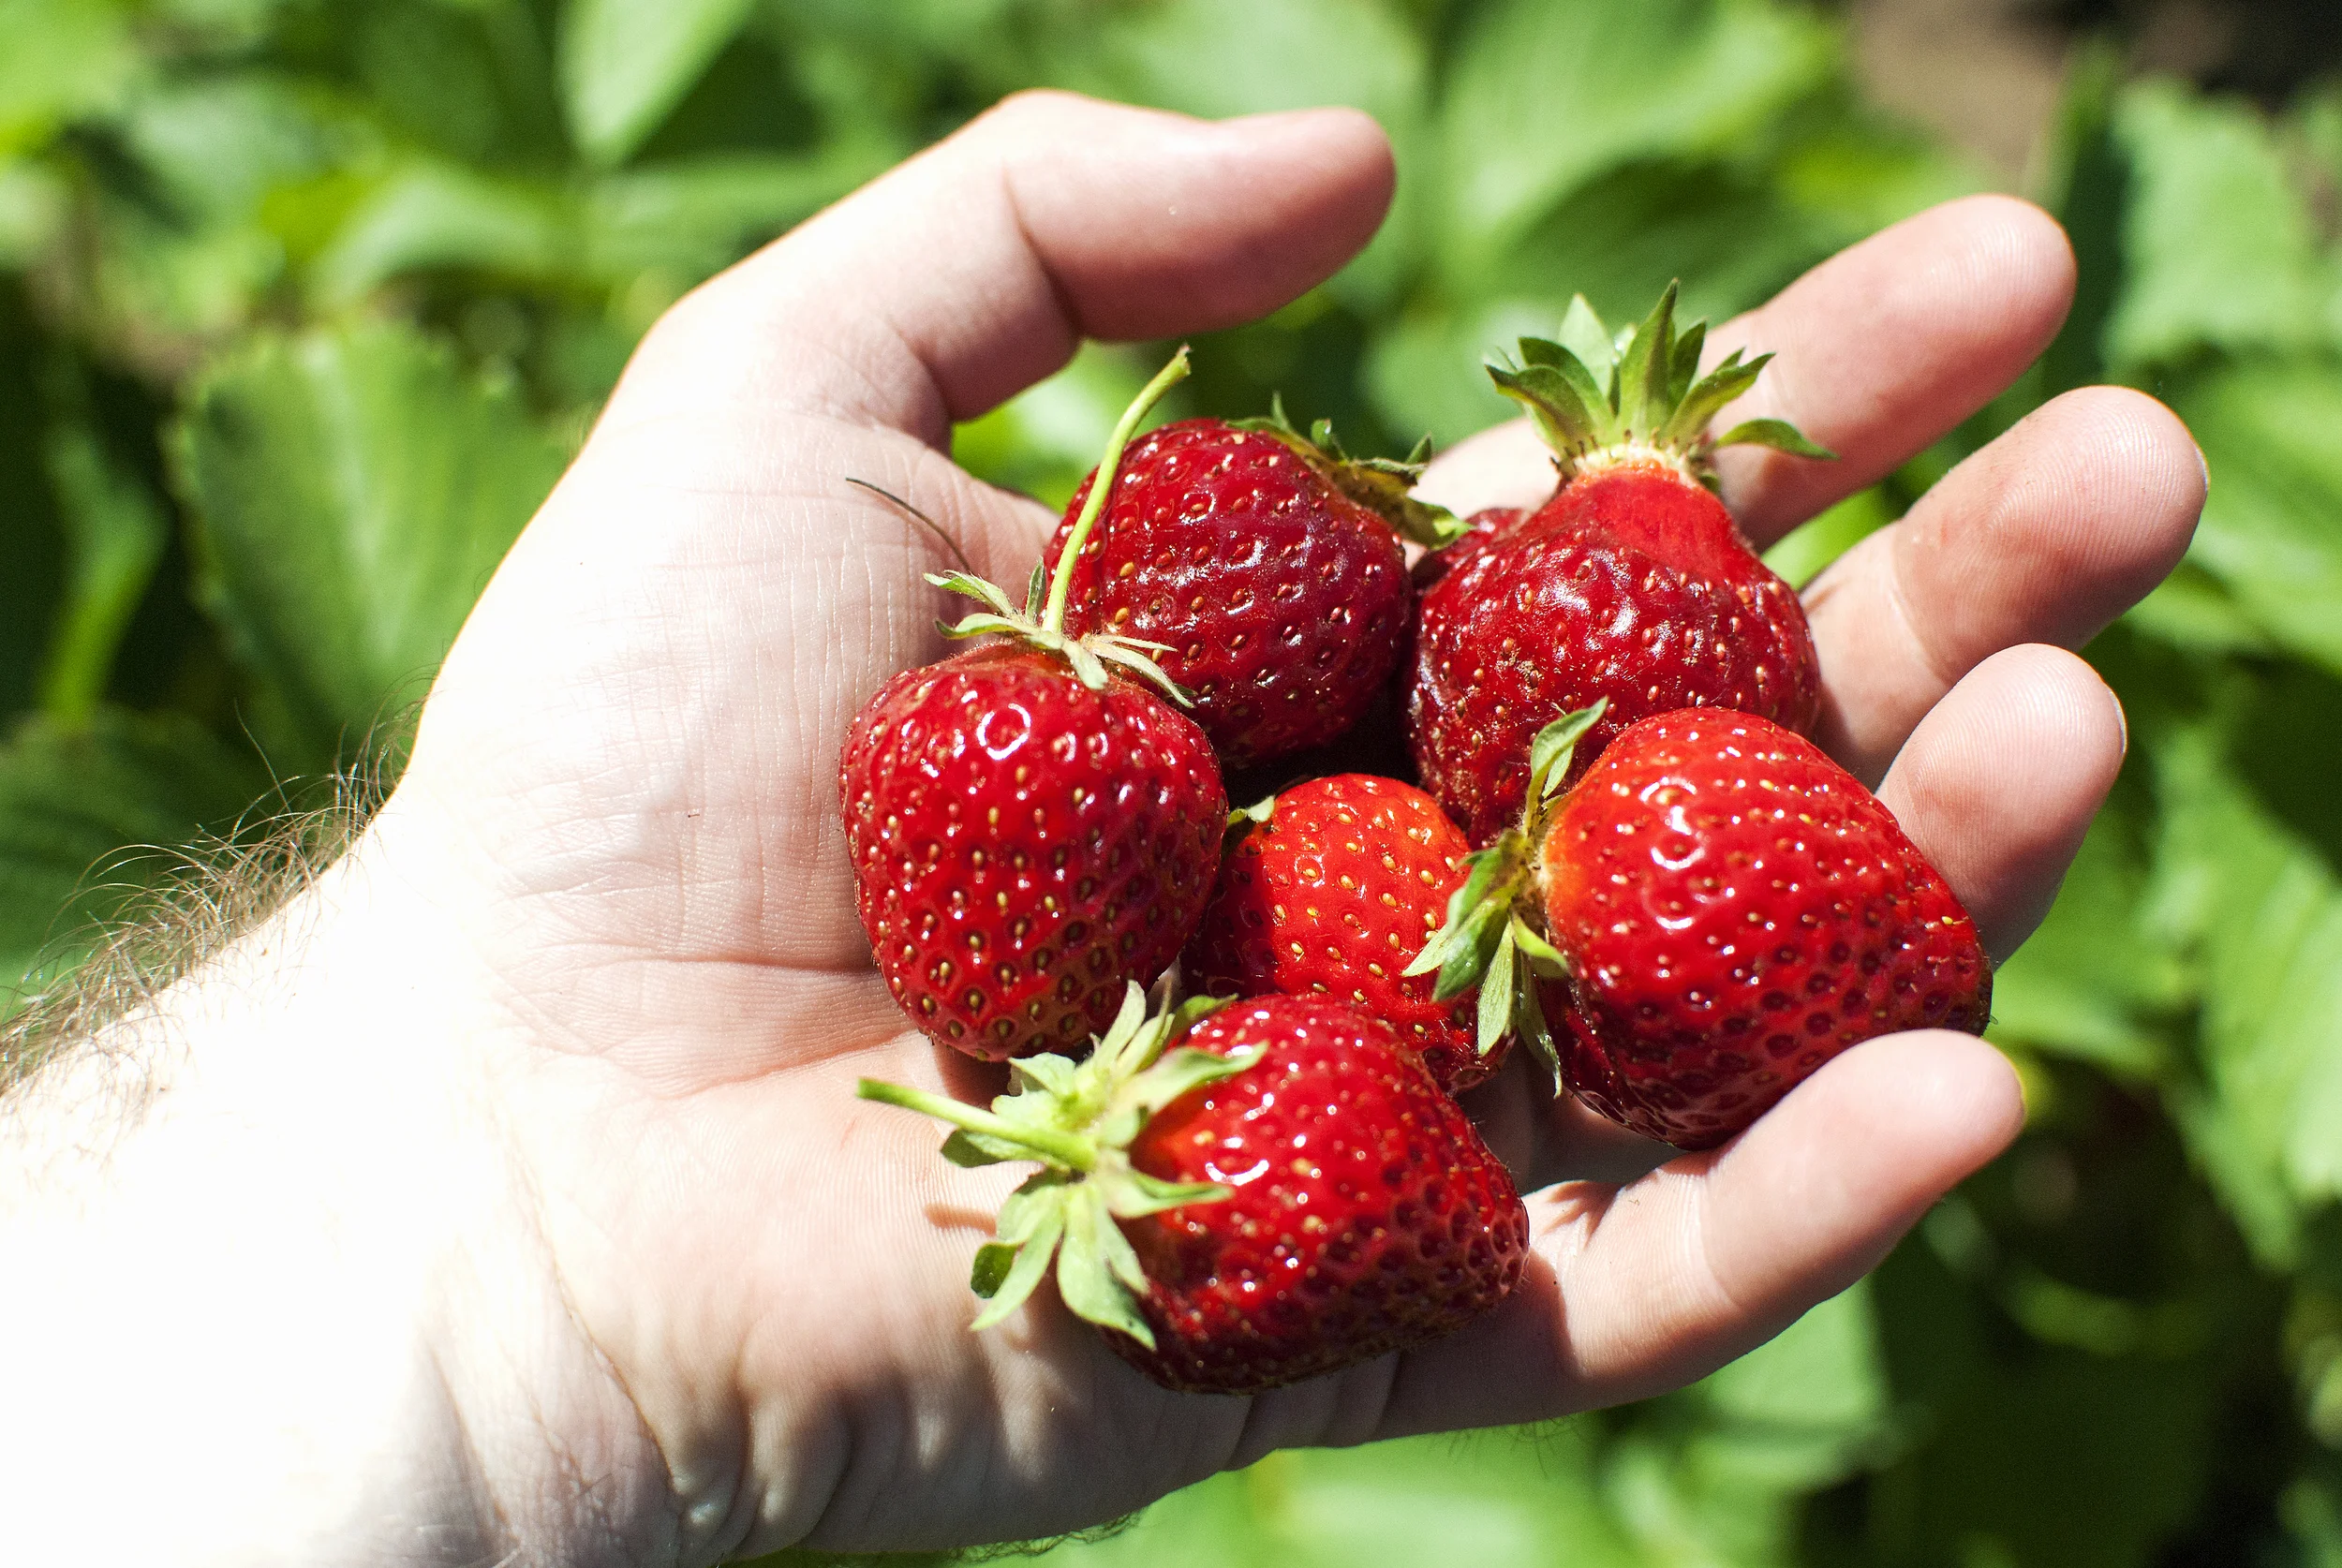
      • Note: the type of the jam is up to you on this one; just imagine what kind of flavor you’d love to have on your peanut butter and jelly sandwich, and that’s probably the flavor you should go with. We used a homemade raspberry jam and it was a religious experience, so…

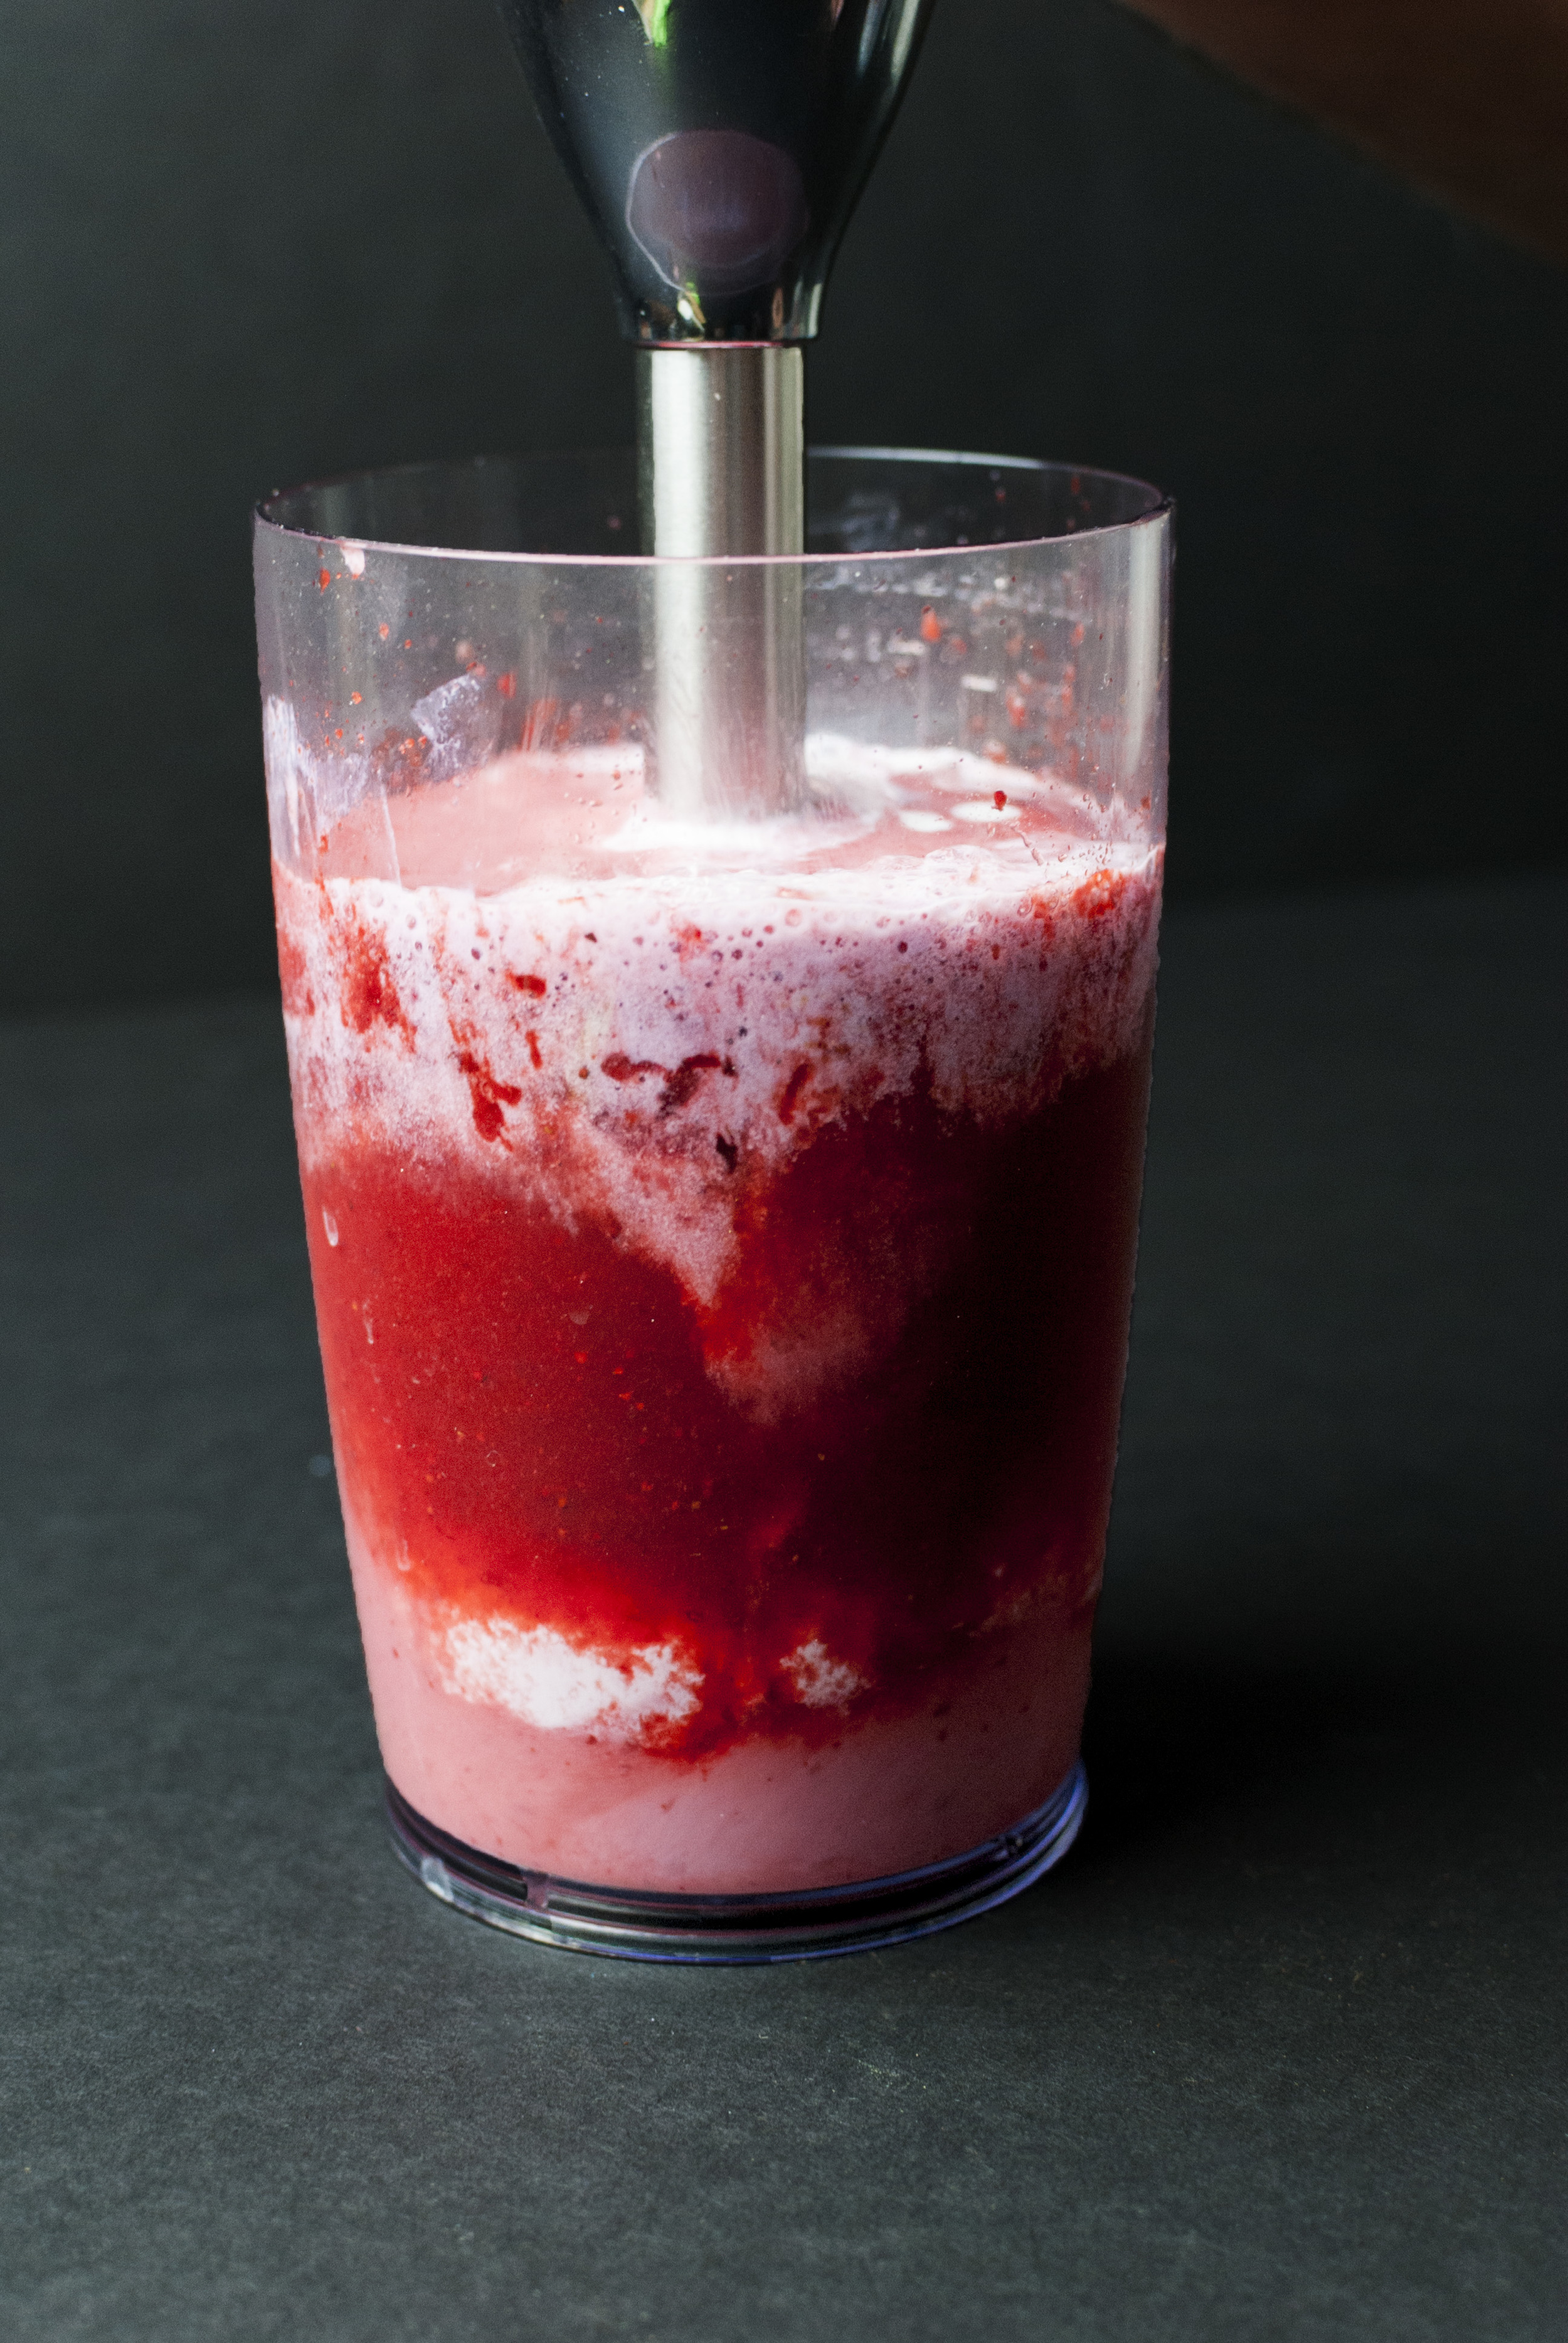
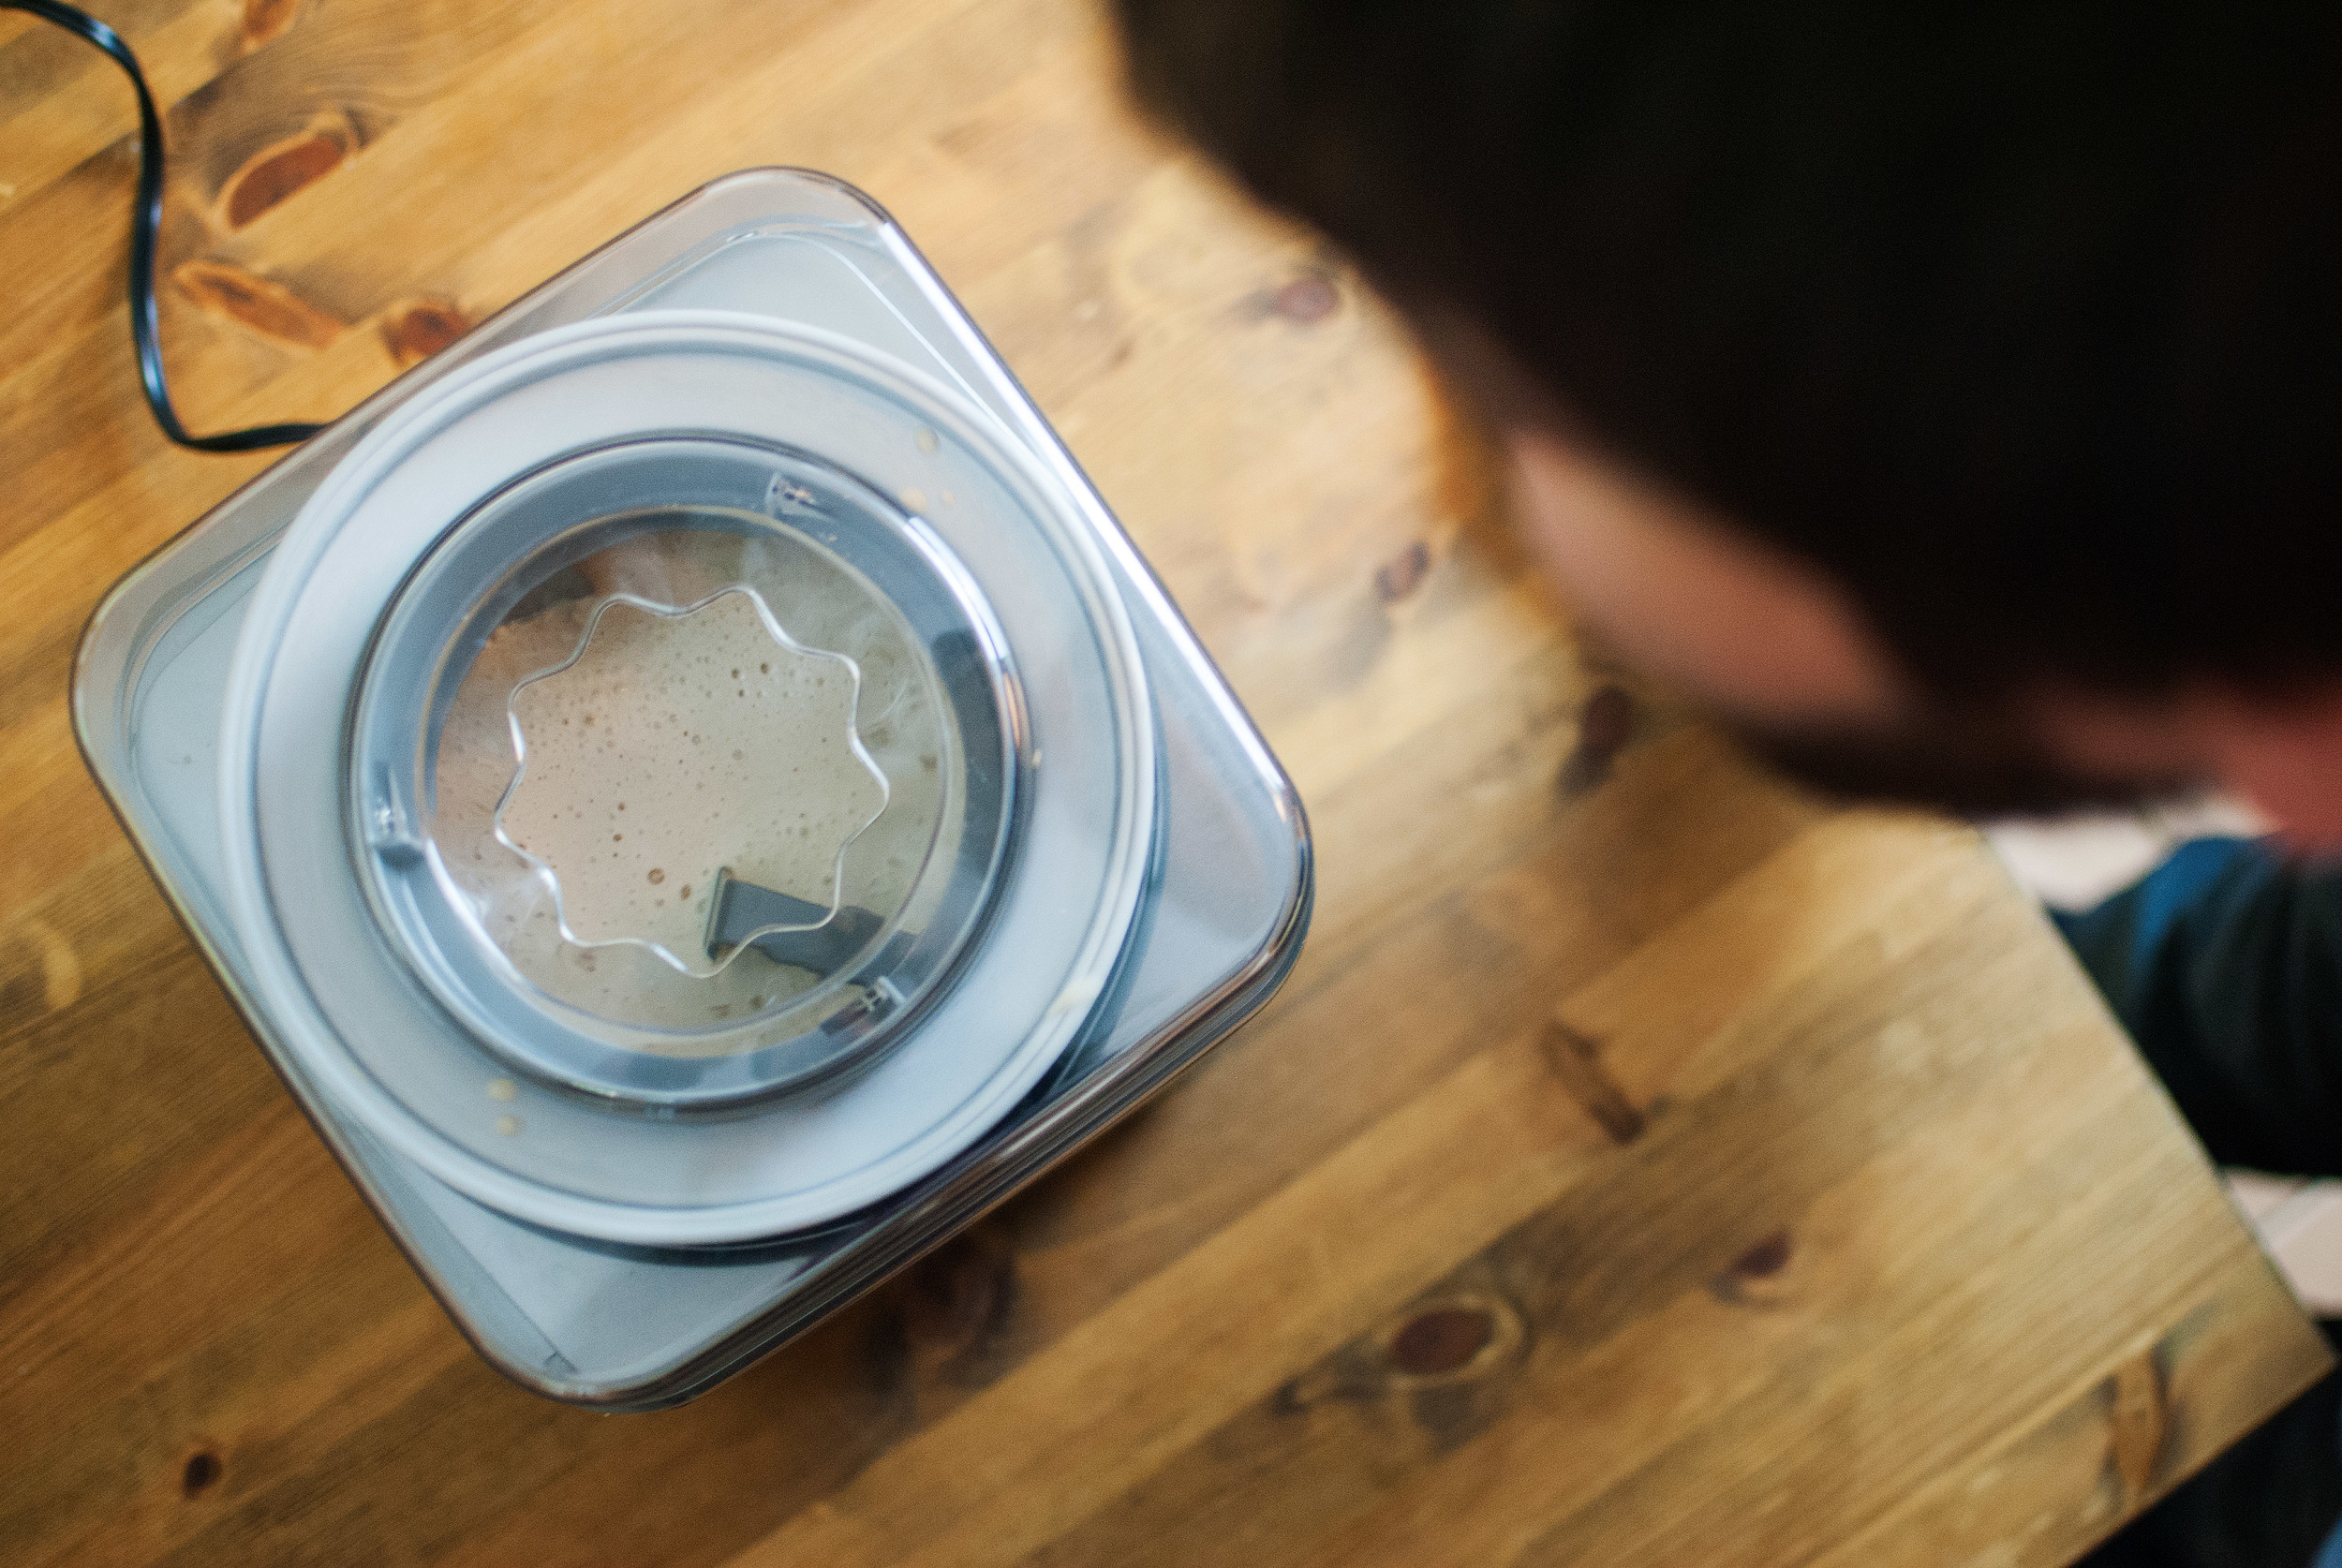
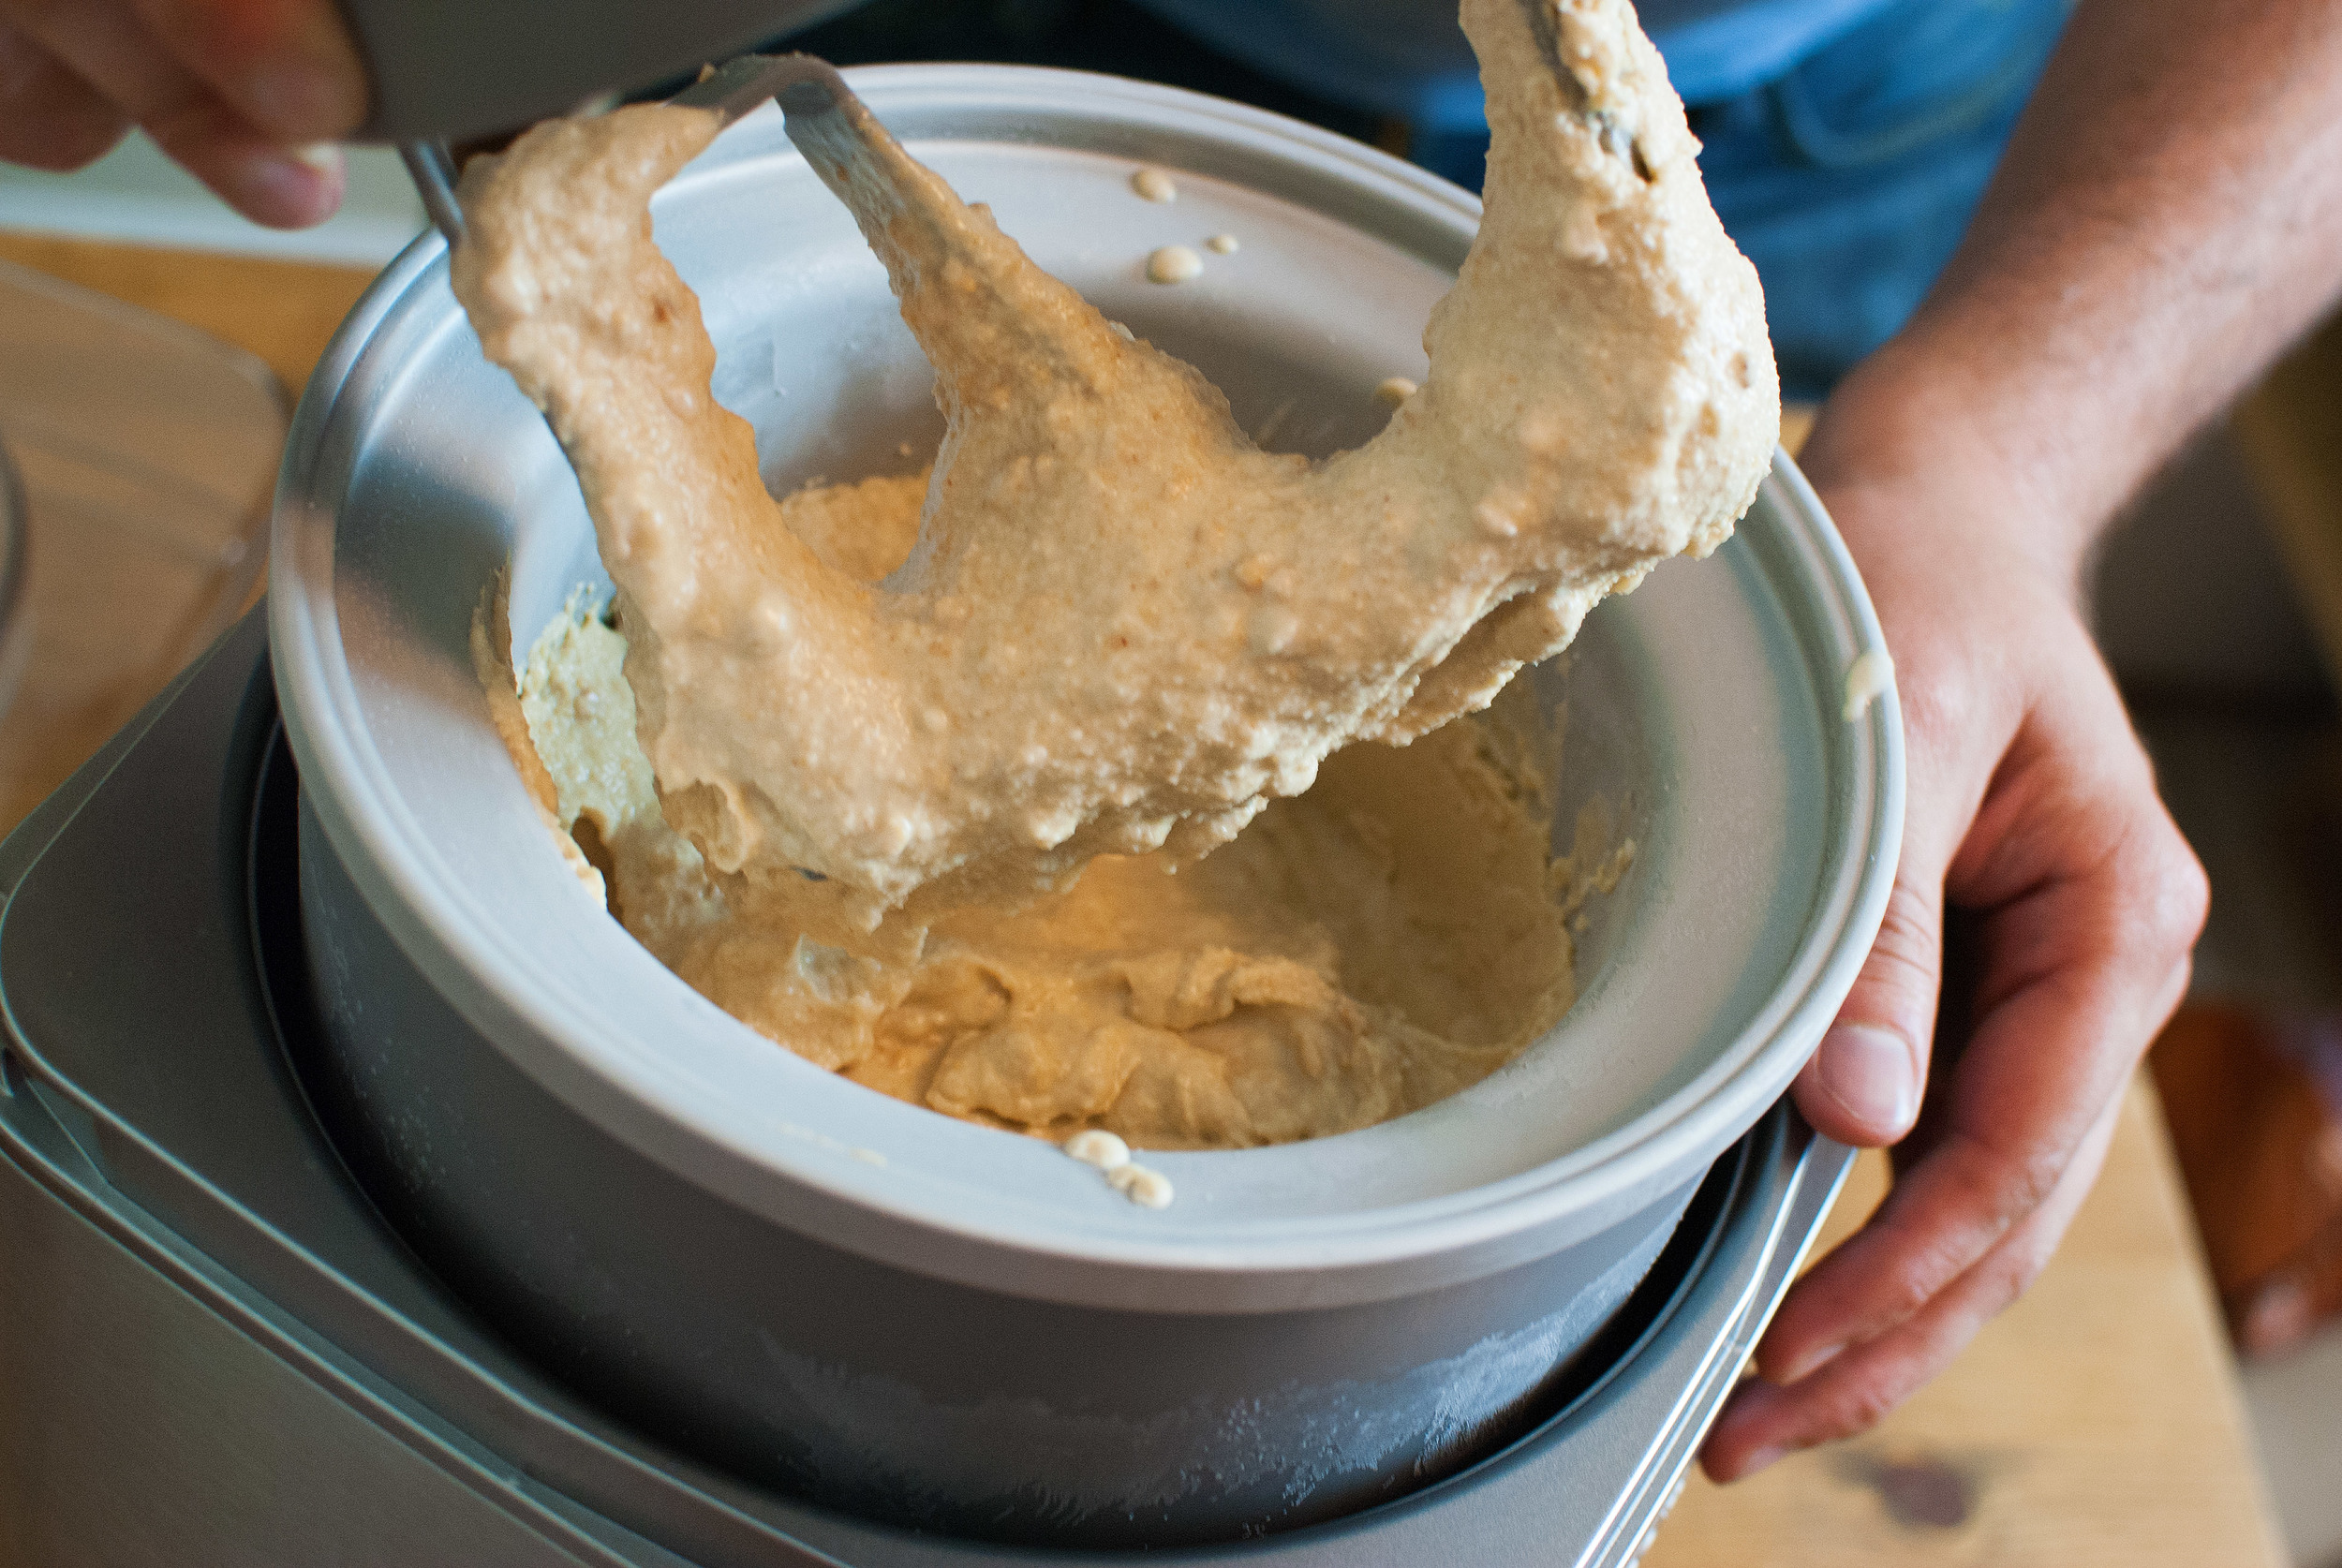
    In a bowl large enough to hold all the ingredients except the jam, add the peanut butter, sugar, and salt, then whisk together until completely incorporated. Add the milk and whisk together until the sugar has completely dissolved; you shouldn’t hear any scratching noises coming from the bottom of the bowl. Proceed to add the cream and the liquid smoke, then mix together until just incorporated. You don’t want to mix the cream anymore than you need to.

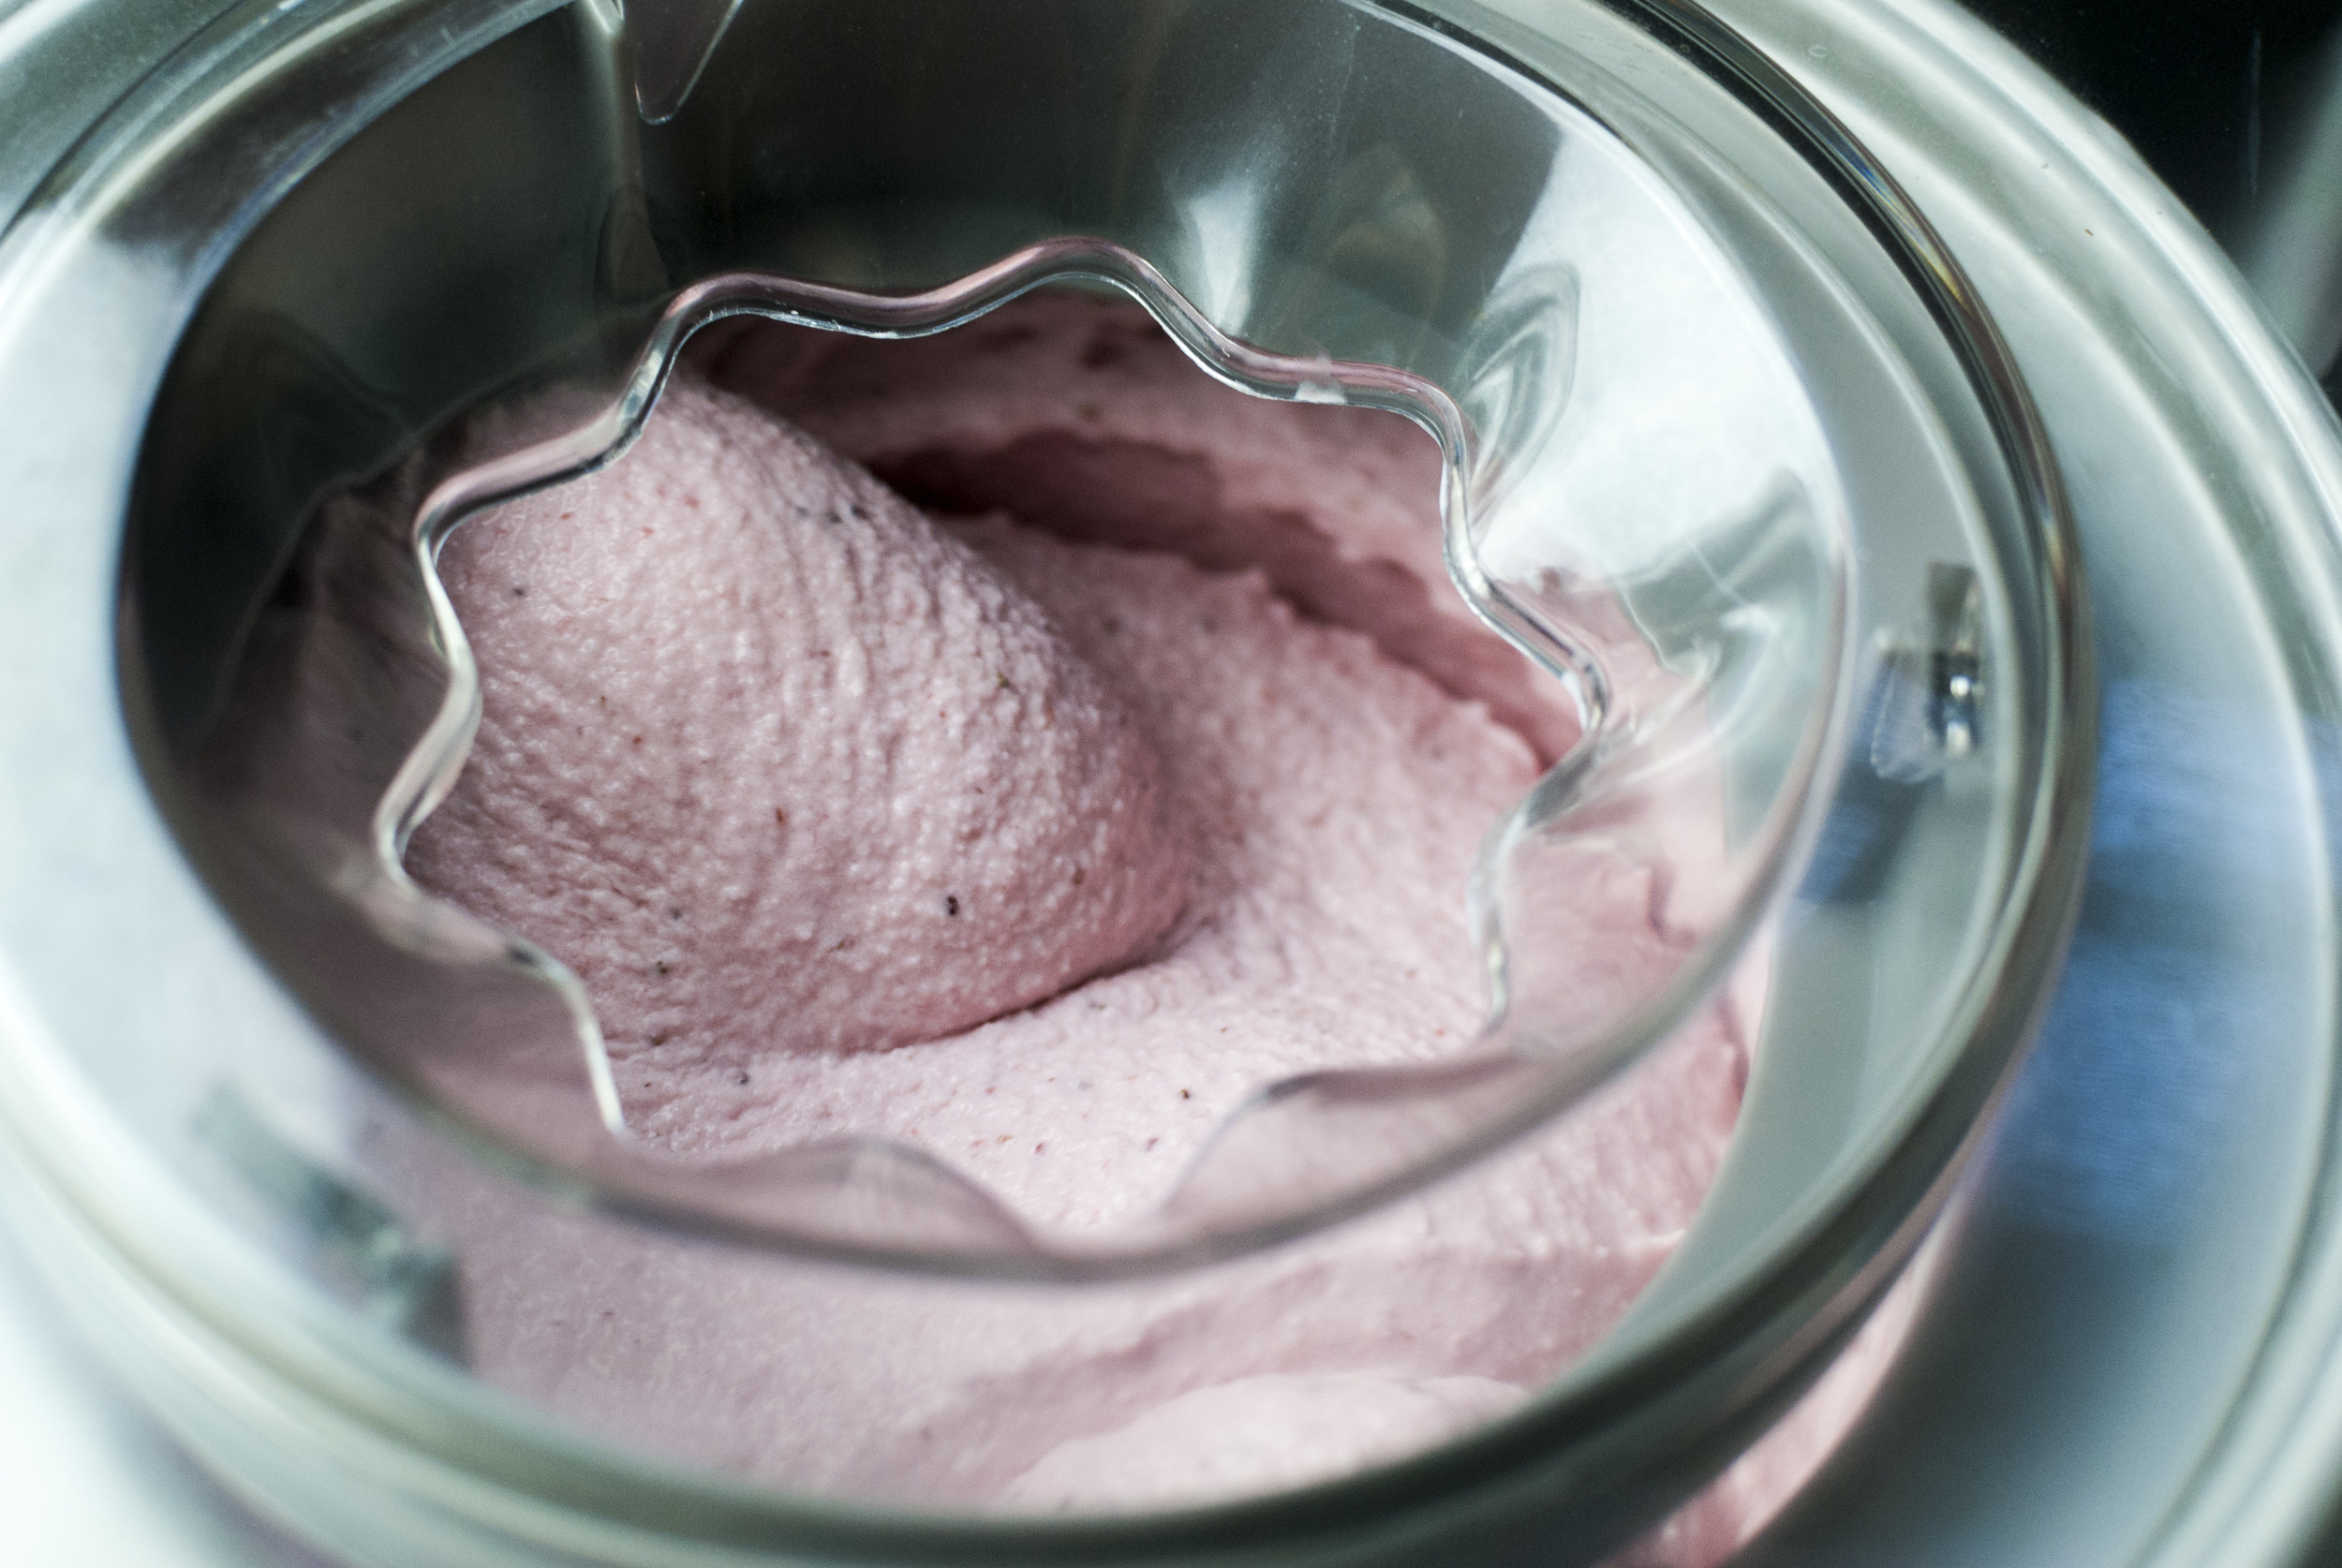
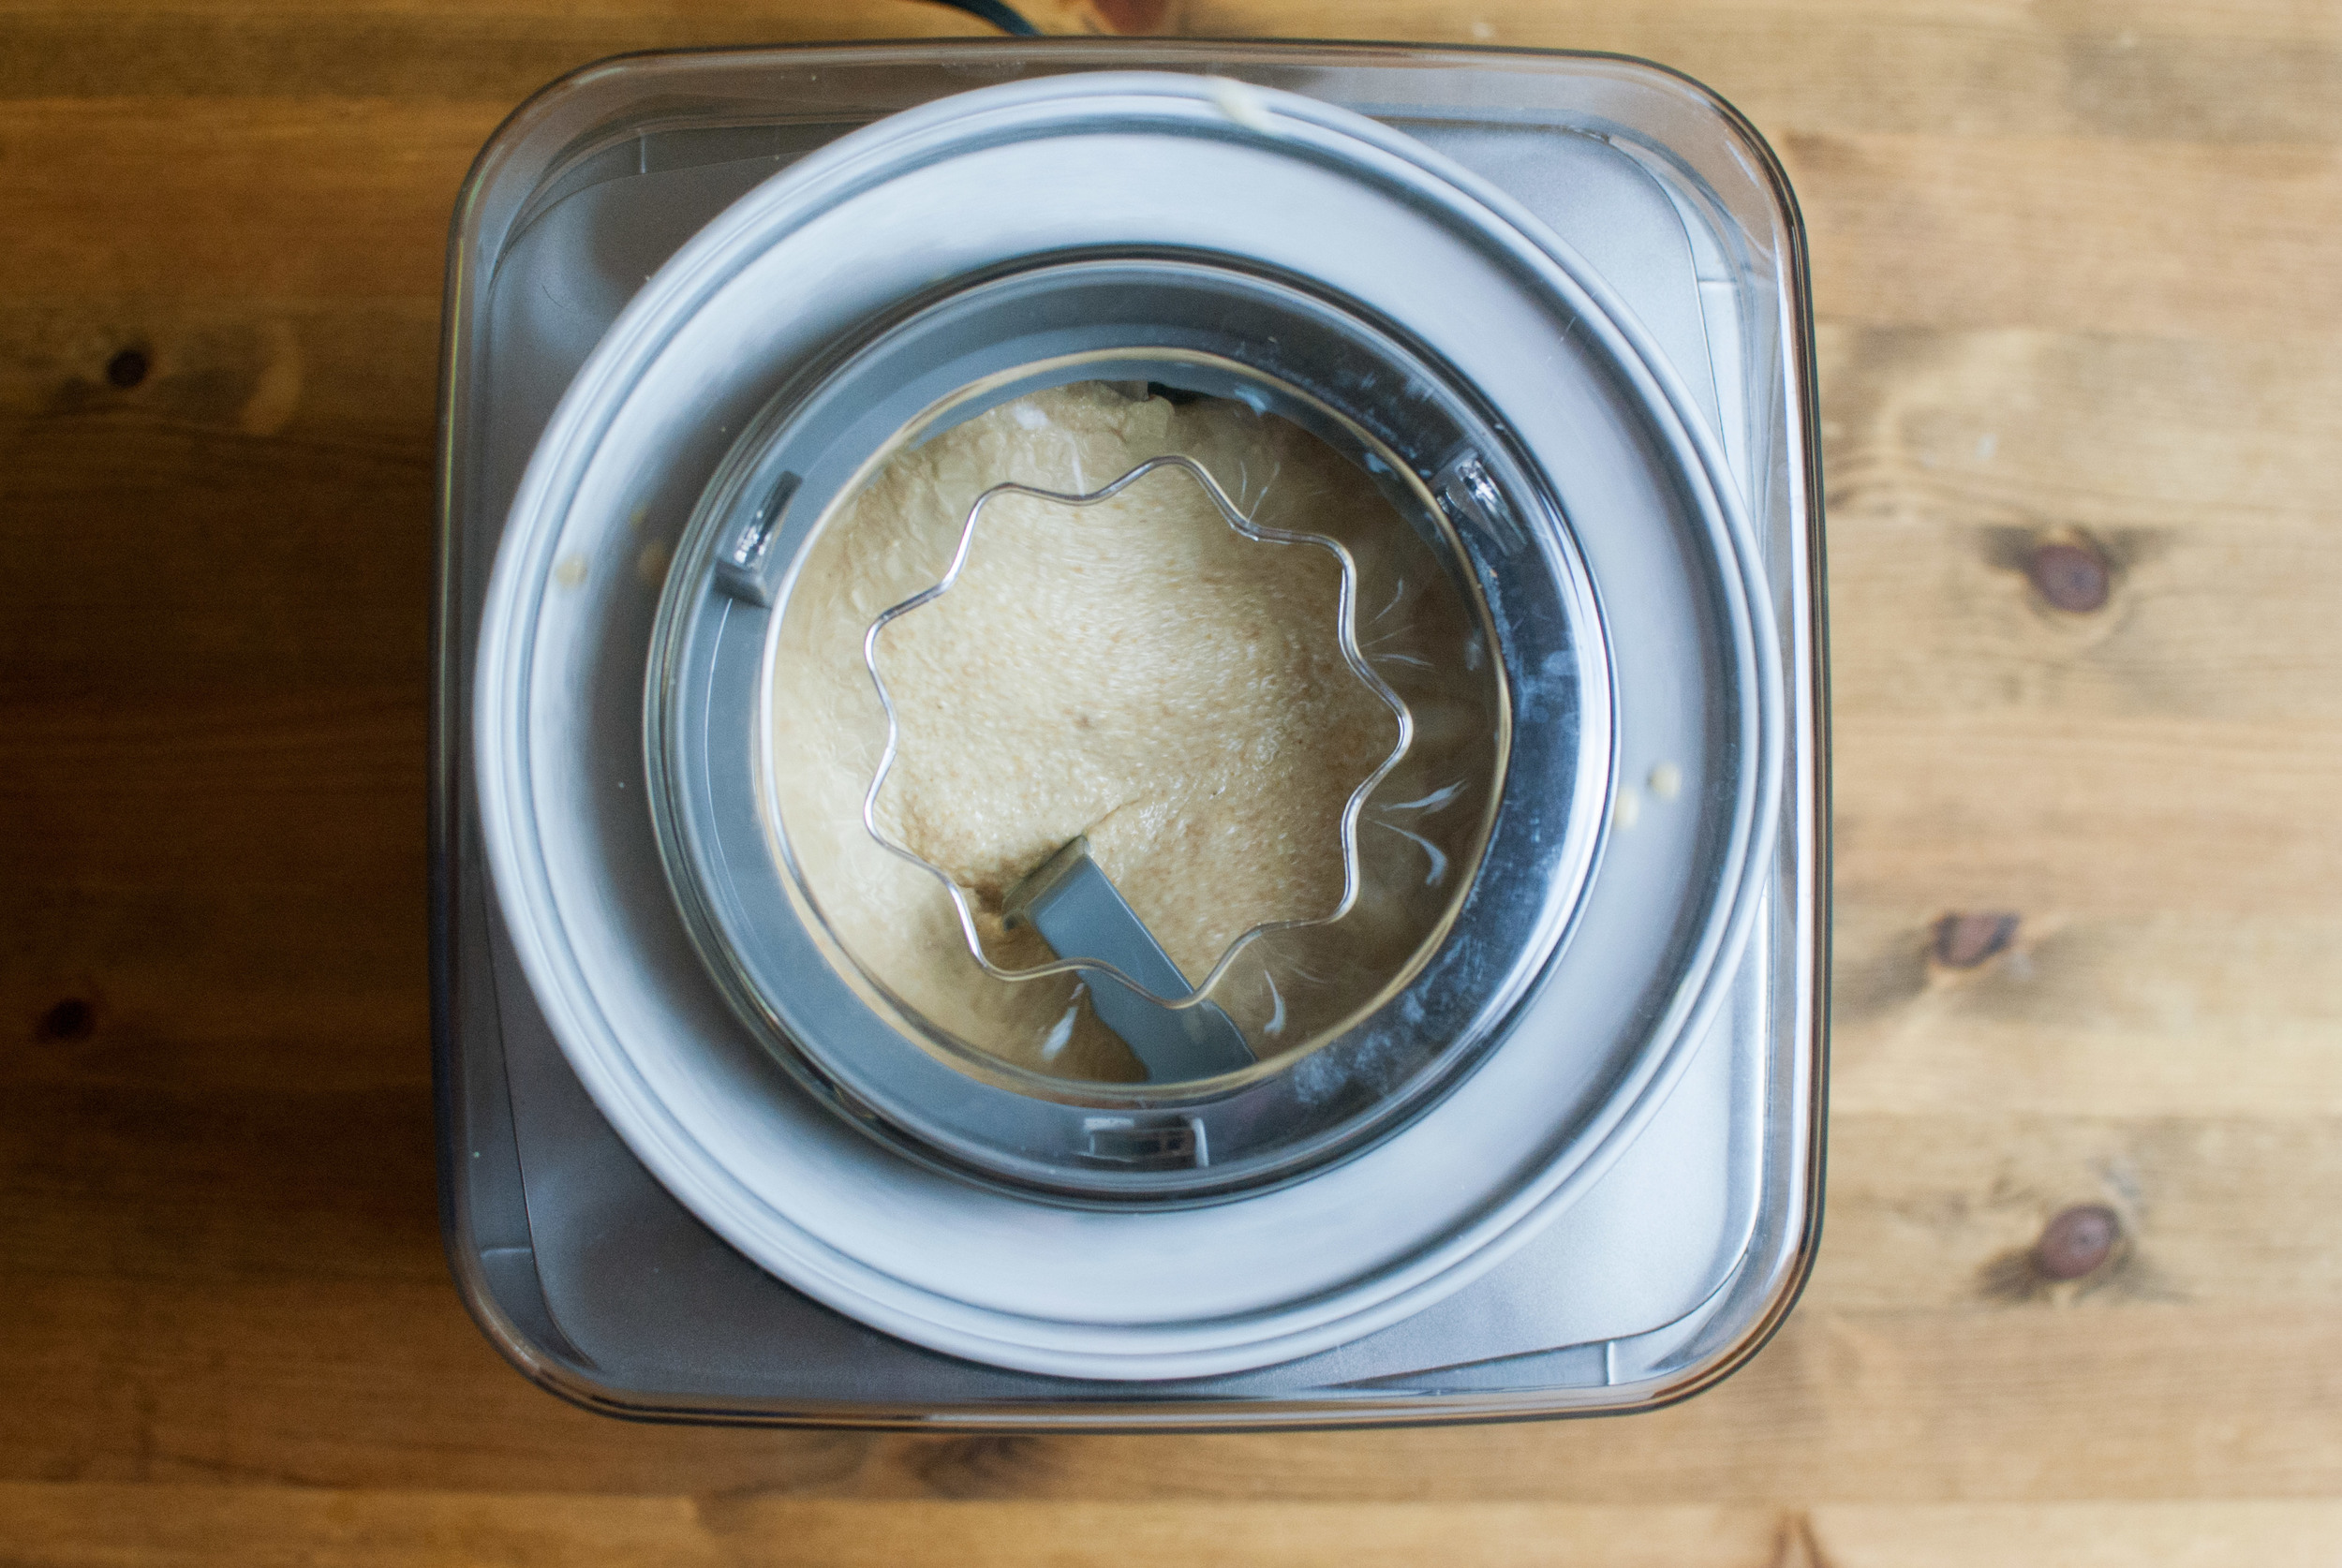
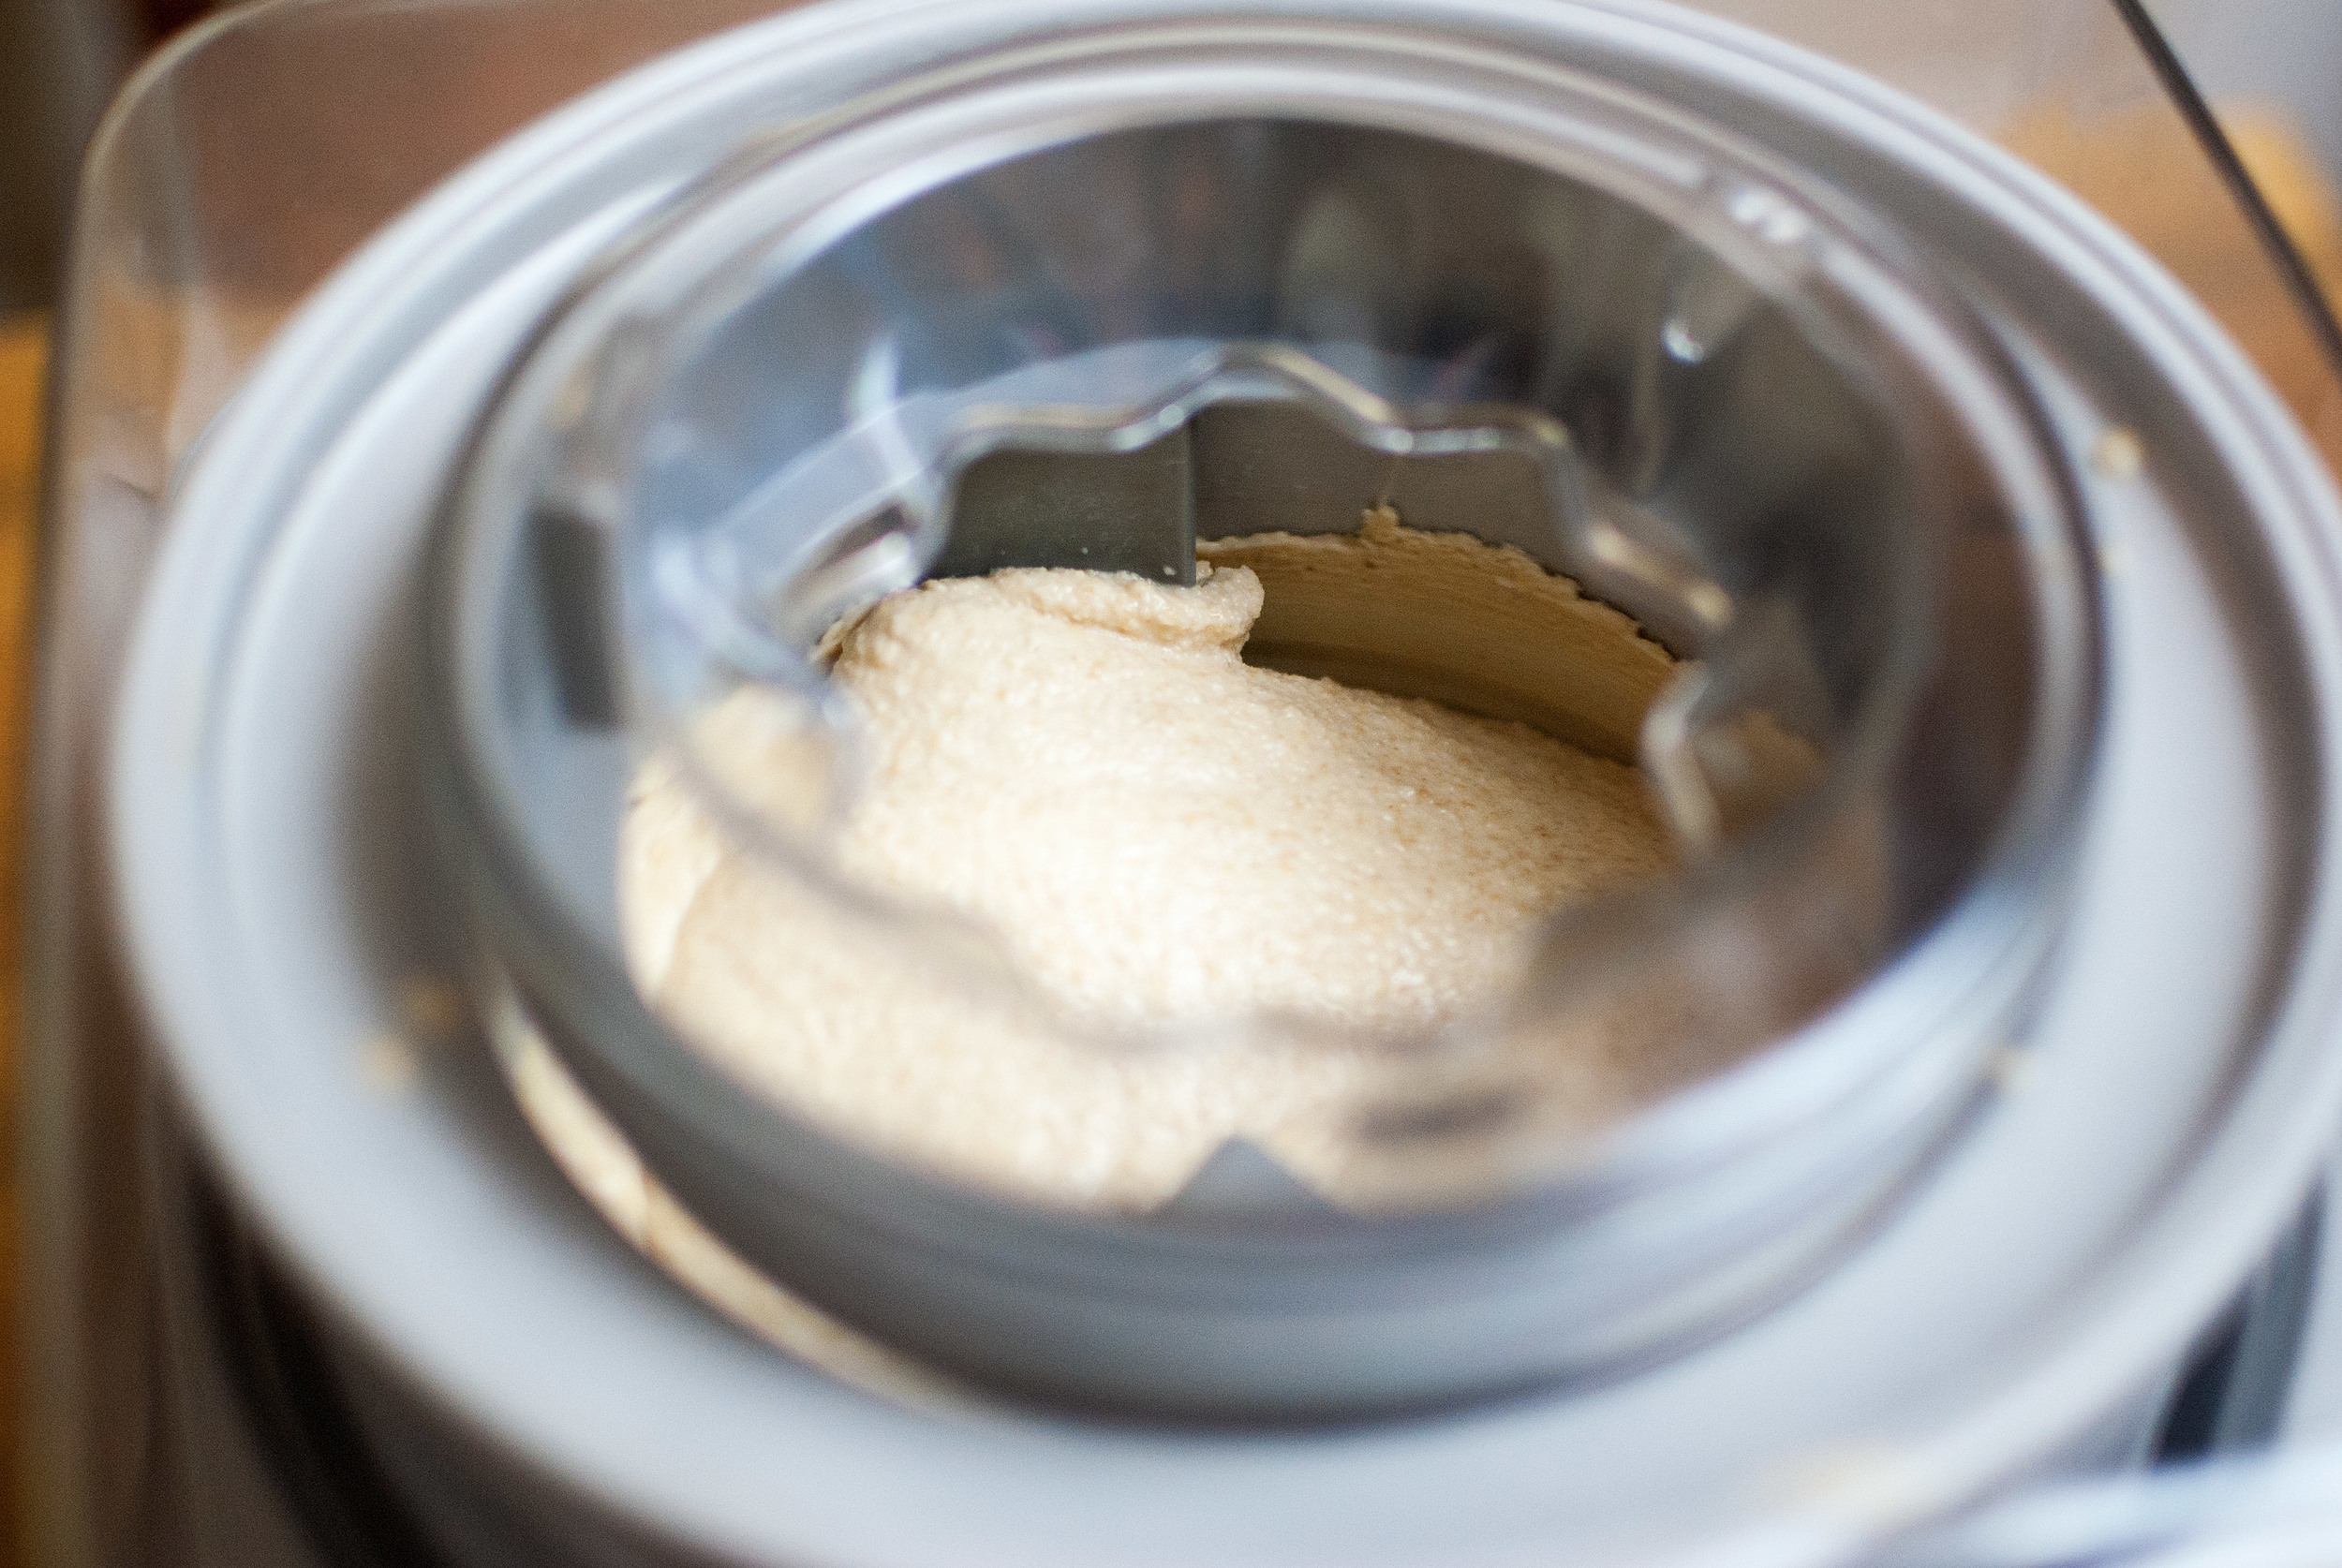
    Pour the mixture into your ice cream churner that has been prepared according to your models instructions and churn. If you’re using a frozen bowl, like ours, you’ll want to churn it for around 25 minutes, checking frequently after the 22 minute mark to make sure that it’s not over-churning. (Beware over-churning because you don’t want to make frozen butter!)


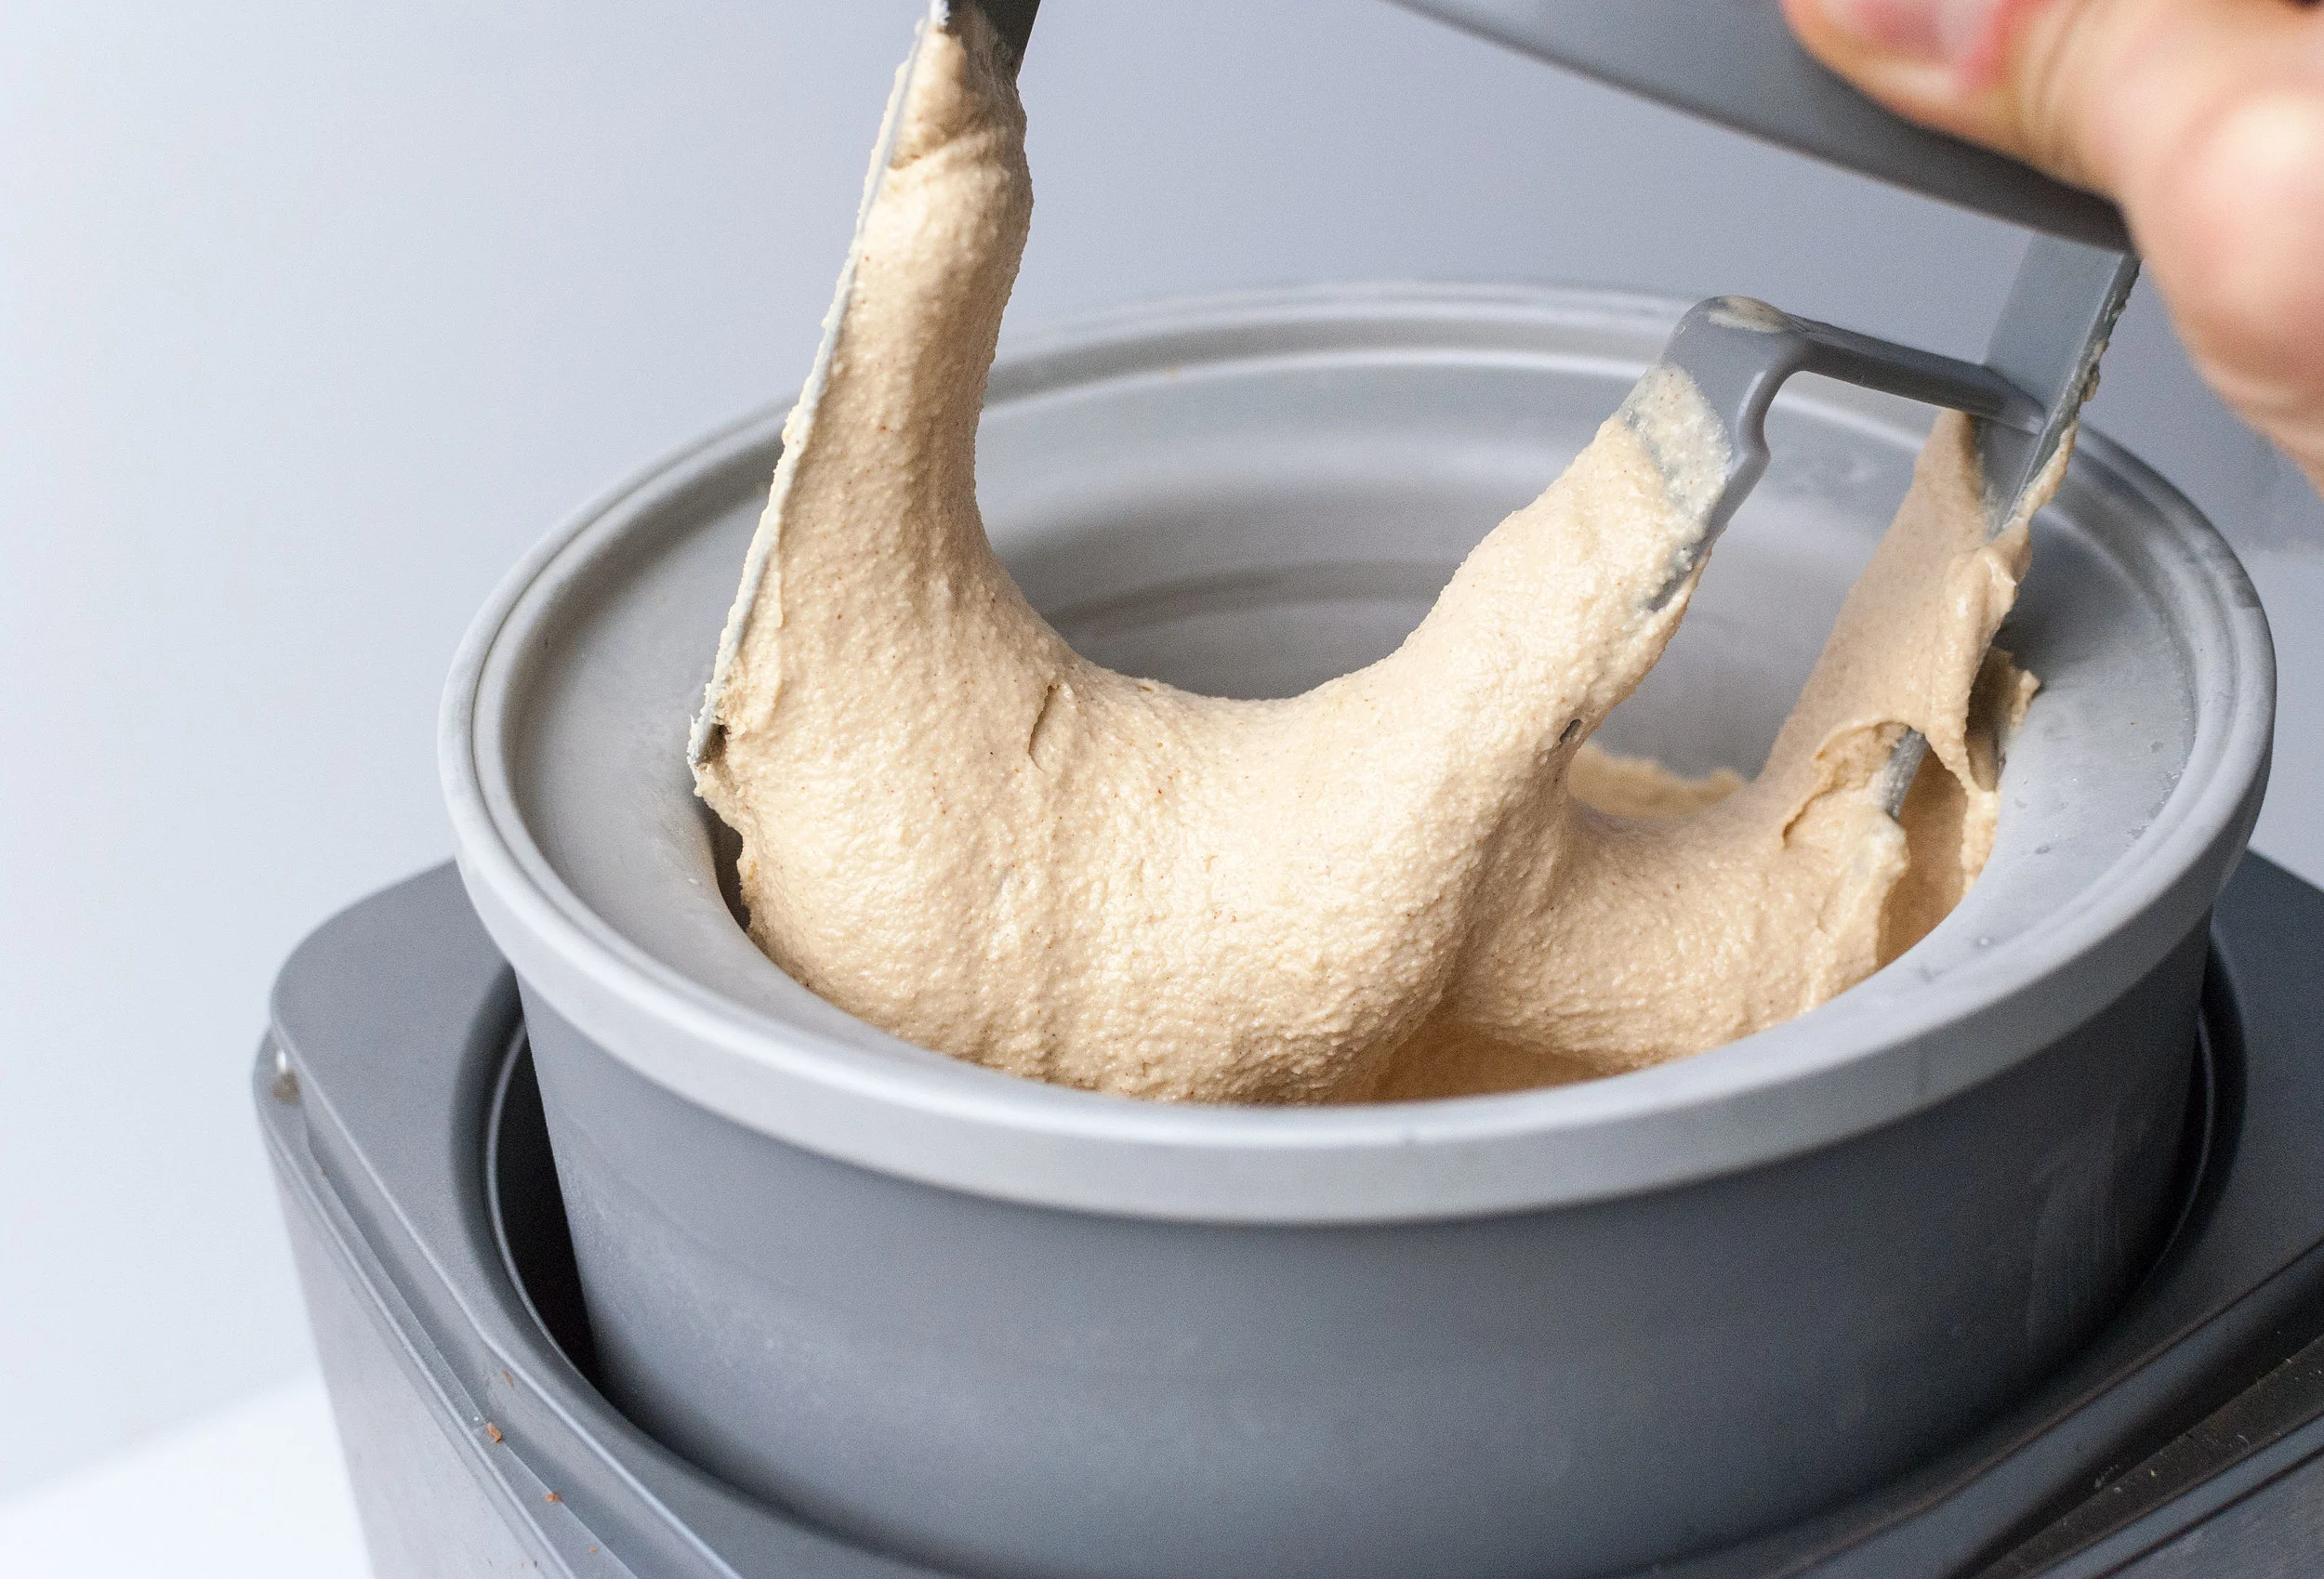
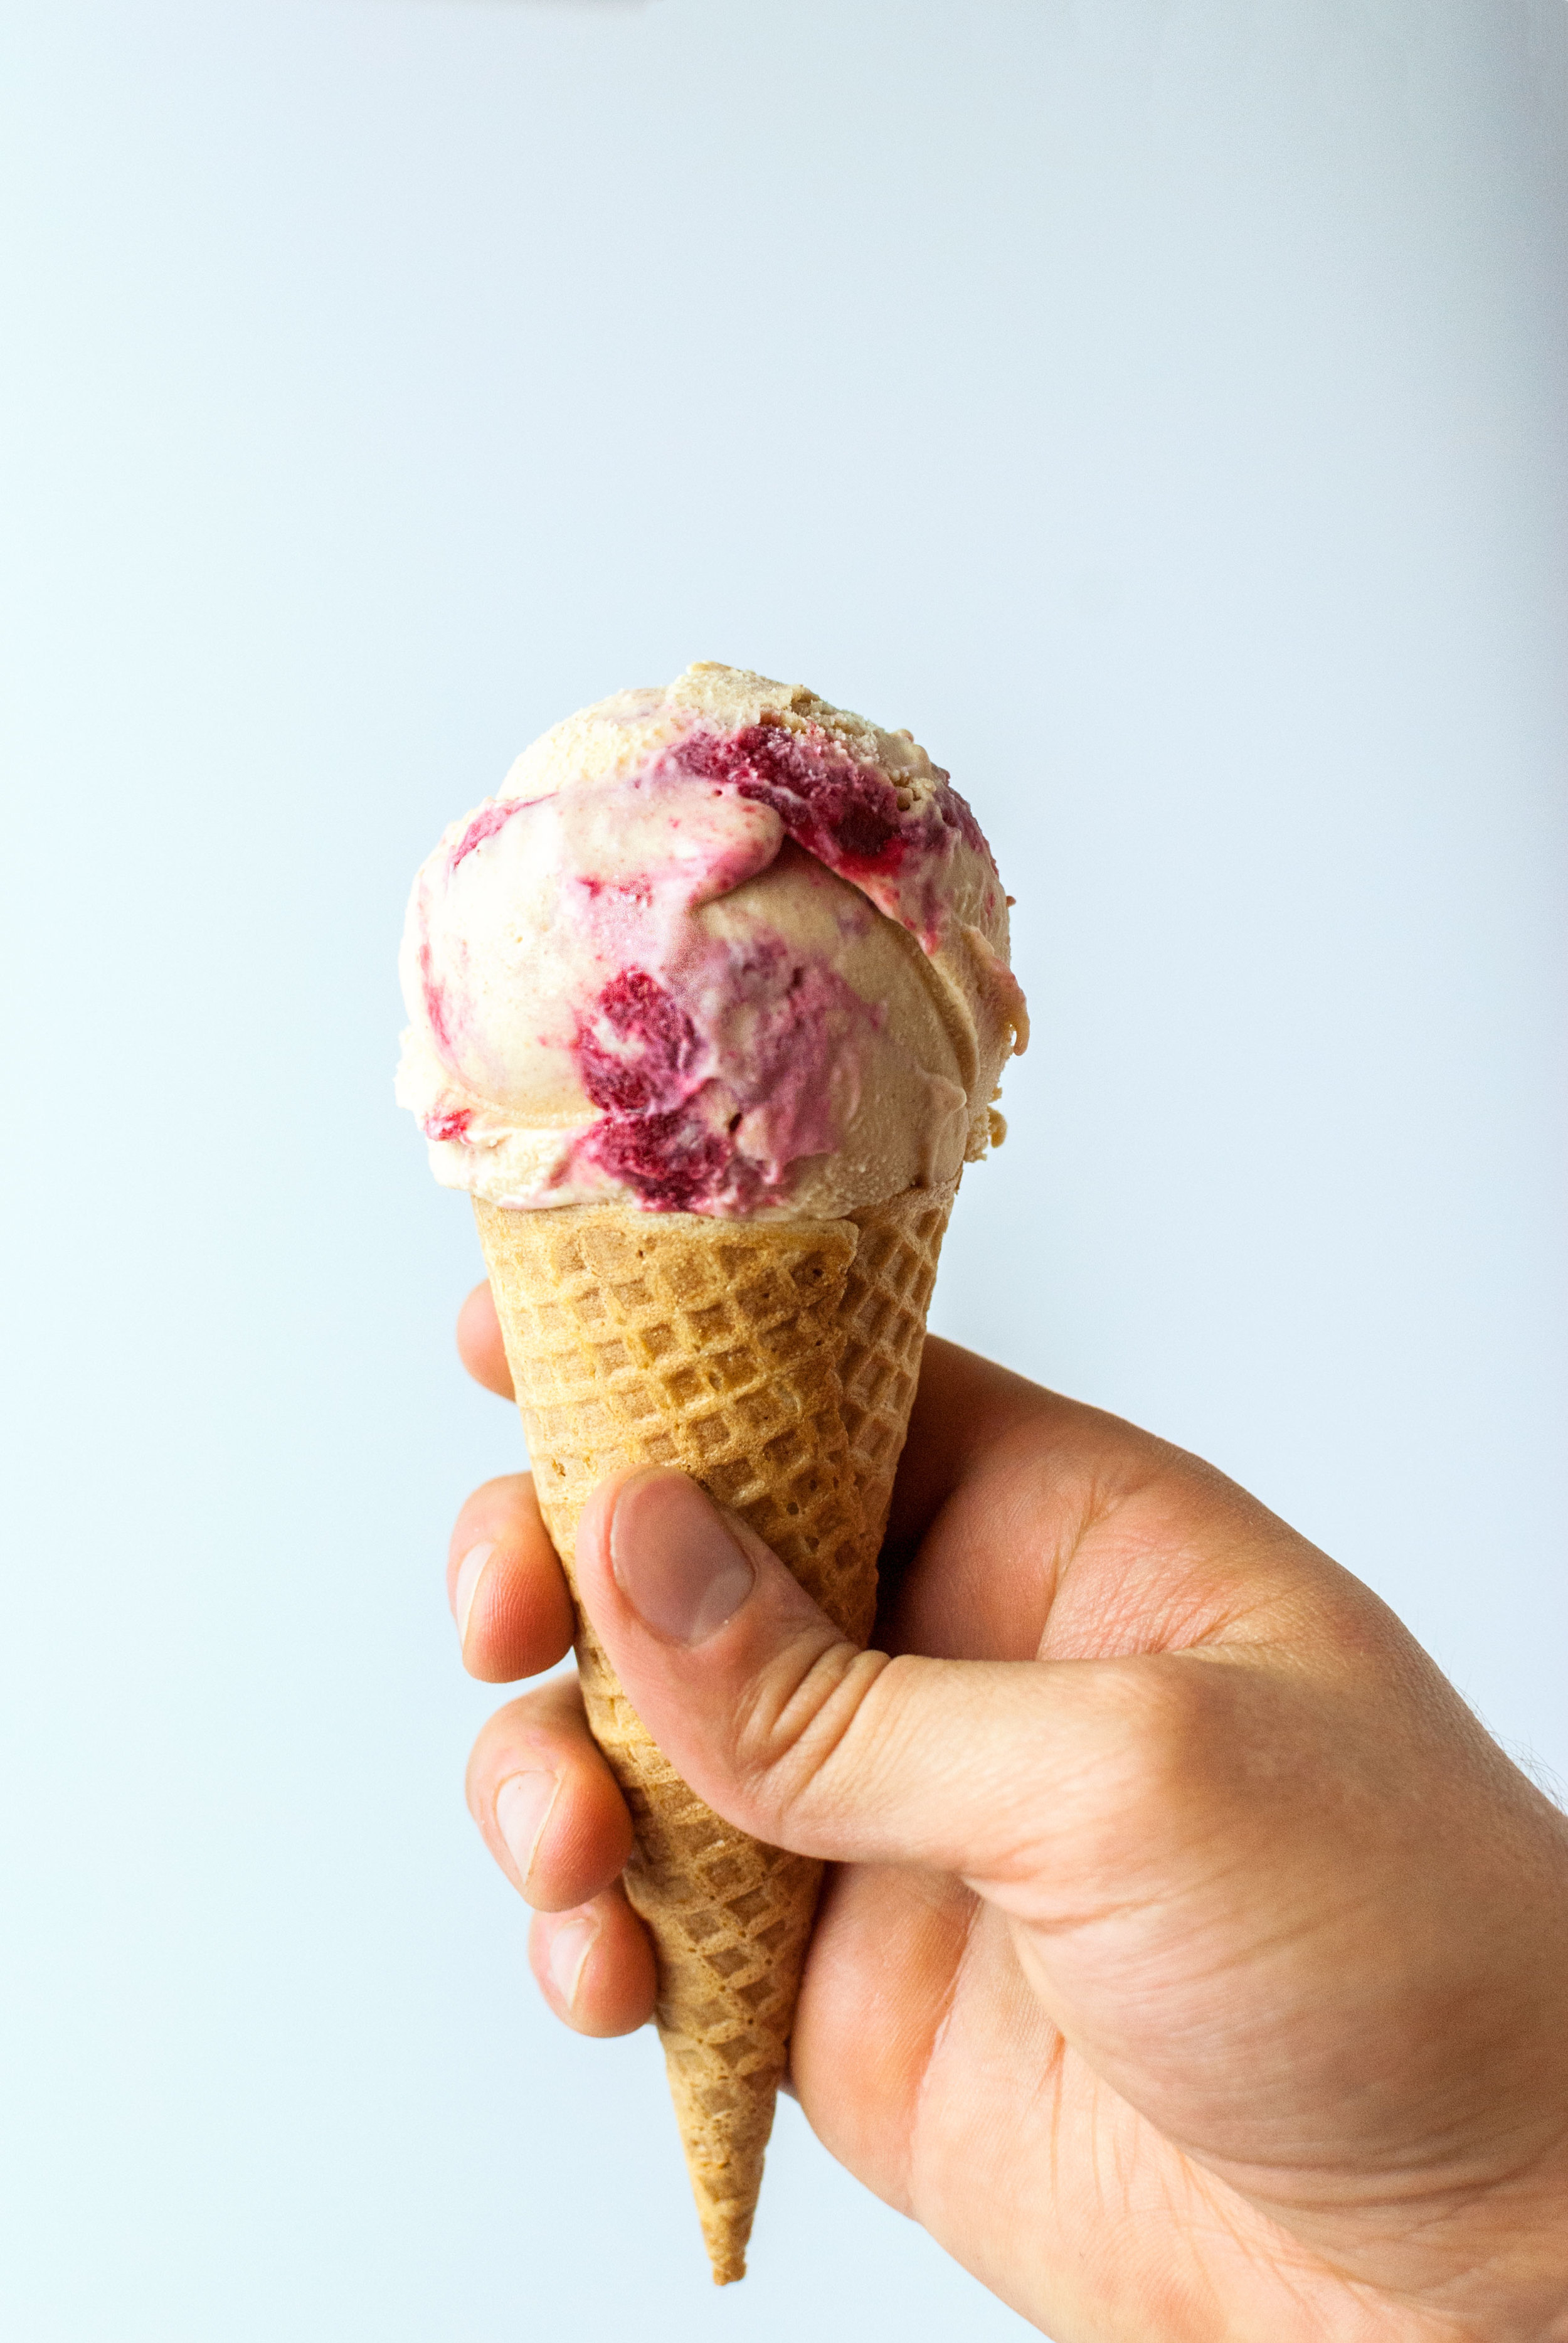
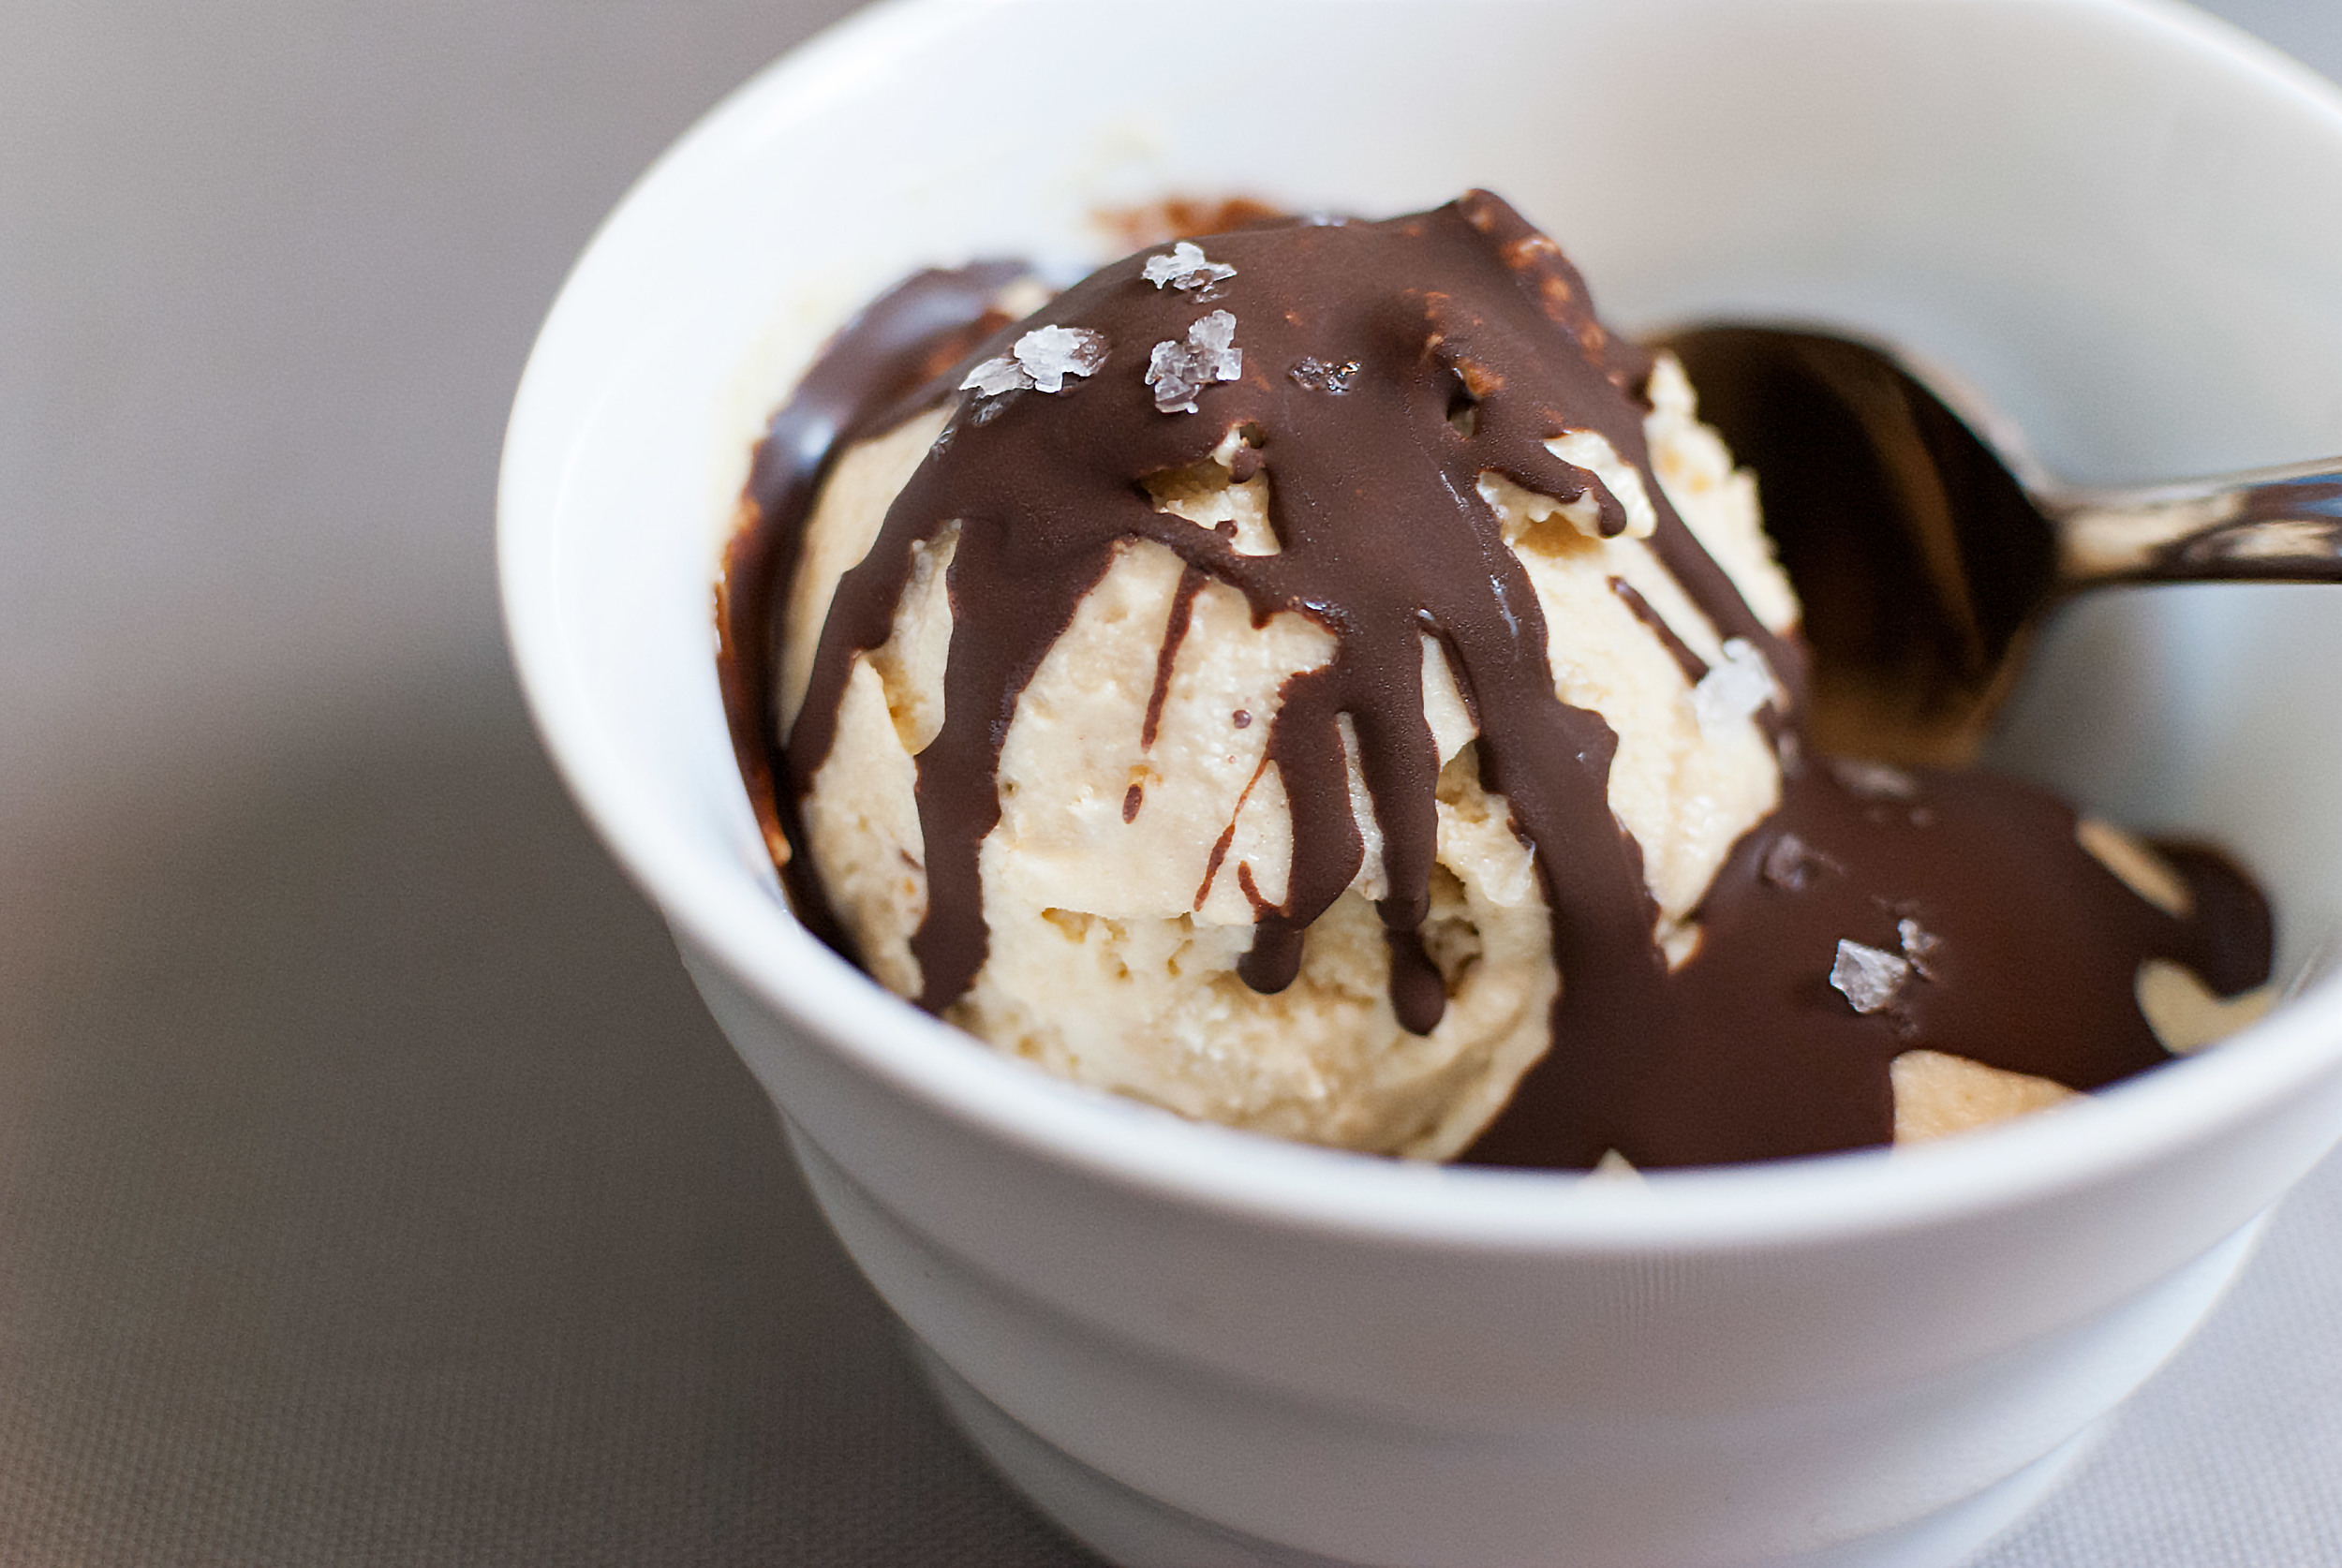
    When the ice cream resembles thick soft serve, turn off the ice cream maker and dump it into a large container for freezing. Ladle in spoon-fulls of the homemade ice cream into the container while ribboning your jam of choice over the top of it in layers. Be sure to do this process as quickly as you can so that your just churned ice cream doesn’t melt. Spread the jam out in a fashion that it would create a balance scoop as consistently as possible; not too much and not too little anywhere, and be sure to put a little bit of jam on top to make a good first scoop when it’s finally ready! After it’s all in the container, cover the ice cream in a layer of plastic wrap, followed by the lid, then pop it in the freezer for at least 4 hours, although overnight seems to work best when we make ice cream.

    Yields about 1.5 quarts.


  • Fresh Strawberry Ice Cream


    Oregon’s berry bounty is impressive, especially in the summer. Wave after wave of variety comes into its own and it can seem overwhelming when the time comes to choose which one to work with, but after much deliberation, Nate and I think that we’ve finally decided on what our favorite is.

    Is it the plentiful, tart, and quintessential Pacific Northwestern blackberry?

    No.

    Is it the delicate, elegant, and high-brow dessert-loving raspberry?

    No.

    Is it the versatile, delicious, and nutritious blueberry?

    No. No it is not.


    For us, the most sublime berry is the one that welcomes us into the warmer months in Oregon. Hitting their peak in early summer, their season comes and goes quickly. It’s important to get them while you can because, as summer develops, they just aren’t the same anymore, then they disappear altogether, waiting for late spring once again. We are, of course, talking about what might be the most popular berry in America: the strawberry.

    One might think to oversimplify this common ingredient; after all a strawberry is a strawberry is a strawberry, right?

    Noooooope.

    There are so so many species of these little beauties, and they all taste a little different from one another. However, there are two that rise above the rest for us: Hoods and Seascapes. I’d be impressed if anyone went wrong with either one of them if you get them at the right time, and the time is now, but as this recipe suggests, like so so many things in this world, we believe that they should be drowned in cream and churned.

    P.S. This fresh fruit ice cream proportion works magic with these strawberries, but don’t let that stop you from getting creative. If you apply the same amount of any fresh fruit into this recipe, it will work. Let this be a way for you to experience all the best fruit this summer. I mean, that’s what we will be doing…

    Fresh Strawberry Ice Cream:

    • About 1½ cups (335 grams) fresh, ripe strawberries, tops removed (Hoods or Seascapes if you can get them)
    • A pint (472 grams) heavy whipping cream
    • 1¼ cups (263 grams) whole milk
    • ¾ cup plus 1 tsp (161 grams) sugar
    • Scant ¼ cup (67 grams) light corn syrup
    • A dash xanthan gum

    Blend strawberries in a food processor or using an immersion blender, then transfer into a large bowl big enough to hold all ingredients. Whisk in the cream, milk, sugar, corn syrup, and xanthan gum.

    Ready your ice cream maker (if you have a freezer bowl type make sure the bowl is completely frozen! This usually takes at least 24 hours.), and begin churning immediately. Churn for 25–30 minutes, or until the mixture resembles thick soft serve ice cream. Transfer ice cream to an airtight container, but before putting on the lid, cover it with a layer of plastic wrap, allowing it to stick to the entire surface of the ice cream. Seal the container and place in the back of the freezer for at least 4 hours prior to serving. For best consistency, freeze overnight.

    Temper about five minutes before devouring.


  • Cookies & Cream Grows Up


    This monstrosity was borne out of wondering what to make for National Ice Cream Day. There were two schools of thought at first. I was thoroughly excited about making our very first chocolate ice cream, while Nate had his eye on experimenting with a cookies ’n’ cream. The time came to when we were wandering the aisles of a grocery store near our house and we knew we had to make up our minds soon. At the last moment, Nate had the utterly genius idea of…simply not choosing.

    data-animation-override>
    ‘¿Por qué no los dos?’ he said to me.

    “¿Por qué no los dos?” he said to me.

    He’s a madman, I thought.

    We bought good chocolate, Oreos, and heavy cream and went home.

    What transpired was a combination of a rich chocolate ice cream that resembled chocolate mousse—spiked with a little bourbon because we found it raiding the pantry and also why wouldn’t you do that? Then, in it’s last moments of churning, we crammed it full of crumbled Oreos.

    There’s no possible way we can prepare you for how delicious this is. I almost got angry the first time I tasted it because it was so delicious. Angry. Lesson learned from making this ice cream: when you’re deliberating between two things, sometimes the best possible outcome for the choice is, in fact, choosing both. And I have to say, this is the best tasting compromise I’ve ever come across in my life.

    ¿Por qué no los dos?

    Boozy Dark Chocolate Cookies & Cream Ice Cream

    • 1 pint heavy cream
    • 1 cup whole milk
    • ½ cup sugar
    • ¼ tsp. good sea salt
    • 8 oz. good dark chocolate, 60% cacao or higher (we recommend Valrhona or Woodblock)
    • Scant ⅛ tsp. xanthan gum
    • 1½ tbsp. bourbon or rye whiskey
    • 10 Oreo cookies, crumbled (plus more to snack on, because porqué no?)

    In a heavy bottomed 2-quart pan, heat cream, milk, sugar, and salt until simmers and the sugar and salt completely dissolve. Place chocolate into the bowl of a large food processor. Pulse until broken into small chunks, the smaller the better. Add 1 cup of the hot cream-milk mixture while the food processor is running. Blend until chocolate is melted, making a rich ganache.

    In a medium bowl, pour the rest of the cream-milk mixture. Add the ganache to the cream and whisk until fully incorporated. Add the whiskey. Add the xanthan gum, and stir until dissolved. Chill mixture for at least 2 hours before churning.

    In your ice cream machine, churn the mixture for 25–30 minutes or until it thickens enough to stick to the churn or a spoon. Right before you stop churning, slowly add the cookies and churn for about a minute. Quickly transfer to a freezer-safe container. Cover with plastic wrap and the lid, and freeze until desired hardness is achieved. We recommend overnight, but this depends on how cold your freezer is.

    Yields about 1.5 quarts.

  • Spiced Banana Bread


    banana-bread-031.jpg

    I spent a long time looking for the perfect banana bread recipe, which, when you think about it, shouldn’t be all that hard. The problem I kept running into was finding all sorts of things in the recipes from buttermilk to sour cream. I prefer to get the moisture in my banana bread from the bananas, since it gives it more banana flavor rather than a milk-based additive.
    What I ended up with was a soft, caky banana bread that’s always a hit at parties or when I take it to work. The thing that varies for me is what spice I use in it. Usually I’ll put in nutmeg or allspice, but sometimes cloves. Honestly it’s usually whatever I see first on the shelf. The key part of great banana bread is bananas so ripe, you think they’re rotten. For this last batch, I let the bananas get so black, they started to ferment. If this makes you uncomfortable, just remember that any alcohol in the bananas will cook off. Because you let them go for so long, make sure to start out with big fruit or use an extra so it’s moist enough.

    I think the best part about this recipe is that it takes a little over an hour from start to finish. It will keep, wrapped in foil, for up to a week.

    • ¼ cup butter, softened
    • ¾ cup granulated sugar
    • 1 large egg
    • 3 extremely ripe bananas, mashed
    • 1 tsp. vanilla extract
    • 2 cups (240 g./8.5 oz.) all-purpose flour
    • 1 tsp. baking soda
    • ½ tsp. salt
    • ½ tsp. ground nutmeg/allspice/cloves

    Preheat oven to 350°F. Lightly oil an 8×4 inch loaf pan. (I use 8×5 pans, but bake for a shorter time.)

    In a medium bowl, cream butter and sugar together until the sugar starts to dissolve. Stir in the egg. Add the bananas and vanilla extract and stir until fully mixed.

    Sift together flour, baking soda, salt, and spices. Add to the banana mixture and stir gently until just combined. You should still have some bits of undissolved flour.


    banana-bread-01

    banana-bread-01

    Pour into prepared loaf pan and tamp the base of the pan with your hand, or on a flat surface, to get rid of any bubbles. Bake for 50–60 minutes. Check about 40 minutes in. If it’s getting dark too soon, it means your oven is too hot. Bread is done when a toothpick comes out clean.

    Remove from oven and let rest in pan for 10 minutes before removing from the pan. Cool on an wire rack. I’d tell you to cool it completely, but good luck with that.


    banana-bread-02

    banana-bread-02

  • Salty Peanut Butter Sundae


    peanut-butter-ice-cream-07.jpg

    WARNING: Do not make this recipe. If you make ice cream and realize how ridiculously easy it is to make, you won’t stop. We certainly haven’t.
    That said, we love us some peanut butter. There was this time where we were eating only low-fat protein and veggies, and on a whim we ate a spoonful of natural peanut butter (salted, of course). The experience, when we hadn’t had a lot of fat for a while, was religious. The complexity of this everyday staple has led us to experiment with different formulations of the legume paste in ice cream.


    peanut-butter-ice-cream-03

    peanut-butter-ice-cream-03

    Eventually, we settled on a less-sweet version of the ice cream, preferring the sweetness to come from the add-ins. The added twist of extra salt gives it that extra savory oomph to sate our salty-tooth tastes. This version has Heath toffee chunks swirled in (we found these next to the chocolate chips), though we have experimented with chocolate bits and peanut butter cup pieces, both of which are delicious. And to make it all the more us, we covered it in a crispy dark chocolate shell that adds a distinct bitterness to this rich and creamy dessert.

    • 2 cups whipping cream (not heavy)
    • 1¼ cups milk
    • ½ cup granulated sugar
    • 1 heaping cup peanut butter
    • 2 tsp. good quality vanilla extract
    • 1 heaping teaspoon good sea salt
    • ½ cup Heath bits o’ brickle toffee pieces

    Dark chocolate shell

    • 2.5 oz. dark chocolate chips
    • ¼ cup coconut oil

    In a medium bowl, whisk together peanut butter and sugar until sugar is completely dissolved, about 1–2 minutes. Add cream and vanilla extract and stir until mixed. Add milk and salt, and continue stirring until it is completely incorporated.


    peanut-butter-ice-cream-04

    peanut-butter-ice-cream-04

    Prepare your ice cream maker, turn it on, and pour the ice cream into the machine. Churn according to your machine’s directions (usually 20–25 minutes). About 15 minutes in, pour the toffee pieces in and continue churning until you achieve a thick, soft serve consistency. Scrape into a freezer-safe container and freeze for at least 4 hours, ideally overnight. Ice cream is better fresh, so consume within two weeks of making it, or it will become dense.


    peanut-butter-ice-cream-05

    peanut-butter-ice-cream-05


    peanut-butter-ice-cream-06

    peanut-butter-ice-cream-06

    Yields 1.5 quarts

    When you are ready to serve, heat the chocolate chips and coconut oil in the microwave until thin and liquid. Let cool slightly. Pour slowly over the scooped ice cream, garnish with some big flake sea salt, and serve immediately. If the shell does not harden immediately, place the sundae in the freezer for about 30 seconds. Store any unused chocolate shell in the fridge.


    peanut-butter-ice-cream-08

    peanut-butter-ice-cream-08

  • Salted Dark Chocolate Mousse


    dark_chocolate_mousse_04.jpg

    We don’t spring for sweet things often. Like, ever. But when we do, it usually involves chocolate or peanut butter. We are excited to introduce our first dessert, which involves a healthy amount of delicious chocolate and super sexy sea salt.
    Mousse is a basic dessert that’s easy to make at home (with or without an electric mixer), and we think it’s fair to say that it’s only as good as the ingredients you put in it. The thing we really like about our recipe is that we don’t add any sugar to it. There’s nothing for you to focus on while eating it other than the luscious texture and the wonderful chocolate you put in it. We would recommend using dark and complex chocolate for this, especially if it has some fruity notes in it. In this case we used some of the best chocolate we have ever come across roasted right here in Portland, Oregon, from chocolate maker, Woodblock Chocolate. We highly recommend that if you use Woodblock for this recipe, use the single origin Peruvian chocolate. It’s exquisite. The sea salt we use is also local (we hoard the stuff) from a wonderful company called Jacobsen.


    dark_chocolate_mousse_01

    dark_chocolate_mousse_01

    • 1¼ cup heavy whipping cream
    • 3 egg whites
    • 8 oz. good dark chocolate, reduced to small chunks
    • ½ cup milk
    • 1 heaping tsp. good sea salt

    In a small bowl, place the chocolate, milk, and salt and microwave in short bursts until the chocolate is melted (usually two sets of 30 seconds). Mix together until well incorporated. Set aside.


    dark_chocolate_mousse_02

    dark_chocolate_mousse_02

    Place the whipping cream into a chilled bowl and whip until there is enough air to create floppy peaks with the cream. Set aside in a large bowl big enough to hold all ingredients. In another bowl (or the same bowl you used to whip the cream in after being cleaned and dried), whip the egg whites until they become very white and and have stiff peaks. Set aside.

    Slowly and gently fold in the melted chocolate mixture into the whipped cream, turning the cream and chocolate onto itself instead of mixing. The goal is to maintain the air you whipped into it. Once the chocolate is evenly mixed in, add the egg whites to the cream and chocolate and continue to fold gently until all three ingredients are completely incorporated.

    Divide the mousse evenly among four small dishes. Chill in the fridge for at least 4 hours.

    Serves 4


    dark_chocolate_mousse_03

    dark_chocolate_mousse_03